When installing Microsoft Office 365 in Windows 10/11, you may sometimes receive the error code 0-2031 in Office 365. In this post, MiniTool Partition Wizard provides several ways to troubleshoot the problem.
Sometimes, you may receive error code 0-2031 when trying to install Office 365. Error code 0-2031 in Office 365 prevents users from installing applications. Pre-existing Office installation files, tamp and log files, corrupted Office files, Office not fully updated, and Windows Firewall blocking Office installation are all causes of this problem.
Based on these reasons, there are several ways to fix error code 0-2031 in Office 365. Please keep reading. Before trying the following complex ways, you should first try to restart your computer and router; check your Internet connection and make sure you have a stable and reliable Internet connection.
![[Solved] Windows Boot Manager Not Showing in BIOS](https://images.minitool.com/partitionwizard.com/images/uploads/2023/11/windows-boot-manager-not-showing-in-bios-thumbnail.png)
Solution 1. Repair the Microsoft Office Installation
According to some affected users, Microsoft error code 0-2031 occurs due to a corrupt Office installation. Then, you can fix the problem by repairing your Office installation.
Step 1: Press the Win + R key to open the Run dialog. Then type appwiz.cpl in the box and press Enter to open the Programs and Features window.
Step 2: In the Programs and Features window, find your Office installation from the list of installed applications. Then right-click on it and select the Change option.
Step 3: In the next window, select the Online Repair option, and then click on the Repair button.
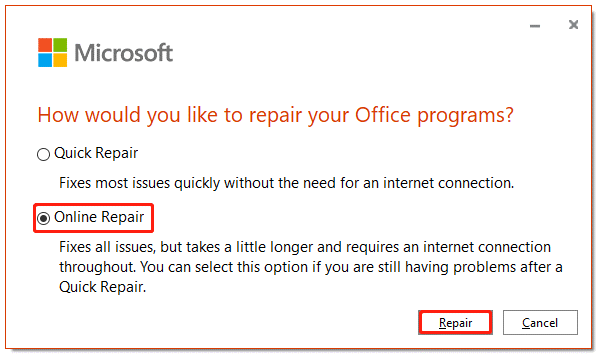
Step 4: After confirming the operation, wait for the operation to complete. After the process is complete, restart the computer.
After that, open the Office application that failed earlier and see if the problem is resolved.
Solution 2. Check If There Is Enough Free Space
The disk on which Office is to be installed must have at least 4GB of free space. If you run out of space, you can delete some unnecessary files or replace the drive during the installation process.
If the space is still not enough after deleting some redundant files, then you can try to use the Extend Partition function of MiniTool Partition Wizard to obtain more free space. This free disk partition software enables you to do most basic operations related to partitions/disks and some complex operations.
MiniTool Partition Wizard FreeClick to Download100%Clean & Safe
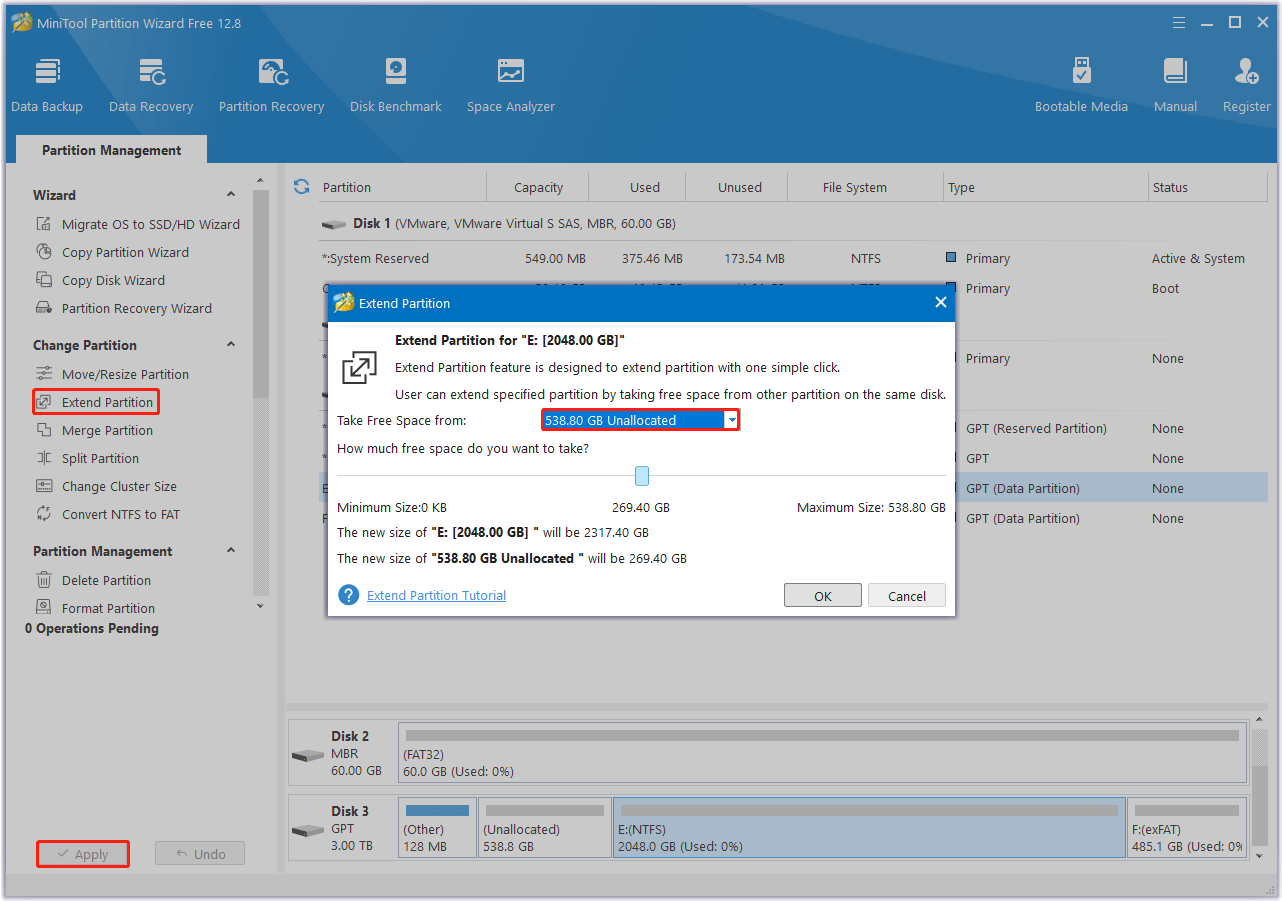
- Run MiniTool Partition Wizard to get its main interface. Then, select the partition that needs extending and choose Extend Partition from the left action panel.
- Open the drop-down list of Take Free Space from and choose a partition or unallocated space to take free space. Then, drag the sliding handle leftwards or rightwards to decide how much space to take. After that, click OK to continue.
- Click the Apply button to apply changes.
Solution 3. Temporarily Turn Off Your Security Software
Your antivirus software may be conflicting with the installation process. Therefore, you need to temporarily disable your security software before installing Office. To disable antivirus on Windows 10 temporarily, you can refer to this article.
Solution 4. Install Office in Clean Boot
You can install Office in a clean boot state so that third-party applications or services don’t interfere with the process. Therefore, perform a clean boot and then install Office.
Step 1: Open the Run dialog. Then type msconfig in it and press Enter.
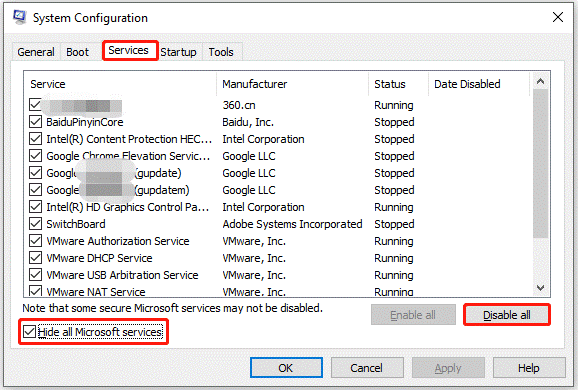
Step 2: In the System Configuration window, switch to the Services tab, check the Hide all Microsoft Services option, and then click on the Disable all button.
Step 3: Go to the Startup tab, and click on Open Task Manager.
Step 4: In the Task Manager window, click on an app listed there and click on Disable. Then repeat this process and disable all apps on the list.
After reading this post, you may know how to fix error code 0-2031 in Office 365. Is this article helpful to you? And if you have other solutions to the problem, you can share them with us in the following comment zone.
![[6 Ways] How to Fix Hitachi External Hard Drive Not Recognized](https://images.minitool.com/partitionwizard.com/images/uploads/2023/11/hitachi-external-hard-drive-not-recognized-thumbnail.png)
About The Author

Position: Columnist
Vega enjoys helping people with computer problems, including disk management, data recovery, data backup, and more. She is constantly expanding her knowledge in related fields. And she will continue to bring more easy-to-understand professional articles to help people solve various problems on the PC.
User Comments :