This post mainly tells you how to enable or disable ReFS (Resilient File System). Based on your demands, enable or disable Resilient File System by using the given steps in the post. Besides, MiniTool Partition Wizard offers you some extra information about ReFs.
About ReFs (Resilient File System)
ReFs (Resilient File System), initially introduced on Windows 8.1 and Windows Server 2012, is designed to maximize available data and reliability even if the related storage device had a hardware failure. Though Windows 8.1 and Windows 10 support ReFs drives natively, you can’t format a drive with ReFs by default unless it is enabled manually.
Here comes the question: how to enable ReFs file system. Well, this post provides you with a full guide on how to enable or disable ReFs file system. Explore the content now!
Also read: REFS_FILE-SYSTEM BSOD: Top 8 Solutions to Fix It
Further reading:
To format a storage device to the desired file system, MiniTool Partition Wizard is a good option. For instance, it allows you to format the device to FAT32/exFAT/NTFS/Ext2/3/4.
This free partition manager is regarded as a FAT32 formatter and exFAT formatter because of its powerful features. It can be used to format storage devices like SSDs, HDDs, SD cards, USB flash drives, dynamic disks, and so on.
MiniTool Partition Wizard FreeClick to Download100%Clean & Safe
Enable or Disable Resilient File System
How to enable or disable ReFs file system? Here’s the full guide. Simply follow the corresponding instructions to complete the operation.
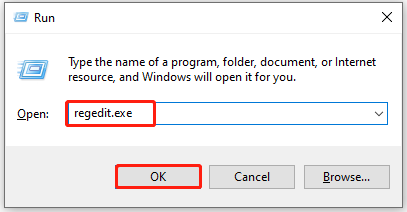
Step 1: Open the Run window by pressing Windows and R keys.
Step 2: Type regedit.exe in the Run window and click OK to open Registry Editor.
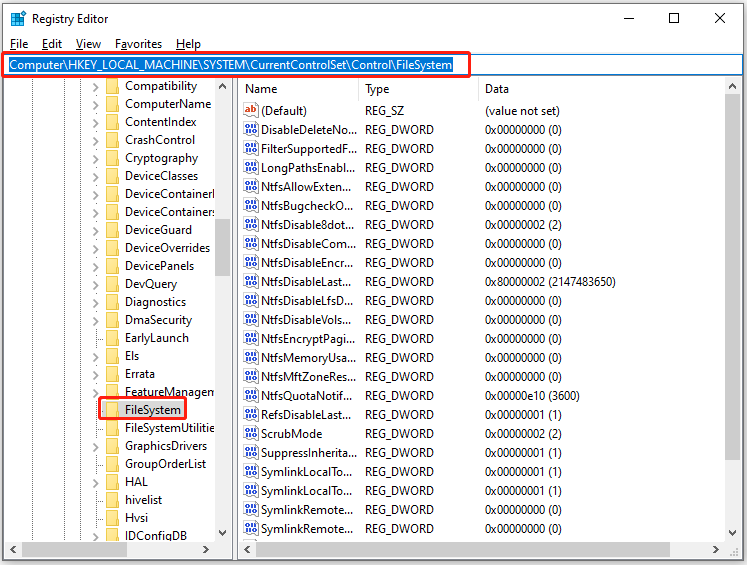
Step 3: Copy and paste the path below in the address bar of Registry Editor. Then hit the Enter key to locate the destination.
Computer\HKEY_LOCAL_MACHINE\SYSTEM\CurrentControlSet\Control\FileSystem
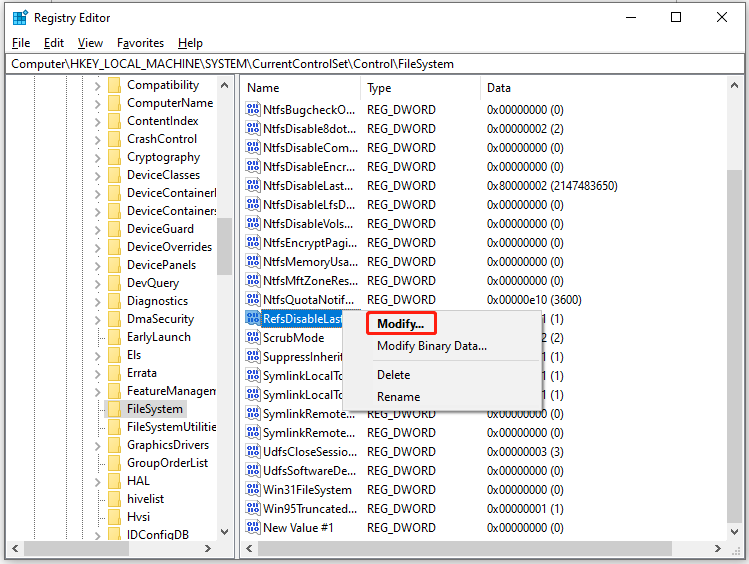
Step 4: Find and right-click RefsDisableLastAccessUpdate in the right panel and click the Modify option.
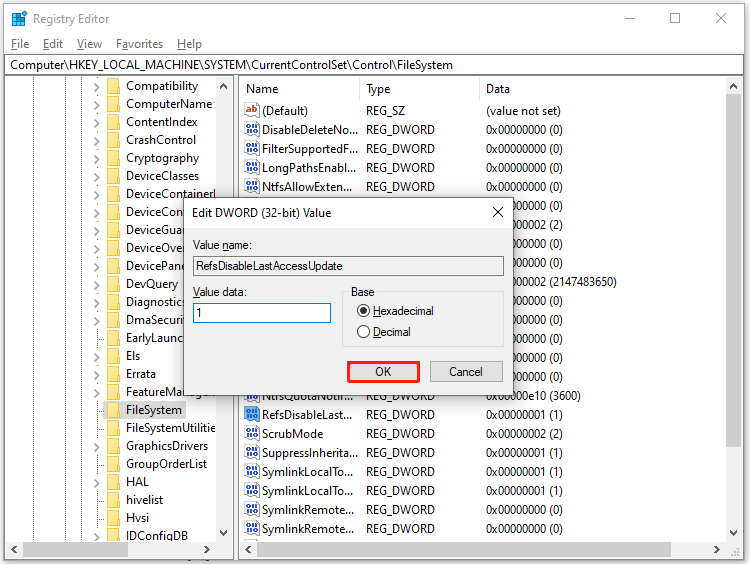
Step 5: In the pop-up window, set the value data as 1 to enable it and then click OK to save the changes.
Step 6: Then navigate to the path below and create a new DWORD in the right panel. To do that, right-click the empty space and click New > DWORD (32-bit) Value. After that, name it as AllowRefsFormatOverNonmirrorVolume.
Computer\HKEY_LOCAL_MACHINE\SYSTEM\CurrentControlSet\Control\MiniNT
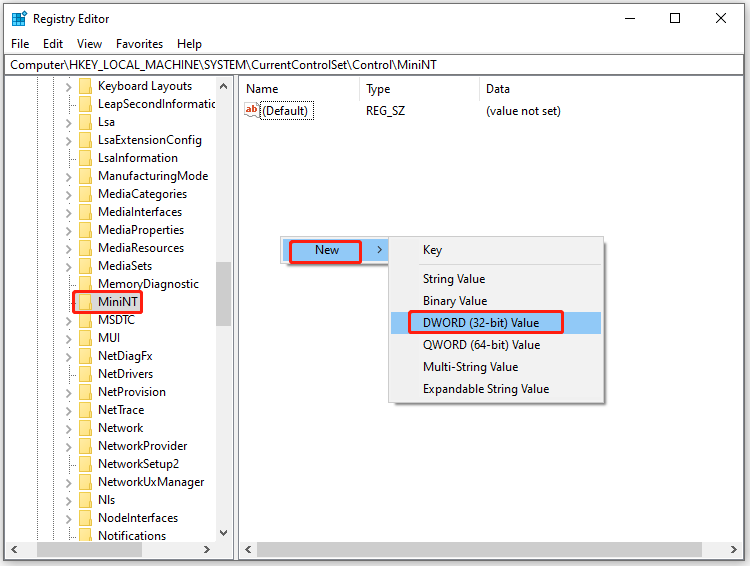
Step 7: Double-click the AllowRefsFormatOverNonmirrorVolume entry and then configure its value data to 1. Finally, save the changes you’ve made by clicking OK.

Step 8: Log off and then log back to make the changes to take into effect. Now, try plugging into an external storage device and formatting it to ReFs file system.
Also read: Can’t Format External Hard Drive? Here Are 7 Fixes
How to enable or disable ReFs file system? This post has shown the answer to you. Just follow the provided steps in this post to perform the operation.
User Comments :