About Dynamic Lighting
Windows 11 brings many new features like Enhanced Taskbar, DirectStorage, multiple desktops, etc. Dynamic Light is one of the newly added features in Windows 11. It offers granular settings to tweak the lighting of connected devices.
Before the existence of Dynamic Lighting, there was only a single option to enable the ambient lighting mode. You could tweak the effects and brightness of each connected device to some extent. Now, you are able to tweak lighting according to apps in the Dynamic Lighting section.
Dynamic Lighting also allows apps to control the lighting when another app or game isn’t in use. Not all devices support Dynamic Lighting, but the support for that is arriving soon. At present, Dynamic Lighting supports a handful of Razer keyboards and mice.
Several device manufacturers including Acer, ASUS, HP, HyperX, Logitech, Razer, and Twinkly have cooperated with Microsoft on Dynamic Lighting. As for the operating system, it is only part of the Windows Dev Insider channel.
How to Enable Dynamic Lighting on Windows 11
As mentioned earlier, Dynamic Lighting is available in Windows Dev Insider channel. If you aren’t an Insider user, use UUP Dump to download an Insider build 23466 or above and then install it on your computer. After that, download ViVeTool from GitHub and extract it to a folder named “Vive” in the C drive.
Then enable Dynamic Lighting on Windows 11 by following the steps below.
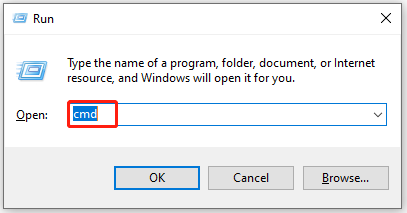
Step 1: Open the Run window by pressing Windows and R keys.
Step 2: Input cmd in the Run window and press Ctrl + Shift + Enter keys to run Command Prompt as administrator.
Step 3: In the opened Command Prompt window, type cd c:\ and press Enter.
Step 4: Type cd [folder name] and hit Enter. In this scenario, the command is cd vive.
Step 5: In the ViveTool directory, type the command below and press Enter.
vivetool /enable /id:35262205
Step 6: Exit Command Prompt after the process ends and then restart your PC.
Step 7: Open Settings by pressing Windows and I keys. Then click Personalization.
Step 8: Scroll down to find and click the Dynamic Lighting option.
Step 9: Toggle on the “Use Dynamic Lighting on my devices” option to activate the feature.
Step 10: Enable the Compatible apps in the foreground always control lighting option.
Step 11: Move the Brightness handle to adjust the color brightness of the lighting on connected devices.
Step 12: Scroll down to the Effect option to apply an effect and change its speed and color.
How to enable Dynamic Lighting on Windows 11? This post has shown the detailed steps to you. Simply follow the offered steps to complete the operation.
MiniTool Partition Wizard is a comprehensive partition manager for Windows PCs. It can even work on Windows 11. It helps you undelete Windows 11 partition, fix Windows 11 black screen, install error 0x80070103, solve Windows 11 blue screen, repair Windows 11 upgrade and installation errors, etc.
MiniTool Partition Wizard DemoClick to Download100%Clean & Safe
As a PC optimizer, MiniTool Partition Wizard enables you to check the hard drive for errors, increase disk space, clean up the computer, migrate OS to other hard drives, copy disk, recover missing data, etc. It is worth having a try!
User Comments :