Blue screen errors are one of the most confusing issues on Windows. Sometimes, you may experience a blue screen after installing Wi-Fi card. Don’t worry. In this post, Partition Magic will offer some effective solutions to help you solve it.
Blue Screen After Installing Wi-Fi Card
Some users have reported that they encounter a blue screen after installing Wi-Fi card upgrading Wi-Fi card. The error is usually accompanied by a message “Your device ran into a problem and needs to restart. We’re just collecting some error info, and then we’ll restart for you.”
It is accompanied by the failing files Netwsw00.sys, NETwlv64.sys, Netwtw08.sys, Netwtw10.sys, and others.
These are driver files related to the Intel Wi-Fi adapter. It is part of the Intel Wireless Network Card driver package and is responsible for enabling communication between the Windows operating system and the Intel Wi-Fi hardware. This error occurs because the Wi-Fi driver is outdated or corrupted.
No matter for what reason, you need to solve the blue screen after installing Wi-Fi card as soon as possible. Well, there are 4 fixes for you.
If you cannot boot your PC normally when you encounter this issue, you can boot into Safe Mode, and then try the solutions below.
Fix 1. Roll Back the Driver
If a blue screen occurs after a driver update, rolling back to an earlier stable version can help resolve the issue.
- Right-click on the Windows icon to open the Start menu. Then click Device Manager from the menu.
- Double-click Display adapters to expand it.
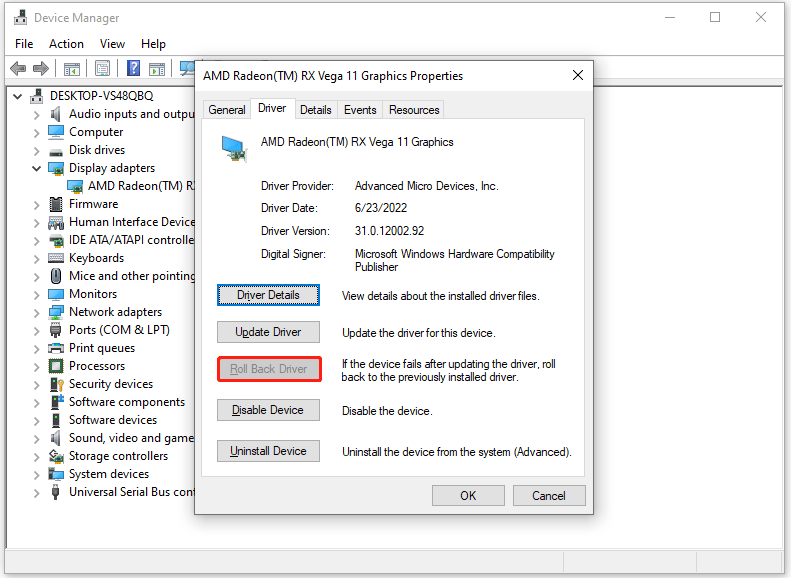
- Find and right-click on the newly installed driver and then click Properties.
- Navigate to the Driver tab and then click Roll Back Driver.
- Follow the on-screen instructions to complete the operation. Then boot your computer again to see if the blue screen vanishes.
Fix 2. Update the Driver
If your Wi-Fi driver is outdated. So, you should update the specific drive.
- Right-click on the Start menu and select Device Manager.
- In the Device Manager window, expand Network adapters. Then right-click the wireless adapter and select Update driver from the drop-down menu.
- On the next screen, click on Search automatically for drivers. Then follow the on-screen instructions, and the drive should be updated to the latest version.
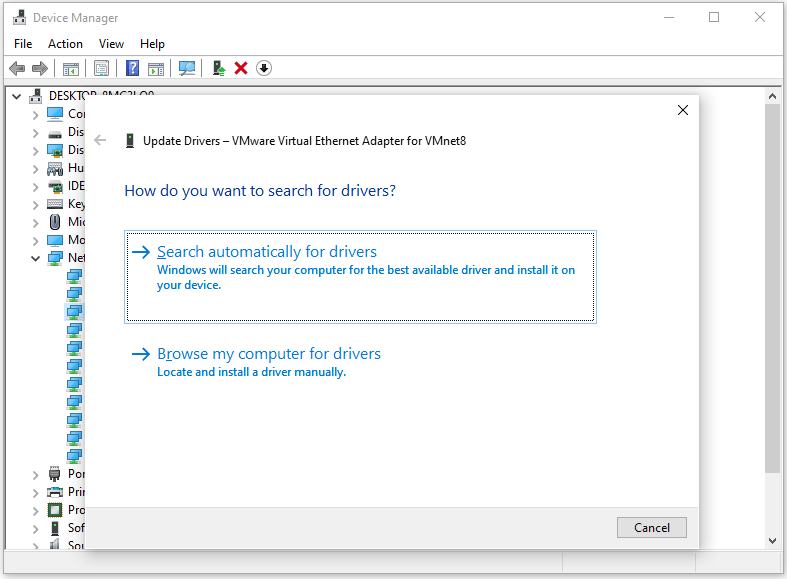
If the Wi-Fi driver is corrupted, you can try to reinstall the drive. Just click Uninstall device and then restart the computer to let Windows automatically reinstall a proper Wi-Fi driver for you.
Fix 3. Uninstall the Latest Update
You can try to uninstall the latest update to fix the blue screen error while using Intel Wi-Fi cards. The steps are as follows:
- Press the Win + I key to open the Windows Settings.
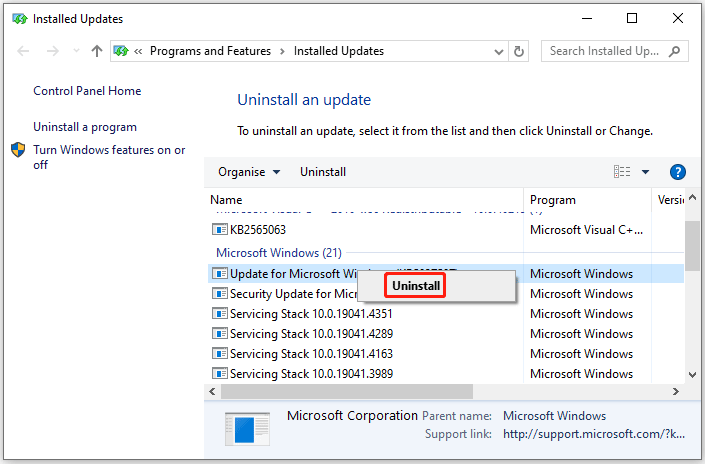
- Go to Update & Security > Windows Update> View update history > Uninstall updates.
- In the next pop-up window, go to the Microsoft Windows section, right-click the latest update, choose Uninstall, and then follow the on-screen instructions to complete the process.
Fix 4. Perform a System Restore
System Restore allows you to return your system to a previous state, effectively undoing recent changes that may have triggered the blue screen after installing Wi-Fi card.
- Press the Win + R key to open the Run dialog box. Then type rstrui in it and press Enter to open System Restore.
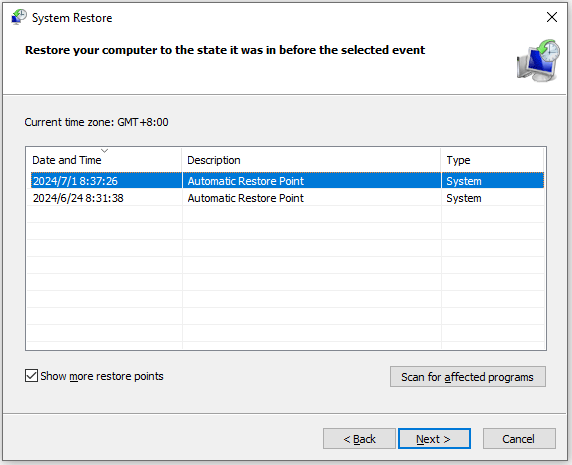
- To proceed, click Next.
- In the next screen, check the box next to Show more restore points, and then select a suitable restore point and click Next to go on.
- Finally, click on Finish to initiate the restore procedure.
Recover Data from Blue Screen After Installing Wi-Fi Card
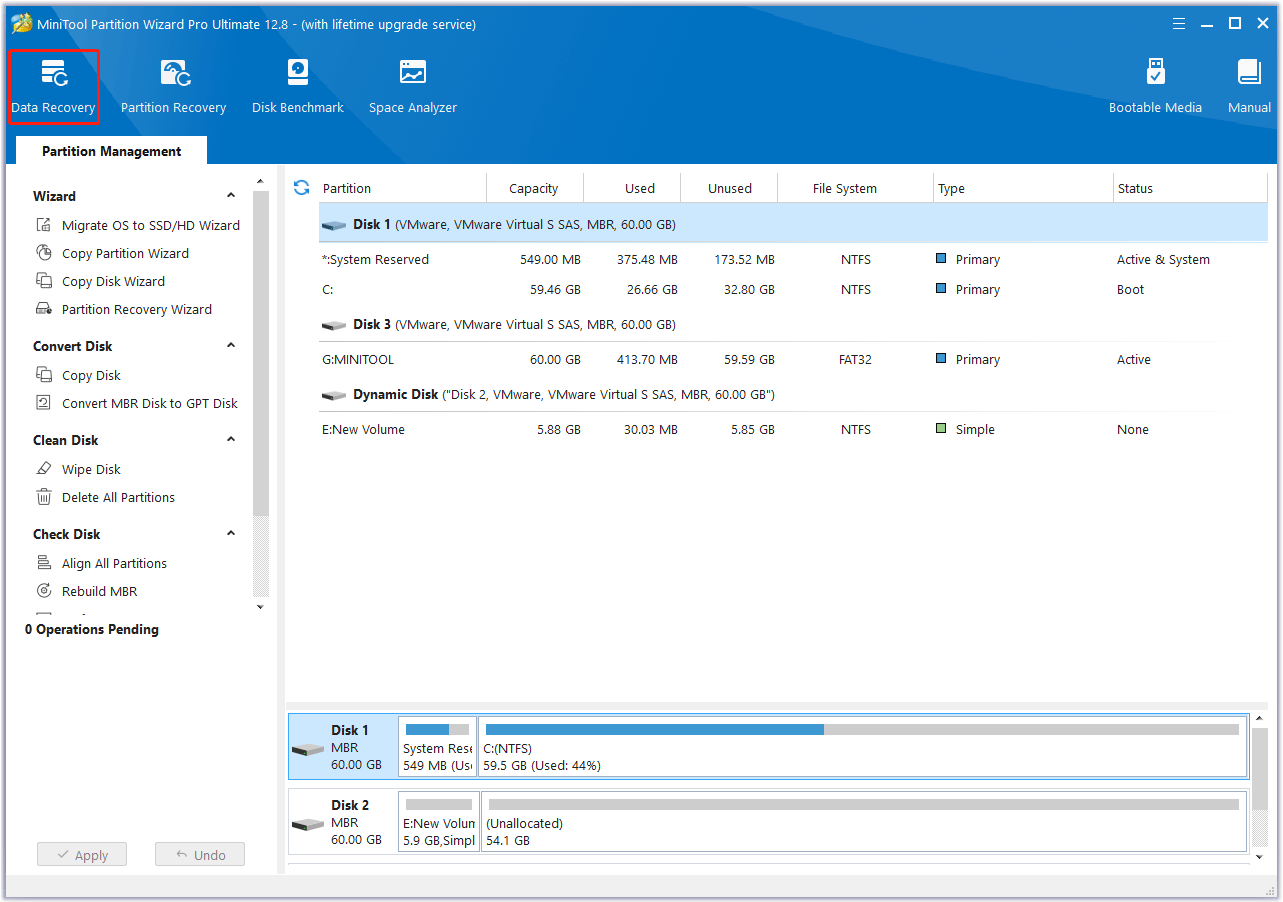
Your data may get lost due to this blue screen. After fixing the blue screen, recover the missing data by using hard drive recovery tools like MiniTool Partition Wizard. In addition to data recovery, partition recovery is also available in this software. With this program, you can recover the lost data caused by various reasons.
MiniTool Partition Wizard DemoClick to Download100%Clean & Safe
Bottom Line
How to fix the blue screen after installing Wi-Fi card on Windows 10/11? If you are looking for the answer, this post is what you need. It offers 4 methods to fix it.

User Comments :