When Windows 10 becomes unstable or unbootable, you can roll back the system to the recently created restore points. It is quite useful. You can create System Restore Point on schedule to make sure there is always a fresh restore point available.
To recover from various issues on Windows 10 computers, like Windows not booting after installing a program, you can trigger one of the restore points. As you can see, the System Restore feature is quite useful.
However, the sad thing is that your recent changes are not brought back if the restore point you trigger is not recent. To get rid of this dilemma, MiniTool will guide you on how to create System Restore Point on schedule on Windows 10.
To schedule System Restore Points, you should finish the following 4 moves one by one.
Move 1: Check If System Restore Has Been Disabled on Windows 10
The System Restore feature on Windows 10 should be enabled on Windows 10. If you have disabled this feature, you should re-enable it. If not, please go to Move 2.
Step 1: Type Create a restore point on the Cortana’s search bar and then double-click the first result.
Step 2: Under the System Protection tab of the System Properties window, look at the Protection Settings section. If your system drive has set to “Off’, please click it and then choose the Configure button.
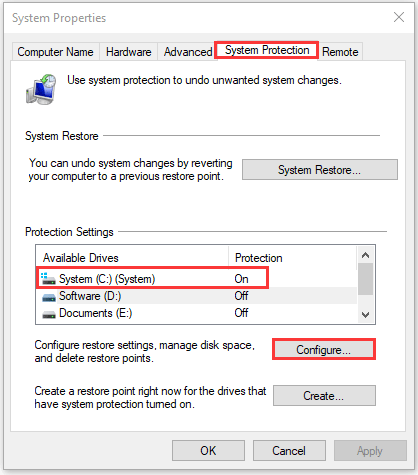
Step 3: Select the Turn on system protection option and then click Apply > OK to confirm and save this change.
Move 2: Break the Limitation
What does limitation mean here? Windows 10 just allows its users to create System Restore only once in 24 hours. In other words, if there is a restore point that has been created within the last 24 hours, Windows 10 won’t create another automatic restore point.
To create more restore points, you can try the following steps.
Step 1: Launch Registry Editor by pressing Windows + R, typing regedit on the Run dialogue and then clicking OK.
Step 2: Once you open Registry Editor, please navigate to the following path:
HKEY_LOCAL_MACHINESOFTWAREMicrosoftWindows NTCurrentVersionSystemRestore
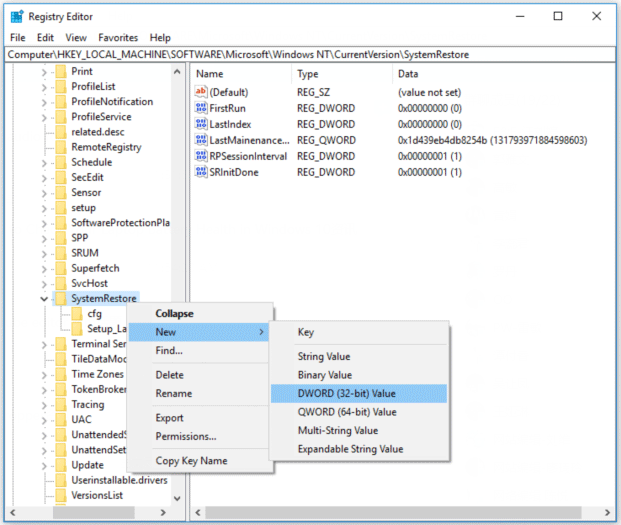
Step 3: Create a key under the SystemRestore folder.
- Right-click the SystenRestore folder and then select New > DWORD (32-bit) Value.
- Name the key as SystemRestorePointCreationFrequency and then press Enter.
Step 4: Edit the SystemRestorePointCreationFrequency key.
- Double-click the newly created key and then set its value data to 0.
- Click OK to confirm and save this change.
After the four steps, you should have been successfully removed the limitation.
Move 3: Create a Restore Point via Windows PowerShell
In this part, you are required to run a command in Windows PowerShell to create a restore point.
Here is the tutorial.
Step 1: Run Windows PowerShell as administrator.
- Type Windows PowerShell in the Cortana’s search bar.
- Right-click the first result and then select Run as administrator.
Step 2: Type the following command in Windows PowerShell and then click the Enter key to run it.
Checkpoint-Computer -Description “*” -RestorePointType MODIFY_SETTINGS
Move 4: Secure System Restore Point on Windows 10
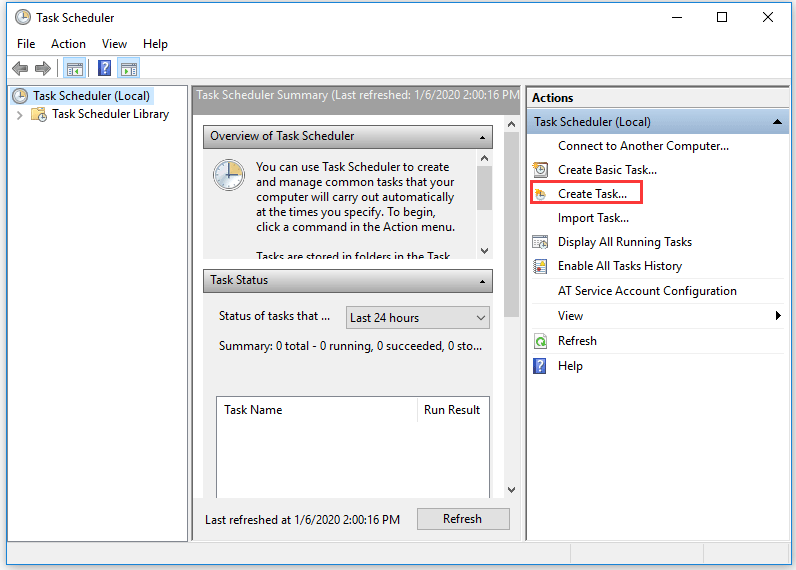
Step 1: Call out the Run window and then type taskschd.msc in the window and click the OK button.
Step 2: On the Task Schedule window, click Create Task.
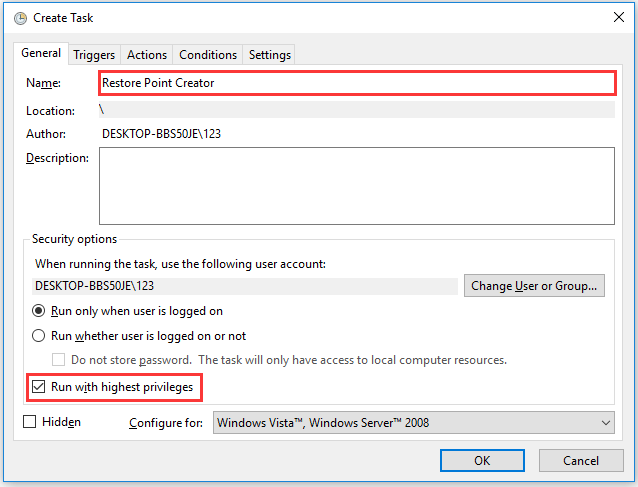
Step 3: Under the General tab of the new window, type Restore Point Creator in the Name zone and then check the Run with highest privileges. If there more than one user on your computer, please check the Run whether the user is logged on or not option.
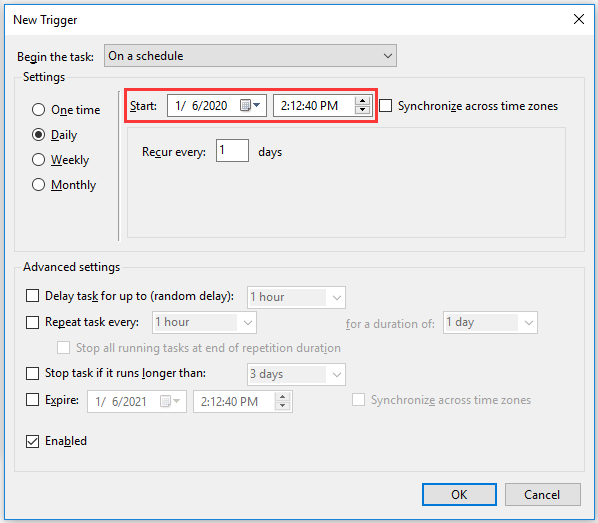
Step 4: Now, switch to the Triggers tab and then click the New button. On the New Trigger windows, decide how to schedule System Restore Point. Here I would like to schedule the task to run once every day and make sure the start date and time.
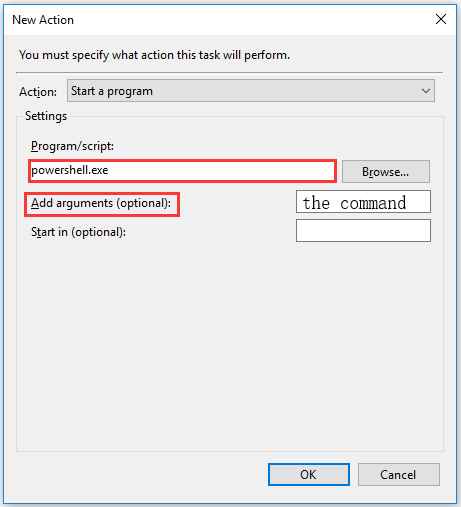
Step 5: Now switch to the Actions tab and then click the New button. Type powershell.exe in the Program/script box and then type the command mentioned in Move 3 in the Add arguments box. Finally, click the OK button.
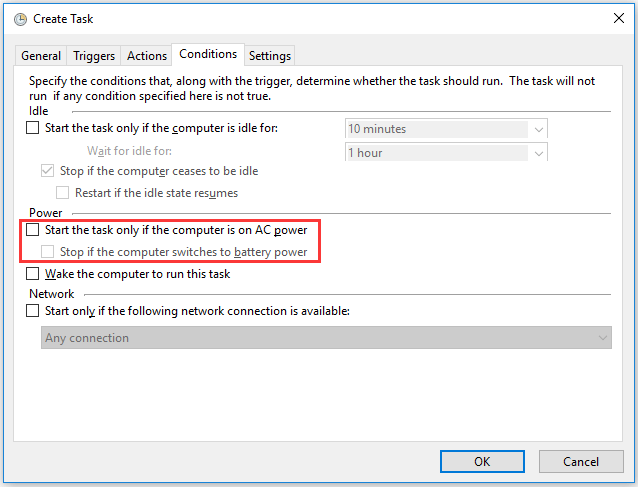
Step 6: Go to the Conditions tab and then untick the following options.
- Stop if the computer switches to battery power.
- Start the task only if the computer is on AC power.
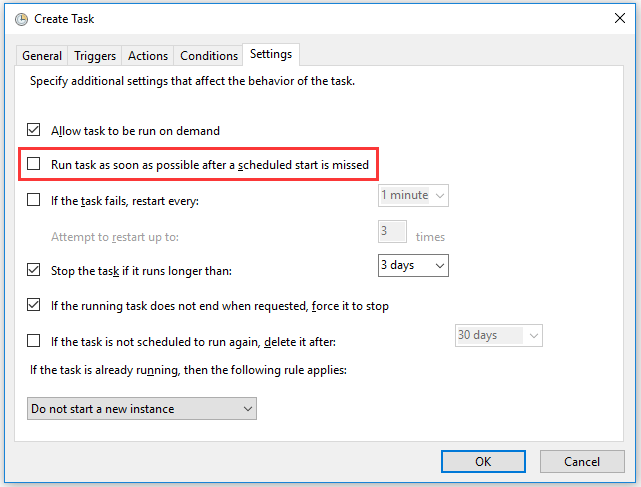
Step 7: Go to the Settings tab and check the Run task as soon as possible after a scheduled start is missed option. Then click the OK button.
Step 8: Type your password when you are required.
After finishing all the above steps, you should have successfully completed creating System Restore Point on schedule. If you want to check whether the task you have created works, you can select the task on the left pane of the Task Scheduler window and then click the Run button on the right pane. If it works, it will instantly launch Windows PowerShell and execute the command.
The tutorial on how to create System Restore Point on schedule on Windows 10 comes to an end. If you have any doubts about this tutorial, please leave a message in the comment zone below.
User Comments :