NVIDIA’s automatic tuning feature optimizes GPU performance by finding the best overclock settings. It assesses the GPU’s capabilities and adjusts voltage, power, temperature, and fan speed to maintain optimal performance and stability.
However, some people report that they encounter Automatic tuning was interrupted in the NVIDIA app on their PC, which bothers them a lot. Have you also encountered the same error? If so, continue reading to get some useful solutions.
Solution 1. Update/Reinstall NVIDIA Drivers
An outdated NVIDIA driver may lead to the Automatic tuning was interrupted error easily. In this case, you can try updating NVIDIA drivers by using GeForce Experience to fix the error. Here’s how to do that:
Step 1. Launch NVIDIA GeForce Experience on your PC, and go to the Drivers tab.
Step 2. Click Check for Updates. If an update is found, click Download.
Step 3. Wait for the process to complete. After the driver is downloaded, click Express Installation.
Step 4. Once done, restart your computer to apply the new driver settings. Then, open your NVIDIA app again and check if the Automatic tuning was interrupted error is fixed.
If updating the NVIDIA driver via GeForce Experience does not work for fixing the error, you can try reinstalling the driver to fix the error. Here’s the guide:
- Download Display Driver Uninstaller (DDU).
- Unzip the downloaded file.
- Find Display Driver Uninstaller in the extracted folder.
- Select your GPU from the device type and choose the GPU manufacturer.
- Click Clean and Restart to begin the uninstallation process.
- After that, navigate to the NVIDIA official website to download the NVIDIA app.
- Once downloaded, install the app on your PC.
- Go to the Drivers tab, and follow the on-screen guide to complete the NVIDIA driver installation.
- Once done, restart your PC and check if the error has been resolved.
Solution 2. Disable Background Applications
Sometimes, the background applications may interfere with the NVIDIA app running normally and lead to the Automatic tuning was interrupted error. In this situation, you can try disabling the unnecessary background apps to fix the error. Here’s how to do that:
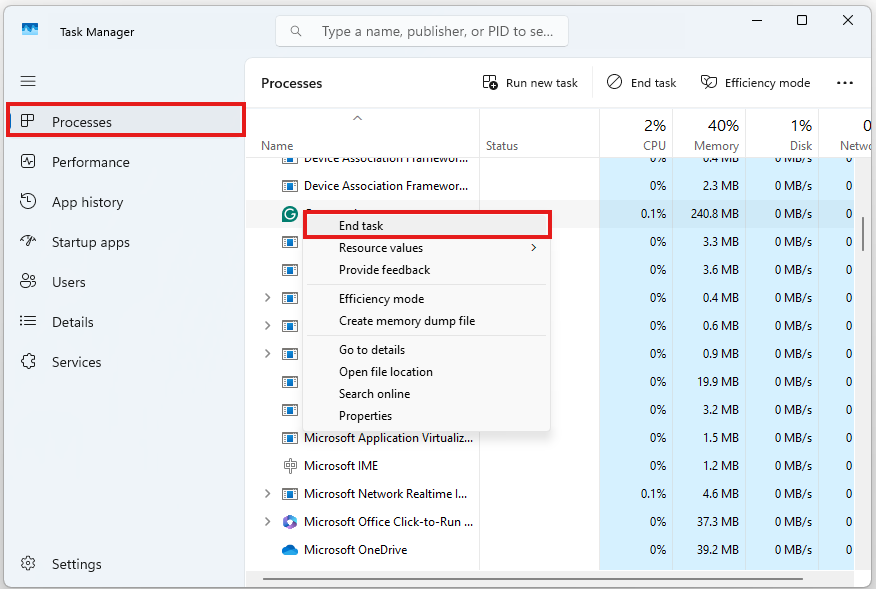
- Press the Ctrl + Shift + Esc keys simultaneously to open the Task Manager window.
- Go to the Processes tab, find the apps or programs that may conflict with the NVIDIA app, such as overlay or monitoring applications.
- Right-click the conflicting app and select End Task.
- After disabling all conflicting or unnecessary apps, open the NVIDIA app again and check if the Automatic tuning was interrupted in the NVIDIA app error has been resolved.
Solution 3. Disable NVIDIA Overlay
You can also try disabling the NVIDIA overlay to fix the Automatic tuning was interrupted error. Here are the detailed steps:
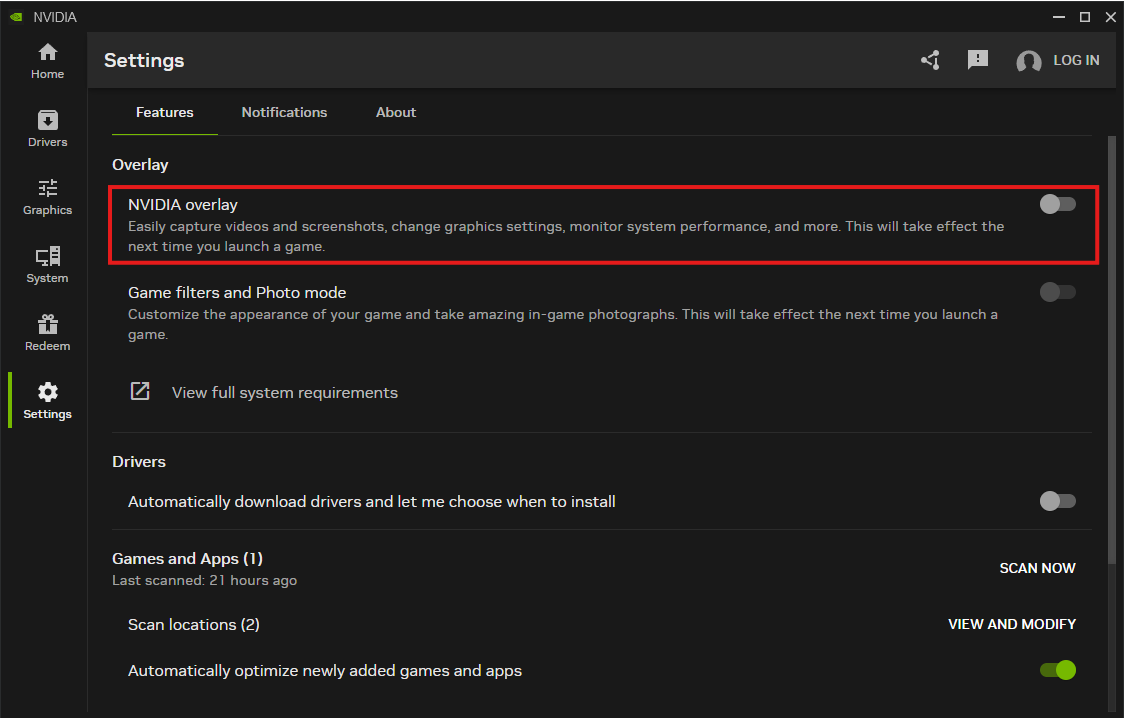
- Launch the NVIDIA app on your PC.
- Select the Settings tab.
- Switch off NVIDIA overlay.
Solution 4. Lower Monitor Refresh Rate
Lowering the Monitor refresh rate helps some people solve the Automatic tuning was interrupted error. If you also want to have a try. You can do the following steps:
- Press the Win + I keys simultaneously to open the Settings window.
- Go to System > Display > Advanced display.
- In the Choose a refresh rate section, select a lower refresh rate from the drop-down menu.
Solution 5. Reset NVIDIA Settings to Default
If you have custom NVIDIA Settings, you can suspect the Automatic tuning was interrupted error is caused by the setting conflicts. So, you can try resetting NVIDIA settings to fix the error. Here’s the way:
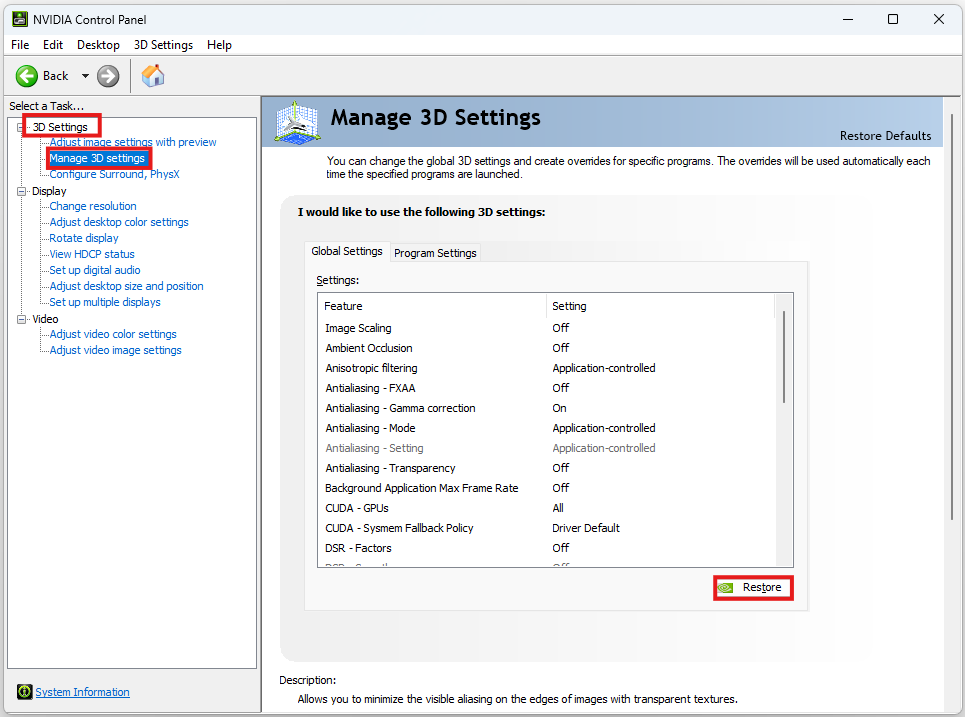
- Right-click any blank area of your desktop and select NVIDIA Control Panel.
- Under the 3D Settings section, click Manage 3D Settings.
- Click the Restore button in the right panel.
- Confirm the action if prompted.
- Click Apply to continue.
- Once done, restart your computer and check if the error is fixed.
Solution 6. Perform a Clean Boot
A clean boot is a Windows operating mode that starts the system with only a minimal set of drivers and startup programs. In this mode, all third-party and non-essential items are disabled, which can help you identify the cause of the Automatic tuning was interrupted error. Here’s a guide on how to perform a clean boot in Windows:
- Open the Run window, and then type “msconfig” in the box.
- Then, click on the OK button to open the System Configuration window.
- Select the Services tab and check the Hide all Microsoft services option.
- Click on the Disable all button and then click on the Apply button.
- Next, go to the Startup tab, and click on Open Task Manager.
- Right-click the applications you suspect and select Disable option from the menu.
- Exit Task Manager, and click OK under the Startup tab.
- Then, when you restart the computer, it is in a clean boot environment.
- Next, see if the problem occurs. If not, enable one program one by one until the problem occurs again. That program might be the source of the error. You’d better consider removing it.
Solution 7. Delete Configuration Files
Some people report that deleting configuration files helps them fix the the Automatic tuning was interrupted error successfully. You can also have a try. Here’s the process:
- Press the Win + R keys simultaneously to open the Run window.
- Type “appdata” in the box and press Enter.
- Go to Local > NVIDIA Corporation.
- Locate and delete the GeForce Experience or NVIDIA App folder.
- Once done, restart your PC and check if the error is fixed.
MiniTool Partition Wizard DemoClick to Download100%Clean & Safe
Bottom Line
How to fix the Automatic tuning was interrupted error? After reading this post, you may already know the answers. It provides several effective solutions to solve the error.
About The Author

Position: Columnist
Charlotte is a technology columnist with a strong focus on the Windows operating system, specializing in disk management, backup, and data recovery. She is passionate about analyzing computer errors, identifying root causes, and delivering practical solutions. In her free time, she stays updated on the latest developments in computer systems and hardware while continuously learning new technologies to broaden her expertise. Her writing style is clear and easy to understand, making complex technical topics accessible even to users with limited computer knowledge.
User Comments :