About ASUS Eee PC
The ASUS Eee PC, a part of the ASUS Eee product family, is a netbook computer line from ASUS. It’s fantastic for students and regular travelers since it’s lightweight and affordable. ASUS offers various series of Eee PCs, including Eee 700, Eee 900, Eee 1201N, etc.
It’s worth noting that ASUS Eee PC uses only a small SSD. So, if you have such a PC but want a larger storage capacity, you may need to perform an ASUS Eee PC SSD upgrade.
ASUS Eee PC SSD Upgrade Without Data Loss
How can ASUS Eee PC replace hard drive without losing data? If you have no idea, you can refer to the following instructions.
Before the SSD Upgrade
Before performing the ASUS Eee PC 1201N SSD upgrade or ASUS Eee PC 900 hard drive upgrade, you should make some preparations.
- Choose an appropriate SSD to replace the original one. The SSD should be compatible with your ASUS Eee PC.
- Prepare a SATA to USB cable to connect the new SSD to your PC.
- Prepare a suitable screwdriver to uninstall the original hard drive.
Steps for ASUS Eee PC SSD Upgrade
To execute the ASUS Eee PC 900 hard drive upgrade, we highly recommend you use MiniTool Partition Wizard. This professional partition manager offers the Migrate OS to SSD/HD feature to help you upgrade your PC SSD without reinstalling Windows. Besides, its Copy Disk feature allows you to clone the whole disk to another.
In addition, MiniTool Partition Wizard also enables you to create/resize/format/delete partitions, format SD card FAT32, convert MBR to GPT, recover data from hard drive, and more.
Here’s how to use MiniTool Partition Wizard’s Copy Disk feature to run the ASUS Eee PC 1201N SSD upgrade.
Step 1: Download and install MiniTool Partition Wizard on your PC.
MiniTool Partition Wizard DemoClick to Download100%Clean & Safe
Step 2: Launch this program to enter its main interface.
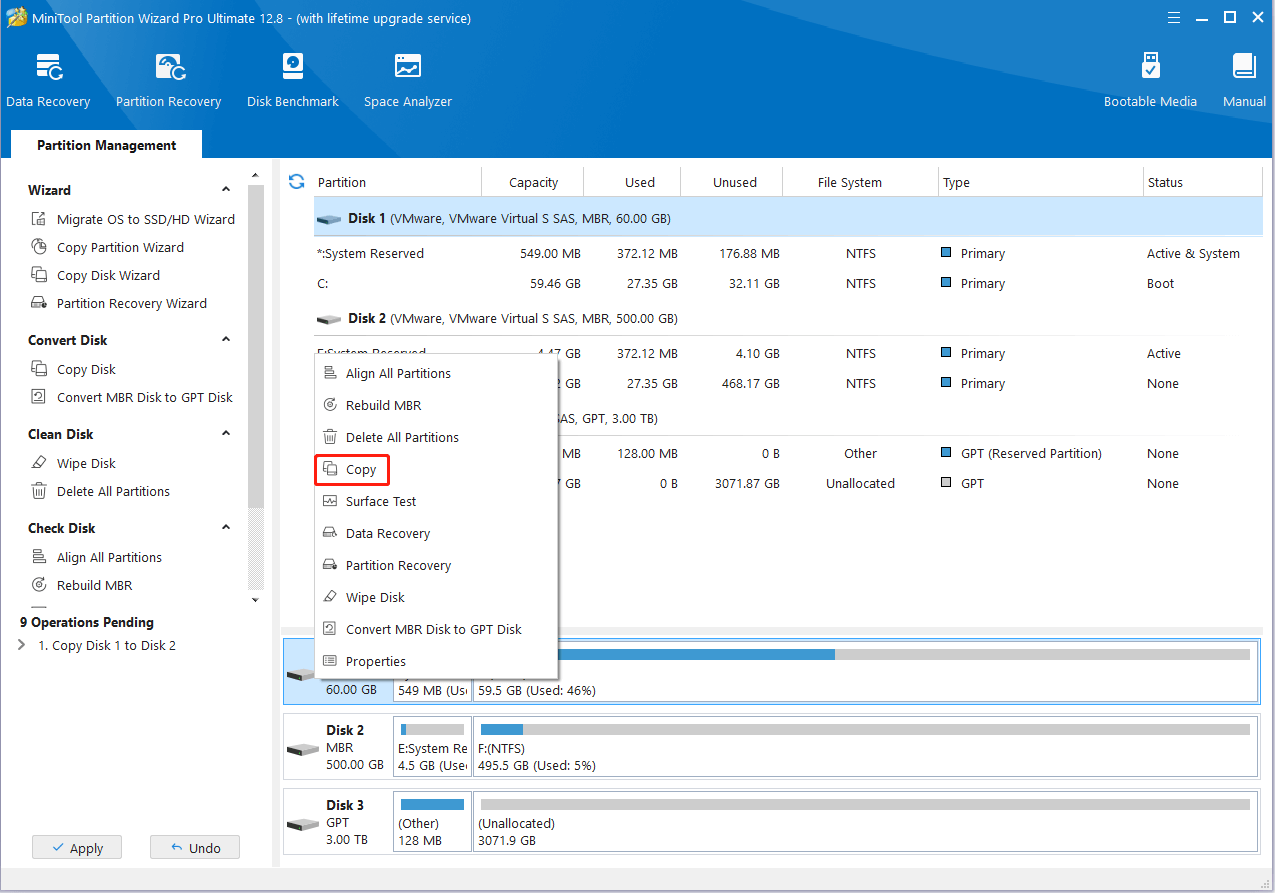
Step 3: Right-click the original disk and select Copy from the context menu.
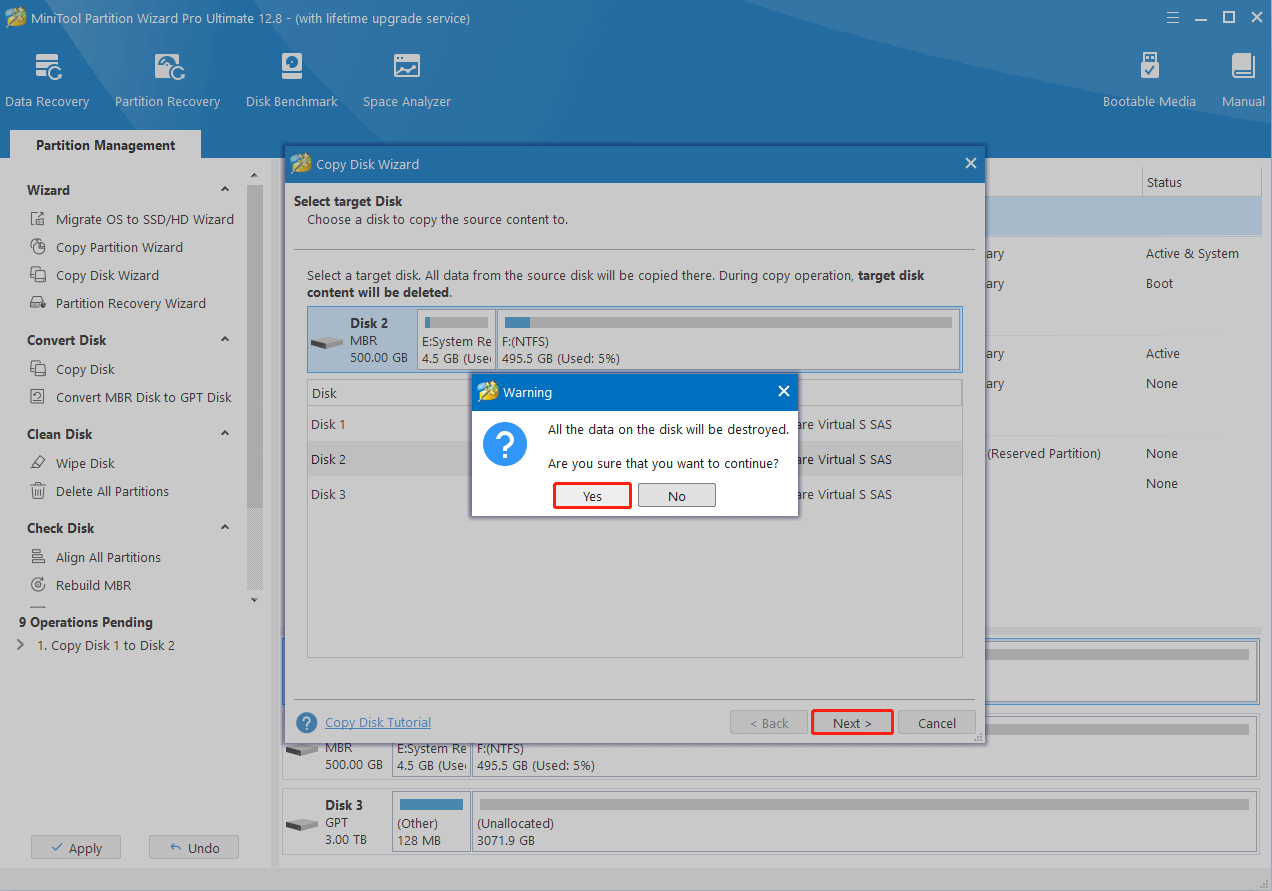
Step 4: In the pop-up window, choose the new SSD and click Next. When prompted, click Yes to confirm.
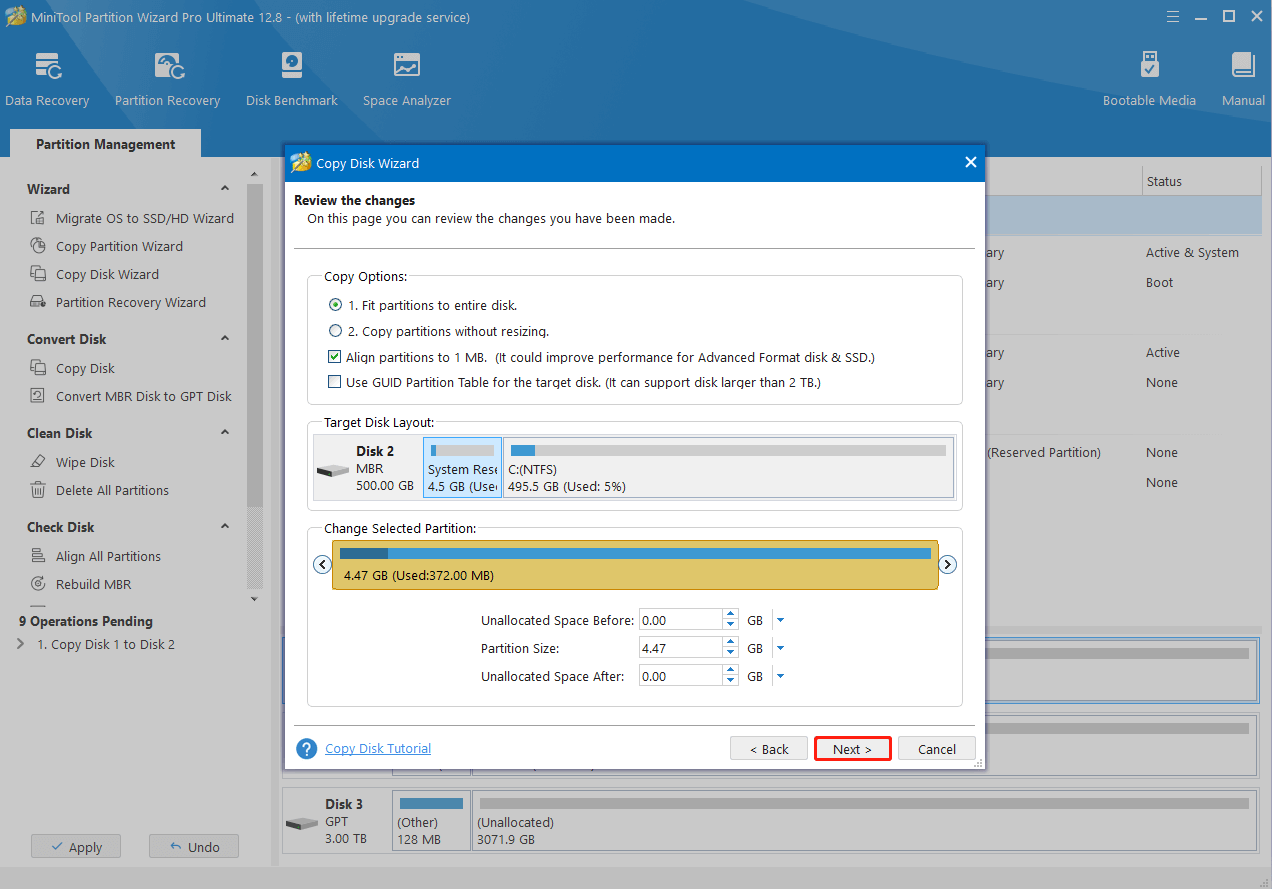
Step 5: In the next window, choose copy options and change the disk layout. Once done, click Next.
Step 6: Finally, click Finish and Apply to execute the changes.
After you clone the original disk to the new SSD, continue the SSD replacement with the given steps.
- Turn off your ASUS Eee PC and disconnect the new SSD.
- Remove the power cable and battery.
- Remove the screws that secure the SSD compartment cover.
- After that, lift the SSD compartment cover away from the PC gently and carefully.
- Remove the screws securing the SSD and then take the current SSD out of its bay.
- Insert the new SSD into the SSD slot and fasten it with the screws you unscrewed before.
- Put everything back in place in the order.
Bottom Line
How can ASUS Eee PC replace hard drive? This post unveils the answer to you. You can follow the above guide to perform an ASUS Eee PC SSD upgrade successfully.
User Comments :