Use SDelete to Add Secure Delete to the Context Menu
SDelete is a utility that allows you to add, configure, and remove the Secure Delete option to the Windows context menu. You can get and set up SDelete and then use it to add Secure Delete to the context menu with the following steps.
Step 1: Download the SDelete-Gui.exe file from its GitHub page. If you download a .zip file, unzip it and copy the sdelete.exe file to the C:\Windows\System32 folder.
Step 2: Double-click the SDelete-Gui.exe file and click Yes on the prompted UAC window.
Step 3: Then the SDelete GUI configuration window will display on the screen. In this window, select how many passes the application should make to eliminate any trace of the file or folder from the computer. The default number of passes is 10, but you can reduce or increase the number based on your demands.
Step 4: Then click Enable and confirm the operation.
Step 5: Right-click on the target file to open the context menu. Then you will see the Secure Delete option on the menu. If you are on Windows 11, click Show more options after you right-click a file to view the Secure Delete option.
The steps to add Secure Delete option to Windows context menu have been shown to you. Just follow these steps to finish the process.
Use SDelete to Remove Secure Delete from Context Menu
If you don’t need the Secure Delete option, remove it from the context menu by following the steps below.
Step 1: Head to the folder where unzipped registries are saved.
Step 2: Double-click on the Remove_Secure_Delete_from_context_menu.reg file.
Step 3: Click Yes on the pop-up UAC window and then tap OK when the Registry prompts.
Step 4: You will find that the Secure Delete option is gone after you restart your computer.
Use MiniTool Partition Wizard to Delete Files or Folders
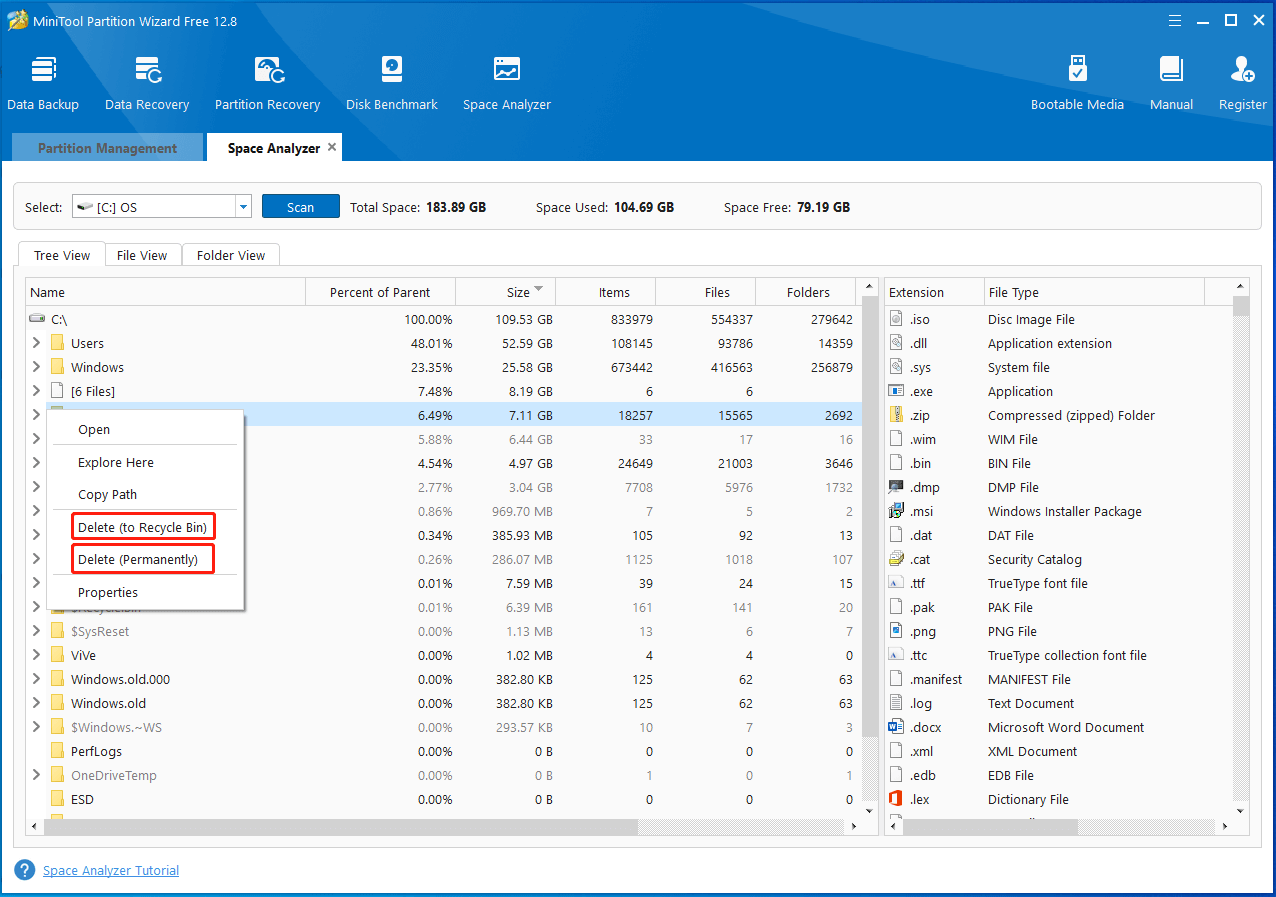
In addition to the Secure Delete option, file deleters like MiniTool Partition Wizard also allow you to permanently delete files and folders. Find files to delete via Space Analyzer and then right-click on them one by one and click Delete (to Recycle Bin) or Delete (Permanently).
MiniTool Partition Wizard FreeClick to Download100%Clean & Safe
Also read: Ultimate Guide to Resolve Can’t Delete Files from SD Card Error
If files or folders to delete are saved on a partition, directly delete or wipe the partition to get them removed. To do that, right-click on the target partition and click Delete or Wipe on the context menu. After that, follow the on-screen instructions to finish the process.
User Comments :