What to do if Windows shows 8GB RAM installed but 4GB is usable? Well, there are 6 troubleshooting methods for you. Try them now to solve the issue.
MiniTool Partition Wizard FreeClick to Download100%Clean & Safe
Way 1: Ensure that the Windows Is 64-Bit
How to fix if Windows shows 8GB RAM installed but 4GB RAM is usable? To use 8GB RAM, you should make sure that your system is 64-bit. Check if your system is 32-bit or 64-bit. If it’s 32-bit, you need to upgrade it to 64-bit.
Step 1: Right-click the Start icon to open the Quick Link menu.
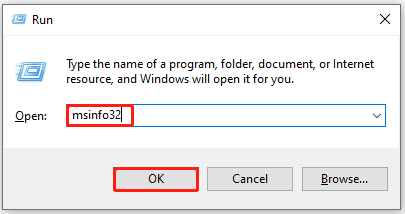
Step 2: Click the Run option to continue.
Step 3: In the Run dialog window, type msinfo32 and click OK.
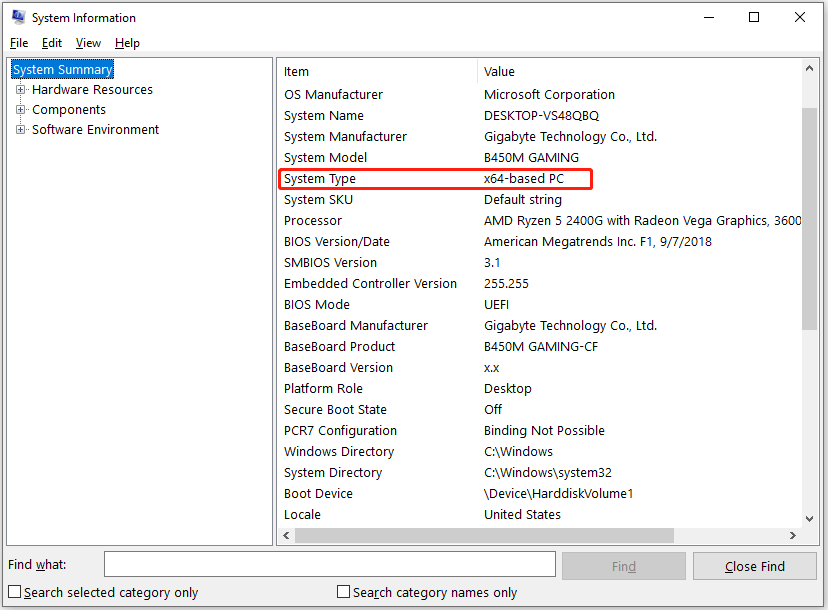
Step 4: Check the information behind System Type. As you see, my computer is x64-based.
Way 2: Check If the RAM Stick Is Defective
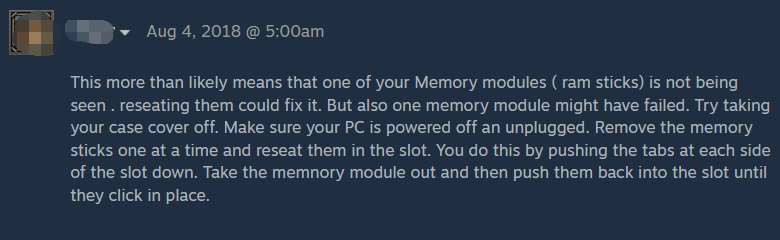
Does memory only show 4GB when 8GB is installed? If so, you’d better check if one of the RAM sticks is faulty. To do that, remove one RAM stick and check if the BIOS detects the other one or the computer boots normally. If not, it means that the RAM stick is defective and you should replace it with a new one.
Repeat the above process to test the other RAM stick. If both RAM sticks work properly, try other methods to troubleshoot 8GB RAM installed but 4GB usable issue.
Way 3: Reseat the RAM Stick
Reseating the RAM stick is an available solution for Windows 10 not all RAM usable issue. It’s worth having a try! Some users solved the issue by using this method.
Step 1: Power off the computer and unplug the cables.
Step 2: Remove the computer cover and take out the RAM sticks.
Step 3: Reseat RAM sticks in the slot by pushing the tabs at each side of the slot down.
Step 4: Reassemble the computer and power back to see if the issue is fixed.
Way 4: Check If You Enable Dual-Channel Mode
If you have confirmed that two RAM sticks are fine and properly seated, you should check if dual-channel mode is enabled. If not, you will receive 8GB RAM installed but 4GB usable issue. The following steps show you how to check if the RAM runs in single or dual-channel and enable dual-channel RAM in BIOS.
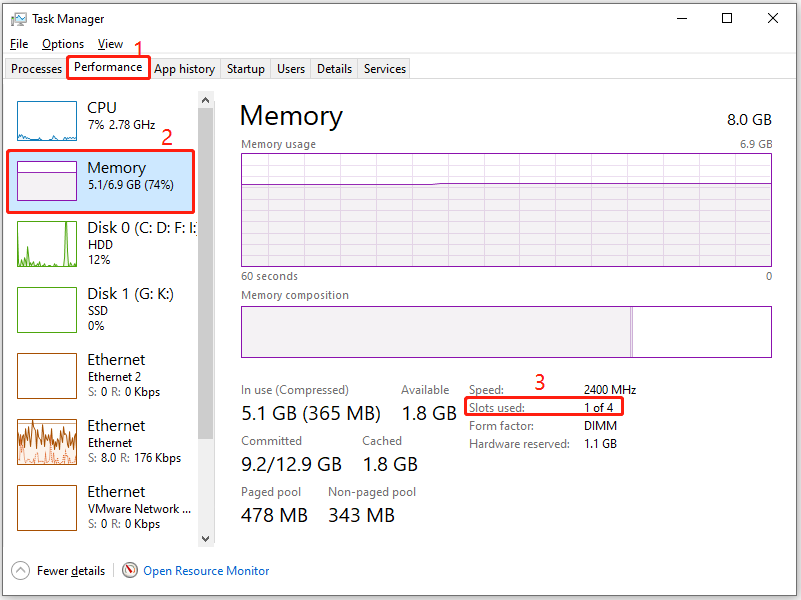
Step 1: Press Windows and X keys and then click Task Manager.
Step 2: Tap on the Performance tab and click on Memory. Spot on the Slots used field on the right side. If it shows 1 of 2/4, it indicates that the RAM runs in a single channel.
Step 3: To enable dual-channel RAM in BIOS, follow the instructions below.
- Restart the PC and press the BIOS key repeatedly during the boot process to enter BIOS.
- Go to the Advanced BIOS Features or Advanced Memory Settings section.
- Locate the Memory Mode, Channel Mode, or Memory Configuration option.
- Choose the option and modify the settings from Single to Dual.
- Press F10 > Enter key to save changes and exit BIOS.
Step 4: Now, check if Windows 10 not all RAM usable issue disappears.

Way 5: Modify BIOS Settings
BIOS settings can limit the amount of RAM recognized, causing 8GB RAM installed but 4GB usable. When the issue occurs, check if any memory remapping options in BIOS settings are disabled. If so, you should enable them manually.
You need to configure BIOS settings as follows. Enter BIOS with the above instructions and change BIOS settings one by one.
- Virtualization: On
- iGPU: Off
- iGPU memory: Auto
- Render Stability: Enabled
Way 6: Update BIOS
If none of the above methods work, consider updating BIOS. By doing so, you can improve compatibility, which may help you get rid of “memory only show 4GB when 8GB is installed” issue.
Step 1: Find the model name of your computer.
Step 2: Navigate to the official website of the computer and find the latest BIOS version on the Download or Support page for your PC model.
Step 3: Download the latest BIOS file and unzip it to a blank USB flash drive.
Step 4: Plug the USB with the BIOS file included into the computer.
Step 5: Restart the computer and boot into BIOS.
Step 6: Navigate to the Boot table and enable any Flash options in the menu to run the BIOS update tool. Then follow the on-screen instructions to finish the update process.
The End
Are you stuck on 8GB RAM installed but 4GB usable issue? Don’t worry! With this post, you can fix it effectively. Here are 6 solutions for the issue.
User Comments :