The USB device not recognized issue may be annoying. This post offers 7 solutions to help you. If the USB drive becomes unallocated or RAW, MiniTool Partition Wizard can help you recover the lost partition and files.
USB device not recognized is an error that may pop up when you connect a USB device, including a USB drive, keyboard, headphones, etc.
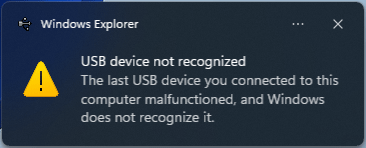
The causes for the error include improper connection, faulty USB ports or cables, faulty USB devices, disabled USB ports settings in BIOS, improper power management settings, and problematic USB device drivers.
Sometimes, the USB device not recognized issue may refer to the USB drive not showing up in File Explorer issue. In this case, the following causes are added: the drive letter of the USB drive is missing, and the USB drive becomes unallocated or RAW.
How to solve the USB device not recognized issue? You can try the following methods.
Here is a video guide:
Fix 1. Check Hardware Issue
Step 1: Shake and make the USB device a little loose. The too-tight connection will misalign the pins, causing the USB device not recognized issue. Then, check if the issue disappears.
Step 2: Shut down your computer completely and unplug all peripheral equipment. Replug the power supply and turn on the PC. Replug the USB device and check if the issue disappears.
Step 3: Connect the USB to another port and check if the issue disappears. For a desktop PC, please plug the USB device into the rear USB port because the rear USB port usually offers more power. If necessary, plug the USB device into another PC to check if the issue still occurs.
Step 4: If the USB device is connected to the PC via a USB cable, use another cable to connect the USB device. Then, check if the issue can be solved.
Through the above steps, you can roughly determine whether the USB device not recognized error is caused by a connection problem, a port or cable problem, or a USB device problem.
If the problem is caused by the USB port, enabling the USB port in BIOS, updating the USB device driver, and changing the USB power settings may solve it.
Fix 2. Enable the USB Port in BIOS
Some PC models offer a switch in the BIOS to enable and disable USB ports. To solve the issue of the USB ports not working, you should make sure the USB port is enabled. Here is the guide.
Step 1: Power on the computer. Then, repeatedly press the BIOS key when the PC brand logo appears.
- Dell: F2.
- HP: F10.
- Lenovo: F1, F2, Fn + F1/F2, or the Novo button.
- ASUS: F2 or Delete.
Step 2: In the BIOS, find the USB setting and then make sure it is checked or enabled.
- For Dell: Go to Settings > System Configuration > USB Configuration and check the box for Enable External USB Port. Or, go to Integrated Devices > USB / Thunderbolt Configuration and check the boxes for Enable External USB Ports and Enable USB Boot Support.
- For HP: Go to System Configuration or Advanced > Device Configurations or Port Options. Then, check the boxes for USB Ports.
- For ASUS: Go to the Advanced Mode. Navigate to Advanced > USB Configuration. Then, set Legacy USB Support or USB Controller to Enabled or Auto.
- For Lenovo: Go to Security, Devices, or Config > USB or USB Setup. Highlight USB Port or USB Support and change the status to Enabled.
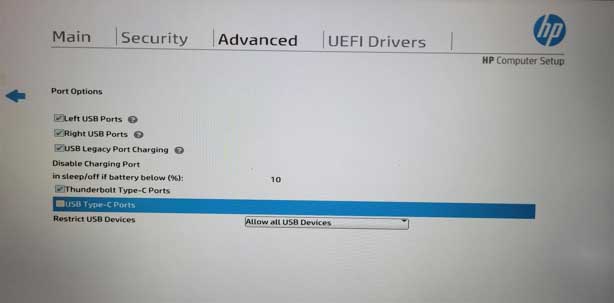
Image from HP Support.
Step 3: Press F10 to save changes and exit.
Fix 3. Update the USB Device Driver
Device drivers act as a bridge between a computer and its devices. Inappropriate drivers can cause the USB device not recognized problem. Then, try updating it.
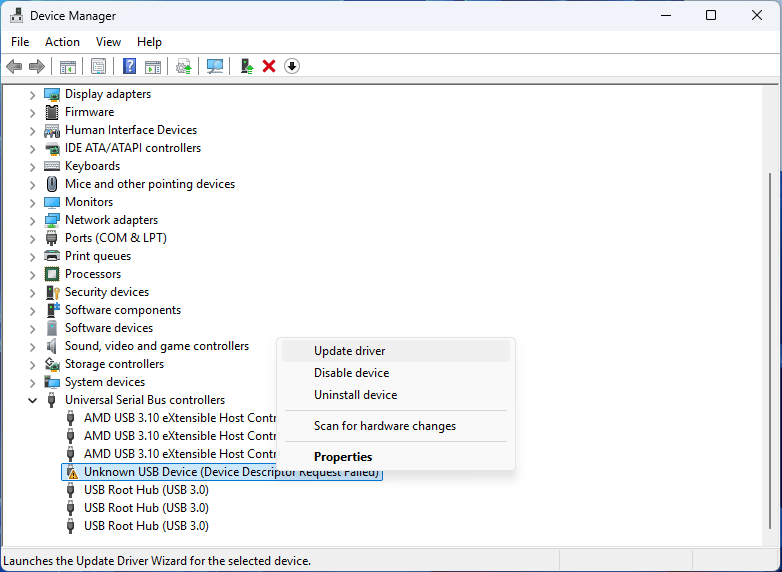
- Press Win + X and select Device Manager.
- Expand Universal Serial Bus controllers.
- Right-click the Unknown USB Device and choose Update driver.
- Follow the wizard to complete the driver update.
Fix 4. Change 2 USB Power Settings
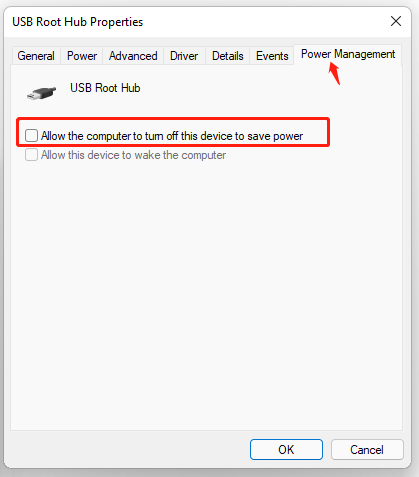
#1. Change USB Root Hub Power Management Settings.
- In Device Manager, under Universal Serial Bus controllers, there are serial USB Root Hub devices.
- Right-click them and choose Properties.
- Navigate to the Power Management tab.
- Untick the checkbox for Allow the computer to turn off this device to save power and click OK.
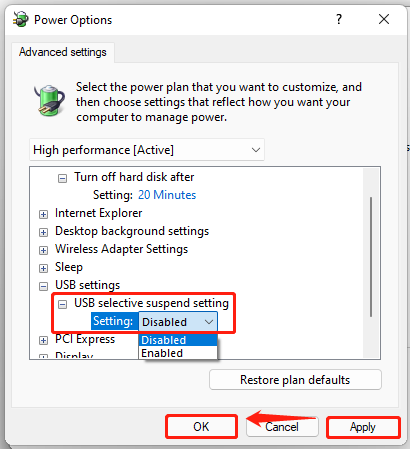
#2. Disable the USB Selective Suspend Setting.
- Open “Edit Power Plan” from Windows Search.
- Click Change advanced power settings.
- Expand USB settings > USB selective suspend setting.
- Set the setting to Disabled.
- Click Apply and OK.
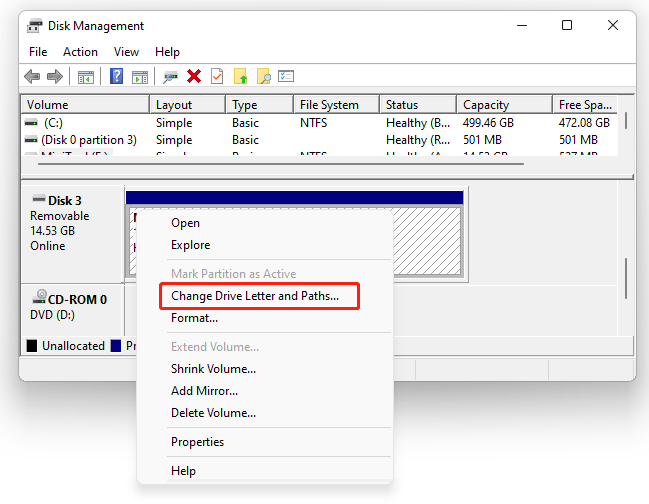
Fix 5. Assign a Drive Letter to the USB Drive
To solve the flash drive not showing up issue, one common method is to assign a drive letter to the USB drive. Here is the guide.
Step 1: Open Disk Management from Windows Search. Right-click the USB partition and select Change Drive Letter and Paths.
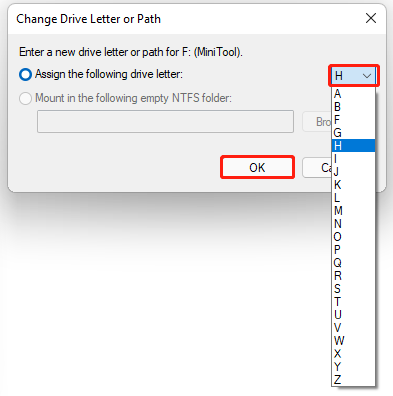
Step 2: Click Add and then select a drive letter from the drop-down menu. After that, click OK to save the change.
Fix 6. Recover Lost USB Partition
If the USB drive becomes unallocated, you can use MiniTool Partition Wizard to recover the missing partition. Here is the guide.
MiniTool Partition Wizard DemoClick to Download100%Clean & Safe
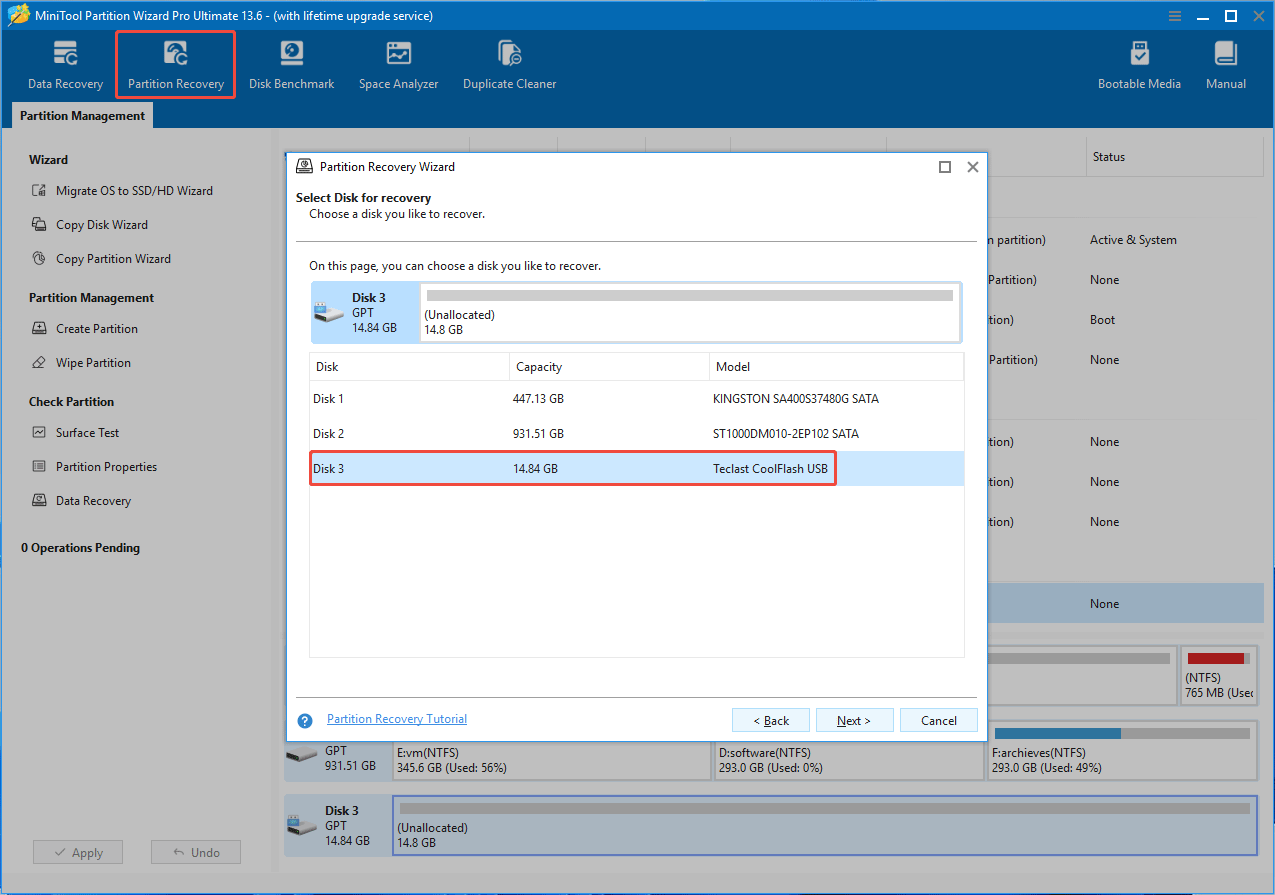
Step 1: Launch MiniTool Partition Wizard and click Partition Recovery. On the pop-up window, click Next and then select the USB drive for partition recovery.
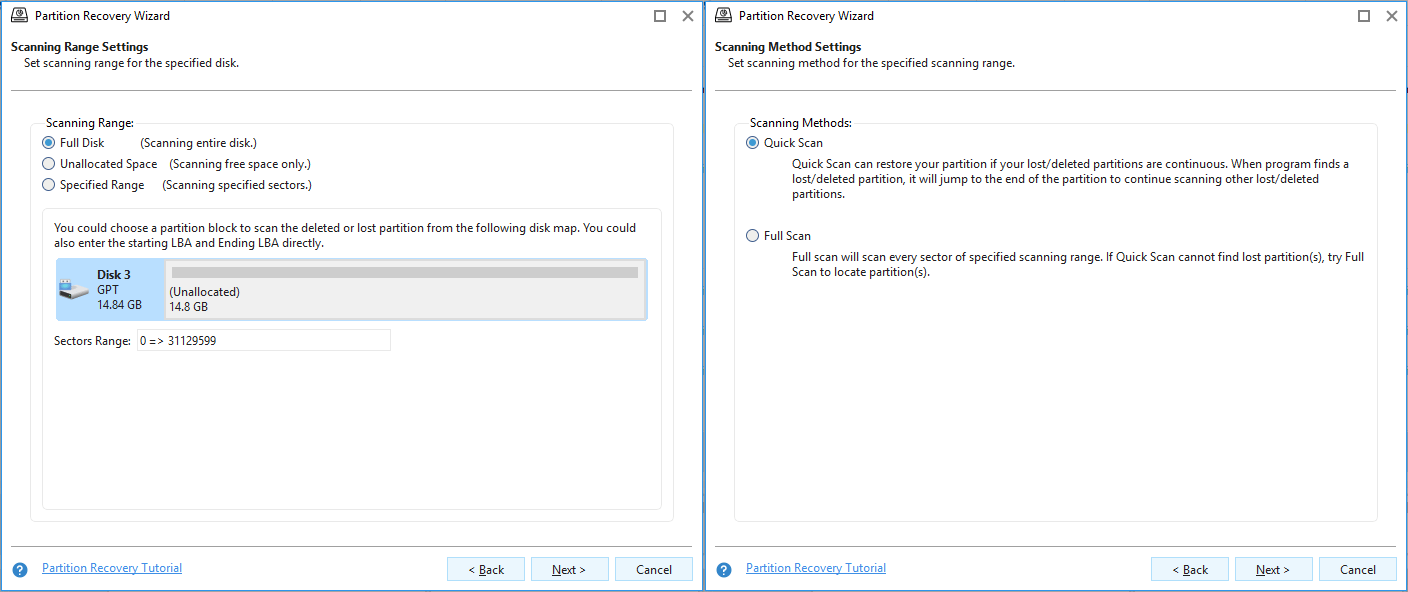
Step 2: Keep the default Scanning Range (Full Disk) and Scanning Method (Quick Scan).
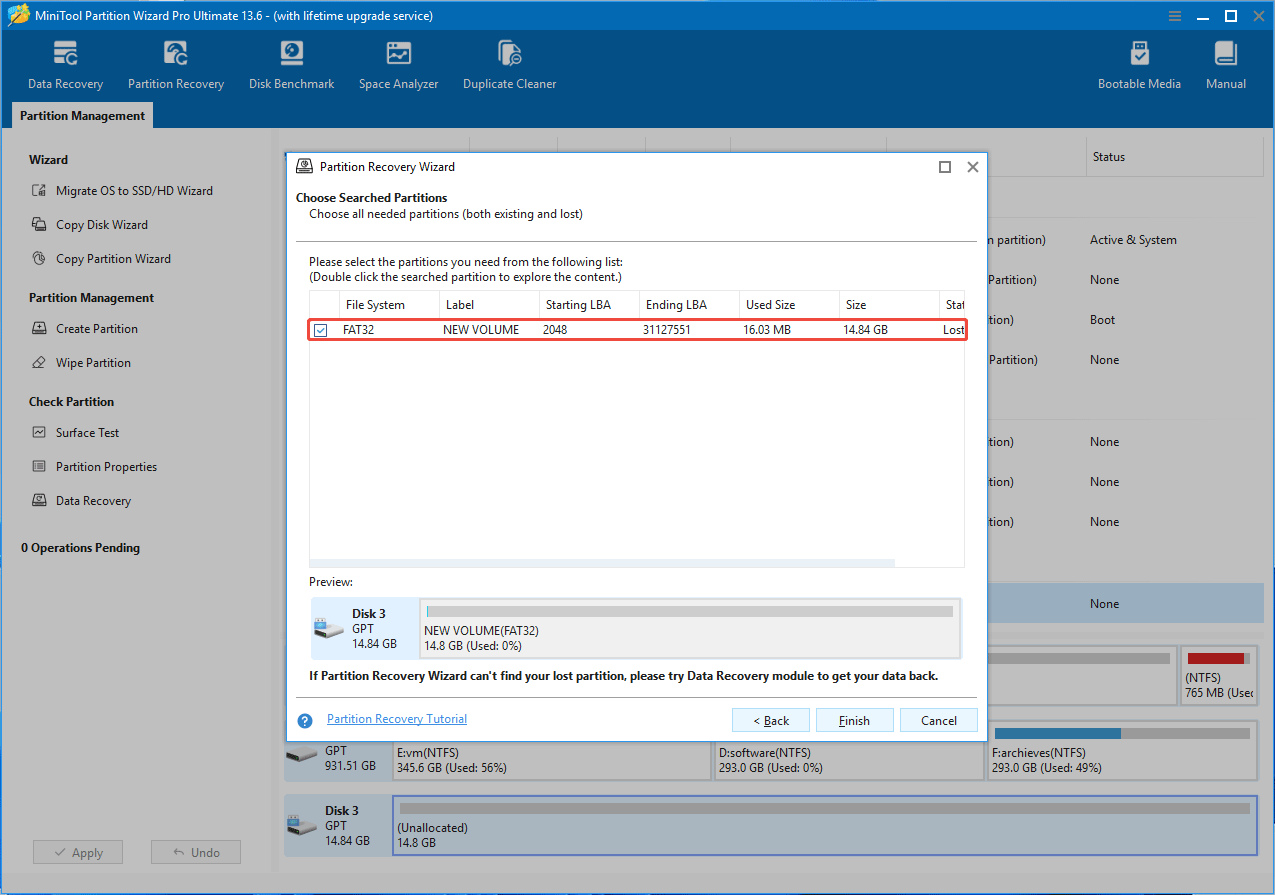
Step 3: Tick the lost partition and click Finish.
Step 4: Click Apply to execute the recovery operation.

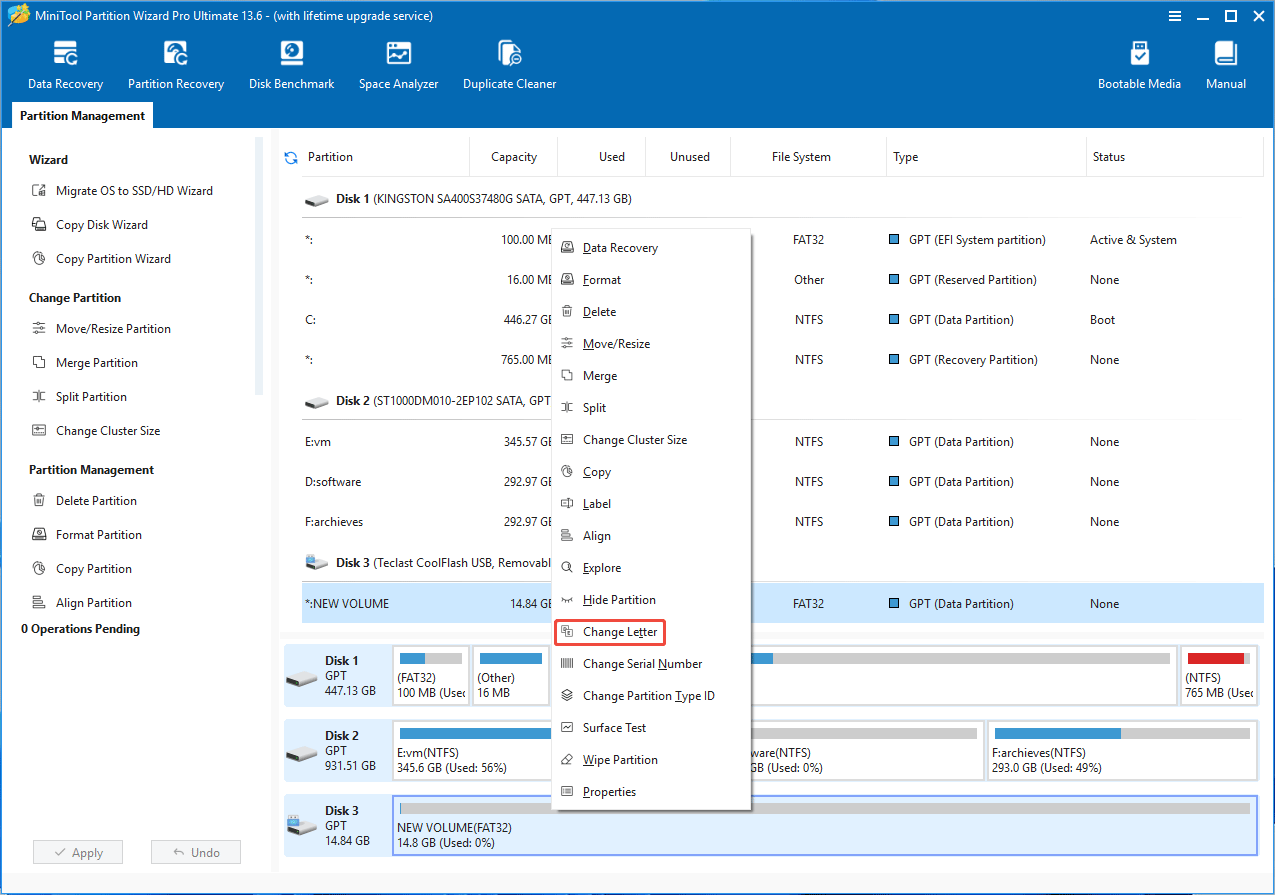
Step 5: The recovered partition has no drive letter. You need to right-click it and choose Change Letter. Then, follow the wizard to add a letter.
Fix 7. Recover Data and Format the USB Drive
If the USB drive becomes RAW, formatting the drive can solve it. Before that, you may need to recover important data with MiniTool Partition Wizard. The steps are as follows.
- Right-click the USB RAW drive and choose Data Recovery.
- After the scanning process is completed, find and tick the files you want to recover under Path or Type.
- Click Save and then select a safe location to put the recovered files.
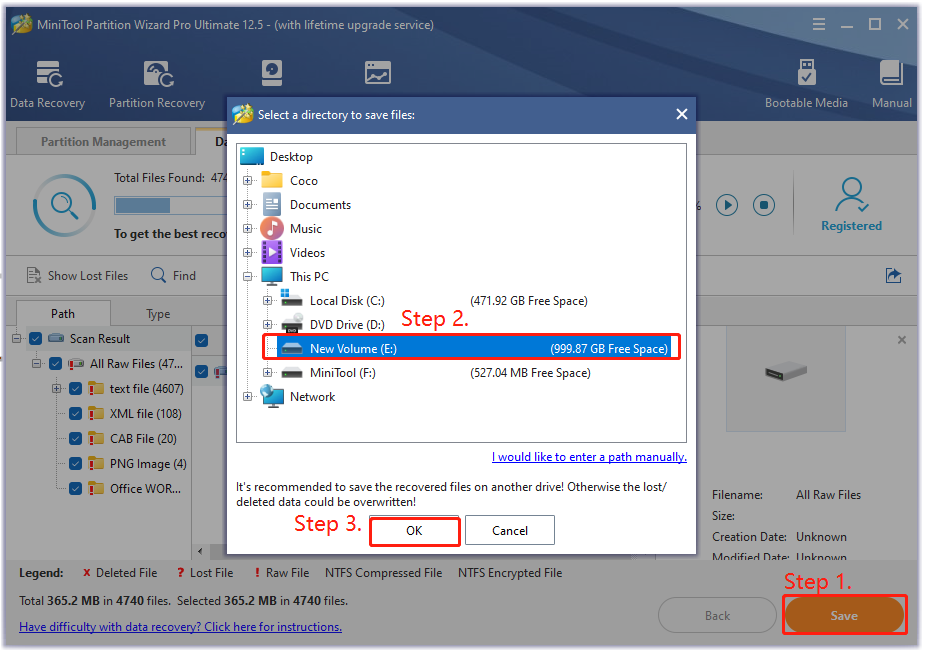
After data recovery, format the USB drive and see if the issue can be solved.
USB Device Not Recognized FAQ
1. Open Device Manager and expand Universal Serial Bus controllers.
2. Look for any Unknown Device or entries with warning icons, right-click them, and uninstall.
3. Click View > Show hidden devices and uninstall any grayed-out devices.
4. Restart your PC and go back to Device Manager.
5. Right-click each USB Root Hub under the same section, select Properties > Power Management, and uncheck Allow the computer to turn off this device to save power. Restart again.
6. Turn off your PC, unplug it from the wall, and hold the power button for 30 seconds to reset the USB ports.
Bottom Line
This post offers solutions to fix the USB device not recognized error and the USB drive not showing up issue. If the USB drive becomes unallocated or RAW, MiniTool Partition Wizard can help you recover lost partitions and data.
If you have any problems with this software, contact our support team via [email protected] for help.
About The Author

Position: Columnist
Linda has been an editor at MiniTool for seven years. She continuously learns about computers and puts her knowledge into practice. Moreover, she is particularly knowledgeable in disk management, data recovery, system installation, and PDF editing. Her articles typically reference multiple examples or are based on her own experience, providing users with the most suitable solutions.
User Comments :