Some people chose TestDisk when they lost their partitions or data. However, sometimes this tool didn't work as expected and prompted “no partition found”. If you are facing TestDisk no partition found, you come into the right place. This post shows you how to successfully recover partition and data using MiniTool Partition Wizard.
TestDisk No Partition Found
TestDisk is a free and open-source recovery tool for Windows. It is primarily designed to help recover lost partitions and make non-booting disks bootable again.
However, some people reported they received an error message saying “no partition found” from TestDisk when they used it to recover partition or data. Here is the true example from forum.cgsecurity.org:
No Partition Found, even after Deep Search:
I have a WD 2TB external USB disk that went RAW. As always, it contains critical information to me. When I run TestDisk, it founds no partition. Selecting QuickSearch appears to go straight into Deep Search (it moves slowly cylinder by cylinder), but stops at 69% due to some unreadable information.
I’ve now re-run TestDisk, aborted the Quick Search, and got to the option of Deep Search specifically, which is now running (I’ll leave it running for the night). As soon as it finishes (if it does) I can post an update with the log, but in the meantime, I wonder if anyone can tell me what to do if no partition is ever found.
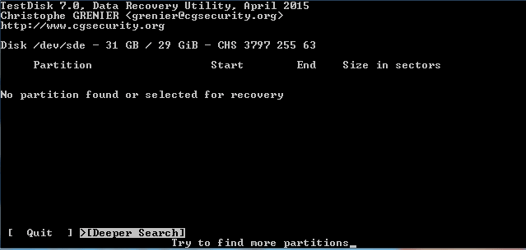
As the poster said, after applying deep search, what to do if TestDisk still said no partition found or selected for recovery? It seems no fix to the issue on the Internet, but do not panic. There is an alternative way to recover your partitions and data on Windows 10. The way is using an alternative to TestDisk, and here MiniTool Partition Wizard cloud be the best one.
Use MiniTool Partition Wizard to Recover Partitions/Data When Running into “TestDisk No Partition Found”
MiniTool Partition Wizard is a professional partition manager for Windows computers. It does excellent in disk managements like partitioning a disk, formatting a disk, extending a partition, etc., as well as does well at recovering data/partitions, copying disk, migrating OS to a large disk, checking drive health, and so on.
Compared to TestDisk, MiniTool Partition Wizard is not available for free when it is used to recover partition(s) and data.
However, MiniTool Partition Wizard comes with a graphical user interface, which makes it easy to operate. While TestDisk is a command-line utility and does not have a user interface. If users don’t have the technical knowledge, it is time-consuming to recover a partition using TestDisk. All in all, it is much easier and time-saving to recover a partition using MiniTool Partition Wizard than using TestDisk.
Moreover, MiniTool Partition Wizard allows you to recover partition and data from many devices such as hard drives, SSDs, USD drives, SD cards, etc.
So, if you ran into “No partition found or selected for recovery TestDisk”, you can give MiniTool Partition Wizard a try. Well, how to use MiniTool Partition Wizard to recover a partition and data? The detailed tutorials are displayed below.
Recover Partitions Using MiniTool Partition Wizard
The Partition Recovery feature of MiniTool Partition Wizard can help you recover a missing partition and its data. Here are the steps:
Step 1: Launch MiniTool Partition Wizard to access its main interface.
MiniTool Partition Wizard DemoClick to Download100%Clean & Safe
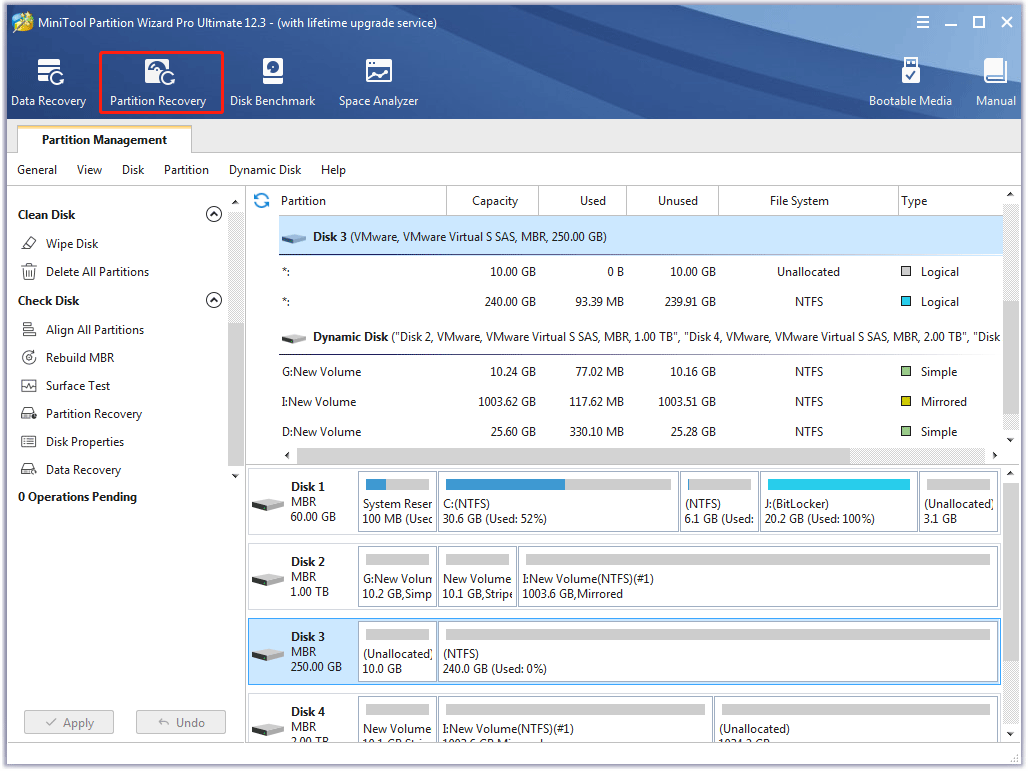
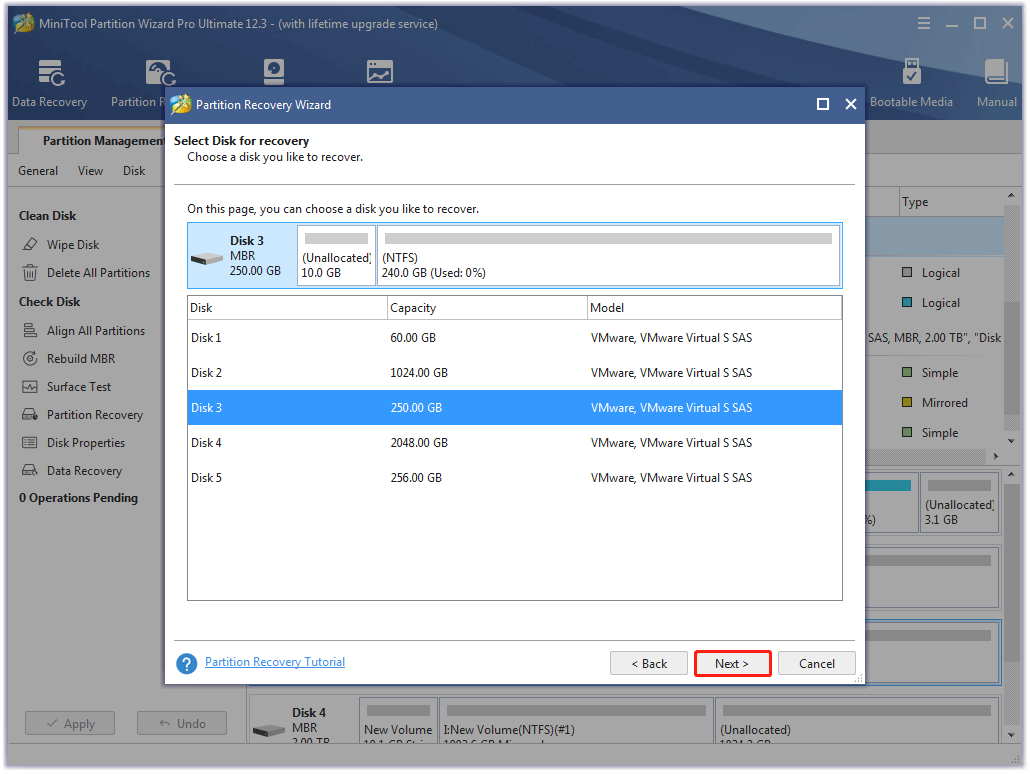
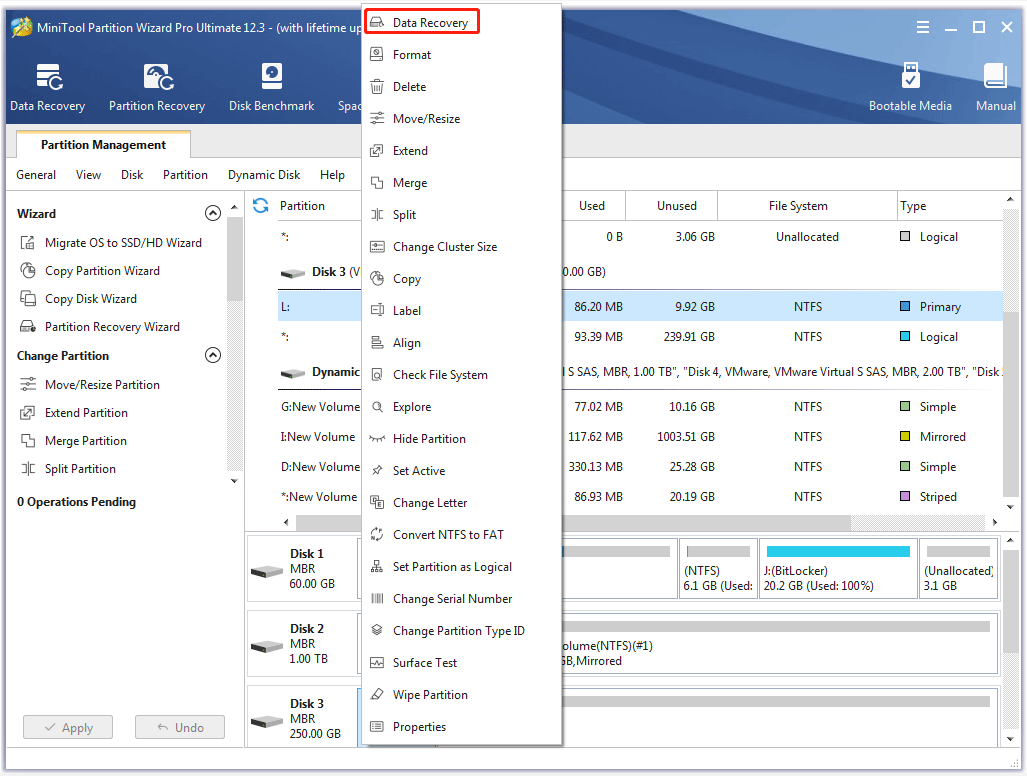
Step 2: Right-click the disk on which partition loss happens and then choose the Partition Recovery feature. Alternatively, click the Partition Recovery feature from the toolbar at the top of the interface. Then, click the Next button to continue.
Step 3: On the Partition Recovery Wizard window, choose a scanning range and then click the Next button. Here are three options:
- Full Disk
- Unallocated Space
- Specified Range
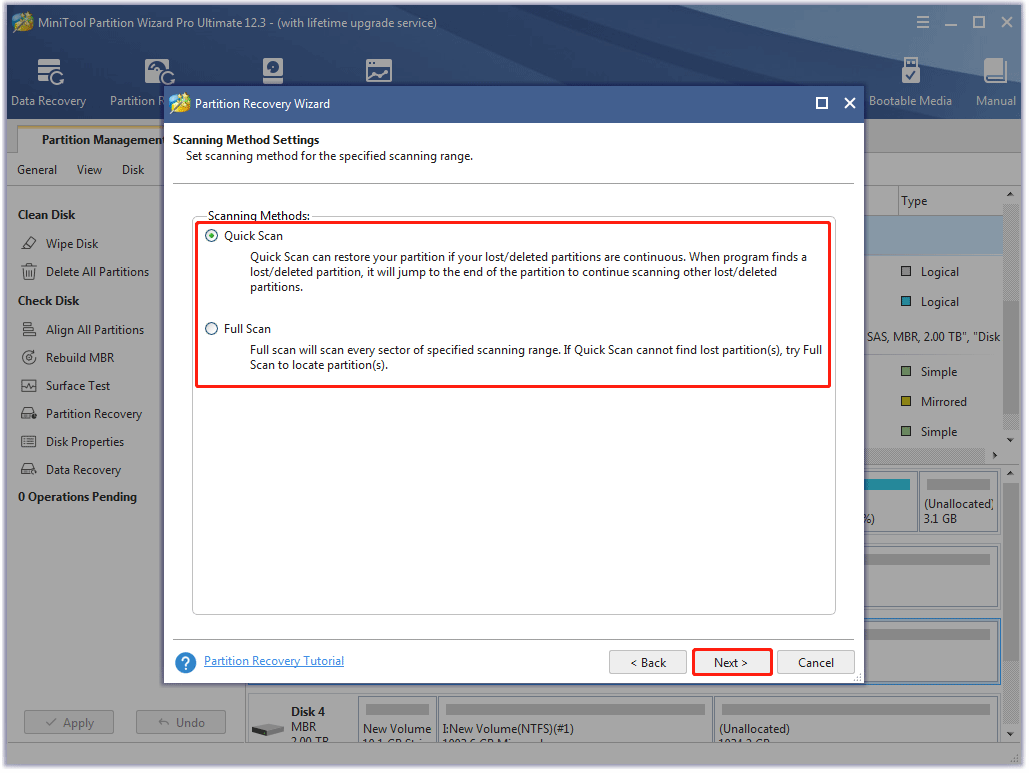
Step 4: On the next window, choose a method to scan and click the Next button. Here are two scanning methods offered.
- Quick Scan
- Full Scan
Step 5: Wait for the tool to complete scanning the drive. Once it finishes, tick all checkboxes next to the found partitions and keep checkboxes next to the existing partitions ticked and then click the Finish button.
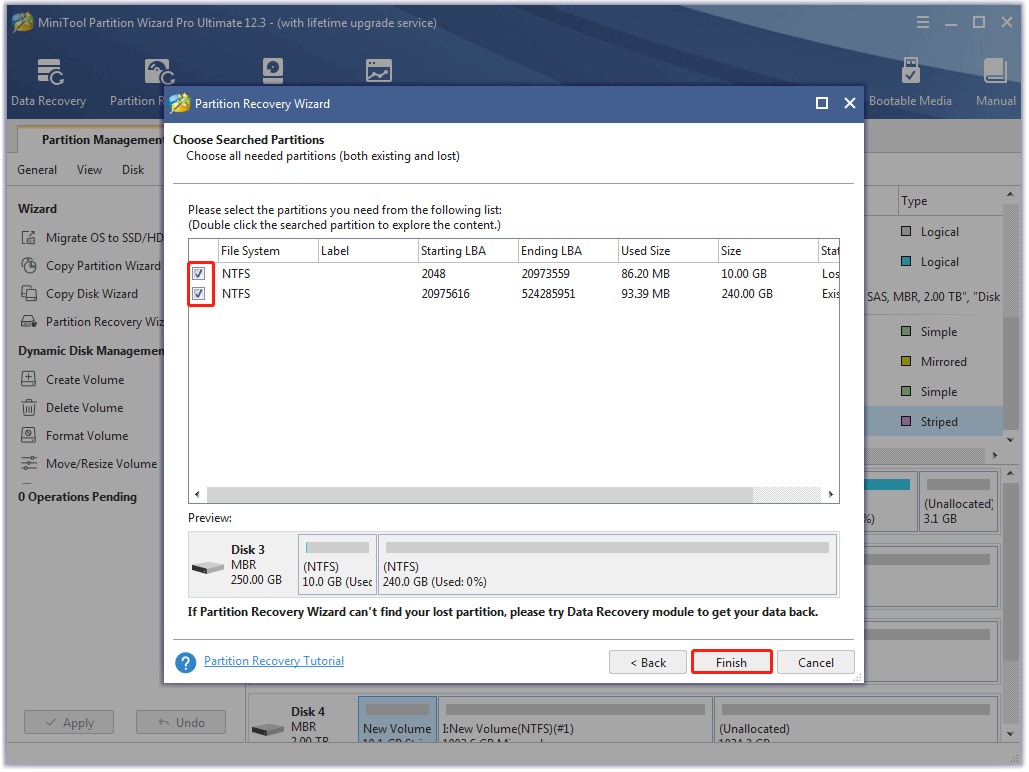
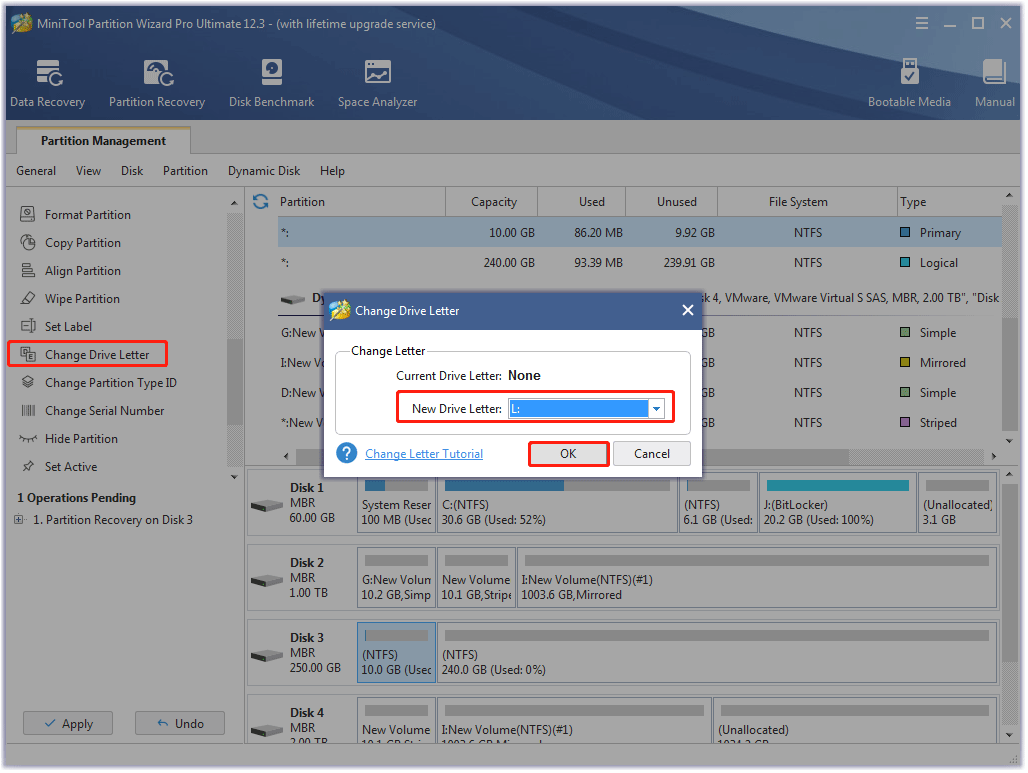
Now preview the recovery result on the software interface. As you can see, the lost partition comes back but does not have a drive letter. If you want to assign one to it, perform the following steps.
- Highlight the recovered partition and choose the Change Drive Letter feature from the left panel.
- Choose a drive letter from the drop-down menu of New Drive Letter.
- Click the OK
Step 6: Click the Apply button to execute the pending task.
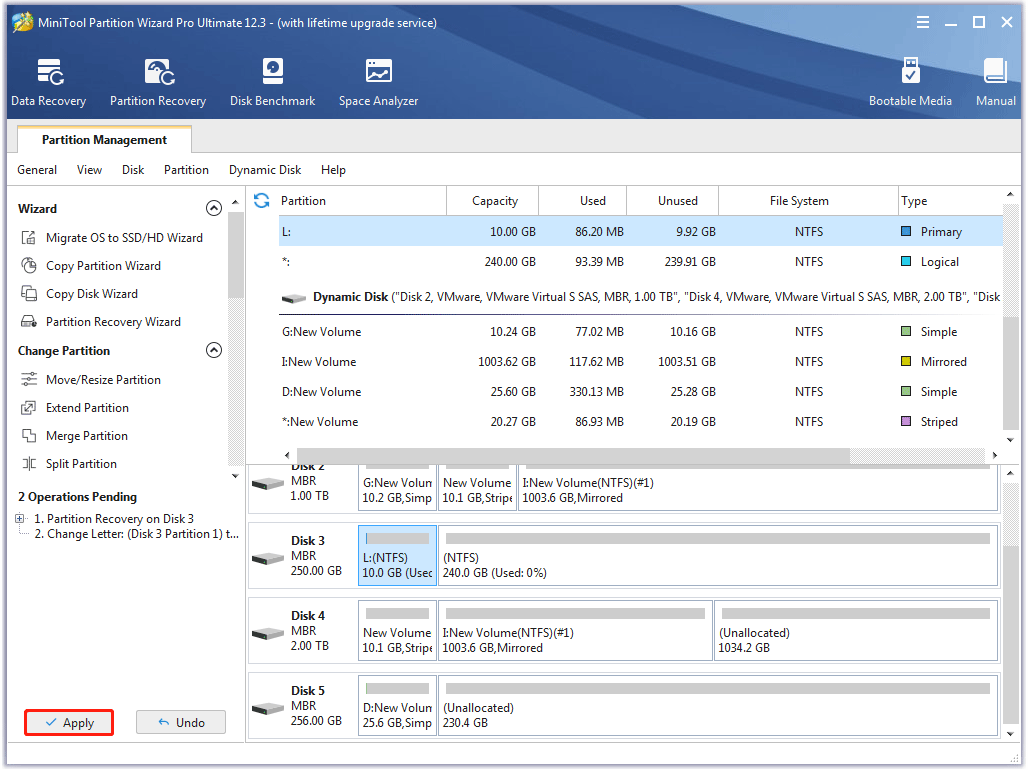
Now your lost partition and its data should come back, you can view them in File Explorer.
Recover Data Using MiniTool Partition Wizard
The Date Recovery feature built-in MiniTool Partition Wizard can retrieve the lost data caused by different factors including mistaken deletion/formation, virus attack, and so on. Here is how to use the feature.
Note: If you want to recover data on an external storage device like a USB drive, please connect it to your computer.
Step 1: Launch MiniTool Partition Wizard to access its main interface.
PW-TRIAL
Step 2: Activate the Data Recovery feature.
Here are two ways to activate the feature:
Way 1: Click the Data Recovery feature in the toolbar at the top of the interface. Then under the Data Recovery tab, select the drive you want to recover data from and then click the Scan button.
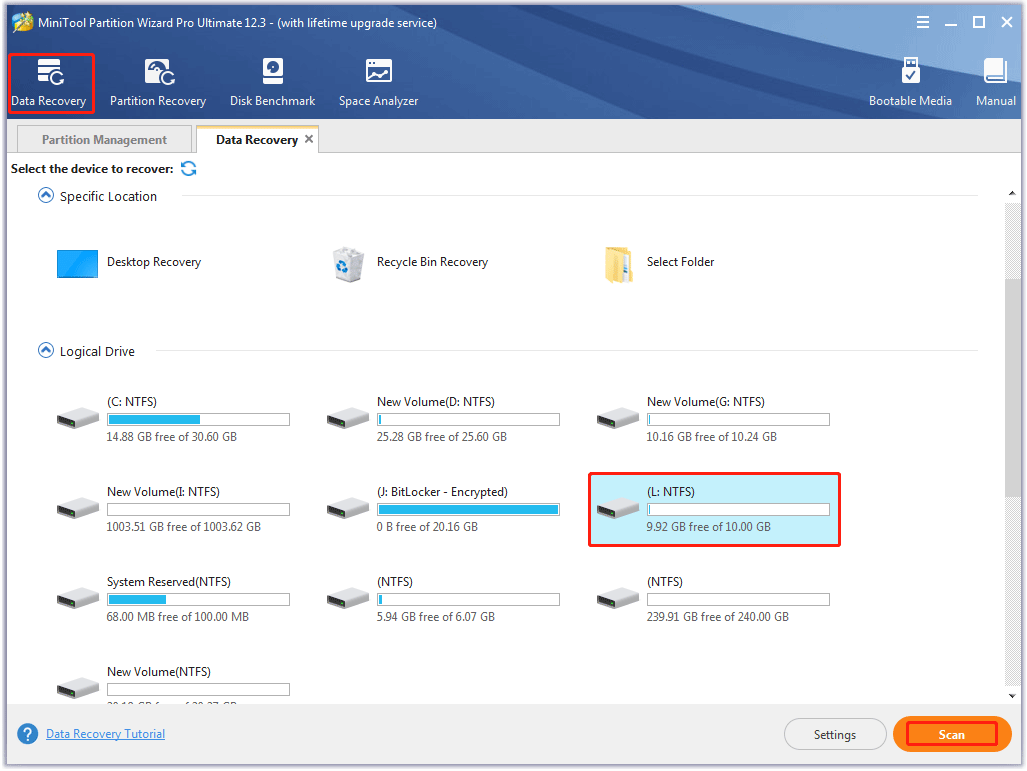
Way 2: Right-click the drive/partition/unallocated space and then choose the Data Recovery feature. The recovery tool will start scanning the selected space.
Step 4: Wait for the tool to complete scanning the drive. During the scanning process, you can check the found files: select the file and then click the Preview button on the right side.

Step 5: Tick the checkboxes next to the files you want to recover and then click the Save button.

Step 6: Choose a location to save the found files.
Note: Please save these files in another location to avoid overwriting.
Now you can go to the location you chose in Step 6 to check the recovered files.
Why Does Partition/Data Loss Happen?
When “TestDisk recover partition not working”, you can choose MiniTool Partition Wizard to recover lost partitions and data. Now let’s discuss the possible causes of partition and data loss to avoid partition and data loss more effectively.
The possible causes of partition/data loss are as following:
Mistaken Deletion
When you delete a partition through Diskpart, it is a high chance of mistaken partition deletion. To remove a partition safely, it is highly recommended that you use a graphical tool like Disk Management or MiniTool Partition.
Improper Partition Resizing
Windows allows you to resize partition size. However, improper operations can cause some trouble. If you don’t have sufficient knowledge about this operation, you’d better choose a reliable partition resizer or not do it by yourself.
Run CHKDSK after Disk Defragmentation
Running disk defragmentation regularly can improve hard drive space. But note that do not run CHKDSK as soon as disk defragmentation. Otherwise, the hard drive structure will get corrupt and result in partition or data loss.
Virus Attack
Computer criminals are more and more cunning and try all sorts of ways to attack computers. If a hard drive gets virus infected partition or data loss are on the way.
To protect your computer from viruses and malware requires not only to install anti-virus software but to take other measures, which are mentioned in How to Protect Your Computer from Viruses? (12 Methods).
Unexpected System Shutdown
Unexpected system shutdown can also lead to partition/data loss and even computer malfunction, while unexpected system shutdown can be caused by abrupt power outages, hot temperature, mistaken application installation, and more.
OS or File System Corruption
If the operating system or file system goes corrupt, the hard drive will not be able to work as normal. Thus, partition or data loss happens.
What caused partition or data loss in your case? When using your computer, keep the above causes in your mind to minimize the risk of partition or data loss.
Final Words of “TestDisk No Partition Found”
TestDisk is a powerful recovery tool, but sometimes it does not function as abnormal and prompts an error like “no partition found or selected for recovery TestDisk”. At the time of this writing, there seems to be no solution to this problem. Thus, it is wise to use a TestDisk alternative like MiniTool Partition Wizard to complete the partition/data recovery.
Do you have any questions about this post? Do you have any doubts about recovering partition or data via MiniTool Partition Wizard? If yes, do not hesitate to leave a comment in the comment zone or contact us via [email protected].
TestDisk No Partition Found FAQ
It is easy to run TestDisk. Here is how to run it on Windows 10.
- Get it from a reliable website.
- Unzip the download file and open it.
- Locate the executable file named testdisk-win.exe and double-click it.
- Click the Yes button on the User Account Control button.
Then TestDisk runs on your computer.
Here are the steps:
- Run TestDisk.
- Choose the Create option and then press the Enter
- Select the hard drive where the partition was before being removed and then press the Enter
- Wait for TestDisk to detect the type of partition used on the selected hard drive and display it.
- Select the partition and hit the Enter For example, if your hard drive uses an Intel partition type, choose Intel, and then press the Enter key.
- Select Analyse and then hit the Enter
- Select Quick Search and press the Enter
- Follow the on-screen instructions to recover the lost partition(s).
User Comments :