What Is DiskPart Format?
DiskPart format is a command within the DiskPart tool that can erase data on a disk or partition and reset the file system. Its syntax is as follows: format fs=* (quick).
Here, * represents the name of the file system, such as NTFS, FAT32, or exFAT. While the “quick” parameter determines whether a quick format is performed. If this parameter is omitted, a full format is executed instead.
When using DiskPart formatting, there are several important things to know: the application scenarios for different file systems, the difference between quick format and full format, and the difference between DiskPart format and DiskPart clean.
It will explain these points in detail below.
1. File Systems and Their Use Cases.
When formatting with DiskPart, you can choose different file systems depending on your needs:
- NTFS: Ideal for storing large files and used primarily by Windows systems.
- FAT32: Offers high compatibility across different operating systems and devices, but has a 4GB file size limit.
- exFAT: Supports multiple operating systems/devices and can store single files larger than 4GB.
2. Quick Format vs. Full Format.
- Quick format: It formats a partition by deleting the corresponding partition table entry and then creating a new one. In some ways, it’s like deleting a partition and then recreating a new one in the same location.
- Full format: A full format completely erases all files on the partition with 0 and 1. It also scans the partition for logical bad sectors and marks them, and then rebuilds the file system, volume labels, and cluster size.
3. DiskPart Format vs. DiskPart Clean.
When discussing the DiskPart format command, the DiskPart clean command is often mentioned as well, since both can operate on the disk, but their purposes differ.
- DiskPart Format: This command works on a partition or volume. It formats the selected partition by logically removing the existing data and creating a new file system, while the disk’s partition structure remains intact.
- DiskPart Clean: This command works on the entire disk. It removes all partition and volume information from the disk, effectively wiping the partition table and turning the whole disk into unallocated space.
Also read: A Comprehensive Guide to DiskPart Clean VS Clean All Commands.
How to Format Hard Drive Using DiskPart Format Command?
Formatting a disk using DiskPart requires extreme caution, as improper operation may result in data loss.
This guide uses Windows 10 as an example to show the specific steps to format drive using DiskPart.
Step 1: Open the DiskPart utility.
- Press the Win + R key, type diskpart, and press Enter.
- When the User Account Control prompt appears, click Yes to proceed.
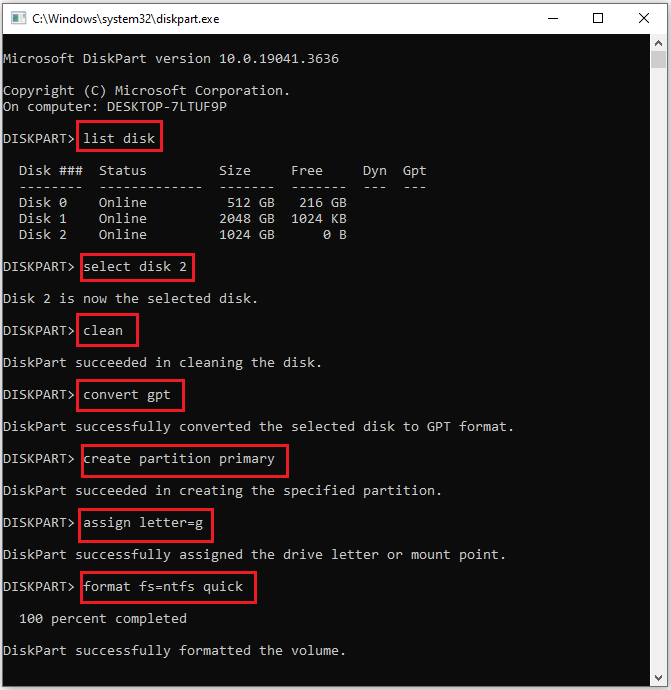
Step 2: Type the following commands in sequence, and hit Enter after each.
- list disk (Running this command will show every disk detected on the computer)
- select disk * (* represents the disk number)
- clean (Completely delete all partitions and volume information on the selected disk)
- convert mbr/gpt (This command changes the disk’s partition table type. MBR only supports disk capacities up to 2TB and can only create a maximum of 4 primary partitions. GPT, on the other hand, supports much larger disk capacities and can create partitions up to 128.)
- create partition primary (Create a primary partition on the selected disk)
- assign letter=* (This command is used to assign a drive letter to the selected partition)
- format fs=ntfs quick (This command performs a quick format of the drive to NTFS. If needed, you can replace NTFS with FAT32 or exFAT, and also leave out ‘quick’ to run a full format instead.)
Step 3: Once the formatting process is complete, type exit or click the X icon to close the DiskPart command prompt window.
DiskPart Format Alternative – MiniTool Partition Wizard
Besides using the DiskPart format command to format a disk, you can also use the MiniTool Partition Wizard.
It’s a free disk partition software that can help you format HDDs, SSDs, SD cards, and USB flash drives.
In addition, it can create/format/delete partitions, move/resize/extend partitions, copy partitions, convert partitions between FAT32 and NTFS without data loss, convert MBR to GPT without deleting partitions, and more.
MiniTool Partition Wizard FreeClick to Download100%Clean & Safe
Here are four features of MiniTool Partition Wizard. They are related to formatting hard drives.
#1. Delete All Partitions.
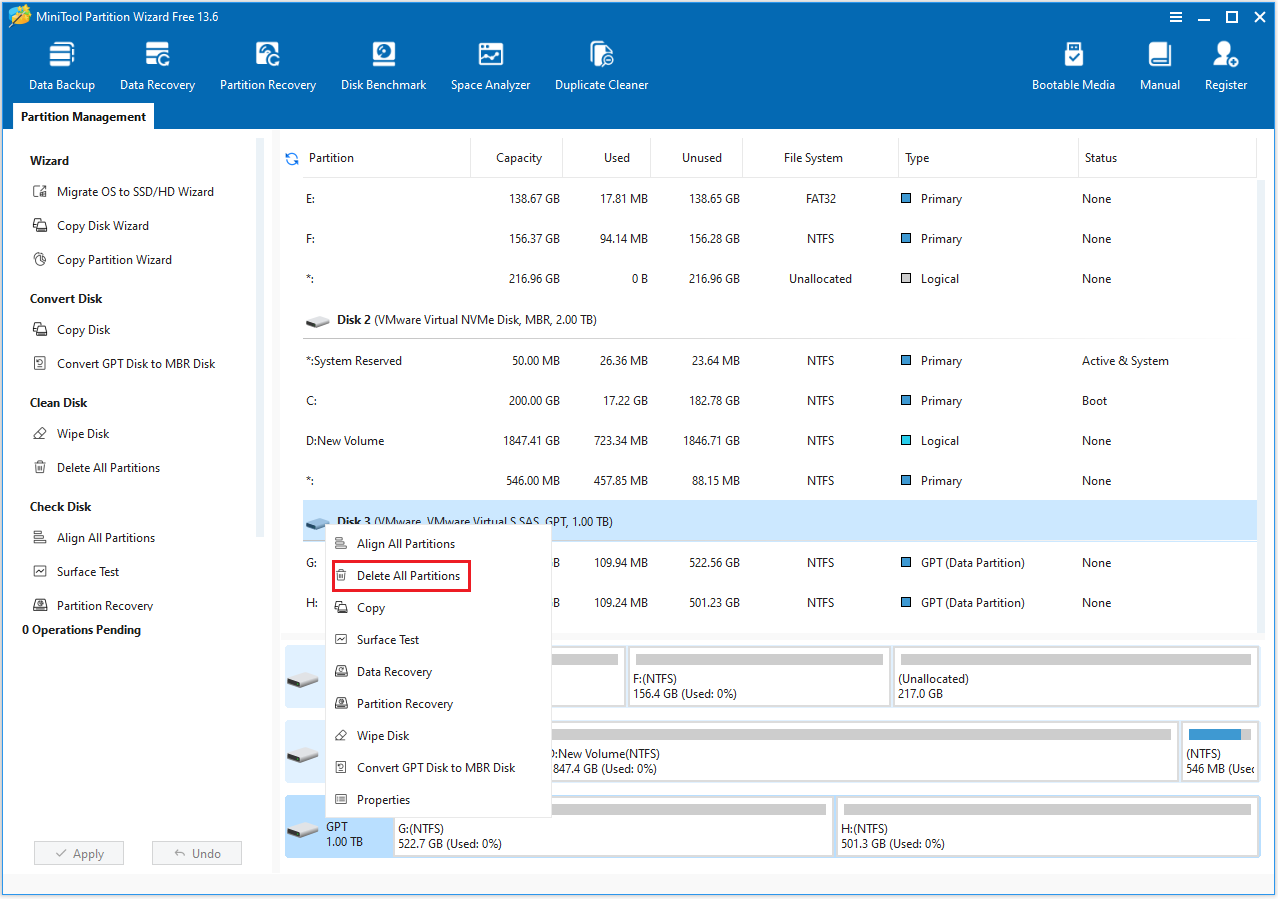
If there are multiple partitions on the disk, you can select the disk and click Delete All Partitions.
- Launch MiniTool Partition Wizard to its main interface.
- Right-click the disk you no longer need and choose Delete All Partitions, and then click Yes.
- The original partitions will appear as Unallocated.
- Click the Apply button to perform all changes.
#2. Convert MBR/GPT.
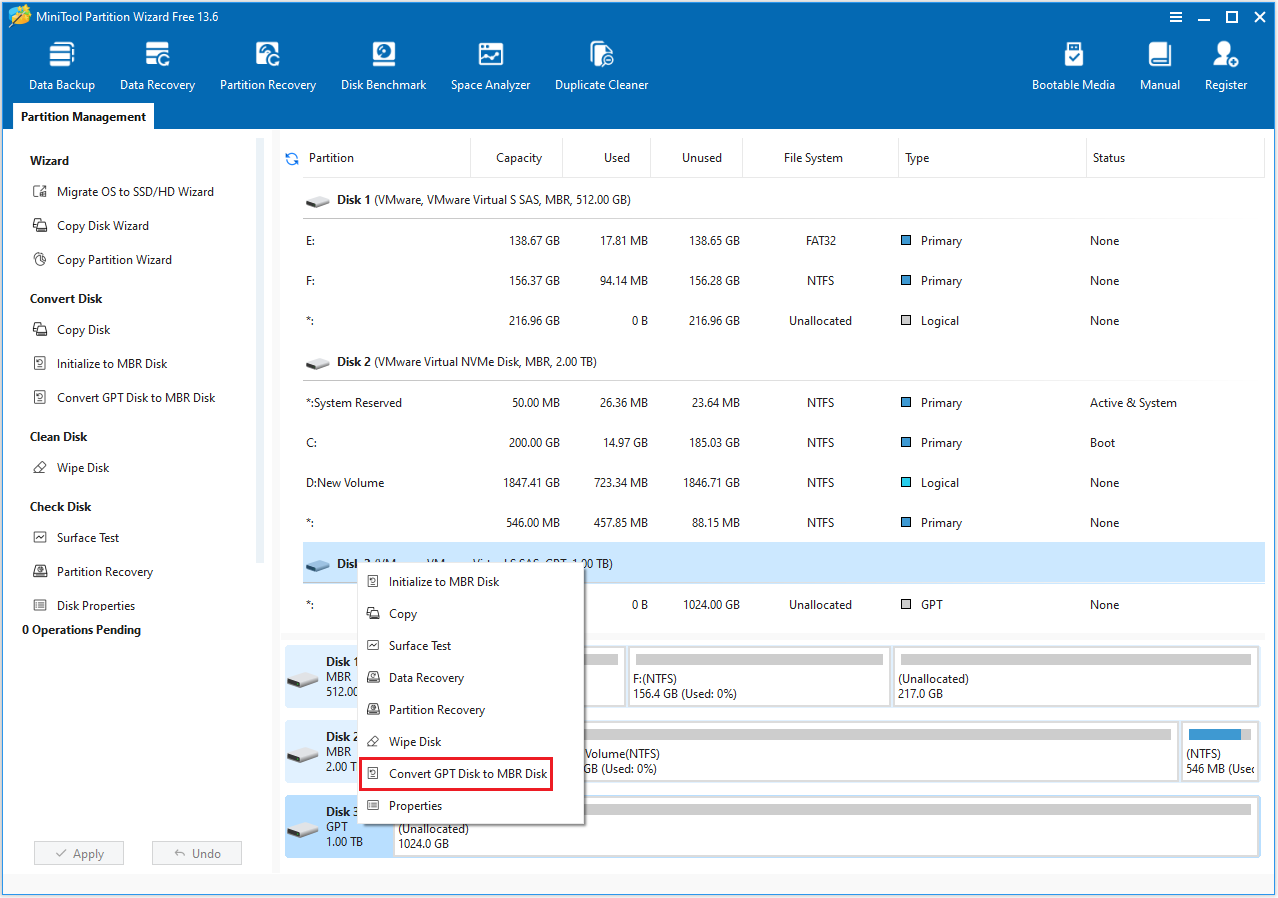
The disk type must match your computer’s boot mode. If your computer uses BIOS, you need to use an MBR disk. If it uses UEFI, you should use a GPT disk.
Using MiniTool Partition Wizard to convert between MBR and GPT formats will not result in data loss.
- In MiniTool Partition Wizard, right-click the disk and choose Convert GPT to MBR Disk or Convert MBR to GPT Disk.
- Click Apply > Yes button.
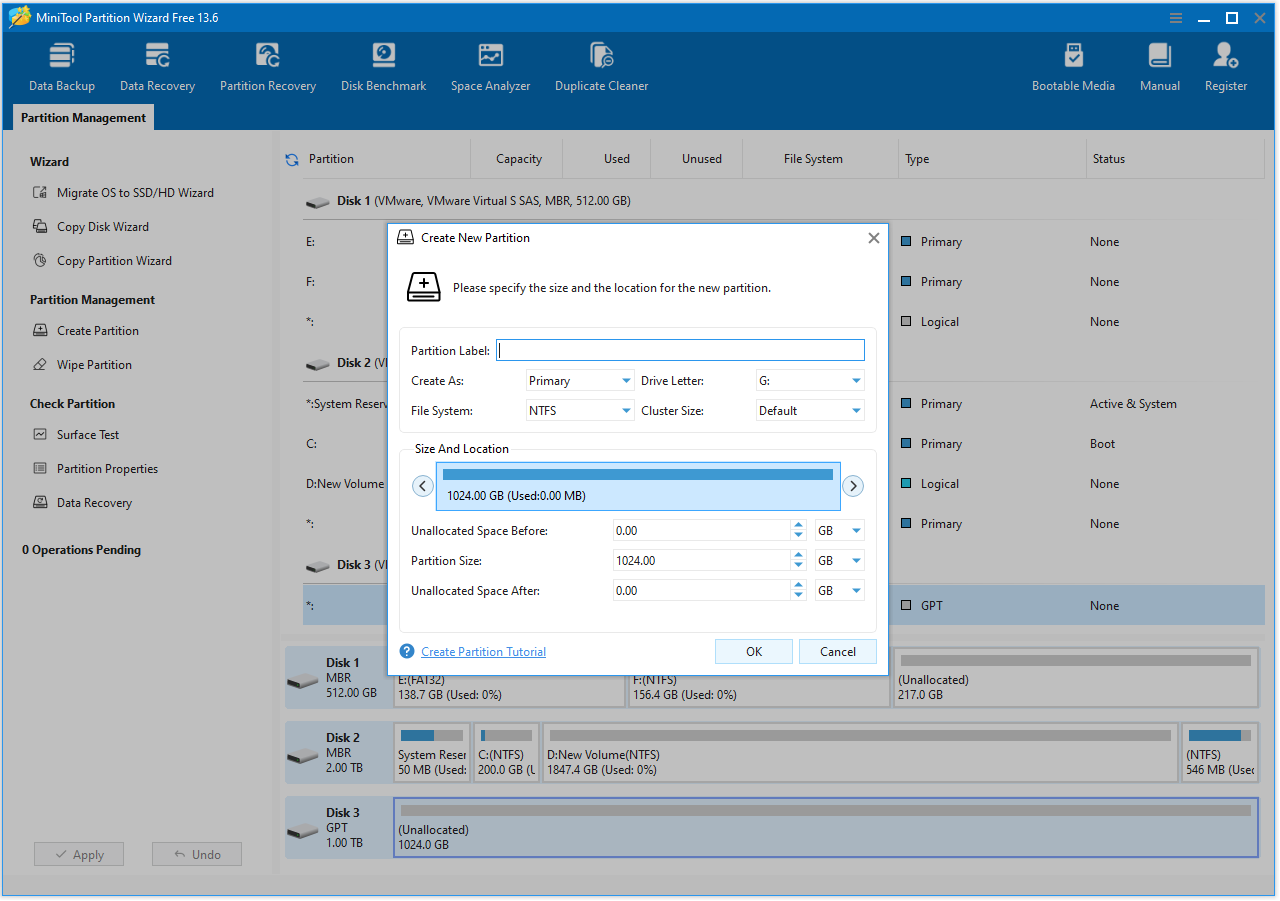
#3. Create Partition.
- In MiniTool Partition Wizard, right-click the unallocated space and choose Create.
- In the pop-up window, you can set Partition Label, Drive Letter, File System, Cluster Size, etc. Then, click OK > Apply > Yes to perform all changes.
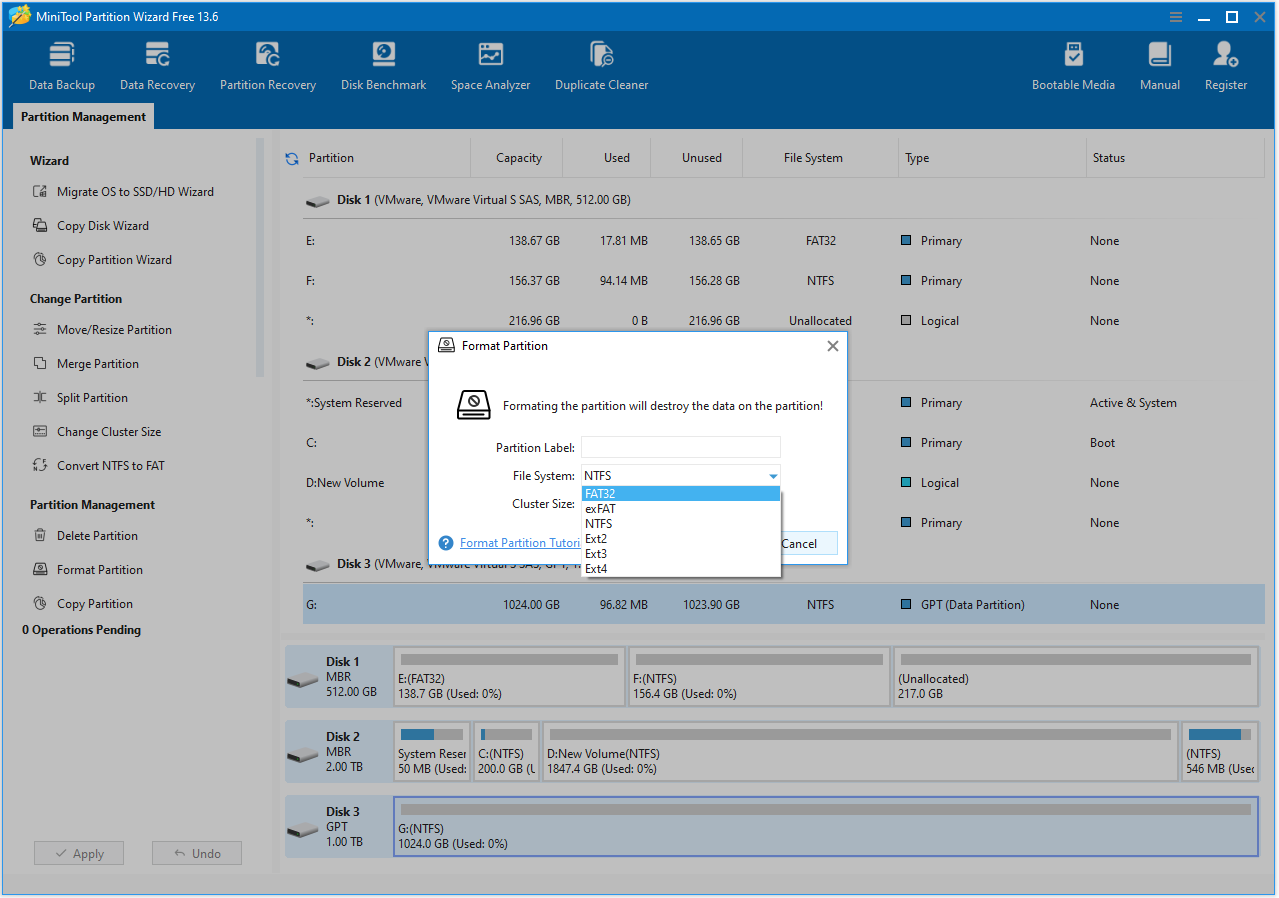
#4. Format Hard Drive.
- Right-click the partition that you want to format and choose Format.
- Configure the formatting settings (file system, volume label, and cluster size) and then click OK.
- Click Apply to start the formatting process, and then click Yes to confirm this operation.
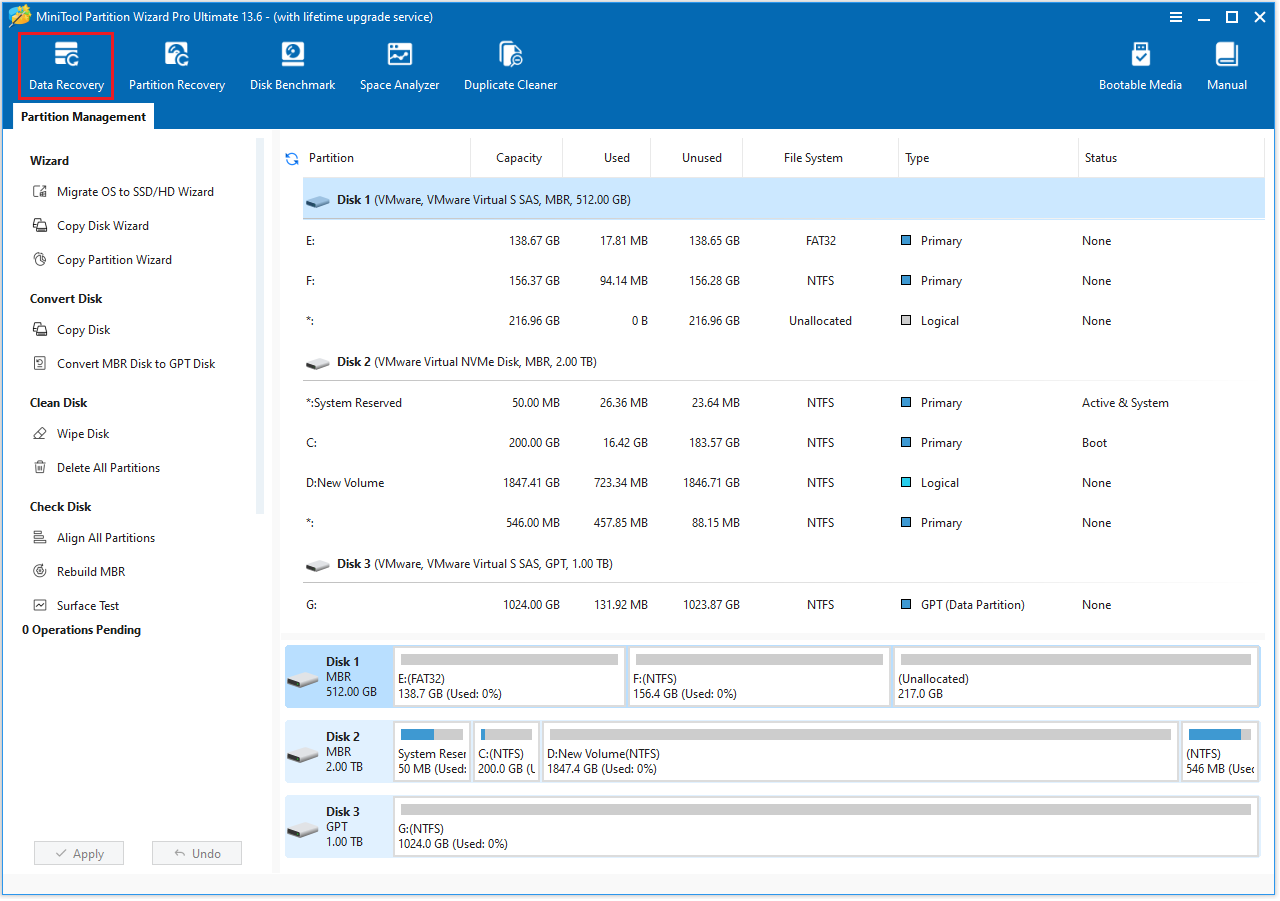
Recover Data from a Formatted Hard Drive
When a disk is formatted, if it contains important files, the data isn’t immediately and completely lost, but you won’t be able to access those files directly.
In this case, you can use the Data Recovery function of MiniTool Partition Wizard to retrieve the lost data from a formatted hard drive.
This software can scan formatted disks and recover various types of files, including documents, pictures, videos, and more.
MiniTool Partition Wizard DemoClick to Download100%Clean & Safe
Also read: How to Recover Files From Formatted Hard Drive on Windows.
DiskPart Format FAQ
Therefore, it is recommended that you run Command Prompt as an administrator and ensure the command object (a partition or disk) is not currently in use.
Once the formatting is complete, the system will be unable to boot. Therefore, please back up your important data before formatting.
1. Check the physical lock on the USB drive or SD card.
2. Run DiskPart in the command prompt and execute “attributes disk clear readonly” to clear the read-only attribute.
3. Remove write protection by modifying the registry.
This is because Windows’ built-in command-line formatting tool imposes a limitation on partition size, permitting only volumes of 32GB or less to be formatted as FAT32.
Bottom line
This article introduces two methods for formatting disks: DiskPart format and MiniTool Partition Wizard. If you have any questions or feedback about MiniTool Partition Wizard, feel free to contact our support team at [email protected] for additional help.
About The Author

Position: Columnist
Cecilia has been an editor at MiniTool for two years. She primarily focuses on disk and partition-related content, with particular expertise in disk cloning, partition recovery, and PDF document conversion. She is dedicated to providing users with clear and accurate solutions to help them efficiently resolve common computer problems.
User Comments :