About WinToFlash
Nowadays, more and more laptops are produced without a built-in optical CD/DVD ROM, which leads to problems while users are trying to reinstall their operating systems. Fortunately, there is a way to help them get rid of the trouble: create a bootable USB flash drive which includes the Windows operating system.
For their low cost and great portability, durability, and compatibility, USB drives are quite popular as bootable media, especially for desktops without a CD/DVD ROM. Many PC users also like them.
To create a bootable USB flash drive, you can use Windows 10 Media Creation Tool, Command Prompt or third-party software. For more details, you can read the following post: How to Make A Bootable USB Windows 10. In the following contents, I will introduce another reliable third-party application named Novicorp WinToFlash to you.
What is Novicorp WinToFlash? As mentioned, it is an application which can be used to turn USB flash drives into bootable devices. It is a preferred choice for most users, as it has the following advantages:
- It comes with simple interface.
- It offers multilanguage
- It supports all Windows of all editions (including Home, Professional, Ultimate, etc.) and almost all versions (from the old Windows XP to the latest Windows 10 in both 32 and 64 bit).
- It allows you to create a bootable USB flash drive including more than 2 operating systems.
You have learned about the basic information of WinToFlash. Now, let’s see how to get this Windows to flash software.
Step 1: Open your browser and download WinToFlash from the official website.
Step 2: Run the downloaded installer.
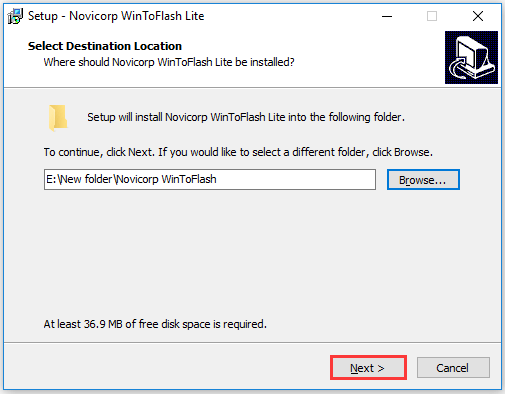
Step 3: In the pop-up window, select the location where you want to install the Win to flash tool and click Next to continue.
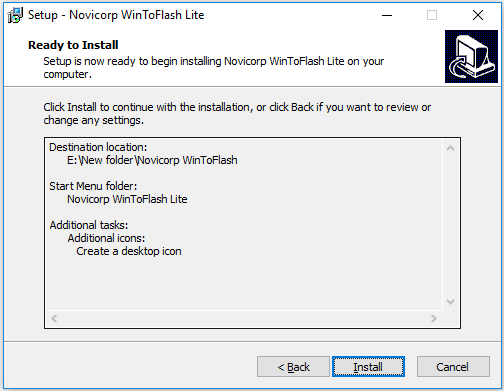
Step 4: Select Start Menu folder and click Next.
Step 5: Check Create a desktop icon to enable the shortcut to show on desktop and click Next. Then select Install to start installing.
Step 6: After the installation, click Finish and this Win to flash tool will be launched automatically.
Step 6: When the tool is launched, you will see a welcome window. Just click Next. In the following window, check I accept EULA to accept the aggrement and click Next to continue.
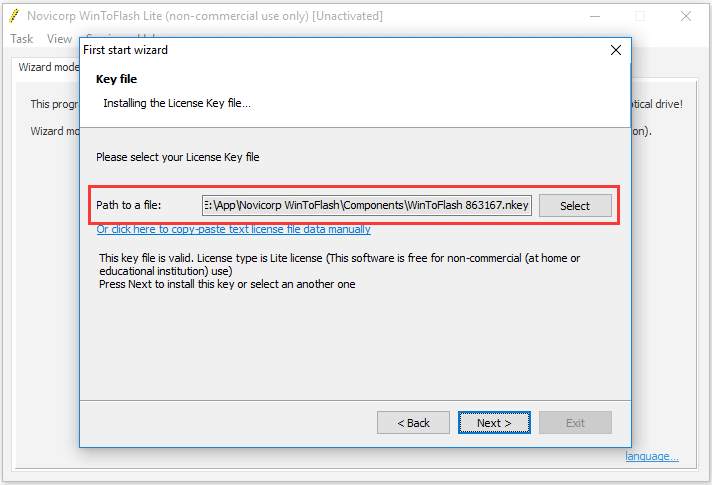
Step 7: Select Paid License and click Next. Then click Select to choose the license key file (the file followed by “.nkey”) from the installation folder and click Next. Then follow the onscreen instructions to finish the process.
Then you can use the WinToFlash to create a single bootable USB flash drive or a multi-boot flash drive according to your needs. But before that, there is something you need to prepare. Please move on to the next part.
Preparation Before Creating a Bootable USB via WinToFlash
To make a bootable USB drive with WinToFlash, you just need to prepare a USB flash drive and a Windows installation disc or ISO file. However, you can’t use the USB drive directly. Here are the things you need to do: back up the data on it, and format it to FAT32 file system for better compatibility. Let’s see more details.
Back up USB Flash Drive (Optional)
You need to know that turning a common USB flash drive to a bootable device will erase all the data in it. Therefore, you should back up your USB flash drive before the burning process if there are any important files. If the USB drive is brand new or the data on it is not so important, you can ignore this move and jump to the next one.
It might take a long time to transfer large files one by one. A better way is to copy the partitions or even the whole drive with third-party software.
MiniTool Partition Wizard is recommended here. It is a professional disk manager which can help you back up your USB flash drive. Here are the detailed steps.
Step 1: Click the button below to download MiniTool Partition Wizard. Then run the installer to install the application.
MiniTool Partition Wizard FreeClick to Download100%Clean & Safe
Step 2: Connect your USB drive to PC and launch MiniTool Partition Wizard to get its main interface.
Step 3: Select the partition on your USB drive and click Copy Partition. You can also right-click the target partition and select Copy.

Step 4: In the following window, select an unallocated space on another disk to store the copied data. Then click Next to continue.

Step 5: Specify the Size & Location by dragging the slider. Then click Finish.
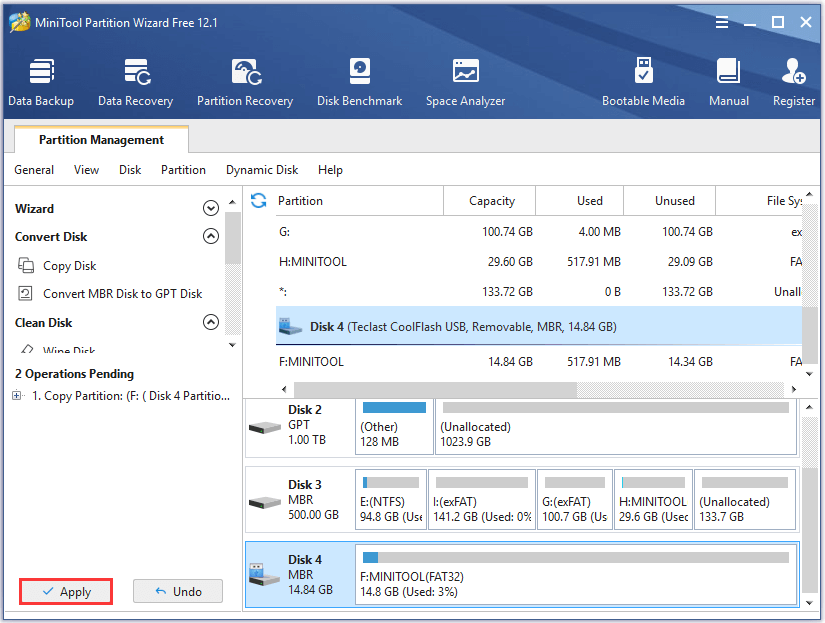
Step 6: Click Apply to execute the pending operations.
If your USB flash drive is FAT32, you can jump to the next part to learn about how to make a bootable USB with WinToFlash. Otherwise, you need to follow the steps below to format the drive.
Format the USB Flash Drive
If your USB flash drive comes with other file systems, you should format it to FAT32. MiniTool Partition Wizard could also help you do that.
MiniTool Partition Wizard FreeClick to Download100%Clean & Safe
Step 1: Launch MiniTool Partition Wizard.
Step 2: When you get the main interface, right-click the partition on your USB flash drive and select Format. You can also select the partition and then click Format Partition from the left action panel.
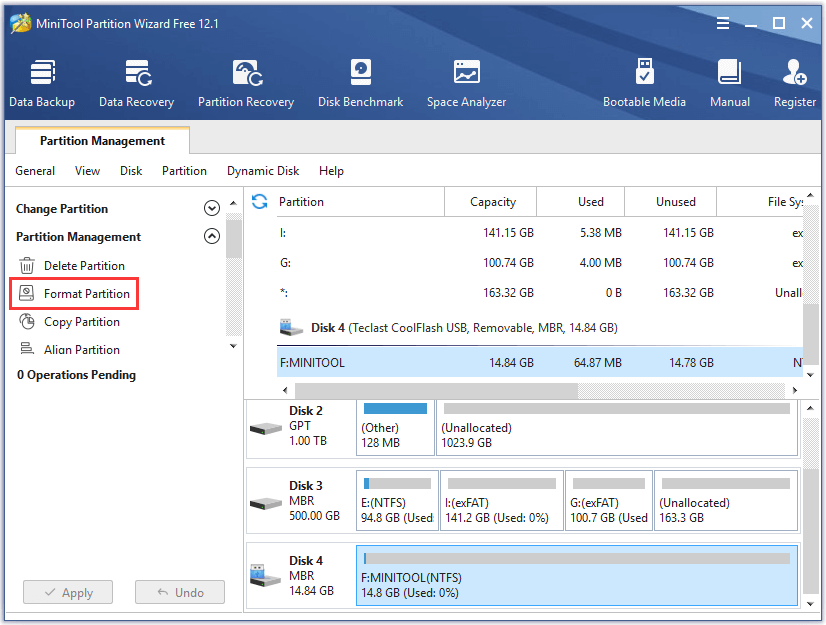
Step 3: In the pop-up window, select FAT32 for the File System and click OK.
Step 4: When you go back to the main interface, click Apply to save the changes.
After the process is finished, you can use WinToFlash to make a bootable USB flash drive without any problems.
How to Make a Bootable USB Drive via WinToFlash
The steps of making a single boot USB drive differ from that of creating a multi-boot USB drive to some degree. You just need to check the part you need.
How to Create a Single Boot USB Drive
If you want to reinstall Windows OS, WinToFlash can help you create a bootable USB drive. Here is how to use it.
Step 1: Keep your USB drive connected to the computer and launch WinToFlash.
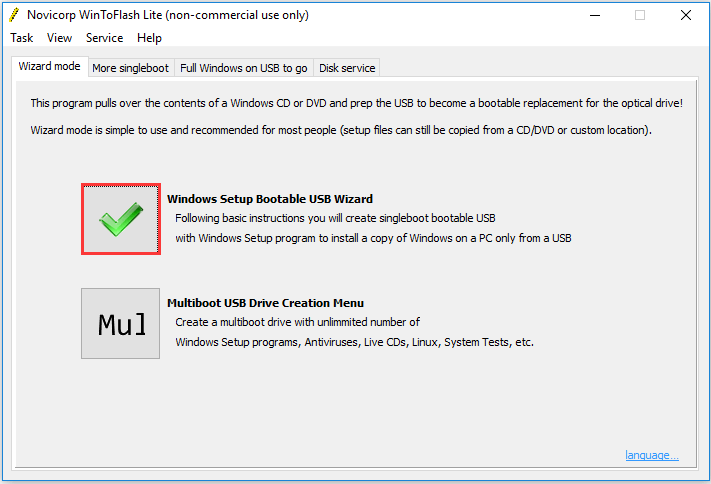
Step 2: Click the green tick mark for Windows Setup Bootable USB Wizard. This will invoke WinToFlash Wizard, and you just need to click Next to continue.
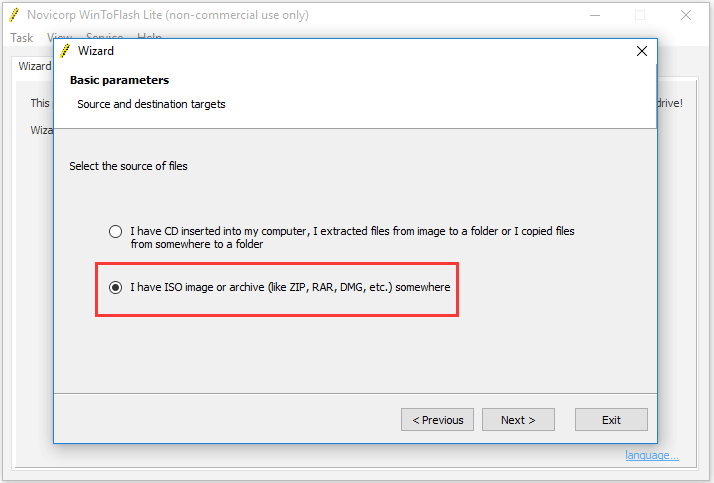
Step 3: Select the second option “I have ISO image or archive (like ZIP, RAR, DMG, etc.) somewhere” as the source for your Windows setup transfer. Then click Next to continue.
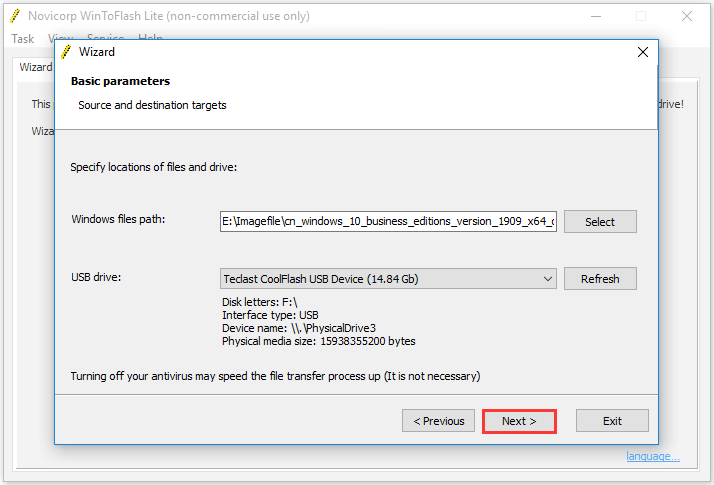
Step 4: In the following window, select your ISO image file for Windows files path, and choose your USB drive. Then click Next.
Step 5: There will be a Ready to start window, and you need to make sure there is no problem with the parameters on screen. Then click Next to confirm the operation.
Step 6: Make sure there is no important data in the USB flash drive and click Continue when a format warning pops up. Then accept the terms of the license agreement and click Continue to start the Windows boot transfer conversion.
Step 7: Click Exit after once the process is finished.
How to Create a Multi-boot USB Drive
WinToFlash allows users to add up to 50 bootable setups and software in your USB device as long as the USB drive is large enough. Therefore, if you want to keep multiple operating systems in your USB flash drive at the same time, WinToFlash is a nice choice.
The detailed steps are as below.
Step 1: Connect your USB device to PC and run WinToFlash.
Step 2: Click the “Mul” icon for Multiboot USB Drive Creation Menu.
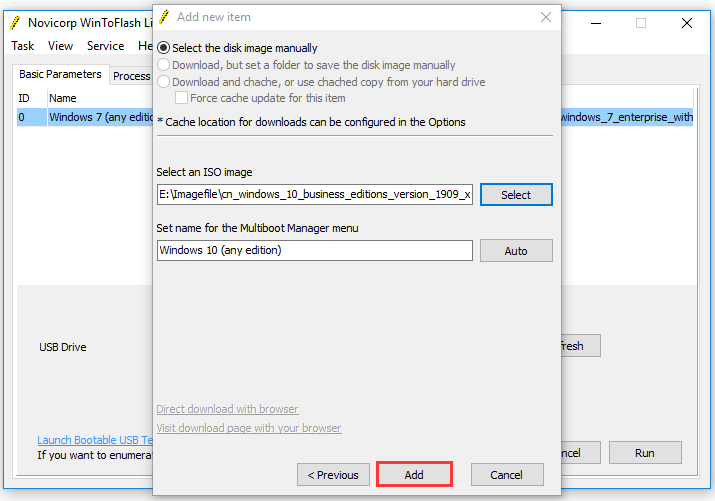
Step 3: In the next window, add your ISO image files to the list. You need to:
- Click Add.
- An “Add new item” window will pop up and you need to select a type of the item and click Next.
- Select your ISO image and click Add to add the ISO image to the list.
- Repeat the steps above to add all the images you want.
Step 4: Once you add all the image files you need, click Run to transfer all the selected ISO images to your USB flash drive.
Once it’s succeeded, you can try booting from the USB drive.
Here is how to use WinToFlash to make a bootable USB flash drive. Let’s have a try.Click to Tweet
Bottom Line
Now, it’s your turn to make a bootable USB drive with WinToFlash by yourself. If you have any better ideas, you can share them with us by posting them in the following comment section. And for any questions about MiniTool Partition Wizard, you can send us an email via [email protected].
WinToFlash FAQ
Yes, you can install Windows XP from USB drive. Here is what you need to do:
- Download an ISO image of Windows XP.
- Make a bootable USB flash drive with the ISO image.
- Connect the USB drive to the computer where you want to install Windows XP.
- Boot and install Windows XP from the USB drive by following the onscreen instructions.
User Comments :