There are a great number of documents, downloads, and other data stored in the user folder. Many users want to move user folder to another drive in order to create more space. Today, MiniTool will tell you how Windows 10 move user folder to another drive.
As you know, user folder saves lots of download files. Over time, the user folder grows significantly in size so that too much hard drive space is occupied. To free up more the drive space, many people are ready to move the user folder to another location.
If you have other drives on your Windows 10 PC like an external hard drive or other partitions, you can move user folder to them. Now, let’s see the guide of the Windows 10 move user folder to another drive.
How to Move Users Folder to Another Drive Windows 10
Windows 10 move users folder to another drive is relatively complex to operate, please follow the steps below carefully.
Step 1. Press Win + E keys to open the File Explorer.
Step 2. Click on This PC on the left pane and select the new drive location that you want to move user folders under the Devices and drives section.

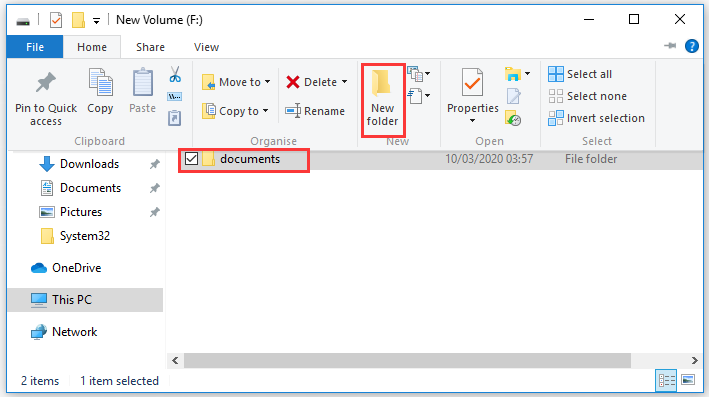
Step 3. Go to the Home tab, and then click on the New Folder and rename the folder to Documents.
Step 4. Repeat step 3 to create several remaining folders such as Downloads, Pictures, Videos, and so on.
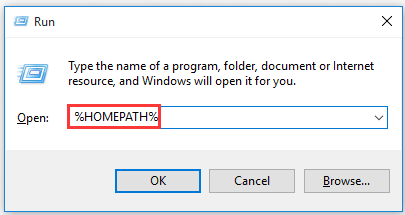
Step 5. Press the Win + R keys to open the Run dialog box, and then type %HOMEPATH% in the box and hit Enter to open the location of the user folder.
Step 6. Right-click the folder that you want to move and select the Properties from the context menu.
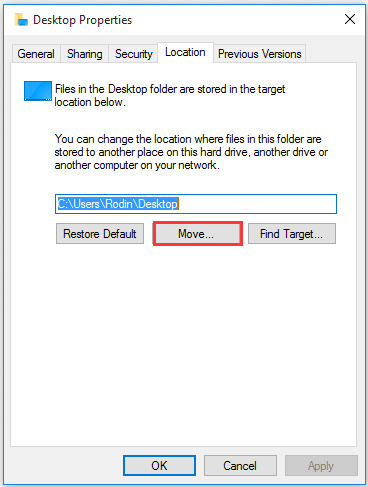
Step 7. Navigate to the Location tab and click on the Move button.
If the Location tab is missing here, you can open Registry Editor and navigate to the "HKEY_CLASSES_ROOTDirectoryshellexPropertySheetHandlers" path. Right click the PropertySheetHandlers folder, and then select New > Key to create new key and rename it {4a7ded0a-ad25-11d0-98a8-0800361b1103}, and click on OK to save the change. Once done, restart your computer and see if the Location tab shows here.
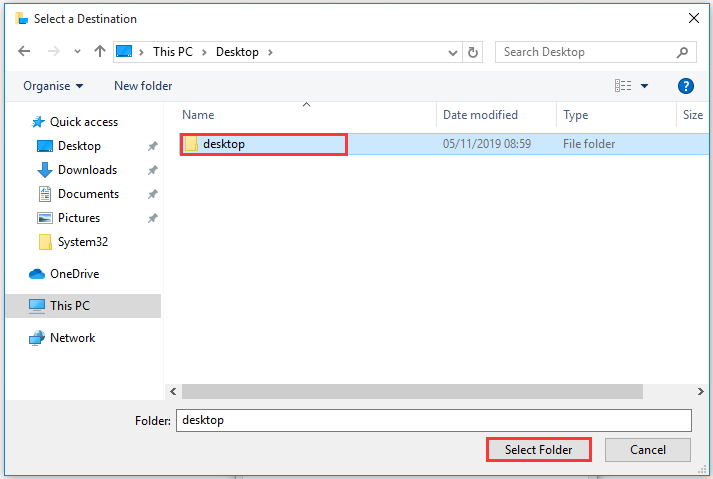
Step 8. In the pop-up window, select the equivalent folder and click on the Select Folder button.
Step 9. In the Properties window, click on the Apply button to execute the change.
Step 10. Click on Yes in the prompt window to confirm this operation. After that, you can repeat the Step No.6 through 9 to move the remaining folders.
Have you understood the Windows 10 move user folder to another drive? It’s your turn to have a try. What should you do if you want to undo this change? Any simpler way to move user folder to another location? You will get all these answers in the following part.
Tips & Tricks for Windows 10 Move User Folder to Another Drive
In this section, you will get extra useful tips and tricks to change the location of the user folder.
Alternative to Move User Folder
In addition to the above method, you can use simple and free software to move user folder. MiniTool Partition Wizard Free Edition can help you move user folder to another drive easily and safely.
It is a professional partition manager that boasts many practical features like convert MBR to GPT without data loss, disk benchmark, upgrade your hard drive, etc. Now, let’s see how to move users folder to another drive Windows 10 using this program.
MiniTool Partition Wizard FreeClick to Download100%Clean & Safe
Step 1. Launch MiniTool Partition Wizard to get its main interface.
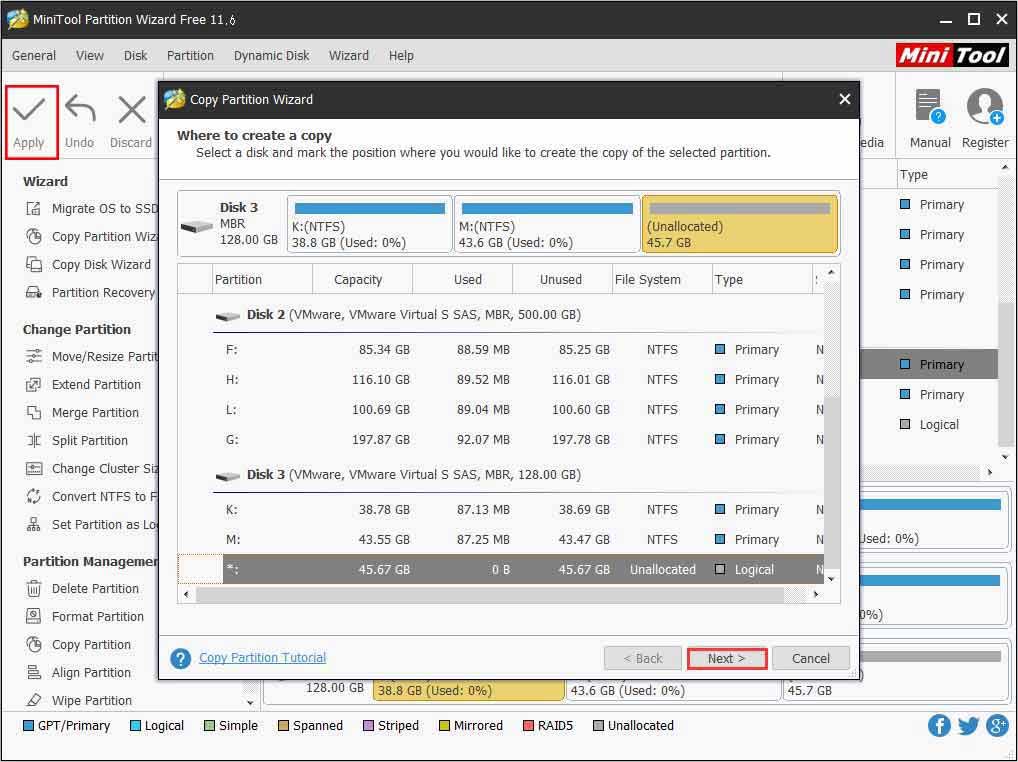
Step 2. Select the partition that contains your user folders and click on the Copy Partition Wizard feature on the left pane.
Step 3. Click on the Next button to continue, and then select the drive that you want to move the user folders to and click on Next.
Step 4. Click Finish to confirm and click Apply to make changes performed.
For more detailed steps you can refer to this post.
How to Restore the Default Folder Location
Well, if you want to revert these changes for the folder location, you can follow the steps below.
Step 1. Open the File Explorer and navigate to the current user folders location.
Step 2. Right-click one of the folders that you want to revert its location and select the Properties option.
Step 3. Go to the Location tab and click on the Restore Default button.
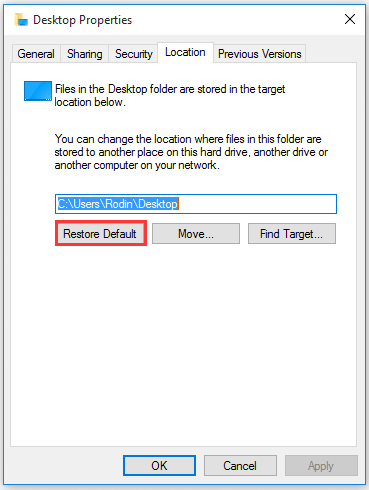
Step 4. Click the Yes button to confirm this operation.
Step 5. Click the Yes button to move the files to the original default location.
After that, you can repeat the above steps to restore the remaining folders to its original location.
User Comments :