When it comes to a Lenovo computer, you may be recommended to use 2 practical tools – Lenovo Diagnostics and Lenovo System Update. In today’s article, we will focus on the Lenovo System Update tool.
You may find lots of posts that are talking about how to use Lenovo System Update, but most of them come from videos and lack of detailed steps. Fortunately, you will have a comprehensive understanding of this Lenovo update tool from here, including its main functions, user manual, and some other useful tips.
Now, please keep reading the following content.

Overview of the Lenovo System Update
In this part, we will mainly focus on the overview, main features, drawbacks, supported computer models, and operating systems.
What Is Lenovo System Update
Lenovo System Update is a practical tool that can be used to update the system, drivers, BIOS, and applications. But it can only be used on Lenovo computers such as ThinkPad and ThinkCentre. Since this program was released by Lenovo in 2017, it has many updated versions. At present, the latest version 5.07.0097 has been published for Microsoft Windows 10 and Windows 7.
Lenovo System Update allows IT administrators to manage updates for BIOS, driver, and apps from a local server. After Lenovo System Update is installed and set up, it will define an auto-start registry entry that helps this software run on each Windows boot for all user logins.
Without a specific user knowledge base, users can download data updates for BIOS and drivers from a Lenovo server easily. It is the update assistant that can help your Lenovo computer check for any available updates and install them automatically when booting up.
Users can add a scheduled task to Windows Task Scheduler so that it can launch various scheduled tasks. Scheduled tasks vary depending on different versions. The program won’t take too much space on your hard disk because its installer is just about 14MB in which 61 files are stored.
Support Systems
This System Update tool can be used on Lenovo desktop, notebook, and workstation. The latest Lenovo System Update version is supported on the following systems:
- Lenovo 3000 C100, C200, N100, N200, V100, V200
- Lenovo 3000 J100, J105, J110, J115, J200, J200p, J205, S200, S200p, S205
- All ThinkPad series
- All ThinkStation series
- All ThinkCentre series
- Lenovo B/E/K/V series
Note: The ThinkPad S440 & S540 is not supported on Windows 8.1.
In addition to the above systems, Lenovo System Update also supports additional models when content is created for them.
Support Operating Systems
This program is supported on the following operating systems:
- Microsoft Windows 10
- Microsoft Windows 8 / 8.1
- Microsoft Windows 7
Benefits of Lenovo System Update
Lenovo System Update is mainly used to download and install data updates for BIOS, drivers, and software from a Lenovo server directly. With this Lenovo technology, your system will be kept up to date and secure:
- Offer a direct connection to Lenovo Service.
- Support software, drivers, BIOS updates for ThinkPad, and ThinkCentre.
- Optimize your system performance.
- Minimize the vulnerable security.
Drawbacks of Lenovo System Update
Also, this program has its own limitations. Lenovo System Update is pre-installed by manufactures that are often considered bloatware by some users. It can only be licensed on the Lenovo computers on which it was pre-installed. If you don’t want to use this program anymore, you can remove it. However, sometimes it is difficult to remove via the Uninstall a Program feature in Windows.
Some users also suspect about whether Automatic Update Programs can work well within older Windows versions. At present, Lenovo System Update Windows 10 seems to work very well and can install system drivers without bloatware such as McAfee.
In order to get better performance, many users recommend using Lenovo System Update after performing a clean installation of Windows 10 or after upgrading to a new Windows 10 version. It’s also recommended that you check for system updates every couple of months.
Now, you may have an overall understanding of the Lenovo System Update. Another important question is about how to use Lenovo System Update Windows 10. Please keep reading the following part.
How to Install the Latest Lenovo System Update
First of all, make sure that you install a suitable version of Lenovo System Update. Some certain updates depend on your Windows components. Here is a simple guide for the latest Lenovo System Update download and installation.
Note: To make sure the System update can work properly, Microsoft .NET Framework version 4.0 and above are required on your Windows system.
Step 1. Click here to download the latest Lenovo System Update version.
Step 2. Select a correct one that matches your current Windows components, and then click on the Download button and save it on your PC.
Step 3. Double click the Installer file in File Explorer to open the User Account Control Prompt windows, and then click on Yes to go on.
Step 4. Click on the Next button to go on, and then select I accept the agreement option and Next button to accept the License Agreement.
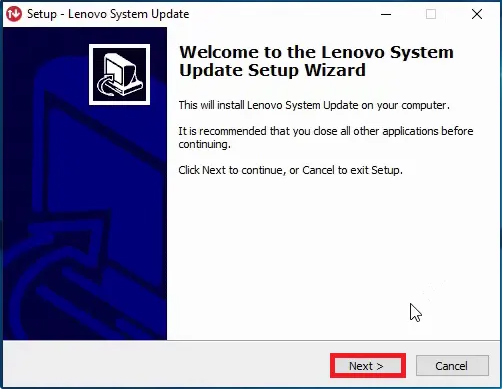
Step 5. Wait for some time. When it’s done, click on Finish to exit the setup window.
Now, you can go to the Start menu to find the Lenovo System Update tool and launch it.
How to Use Lenovo System Update
This part mainly focuses on how to use Lenovo System Update on Windows 10 PC.
Important Things
In order to run Lenovo System Update smoothly, you need to know the following important things:
- Lenovo System Update was previously named ThinkVantage System Update (TVSU) that includes Lenovo System Update.
- Lenovo System Update is only suitable for Windows systems.
- It’s highly recommended using Lenovo System Update to update your system after building a new setup or re-image.
- Sometimes, this tool may need to be run multiple times so that all updates can be downloaded and installed successfully.
- Make sure that your Lenovo computer supports the required operating systems.
- Lenovo System Update includes some firmware updates such as Lenovo driver update and BIOS update. It is very important that firmware updates cannot be interrupted. So, we recommend that the computer should be connected to AC power and a stable Internet connection when updating firmware.
- It is highly recommended that you back up all important data including the system to avoid any accidents when updating BIOS. This is because sometimes your computer may be unbootable or crash once the BIOS update is interrupted or failed.
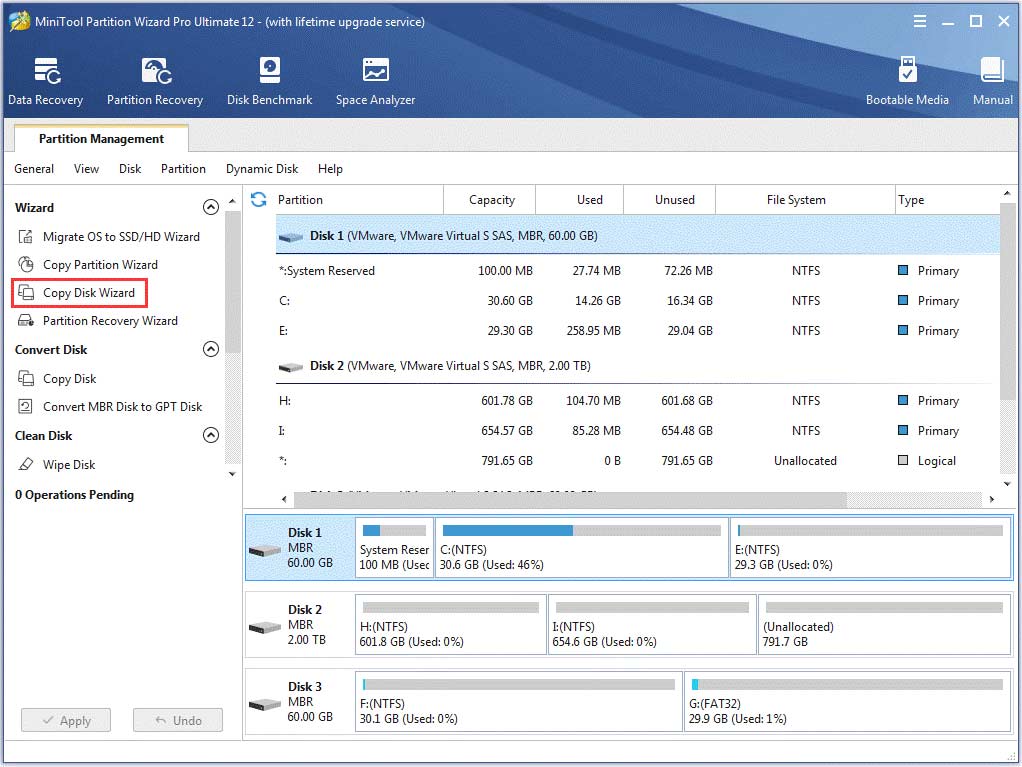
To keep your data safe, we recommend that you use professional software to make a backup in advance. MiniTool Partition Wizard can help you back up the system with ease. It is a trusted partition manager that has helped millions of users to fix various problems.
At present, MiniTool spare no effort to provide an effective method on resizing partition, converting FAT to NTFS, rebuilding MBR, migrating OS to HDD/SSD, and so on. Besides, it also helps users fix games and hardware issues such as PS4 randomly turns off, Minecraft not using GPU, League of Legends critical error, Steam not recognizing installed games, and so on.
Now, click here to make a backup for your important data.
How to Use Lenovo System Update
In this part, we will discuss how to run Lenovo System Update on Windows 10. Here are detailed steps for you:
Step 1. Make sure all other programs and applications are closed and connect your computer to AC power.
Step 2. Connect your computer to a fast and stable Internet connection.
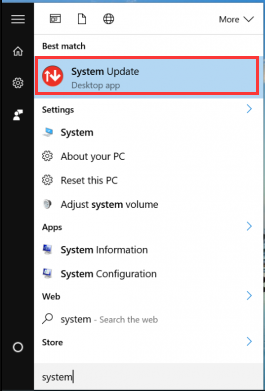
Step 3. Type system update in the search box at and them select the Lenovo System Update option from the context menu.
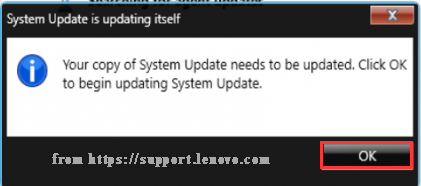
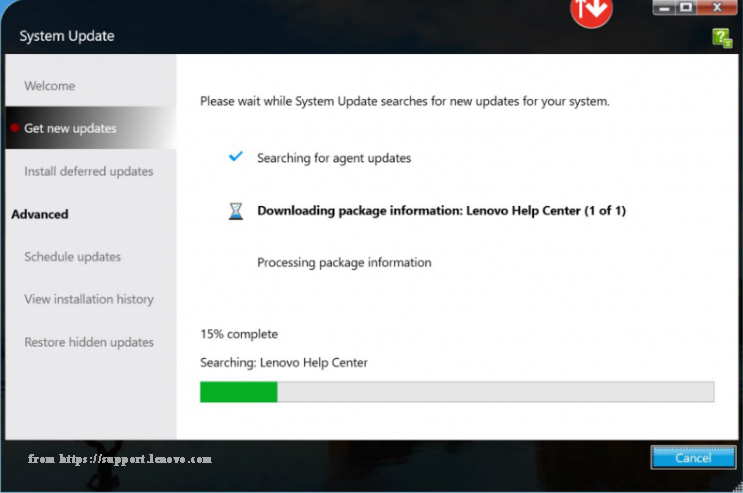
Step 4. If this is the first time that you use this software, this tool will update itself. Open Lenovo System Update to get its main interface and click on OK button in the pop-up window.
Step 5. Then you will get the Lenovo Update home screen and click on Next button. After that, you will get the following screen that will show all available updates for you to choose from.
Step 6. Now, you can start updating your Lenovo BIOS, apps, drivers, and other items. Here you will 3 tabs including Critical updates, Recommended updates, and Optional updates. Each tab has different available updates that you can choose based on needs.
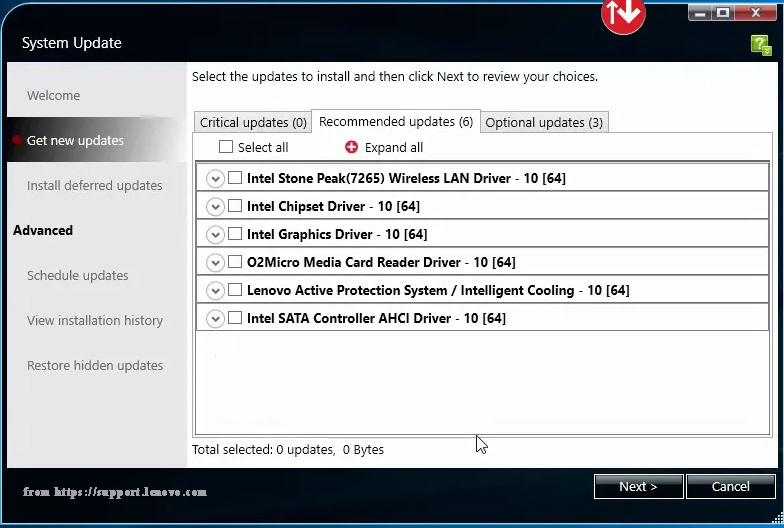
Step 7. Navigate to the Recommended updates tab, and then select a Lenovo driver update from the listed driver that you want to update and click on Next to go on. Alternatively, you can check the box of Select all to update all recommended updates.
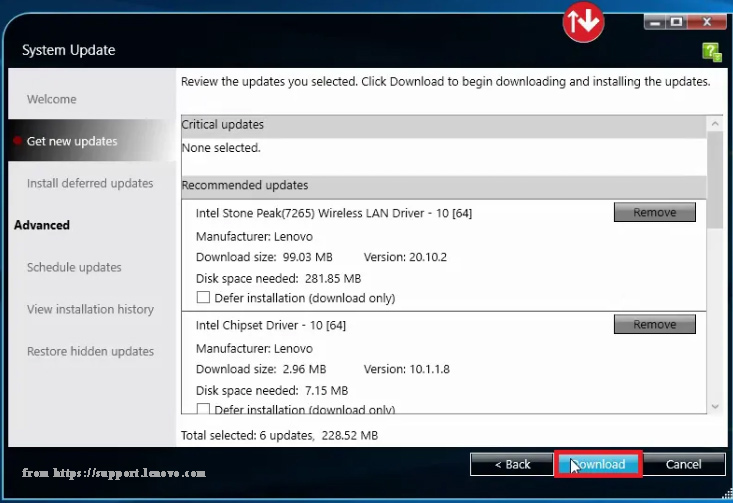
Step 8. Click on the Download button to start downloading the selected updates.
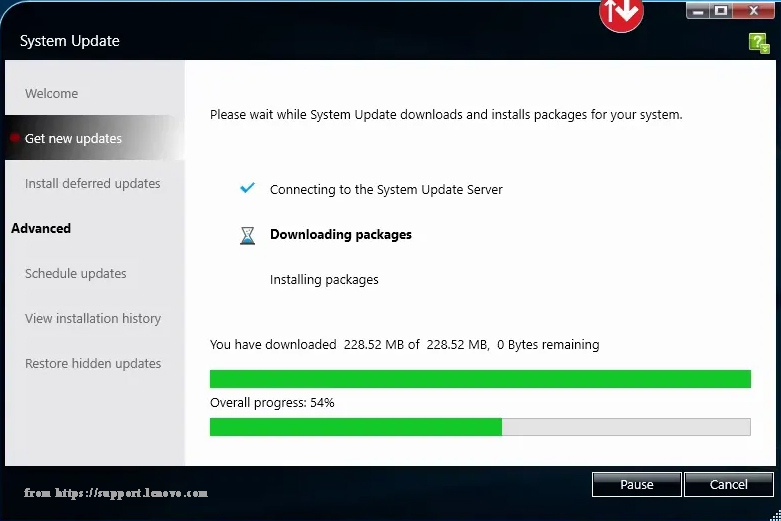
Step 9. Now, this software will download and install the updated driver’s package automatically. Please wait patiently for the Lenovo driver update. Don’t interrupt this downloading process.
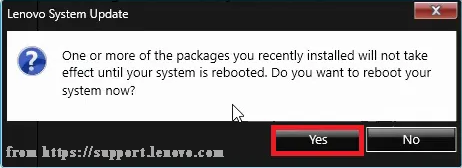
Step 10. Once the Lenovo driver updates are downloaded and installed, you will be get prompted to reboot your computer now. Click on the Yes button.
The above steps are about how to use Lenovo System Update for drivers. You can also select the other 2 options – Critical and Optional updates to update BIOS or apps. This program also allows users to schedule updates, view installation history, and restore hidden updates.
What’s Your Opinion
Here comes the end of this post. Now, I believe that you already have known how to use Lenovo System Update, right? Bear in mind the important things that are summarized in the above content so that you can run Lenovo System Update smoothly.
If you have any questions about this software, you can send us an e-mail via [email protected]. We also appreciate any ideas about this topic in the comment area.
User Comments :