As a fast and lightweight storage device, M.2 SSD has attracted a great many people. However, lots of them don’t know how to install M.2 SSD. If you are also trying to find a full guide, this post of MiniTool is what you need.
What You Need to Do Before Installing M.2 SSD
M.2 SSD is lightweight storage that’s specifically designed for the PCI Express physical card layout and connectors. Since it has a smaller form factor and more flexible physical specification, M.2 SSDs attract a great many people.
However, most people are unclear about how to install M.2 SSD. In order to install an M.2 SSD successfully, here are some important things that you should pay attention to.

# 1. Check Your Motherboard
As you know, M.2 SSDs are commonly used in newer laptops. If you use M.2 SSD on an older computer, it may not be compatible with your motherboard. So, you need to make sure that your motherboard has an M.2 slot before installing M.2 SSD.
To check if you have a compatible M.2 slot, you can consult the manual of your motherboard. If you can’t find the motherboard manual, then you can follow the steps below:
Step 1. Find the motherboard name and model number of your motherboard.
- Usually, you can find the manufacturer name and model number near one of the four edges of the motherboard on the top side.
- Alternatively, you can find them through the Windows system information. Press the Win + R keys to open the Run dialog box, and then type msinfo32 in it and hit Enter. Then you can view the motherboard information under the System Summary
Step 2. Check if your motherboard has a compatible M.2 slot.
- Write down the motherboard information that you have found in the above.
- Use your Google to search for the motherboard manual.
- Carefully view the search results. Here you should know your motherboard information.
# 2. Choose a Right SSD
If you have ensured that your motherboard supports the M.2 SSD, now it’s time to choose a suitable SSD. To help you choose a suitable SSD for your laptop, we summarize some useful tips that you can refer to:
- Purchase the right type of M.2 SSD. As you might know, M.2 SSD is mainly identified by the computer through the 2 main technology standards (PCIe and SATA). PCIe is faster than SATA. You need to check if your motherboard slots support PCIe or SATA M.2 SSD. A simple way is to check the notches on the connector. A SATA M.2 SSD has two notches, while a PCIe M.2 SSD has a single notch on the right side. Here it’s recommended that you choose PCIe M.2 SSD because of its faster speed.
- Choose the right physical size. You need to see the physical size of the SSD that your motherboard slot supports. M.2 SSDs are often 22mm width, while their length varies from 30mm to 110mm. For this, you can find the length of your M.2 slot from the motherboard manual.
- Determine the M.2 key. There are 3 types of M.2 keys including B, M, and B+ M key. The M.2 key can also be found from the motherboard manual.
According to the above information, you should know how to choose the right M.2 SSD.
# 3. Get all Necessary Tools
In addition to preparing a right M.2 SSD for your PC, it is also necessary to get all the necessary tools. To open the side panel of your computer, you need to prepare a small flat head screwdriver. Since static electricity can damage your computer memory, so make sure that the entire M.2 installation is performed in an anti-static environment. So, an optional antistatic wrist strap must be prepared.
Have you prepared all the necessary tools? If it is, you can move on to the next part.
How to Install M.2 SSD on Your Windows PC
This section mainly focuses on how to install an M.2 SSD on PC. There are 3 parts to install an NVMe M.2 SSD.
Part 1. Install the M.2 SSD Carefully
Since the M.2 installation is a relatively complex and time-consuming process, please keep reading carefully.
Step 1. Remove all cables and turn off your computer.
To do so, unplug any cables attached and power down off your computer.
Step 2. Remove the side panel of your Windows PC.
- Using a screwdriver to remove the small screws or latch that is attached to the side panel of your PC.
- Slide the side panel to detach it from the computer and then lay your computer on its side.
Step 3. Detach the components blocking the M.2 slot. Here you need to take out the components including a graphics card and its brace. To do so, you need to safely remove the screws holding the components.
- Remove the graphics card from your PC. Using the screwdriver to unscrew the parts located in the image.
- Push down the small latch that’s attached to the graphics card slot and take out the graphics card.
Step 4. Insert the M.2 SSD carefully. After you have removed all blockings among the M.2 slot, you can gently insert the SSD and screw it in the slot.
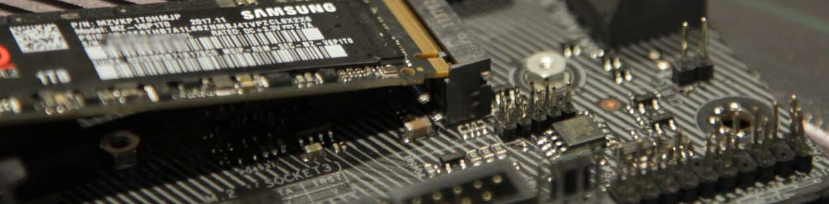
–image from https://www.groovypost.com/
Step 5. Reattach all components to their original positions. Once you have installed the M.2 SSD in your PC, you can reattach the components including the graphics card, screws, and brace that you take out.
Step 6. Plug all the cables again and turn your computer on. Now, you should have installed the M.2 SSD successfully. You can plug the cables back in and power on your computer.
How to install an M.2 SSD? I believe you have known the full guide.
Part 2. Transfer Your Operating Systems to the M.2 SSD
It is not enough for most people who still want to use the Operating System and data on the previous hard drive. Don’t worry. We will show you how to transfer OS and files to the M.2 SSD. To migrate OS to the SSD, you can utilize a powerful tool – MiniTool Partition Wizard.
With this reliable partition manager, you can transfer OS to the M.2 SSD or copy disk without reinstalling OS. Besides, you can use it to convert MBR to GPT, resize partition, perform disk benchmark, convert NTFS to FAT without data loss, etc.
Click on the following button to download this powerful software and install it on your PC. Then move on the steps below:
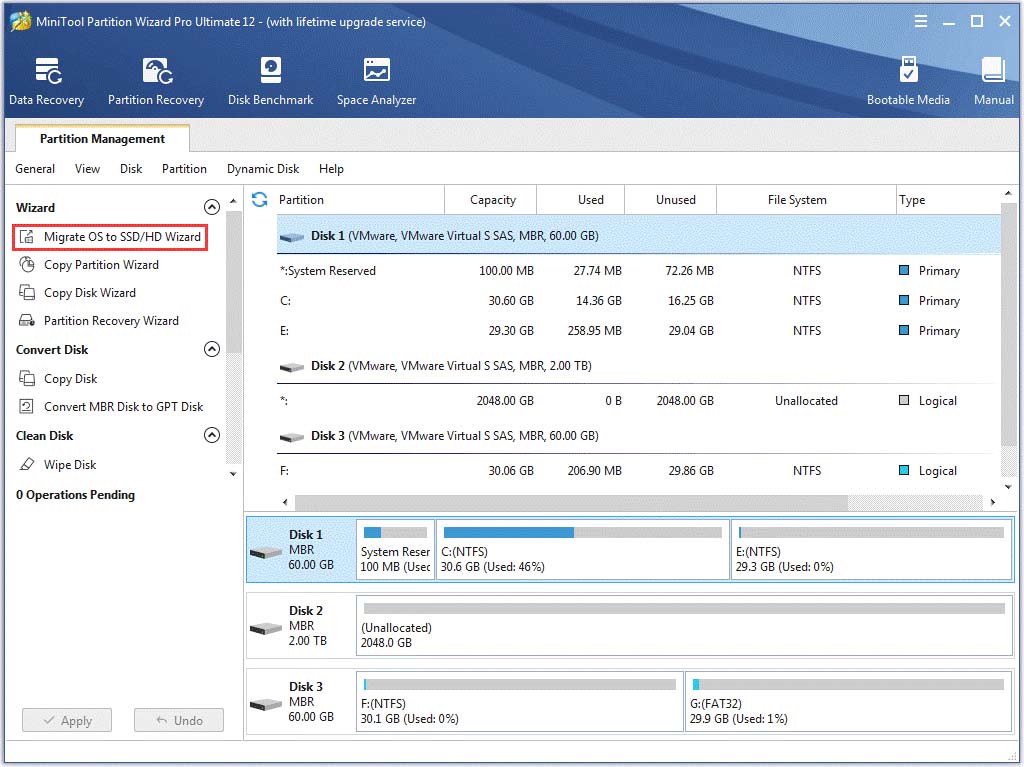
Step 1. Launch MiniTool Partition Wizard to enter its main interface and click on the Migrate OS to SSD/HD Wizard feature at the left pane.
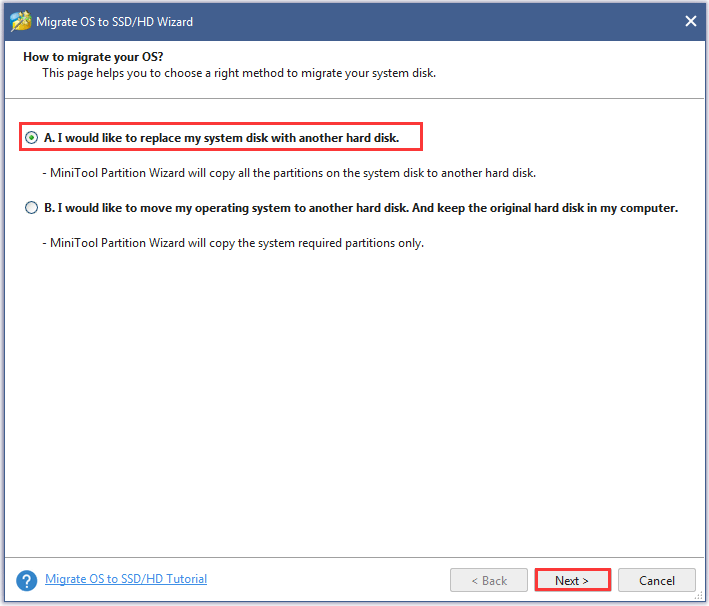
Step 2. In the pop-up window, select a suitable method to migrate your system disk. Here we take Option A for example. After you select a migration method, click on Next to go on.
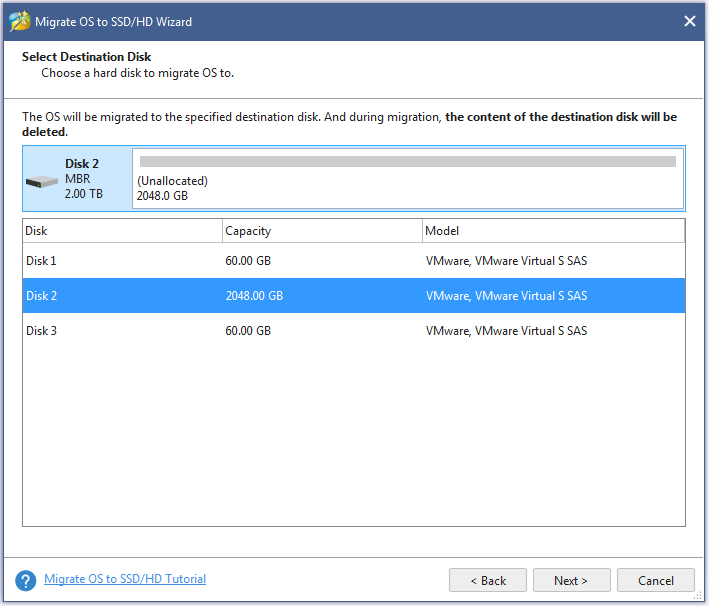
Step 3. Select the new M.2 SSD from the disk map to migrate system disk and click on Next to continue.
Step 4. Review the changes that have been made and click on Next to continue. Here we recommend you click on Align partitions to 1MB, which can improve performance for SSD.
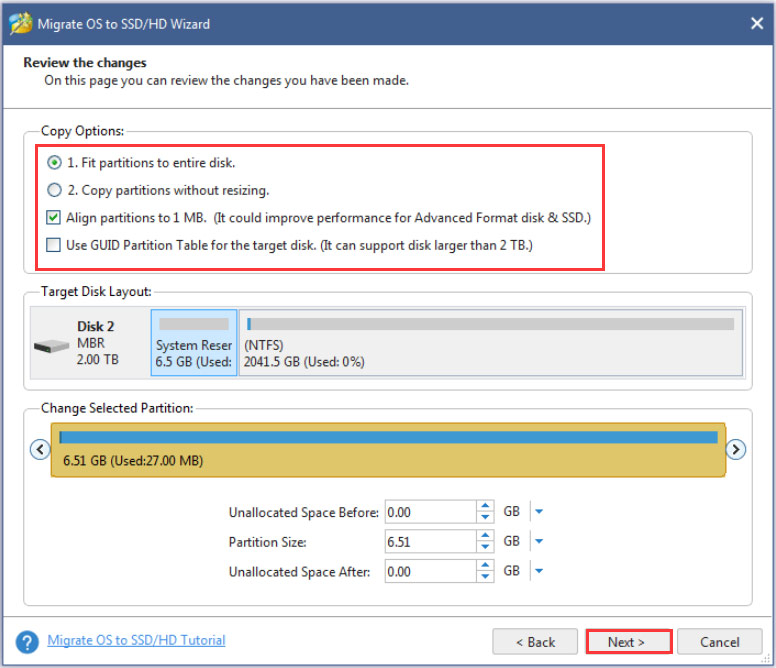
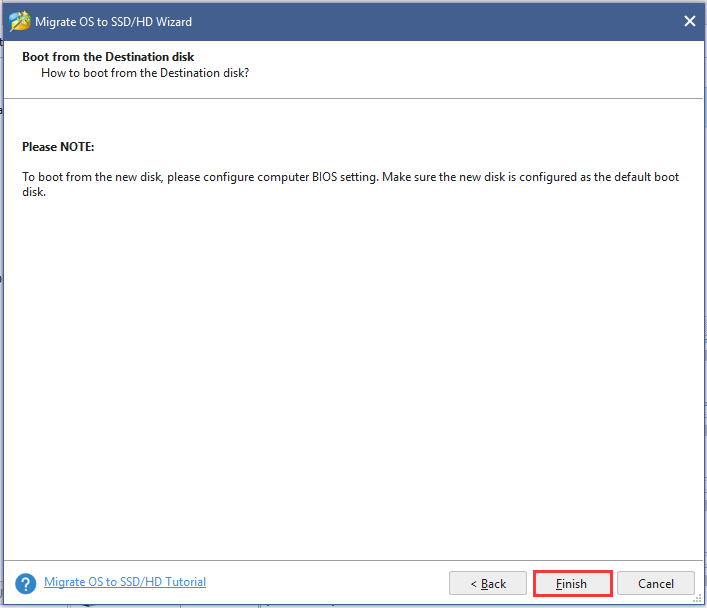
Step 5. Click on the Finish button in the pop-up window.
Step 6. Click on Apply to execute the pending operation.
Now, your operating system on the previous hard drive should be migrated to the new M.2 SSD successfully. Alternatively, you can use the Copy Disk Wizard feature to copy the whole disk to the new SSD.

Part 3. Set the M.2 SSD as a Boot Drive
After you have finished the above 2 parts, the M.2 SSD should have been installed on your PC and the OS also has been migrated. The last step is to set the newly installed M.2 SSD as the boot drive. To do so, follow the steps below:
Step 1. Enter the BIOS menu.
- Turn off your computer first.
- Click on the Power button to restart your computer.
- Click on the F2 or Delete key before Windows loads on your PC to enter the BIOS menu.
Step 2. Find the Boot settings. Use the left or right arrow key to locate the Boot tab.
Step 3. Change the boot order.
- Press the Up or Down arrow key on the keyboard to select the new M.2 SSD.
- Press the “+” or “-” key to put the selected M.2 SSD to the top of the boot list.
- Press the F10 key to save the boot order changes and exit BIOS.
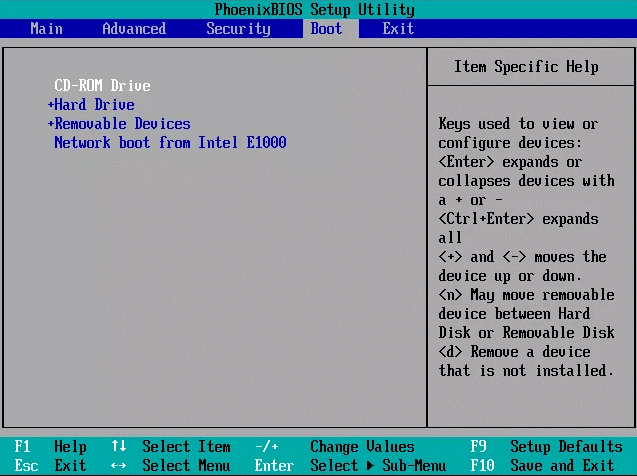
Now, restart your computer and your M.2 SSD should be set as the boot drive.
Have a Try Now
How to install an M.2 SSD on Windows 10 PC? Before installing M.2 SSD, make sure that you have read all the important things given in the above. Then you can follow the full guide to finishing the M.2 installation.
If you have any questions about MiniTool Partition Wizard, please send us an e-mail via [email protected]. We also appreciate any endeavor that makes us go further.
User Comments :