Hard drives, as key data storage devices, usually lose data due to hardware failure or human error.
However, some users have recently reported that data on their hard drives has suddenly been wiped without any action or warning.
Here’s a true example from reddit.com.
I came home today and noticed that some of my game icons on the taskbar were blank. I checked my D drive, and everything was gone. There aren’t any obvious errors or issues on the screen. Is there any tool or method I can use to identify the problem?
What causes this problem? And what can you do to fix it? Read on to find the answers.
What causes a Hard Drive Wiped Itself?
There are several potential causes behind this issue. Understanding them can help you identify the most effective solutions. Here are the main possible causes.
1. File system or partition corruption
A sudden power outage, forced shutdown, or system error during operation can cause file system corruption. This damage can cause files on the hard drive to “disappear”.
2. Malware or virus attack
When a computer is infected with a virus, the system may appear to have lost data or become inaccessible.
3. Hardware failure
Although hard drives don’t automatically erase data, a faulty hard drive can render the disk inaccessible.
4. System installation or update failure
A failed Windows update or installation can sometimes cause system corruption, making it appear as if the disk data has been erased.
5. Logging into a temporary user profile
When a user account fails, Windows may automatically log in to a temporary account, causing existing files to appear to have been deleted.
Once you understand the potential causes, you can begin troubleshooting by trying different solutions one at a time until the issue is resolved.
Before you do
When your internal or external hard drive wiped itself, there are a few steps you need to take.
Step 1: Stop using that hard drive immediately.
If data on a hard drive is randomly wiped, stop using it immediately to prevent new data from being written to it.
Any continued use of the drive (for example, installing software, restarting the system, etc.) may overwrite the existing data, rendering it irrecoverable.
For internal hard drives: If you lose important data on the system drive, shut down the computer immediately and do not restart or continue using it.
For external hard drives: If data loss occurs on an external drive, safely eject it immediately and do not open, write to, or copy data to it.
Step 2: Determine if the problem is logical or physical.
First, determine whether the problem is logical or physical, as different types of failures require different data recovery methods.
- Logical failures: They are typically caused by software or system issues, such as an unbootable system or partition corruption.
- Physical failures: If you hear clicking or beeping sounds, or if the computer can’t detect the hard drive, the problem is likely physical.
Step 3: Use MiniTool Partition Wizard to recover data (for logical failures).
If you suspect a logical problem and the hard drive is still functioning, you’ll need to use another computer to recover the data.
MiniTool Partition Wizard is a good option. Its Data Recovery feature can help you recover files from various storage devices, including SSDs, USB flash drives, HDDs, SD cards, and more.
Here are the steps:
MiniTool Partition Wizard DemoClick to Download100%Clean & Safe
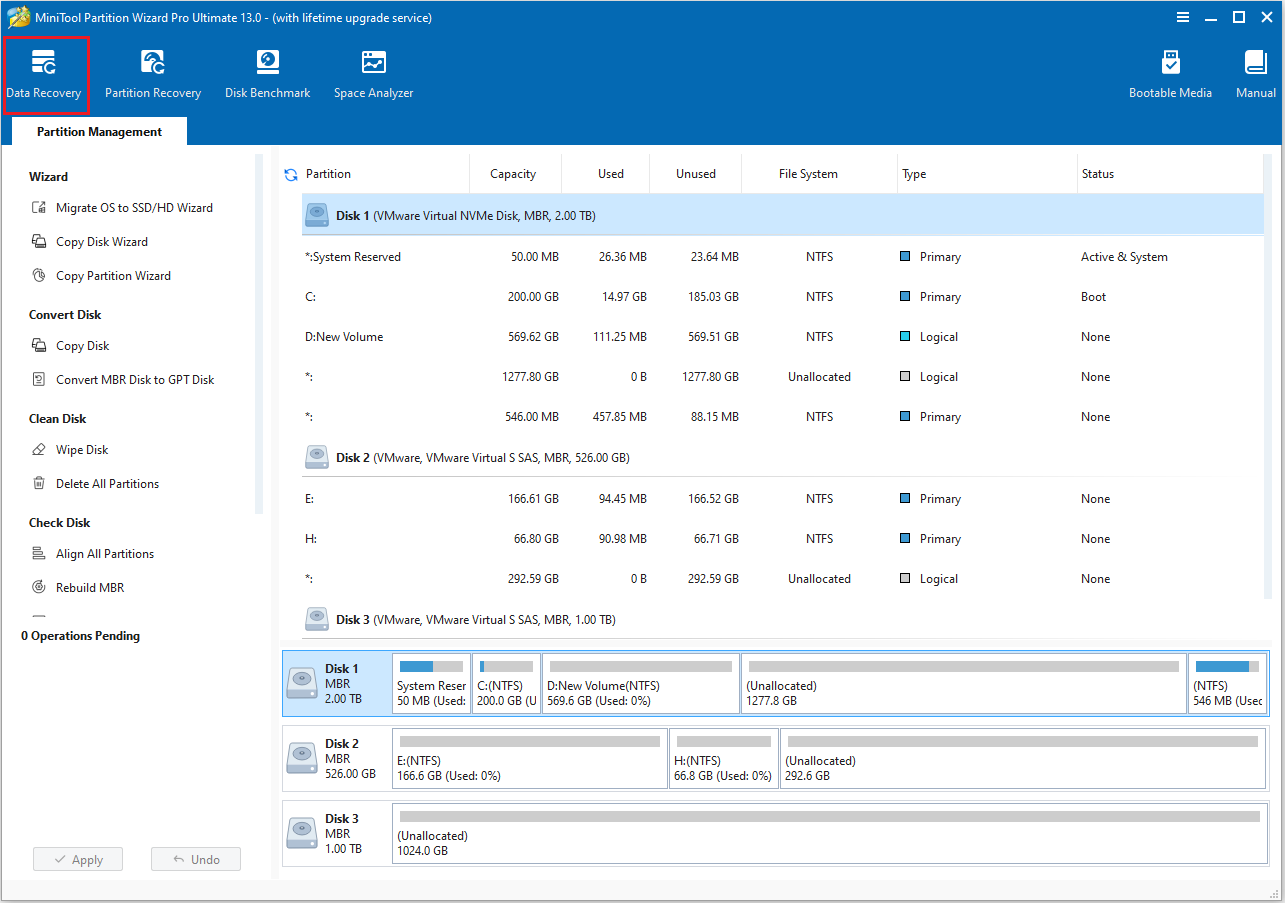
Step 1: Launch MiniTool Partition Wizard to its main interface and click Data Recovery in the top toolbar.
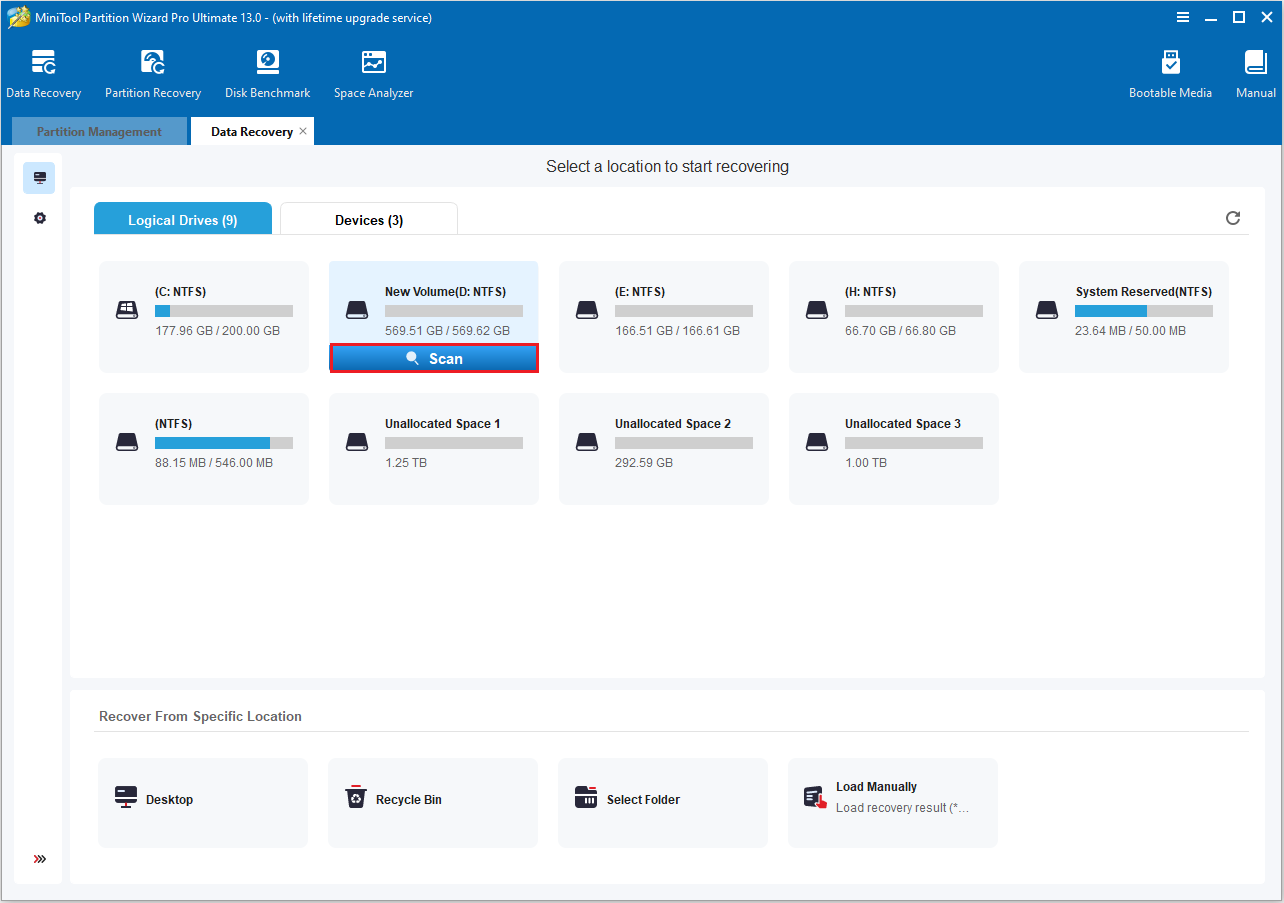
Step 2: Select the drive where the data was lost, then click Scan.
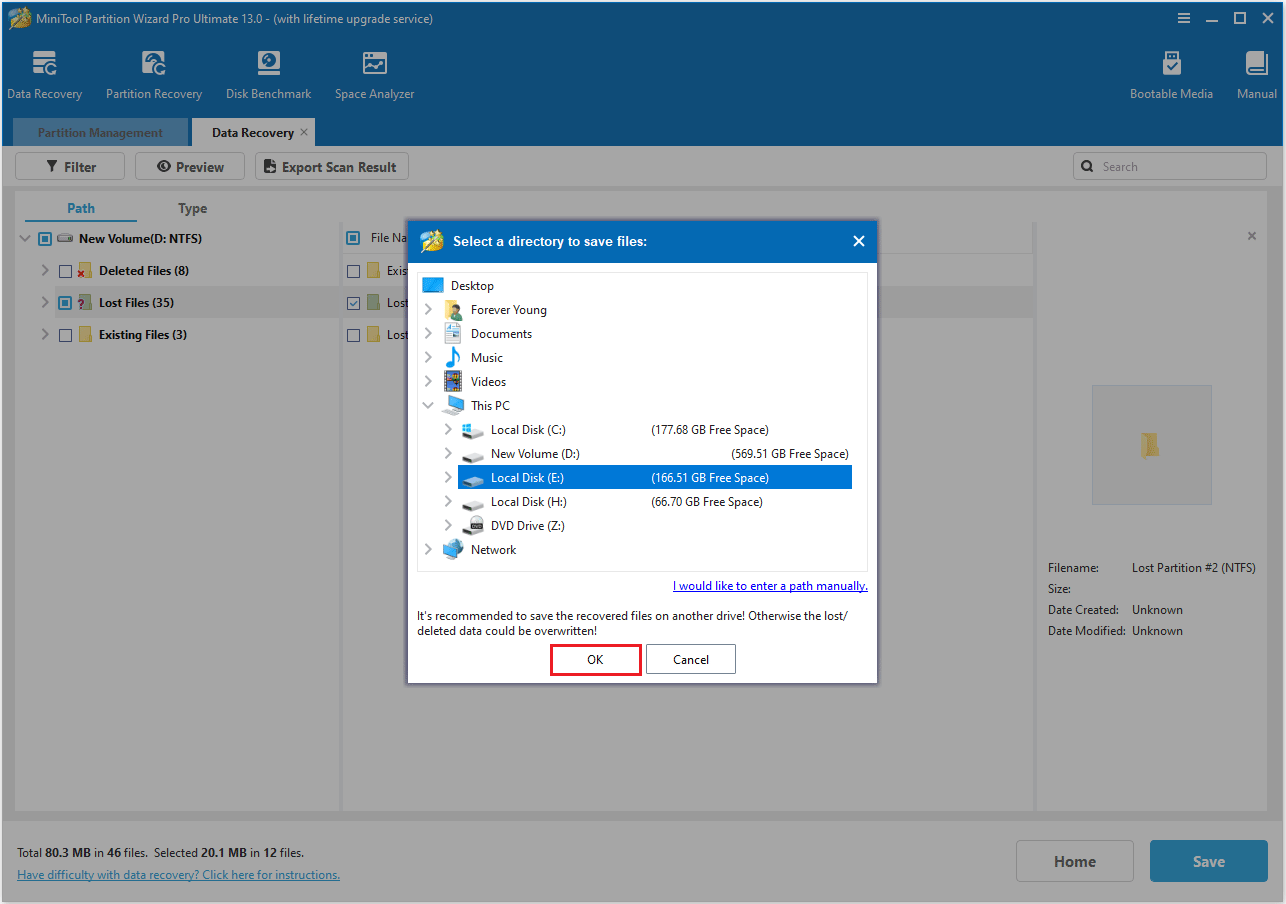
Step 3: Wait for the recovery process to complete. Once done, select the files or folders you want to recover.
Step 4: Click Save and choose a location (preferably a different drive) to avoid overwriting lost data, then click OK to confirm.
Step 4: Seek professional help (for physical failures).
If your hard drive makes unusual noises or can’t be detected, stop using it and contact a professional data recovery service.
To fix the “internal or external hard drive erases itself” issue, try the following methods.
How to Fix a Hard Drive That Wiped Itself Automatically
Here are six practical methods to help you fix this issue, such as checking for temporary user profiles, scanning for malware, and formatting the hard drive.
Fix 1: Check for Temporary User Profiles
If your computer is missing files or your desktop appears blank when you log in, it may be because your system is using a temporary user profile.
In this case, you can restore your original files by checking specific folders on your system, such as the C:\Users folder.
This is where Windows stores all user data. If your system is using a temporary profile, a TEMP folder will appear, but your original user folder (for example, C:\Users\yourusername) may still exist and contain your files.
If you cannot find the file or have just upgraded your system, please refer to fix 2.
Fix 2: Look for a Windows.old Folder
If your files are missing after a Windows update, they might still be in the C:\Windows.old folder because Windows automatically backs up the previous system files during the update.
Fix 3: Scan for Malware
If a virus or malware is attacking your Windows system, you might also encounter the “hard drive wiped itself” issue.
To resolve this issue, I recommend running a full scan of your computer.
Step 1: Press Win + I to open Windows Settings.
Step 2: Select Update & Security > Windows security > Virus & threat protection.
Step 3: Under the Virus & threat protection section, click Scan options.
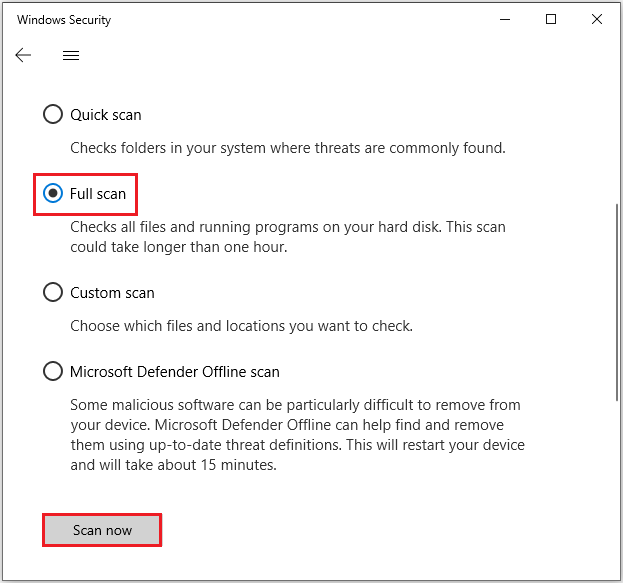
Step 4: Select Full scan > Scan now.
After the scan is complete, restart your computer and verify whether the issue is resolved.
Fix 4: Check Your Hard Drive for Errors
Your internal or external hard drive may have errors or bad sectors, which can make it appear as if the hard drive has been randomly wiped.
First, check the hard drive for errors.
Well, you can use MiniTool Partition Wizard to scan and repair your disk. It provides the Surface Test and Check File System functions to check for bad sectors and fix file system errors on the disk.
Please follow the steps below.
Step 1: Launch this free partition manager to enter its main interface.
Step 2: Right-click the target disk to select Surface Test.
Step 3: Click the Start Now button to start the disk surface test.
Step 4: After scanning, disk blocks without read errors will be marked in green, while those with read errors will be marked in red.

If there are a few bad sectors on the disk, you can use the CHKDSK command to mask and bypass
them. If there are too many bad sectors, you should replace the drive.
Here are the steps to mask the bad sectors:
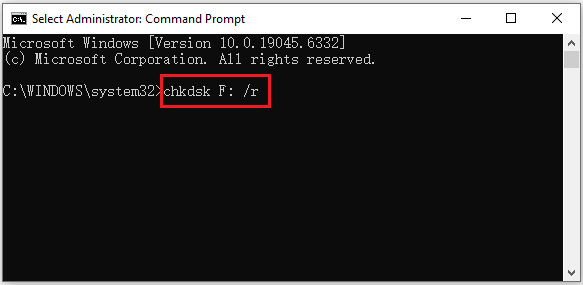
Step 1: Press the Win + R key to open the Run dialog box.
Step 2: Type cmd and press Ctrl + Shift + Enter to open Command Prompt as administrator.
Step 3: Type chkdsk *: /r (* can be replaced with your disk drive letter) and press Enter.
The /r command can locate bad sectors on the hard drive and recover readable information from them.
If a disk has a large number of bad sectors, it may be nearing failure. In this case, it’s recommended to replace the disk with a new one.
To avoid data loss, you need to migrate data from the old disk to the new one by using disk cloning software – MiniTool Partition Wizard.
The following are the specific steps.
MiniTool Partition Wizard DemoClick to Download100%Clean & Safe
Step 1: Connect the erased hard drive to your PC and launch MiniTool Partition Wizard.
Step 2: Right-click the wiped drive and then select Copy.
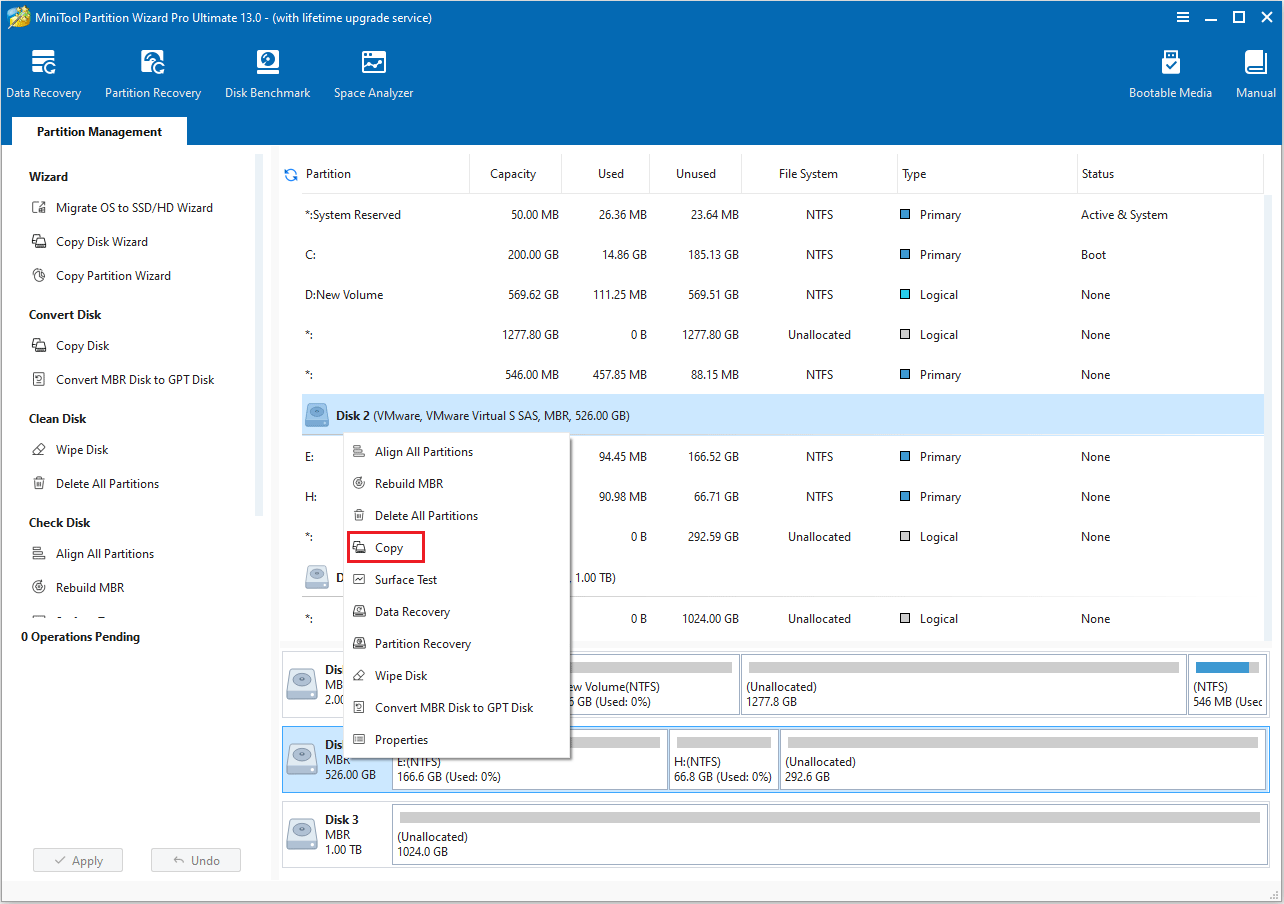
Step 3: Choose the new hard drive as the destination drive, then click Next.
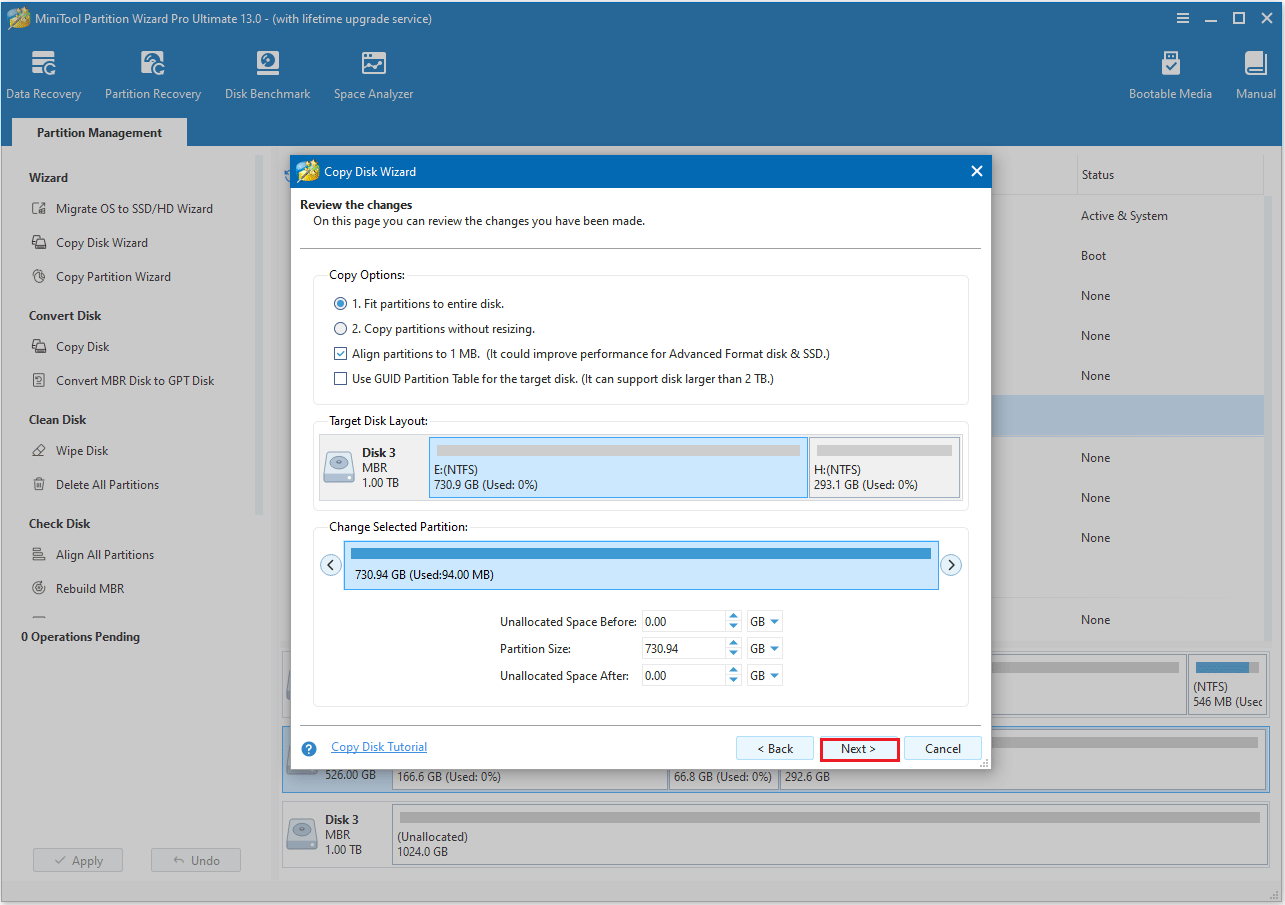
Step 4: Choose a Copy Option and click Next.
- The options “Fit partitions to entire disk” and “Align partitions to 1 MB” are selected by default. The former adjusts partition sizes proportionally to utilize the full capacity of the new hard drive, and the latter option will apply 4K alignment to the disk.
- If the original hard drive is an MBR disk, but you want the cloned disk to be a GPT disk, you can choose the Use GUID partition table for the target disk option.
- Under the Change Selected Partition section, you can resize or move the partition as needed.
Step 5: Carefully review the note, then click the Finish > Apply buttons.
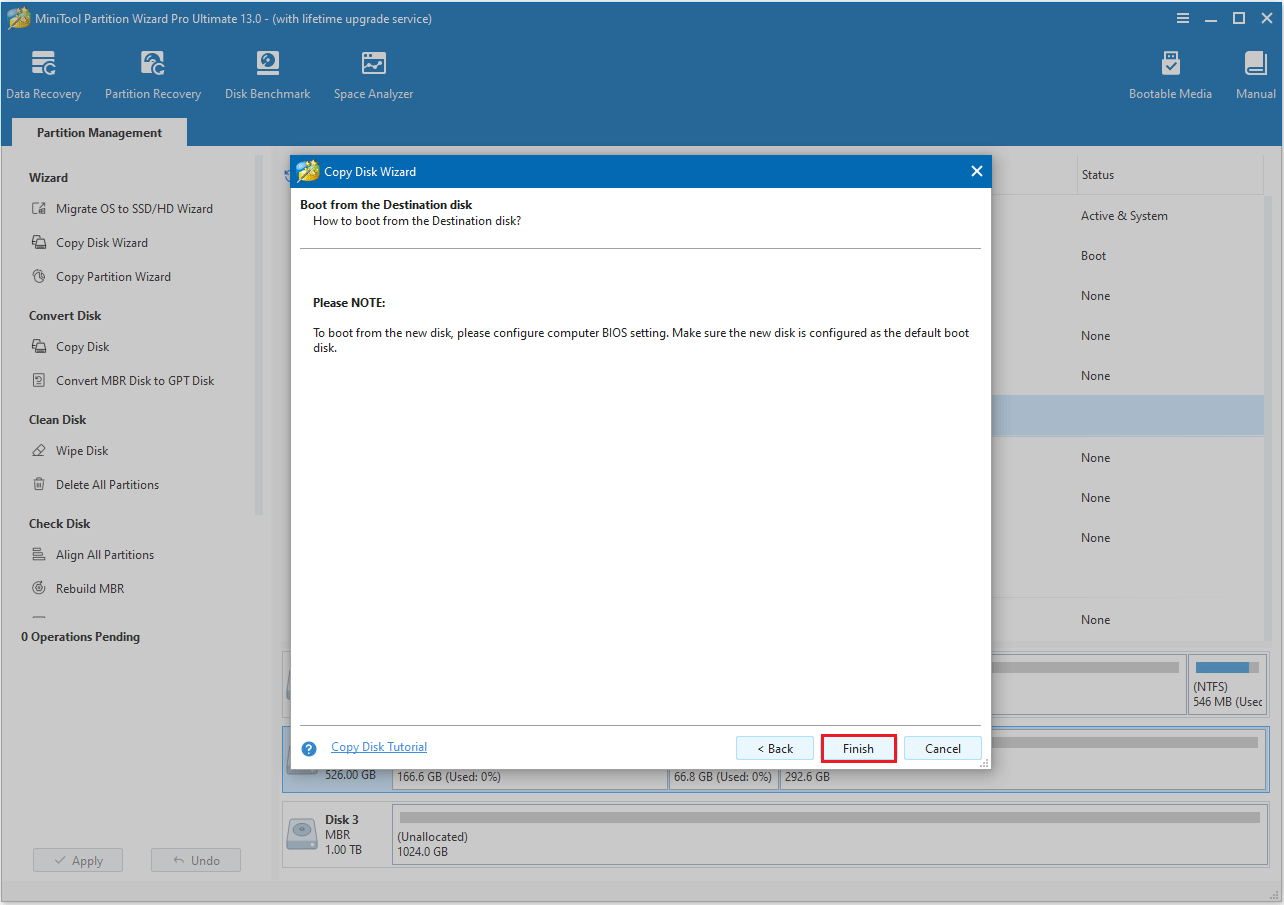
After migration, all data from the wiped disk will be completely copied to the new drive, so you can use it directly.
Fix 5: Extend C Partition
Sometimes, when the system partition is full, Windows may crash and display the error “hard drive data was automatically erased”.
If you encounter this issue, I recommend first checking the free space on the system partition (usually drive C) and freeing up space by clearing unused files or expanding the system partition.
Fix 6: Format Hard Drive
If you encounter a hard drive self-erasing problem, you can also try to format the disk to resolve the problem. Before doing so, please back up your data.
Method 1: Via Disk Management
Step 1: Right-click the Start icon and select Disk Management.
Step 2: Right-click the wiped partition and select Format.
Step 3: Choose a file system from the drop-down list and click OK.
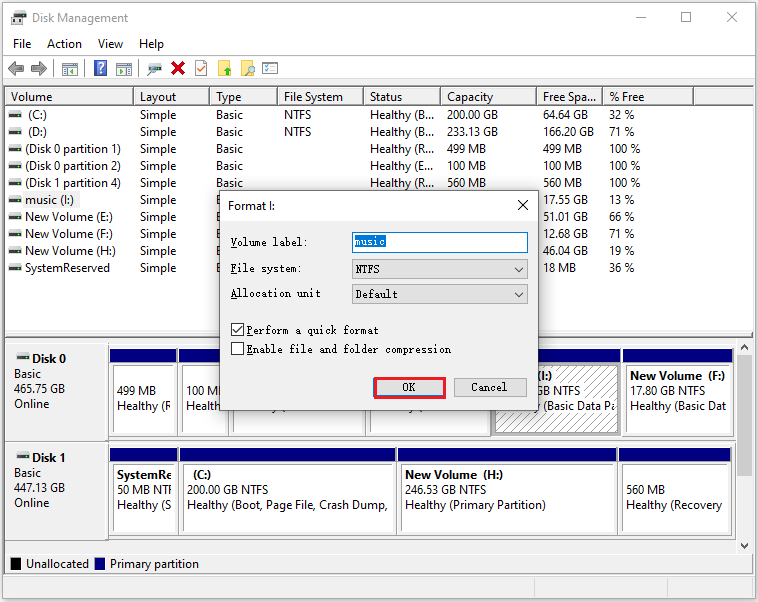
Step 4: When a confirmation message pops up, click OK to proceed.
Method 2: Via MiniTool Partition Wizard
It lets you quickly format your drive and supports formatting drives larger than 32GB to FAT32, which Windows typically doesn’t allow.
Here are the steps:
Step 1: Open MiniTool Partition Wizard.
Step 2: Right-click the wiped partition and select Format.
Step 3: In the new pop-up window, set the Partition Label, File System, and Cluster Size. Then click OK to continue.
Step 4: Click Apply > Yes to execute the pending operation.
How to Prevent Hard Drive Wiped Itself in the Future
To prevent your hard drive from wiping itself in the future, you can take the following precautions:
- Back up your data regularly: Regularly backing up important files to an external hard drive or cloud storage is the most effective way to prevent data loss.
- Use reliable antivirus software: Installing and updating a trusted antivirus program can help prevent viruses or malware from erasing your hard drive.
- Properly shut down your computer: Properly shut down your computer to prevent data corruption.
- Monitor your hardware: Regularly check the health of your hard drive, watch for signs of frequent system crashes, and replace hardware if necessary.
Bottom Line
Automatic disk erasure is a tricky issue. Whether it’s caused by file system or partition corruption, malware attacks, or insufficient disk space, the solutions above can help.
If you have any questions or suggestions while using MiniTool Partition Wizard, you can contact us at [email protected] for further assistance.
About The Author

Position: Columnist
Cecilia has been an editor at MiniTool for two years. She primarily focuses on disk and partition-related content, with particular expertise in disk cloning, partition recovery, and PDF document conversion. She is dedicated to providing users with clear and accurate solutions to help them efficiently resolve common computer problems.
User Comments :