Causes of Dell Error Code 2000-0333
Dell is a renowned brand of laptops that boasts distinct features and specifications. However, just like its competitors, it may prompt you with various errors. Dell error code 2000-0333 is one of the errors.
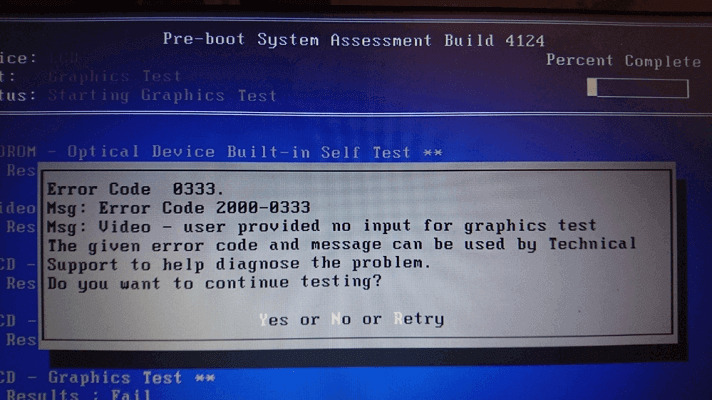
Although Dell error code 2000-0333 is usually caused by issues in the configuration settings of system files, it can also be triggered by other factors. What causes this Dell error code 2000-0333? After investigating this particular issue, we found it can also appear due to the reasons below:
- The operating system is corrupted or outdated.
- There are unexpected motherboard failures.
- There are configuration errors in the system files and folders.
- The BIOS is corrupted.
- There are some corrupt files.
- There is a faulty RAM.
- There are some outdated or corrupt drivers on your PC.
- There are some issues with the Windows key.
- There are some internal glitches or warranty issues.
- There is a failed hard drive.
- There is a faulty SATA cable.
Whatever may be the reasons, you can resolve the error with some methods. Below are some useful methods that you can try to fix this Dell error code 2000-0333.
Method 1. Restart the Dell System
Restarting can wipe away the temporary files and free up memory space. Any code that’s stuck in a misbehaving state will be swept away, too.
So, the first thing you can try is to restart your computer. After restarting the system, check whether the error code still persists. If not, try other solutions.
Method 2. Repeat the PSA Diagnostics
Pre-boot System Analysis (PSA) is a way to test your hardware without using the operating system. Some people report that running the PSA diagnostics can fix this Dell error code 2000-0333.
In this assessment method, you need to perform a series of diagnostics to check for issues with the system board and other hardware devices, like the keyboard, hard drive, and desktop display. If you want to have a try, you can follow these steps:
Step 1. Restart your Dell laptop.
Step 2. While the computer boots up, press the F12 key several times until the One Time Boot Menu appears.
Tip: On some Dell devices, the F12 key won’t be able to open the Boot option. Instead, you need to press the 0 button.
Step 3. On the boot menu screen, select the Diagnostics option and press Enter.
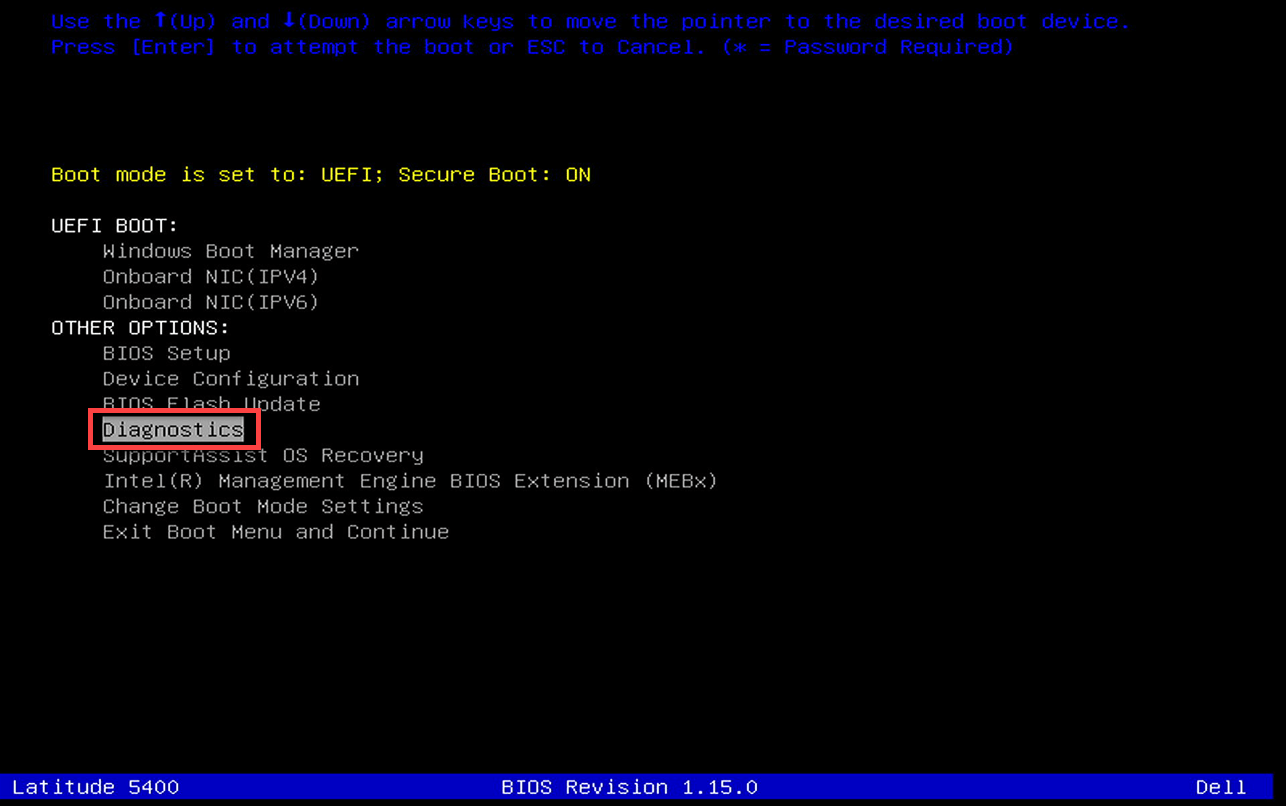
Step 4. The diagnostic test begins.
Though the mouse is not active during the test process, you need to react during the LCD test.
Step 5. If the diagnostics still result in an error code, you can go to their ePSA online tool to get more help.
Method 3. Update BIOS to the Latest Version
Outdated BIOS can also cause error code 2000-0333 on Dell laptops. So, you can try updating your BIOS to fix this error. If you don’t know how to do that, check out this post: How to Update BIOS Windows 10 | How to Check BIOS Version. It provides you with the ways of checking the BIOS version and updating the BIOS.
However, you’d better make a backup of your system because updating the BIOS has a risk of bricking your system. To do that, you can read this post: How to Backup Files on Windows 10? Try These Top 4 Ways.
Method 4. Clean the RAM
Cleaning the RAM is another method that is worth having a try. To do that, you can do as follows:
- Open the case of your Dell laptop.
- Take out the battery, and then take out the RAM from there.
- If you have two RAMs, then you can try to insert one of them while putting the other one aside.
- Next, try cleaning the RAM by using a rubber.
- After that, place the RAM back in its original position and check the status of the error code.
- If the error code 2000-0333 shows again, you need to replace this RAM.
Method 5. Update Windows and Device Driver
An outdated Windows system can also cause errors. So, you can try updating your Windows to fix Dell error code 2000-0333. To do that, you just need to go Settings > Update & Security, and then click on Check for updates button. If there are available updates, it will download and install them.
If there are some outdated or corrupt drivers on your PC, you may also encounter the error code 2000-0333 on your Dell laptop. In this case, update the device drivers to fix the error. Here’s the way:
- Enter the Safe Mode of your PC.
- Press the Windows and I keys to open the Run window.
- Type “devmgmt.msc” in the box and press the Enter key.
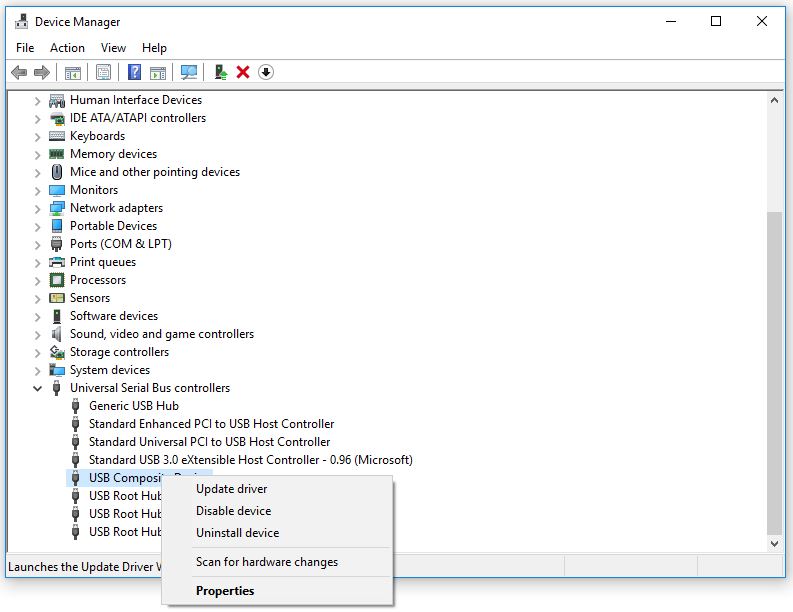
- In the Device Manager window, expand the Universal Serial Bus controllers category.
- Right-click the USB Composite Device and select the Update driver option from the menu.
- Next, click Search automatically for updated driver software.
- Follow the on-screen instructions to complete the process.
- Once done, restart your computer and check if the error is fixed.
Method 6. Run Windows Memory Diagnostic
As faulty RAM can also cause the error code 2000-0333 on a Dell laptop, run Windows memory diagnostic to check your RAM for issues after the error occurs. Here’s the tutorial:
- Boot your PC in Safe Mode.
- Open the Search window by pressing the Windows and S keys, and then type “memory” in the search box.
- Then you can see Windows Memory Diagnostic under Best Match.
- Right-click it and select Run as administrator to open it.
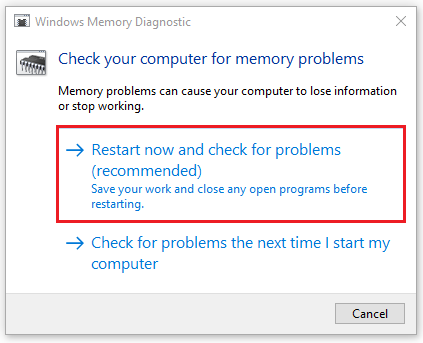
- Next, select the first option: “Restart now and check for problems (recommended)“.
- After that, Windows will reboot automatically and look for RAM errors.
- Once done, you can know if there are any errors in the RAM. If it has, you need to change it.
Method 7. Try a Different Hard Drive
When the BIOS is unable to communicate with the hard drive, you may also receive the Dell error code 2000-0333. In this situation, you can try switching to a different hard drive for your PC to fix this error. Here’s the guide:
If your hard drive is corrupted or damaged, replace it with a new one. Before that, migrate your OS to another one. Then you don't have to reinstall the system on the new hard drive. If the Windows system also includes errors, reinstall OS after you replace the original drive.
Part 1. Back-Up Your Data on the Original Hard Drive to an External Hard Drive
Before you replace your computer’s hard drive and reinstall the Windows, you need to back up your data on the original hard drive to an external hard drive first, or you may lose your data. Here’s how to back up the data:
Step 1. Download and install MiniTool Partition Wizard on a normal working PC. Next, launch this app and connect your USB flash disk to the computer.
MiniTool Partition Wizard DemoClick to Download100%Clean & Safe
Step 2. Next, click Media Builder and then select USB Flash Disk.
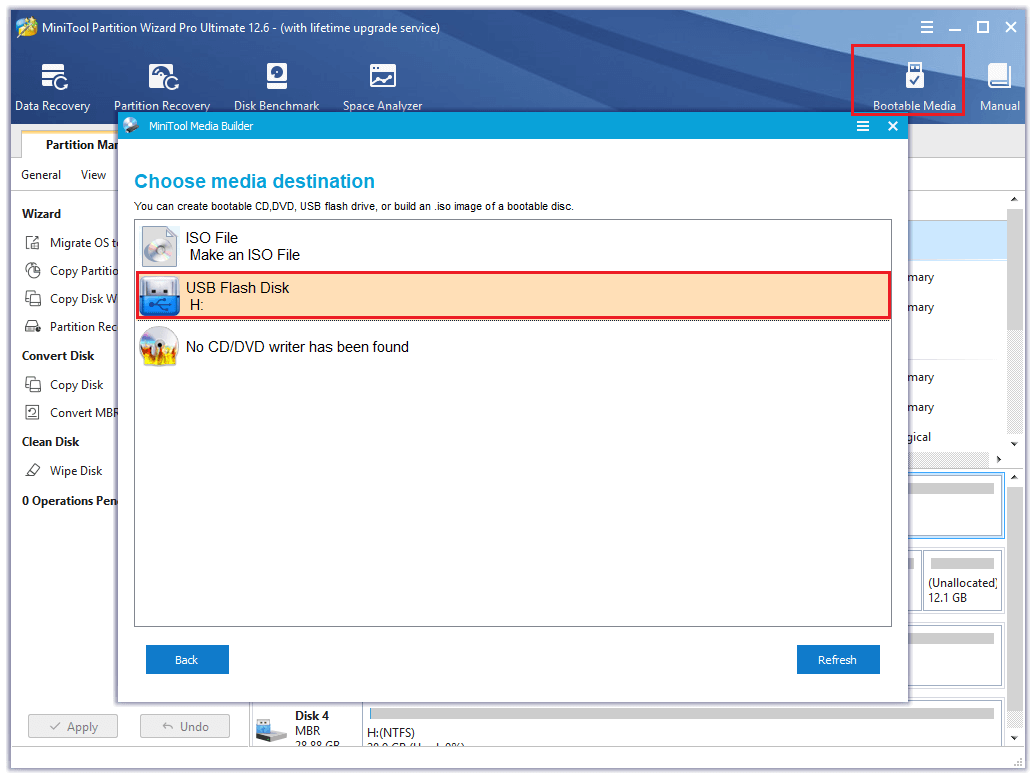
Step 3. Connect the created bootable media to your computer and then boot the device from it.
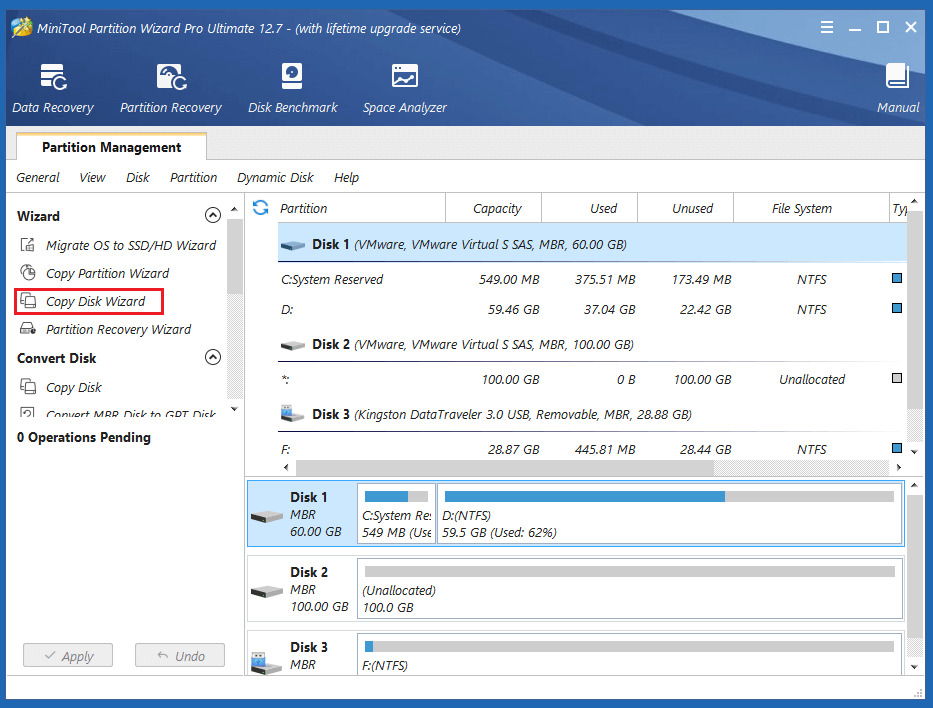
Step 4. Select the Copy Disk Wizard option from the left sidebar, and click Next in the pop-up window.
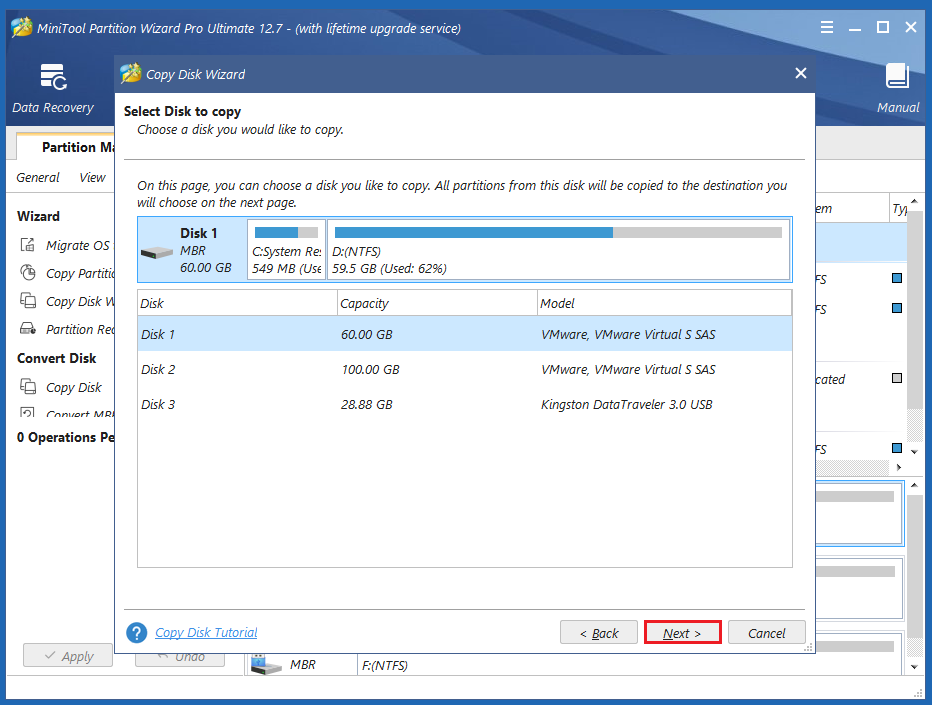
Step 4. Select the disk that you want to make a backup (Disk 1), and then click Next.
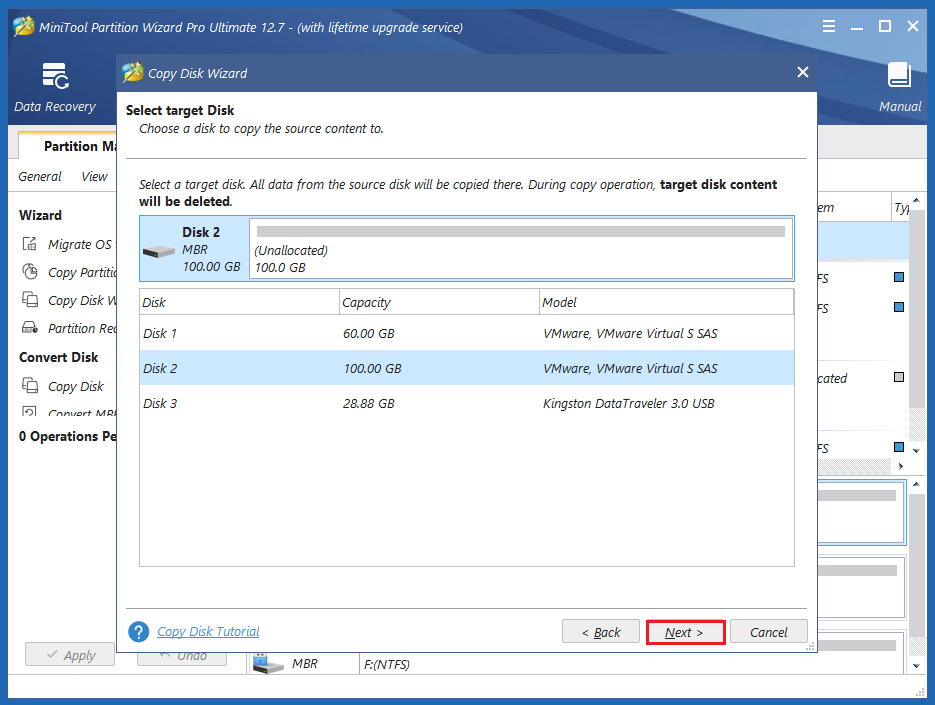
Step 5. Next, select the destination disk (Disk 2) and click the Next button. In the prompted window, click Yes if there’s no important data on it.
Step 6. Select copy options based on your needs and click Next. Click the Finish button on the next window.
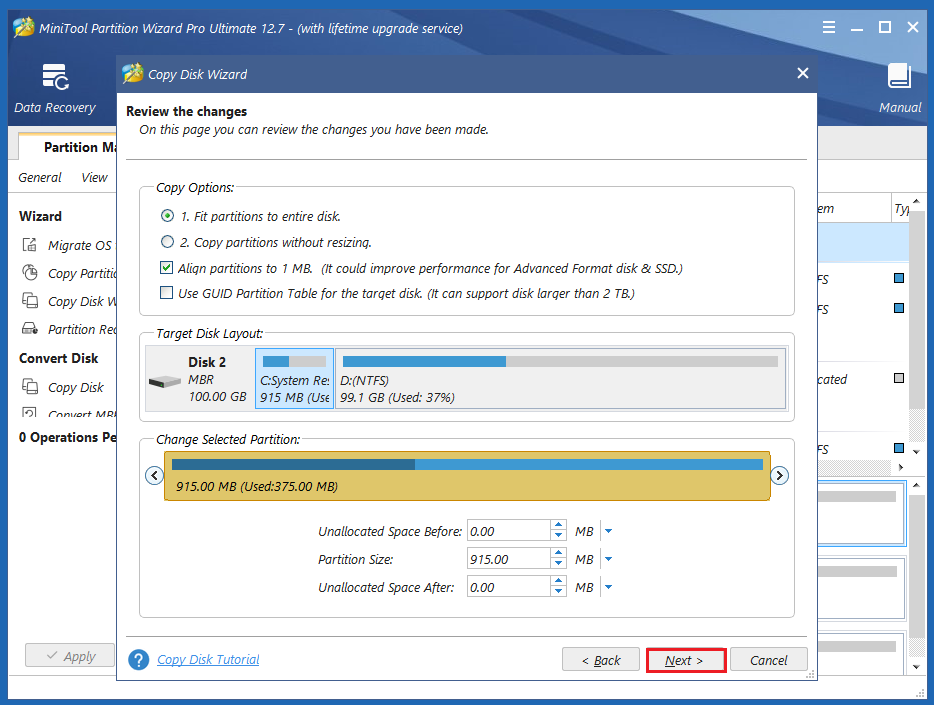
Step 7. Click Apply and Yes to execute your changes.
Step 6. Once done, you can successfully copy the data from the original hard drive to the new hard drive.
Part 2. Change the Hard Drive
After backing up your data to an external hard drive, you can start to change your hard drive. Here’s the tutorial:
Step 1. Do some preparations. The following items must be prepared first:
- Check the current hard drive’s form factor and other specs.
- Buy a proper hard drive for your computer.
- Prepare a small Phillips screwdriver.
Step 2. Create a USB installation drive for your Windows.
Step 3. Turn off your computer and then disconnect both the power cable and any other connected cables.
Step 4. Then unscrew the back panel and remove it to get access to your hard drive.
Step 5. Use the screwdriver to unscrew any screws securing your drive to the laptop.
Step 6. Lift the old drive up about 30 or 45 degrees and pull it out.
Step 7. Next, install the new hard drive.
Step 8. After putting the new disk in the right place, connect the data connectors and power cables, hold the new hard drive with the screws, and close the case.
Step 9. Use the newly created USB drive to reinstall the Windows 10 operating system.
Step 10. Once done, check if the error code 2000-0333 on Dell is fixed.
Method 8. Try a Different SATA Cable
If there is something wrong with your SATA cable, you may also encounter the Dell error code 2000-0333. In this case, you can try a different SATA. Here’s how to do it:
- Disconnect the power cord from the computer.
- Then remove the bottom cover.
- Find the SATA cable.
- Remove the SATA cable from the connector.
- Next, connect the new SATA cable to the connector.
- Reassemble the bottom cover
- Reconnect the power cord to the computer.
Bottom Line
This post provides some methods to help you fix Dell error code 2000-0333. You can try these methods to solve this error on your computer.
If you know other useful methods to deal with this error, please share your ideas with us in the following comment zone. In addition, if you encounter problems while using MiniTool Partition Wizard, please contact us via [email protected]. We will get back to you as soon as possible.

![[Solved] Mfewfpk.sys Driver_IRQL_Not_Less_Or_Equal](https://images.minitool.com/partitionwizard.com/images/uploads/2022/10/mfewfpk-sys-driver-irql-not-less-or-equal-thumbnail.jpg)

User Comments :