Do you need to resize extended partition (shrink or increase it)? If so, this post is worth reading, in which Partition Magic shows you how to do that freely. You can choose one way as you wish.
What Is Extended Partition?
Extended partition is a type of partition that only appears on MBR disks. On GPT disks, only primary partitions can be created.
On an MBR disk, there can only exist one extended partition, which is used to hold all logical partitions. Compared to primary partitions, the biggest defect of logical partitions is that they can’t serve as the boot system (it is the active partition, holding the boot loader file).
How to Create an Extended Partition
On an MBR disk, you can create 4 primary partitions at most. If you want to create more partitions, you need to create 3 primary partitions plus one extended partition and then create many logical partitions in the extended partition.
How to create an extended partition? Here are 2 ways for you.
Way 1. Use Disk Management
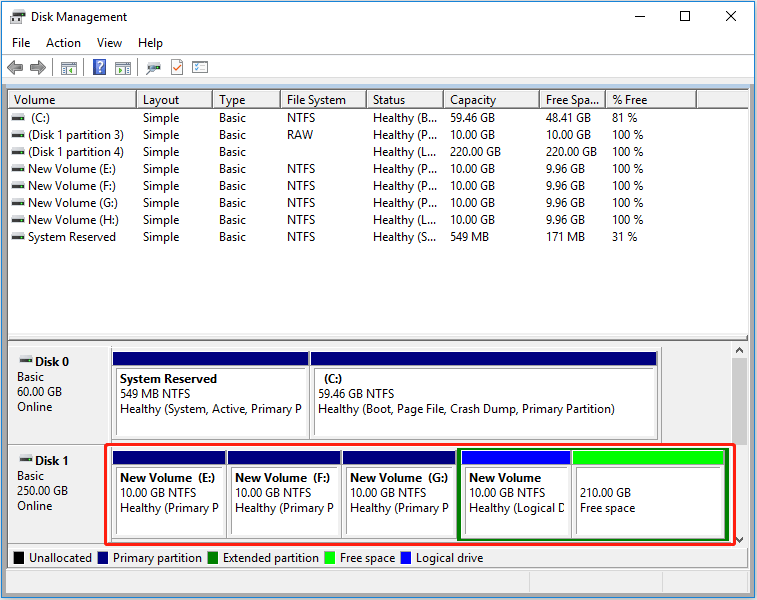
If you create partitions in Disk Management, the fourth partition you create on the MBR disk will become a logical partition automatically and then the space containing the logical partition and the unallocated space behind it will belong to the extended partition.
However, if you use this way, the extended partition is always located at the end of the MBR disk.
Way 2. Use Commands
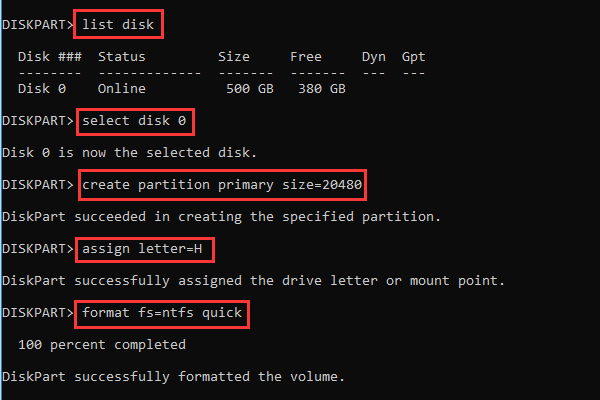
You can also create an extended partition using commands. In addition, this method allows you to decide the location and size of the extended partition. For example, if I want the extended partition to be 100GB and located between 2 primary partitions, I should do as follows:
Step 1: Press the Windows logo key + R to open the Run box. Type “diskpart” and press Enter to open the diskpart.exe window.
Step 2: Type the following commands to create one primary partition, one extended partition, and then one primary partition again.
- List disk
- Select disk 1
- Create partition primary size = xx (the unit is MB)
- Create partition extended size = xx
- Create partition primary size = xx
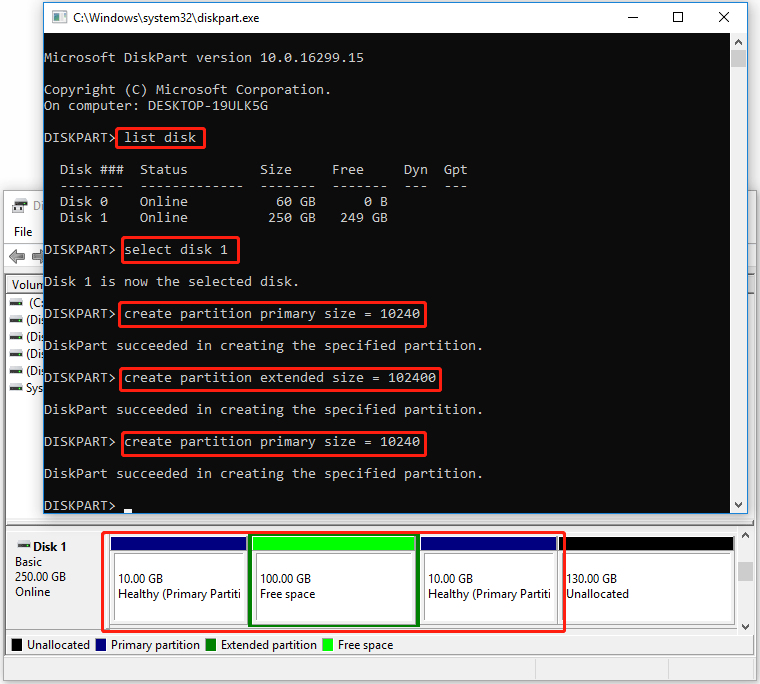
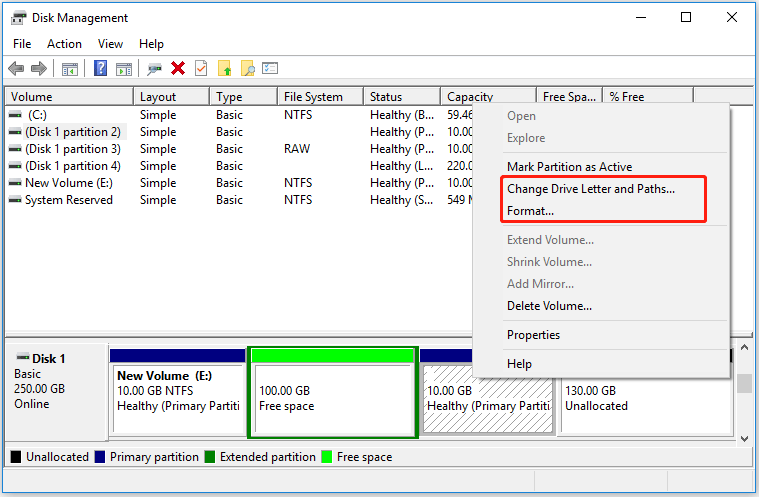
Step 3: Open Disk Management, right-click the primary partitions, choose Change Drive Letter and Paths, and then follow the wizard to add a drive letter. After that, format the partition. Then, create logical partitions in the extended partition.
Can You Resize Extended Partition?
To answer this question, we should consider 2 situations.
#1. Can you increase extended partition?
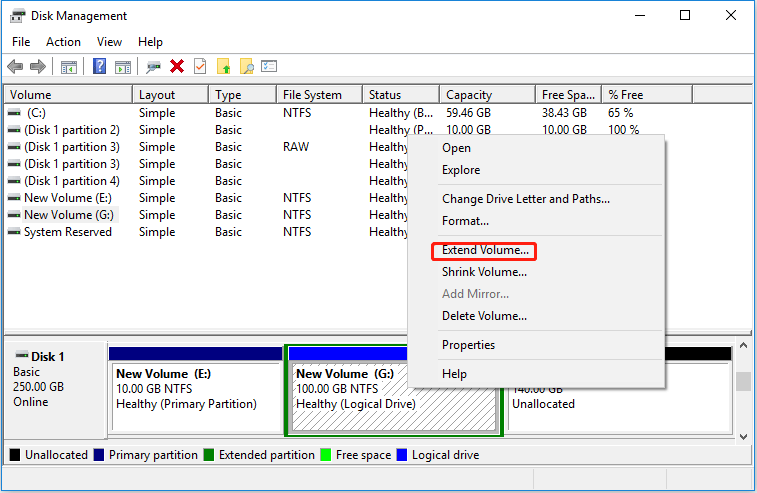
The answer is YES, but there must be unallocated space behind the extended partition. Then, you can increase extended partition by extending the logical partition at the end of the extended partition.
On Disk Management, the feature is called Extend Volume. In DiskPart, you should select the partition first. Then, use the following command: extend size = xx.
#2. Can you shrink extended partition?
In general, you can’t do that in Disk Management or using DiskPart commands.
In Disk Management, you can shrink the logical partition, but the shrunk space will become free space and it belongs to the extended partition still. In addition, there is no option to shrink the extended partition and the free space can’t be used to create a primary partition.
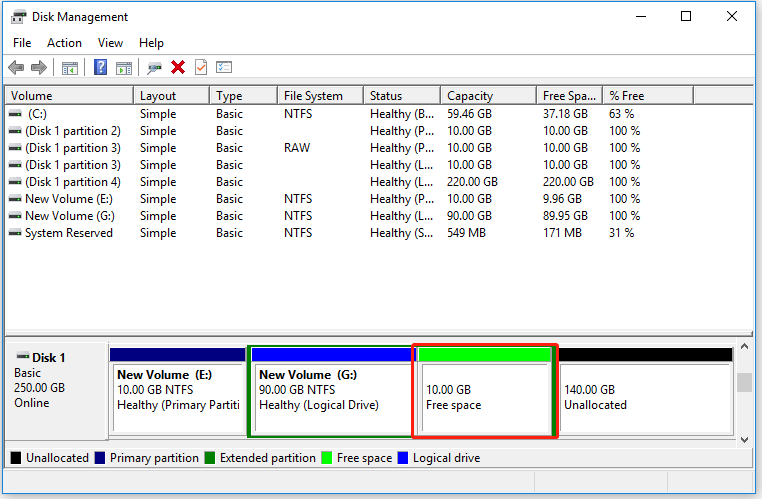
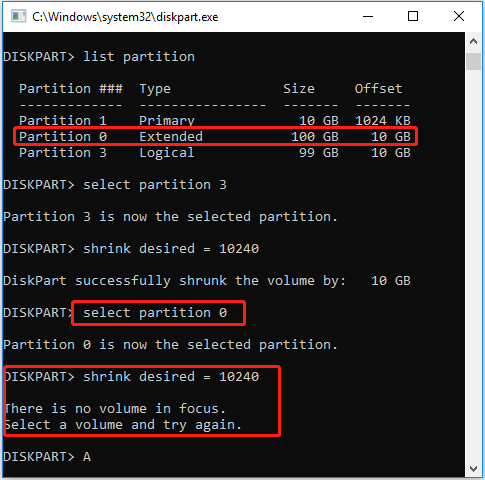
On the other hand, if you want to use DiskPart commands (shrink desired = xx) to shrink the extended partition like primary or logical partitions, you will get this error message “There is no volume in focus. Select a Volume and try again.”
How to Resize Extended Partition Freely
To resize the extended partition freely, I recommend you use MiniTool Partition Wizard. It is a professional disk and partition manager that can move/resize or extend partitions freely, convert partitions between primary and logical as well as FAT and NTFS without formatting, clone hard drives, convert MBR to GPT, do data recovery, etc.
MiniTool Partition Wizard FreeClick to Download100%Clean & Safe
#1. Increase Extended Partition Using MiniTool Partition Wizard
If there is unallocated space next to the extended partition, you can use the Move/Resize feature to increase extended partition. If not, you can use the Extend feature. In this part, I will show you how to increase extended partition using the Extend feature.
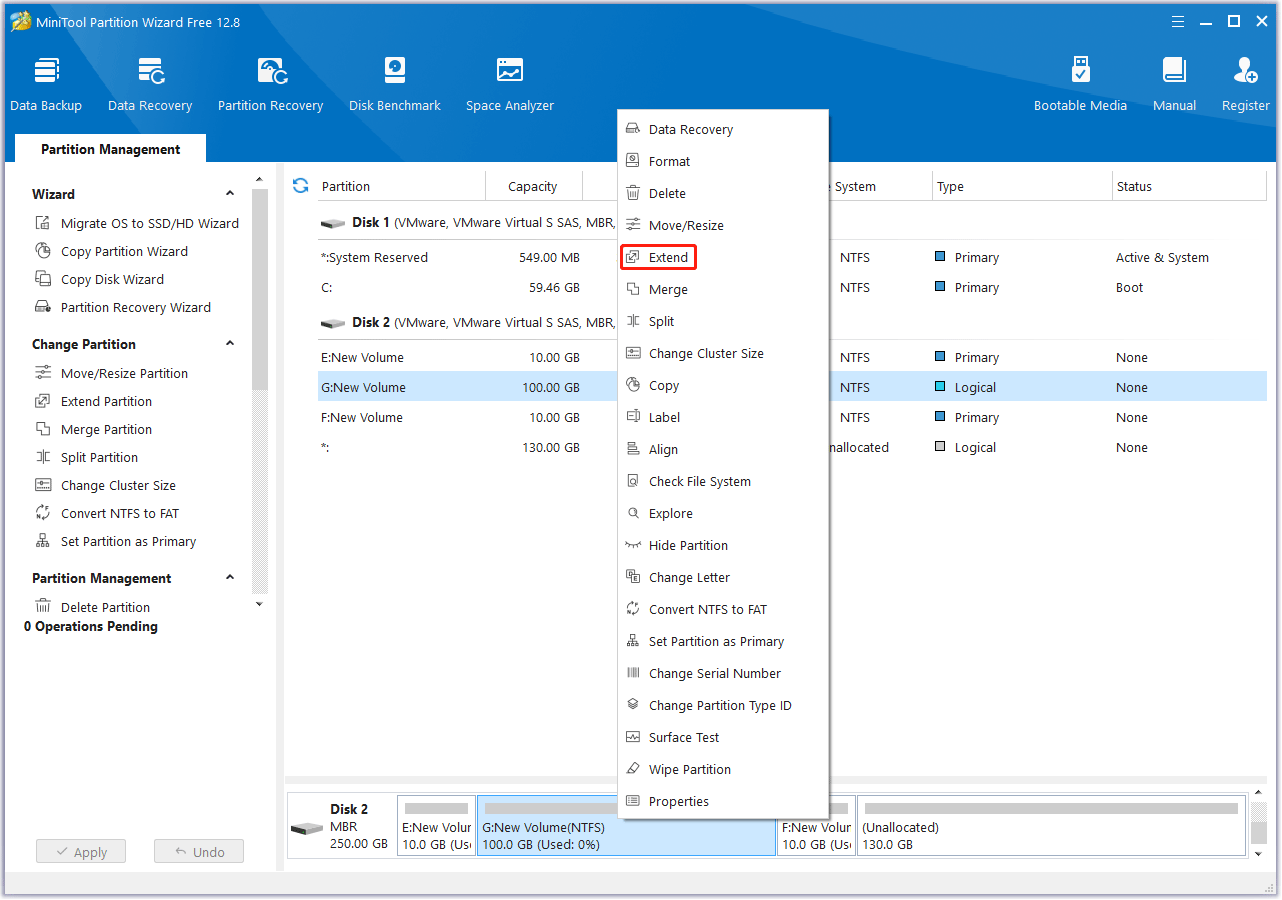
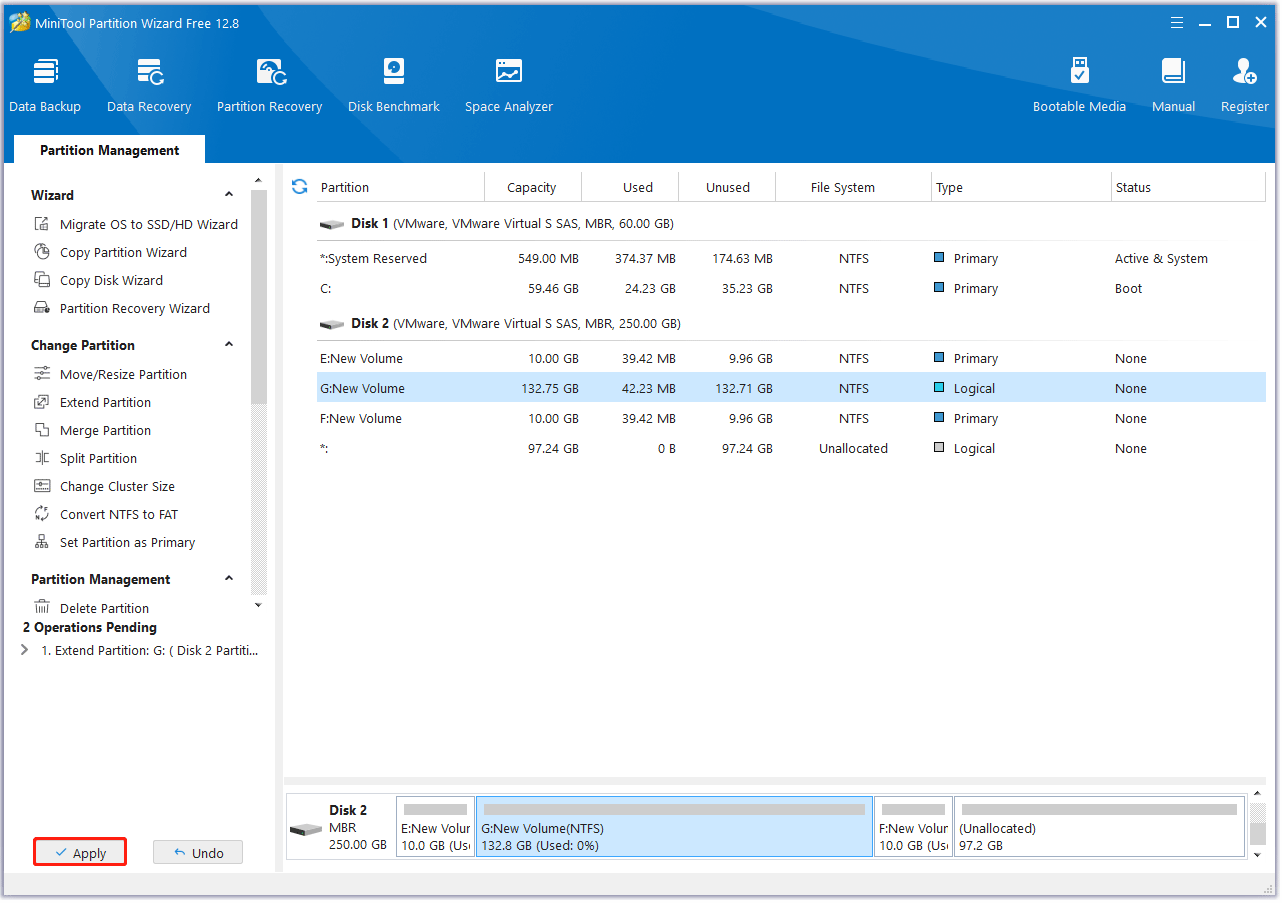
Step 1: Launch MiniTool Partition Wizard. Right-click on a logical partition and choose Extend. MiniTool Partition Wizard also increases extended partition by extending a logical partition, but it is more flexible.
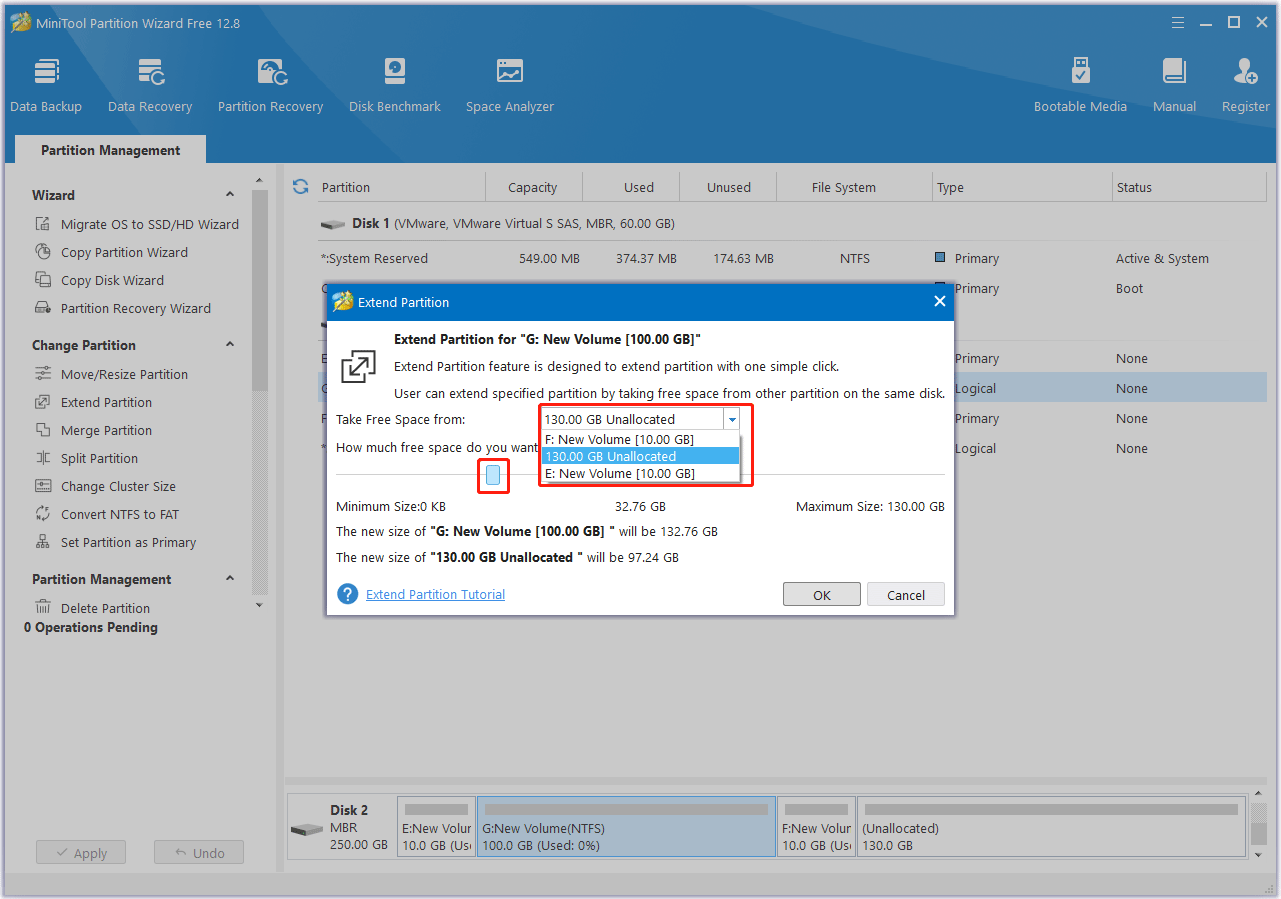
Step 2: On the pop-up window, you can choose any existing partitions or unallocated space to take free space from, regardless of the distance, and then drag the blue block to decide how much free space you want to take. Then, click OK.
Step 3: Click the Apply button execute to the pending operation. Then, the logical partition and the extended partition will be both enlarged.
#2. Shrink Extended Partition Using MiniTool Partition Wizard
To shrink the extended partition, you can use the Move/Resize feature. Here is the guide:
Step 1: Launch MiniTool Partition Wizard. Right-click on a logical partition in the front or at the end of the extended partition and choose Move/Resize.
Step 2: On the pop-up window, drag the arrow icon to decide how much space to shrink. You can also drag the block to decide the partition location. However, make sure the unallocated space is adjacent to a primary partition. Then, click OK.
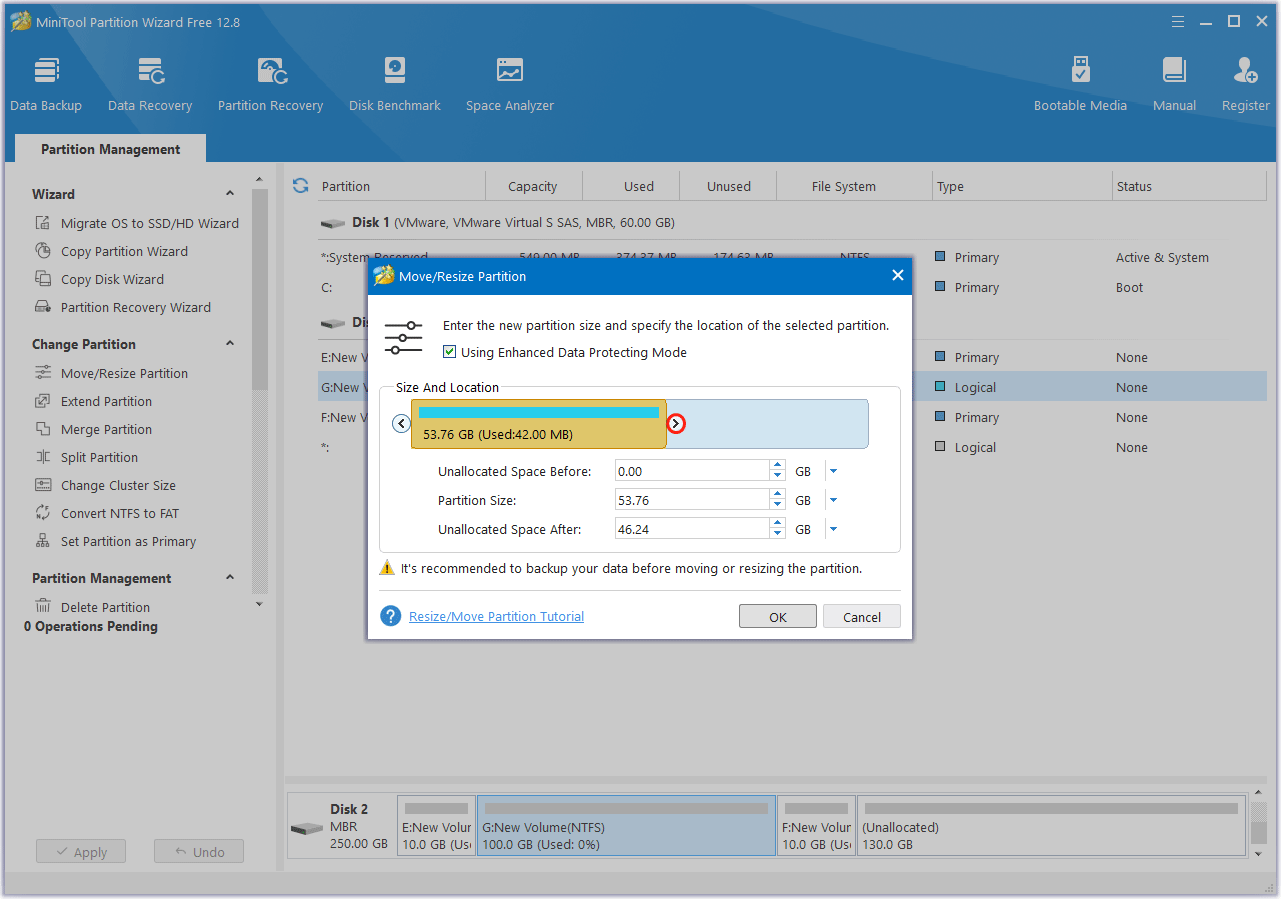
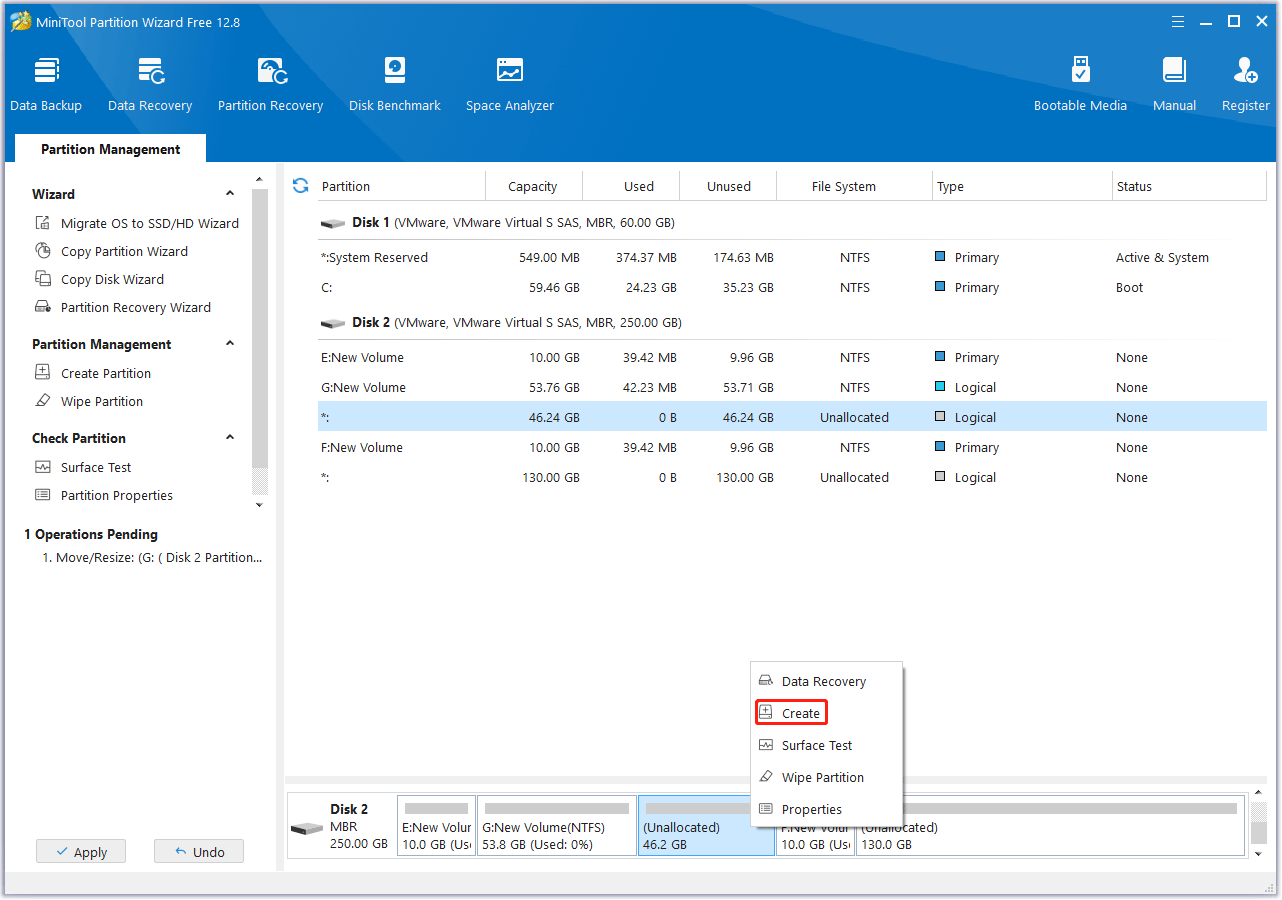
Step 3: As you can see, the shrunk space is not marked as free space. MiniTool Partition Wizard recognizes it as unallocated space. Then, you can use the Move/Resize feature to merge the unallocated space into the adjacent primary partition. Or, if possible, you can create another primary partition there.
Bottom Line
If you need to resize extended partition, the above methods may help you. If you encounter problems when using MiniTool Partition Wizard, send an email to [email protected]. We will get back to you as soon as possible.

![Is an Extended Partition Be Bootable & How to Do? [Answered]](https://images.minitool.com/partitionwizard.com/images/uploads/2024/01/can-extended-partition-be-bootable-thumbnail.jpg)
User Comments :