Seeing "Non-system disk or disk error replace and strike any key when ready" when booting Windows? How to get rid of this error message? Here MiniTool shows the best solutions that could be helpful in removing non system disk or disk error.
When booting up the computer, some Dell users encounter the following error which reads: “Non-System disk or disk error replace and strike any key when ready“. See the following image:
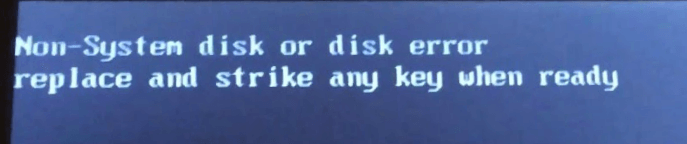
Reasons behind this error message vary. According to Microsoft, this issue may occur if your start device (such as a floppy disk drive, hard disk drive, or CD-ROM drive) does not contain boot files. But, users also report more possible reasons. In this post, we tell you how to fix the non system disk error by trying 8 solutions.
Fix 1. Remove All Non-System Disks
Similar to the “Boot Device Not Found” issue, the first step to try is to remove the non-system disk from your boot device because the boot order can be changed for some reasons. For example, you can remove any non-system disk from the floppy drive or eject the disk from the CD-ROM drive. Then turn off and on the computer to have a check.
Fix 2. Confirm the Boot Sequence
You can also enter BIOS to confirm whether the disk containing boot files is set to the first place of the boot order. If not, you will need to change your computer’s boot sequence. To do this, you must change your computer’s setup and the option that controls which device your computer uses to start from. Make sure that you select a device that has boot files (or operating system files) installed.
Fix 3. Remove and Reinstall the Hard Drive
If the computer was dropped or jarred, there may be a bad connection between the hard drive and computer. You might have to remove and reinstall the hard drive. Here is how to fix non system disk error this way:
Step 1. Cut off the power.
Step 2. Remove the battery if it is a laptop.
Step 3. Remove the system disk.
Step 4. Reinstall the system disk.
Step 5. Reinstall the battery if it is a laptop.
Step 6. Power on the computer.
Fix 4. Perform Startup Repair
Startup Repair helps fix non system disk or disk error in most cases. First of all, disconnect any external devices connected to the computer. Then inject a Windows installation disc. Finally, follow the below-mentioned steps to troubleshoot the issue:
Step 1. Enter BIOS and set PC to boot from the installation disc.
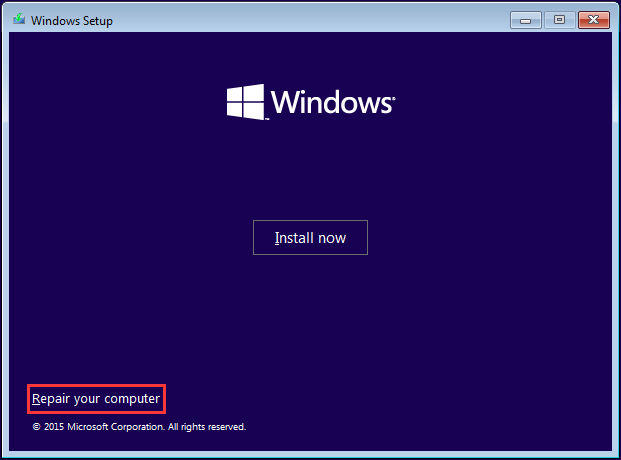
Step 2. Wait for Windows to load files. When you see the Windows Setup interface (for Windows 10 it is “Windows Setup”; for Windows 7 it’s “Install Windows”), select the language, time and currency format, keyboard or input method and click Next.

Step 3. Click the Repair Your Computer link.
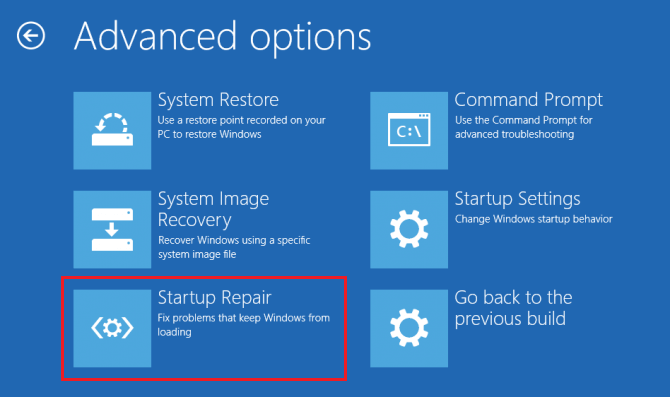
Step 4. For Windows 10 users, select Troubleshoot –> Advanced options –> Start-up Repair –> Choose a target operating system and then Windows will start diagnosing your system. If a problem is found, Windows will try to fix the problem automatically or suggest a solution. Just follow the prompt to fix the “Non-System disk or disk error” issue.
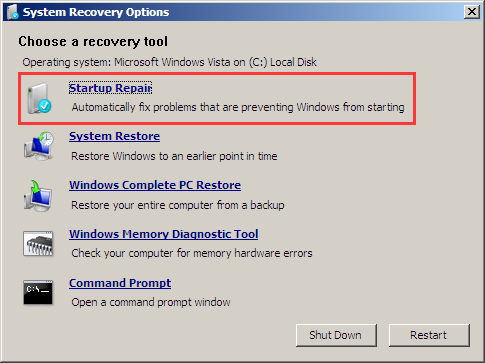
For Windows 7 users, wait for the System Recovery Option to load your operating system. When your operating system is listed in the box, just select it and click Next to fix any problems when starting Windows. You will be asked to choose a recovery tool. Here, choose the first one named Startup Repair. Please wait patiently while this tool is searching for problems and trying to resolve the issue.
Step 5. After following these steps, click Finish to restart your computer.
But, if no problem is found, you can go for the rest of the solutions with the help of MiniTool Partition Wizard Bootable CD.
Kind remind: To get MiniTool Partition Wizard Bootable CD, you should first of all get MiniTool Partition Wizard Pro and then make use of its Bootable Media feature to create a bootable media. The following two articles will help you create and boot your computer from MiniTool Bootable Media.
- How to Build Boot CD/DVD Discs and Boot Flash Drives with Bootable Media Builder
- How to Boot from Burned MiniTool Bootable CD/DVD Discs or USB Flash Drive
MiniTool Partition Wizard DemoClick to Download100%Clean & Safe
Fix 5. Repair MBR
Virus infections and hard drive failures often lead to MBR (master boot record) damage. Many viruses target the MBR, the most important part of your hard drive. If the area where the MBR is located contains a few defective clusters, the MBR is rendered unreadable, bringing the “non-system disk or disk error replace and press any key when ready” message.
Luckily, MiniTool Partition Wizard is able to create a brand new master boot record allowing your computer to now boot normally.
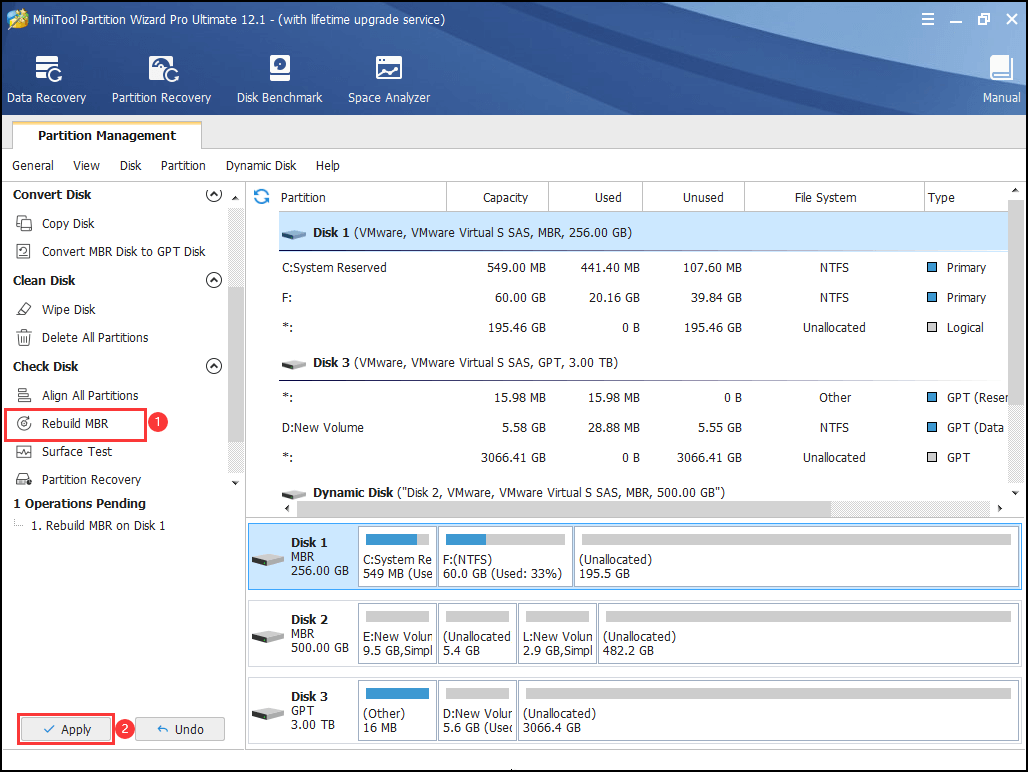
Step 1. At the main interface of the MiniTool Partition Wizard Bootable CD, select the system disk and choose Rebuild MBR from the action panel.
Step 2. Click Apply at the top left corner to confirm this operation.
However, if the “Non system disk or disk error” error message insists, repairing the HDD’s boot sector, master boot record and BCD (Boot Configuration Data) would be the next step. To do so, you need the help of a Windows installation disc.
Step 1. Insert a Windows installation disc into the affected computer and set it as the first boot device in your computer’s boot order.
Step 2. When you see the Windows Setup window, press Shift+F10 at the same time to call out the command Prompt window.
Step 3. Type the following commands into the Command Prompt and press the Enter key after typing in each one:
- bootrec /fixmbr
- bootrec /fixboot
- bootrec /rebuildbcd
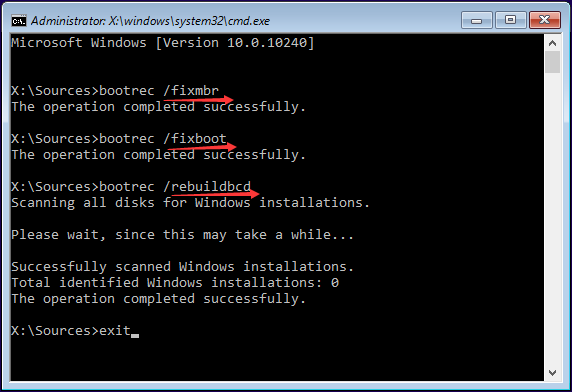
Then you can remove the installation disc, restart the computer and see if the non system disk or disk error has been resolved.
Fix 6. Set System Partition Active
Several HP users also report their issue is successfully fixed by setting the system partition active. As we know, a virus attack can get the system configuration wrong leading to the system partition being inactive and further causing the non system disk or disk error.
MiniTool Partition Wizard Bootable CD can help you check whether the system partition is set as inactive partition and reset it to active if things get messed up.
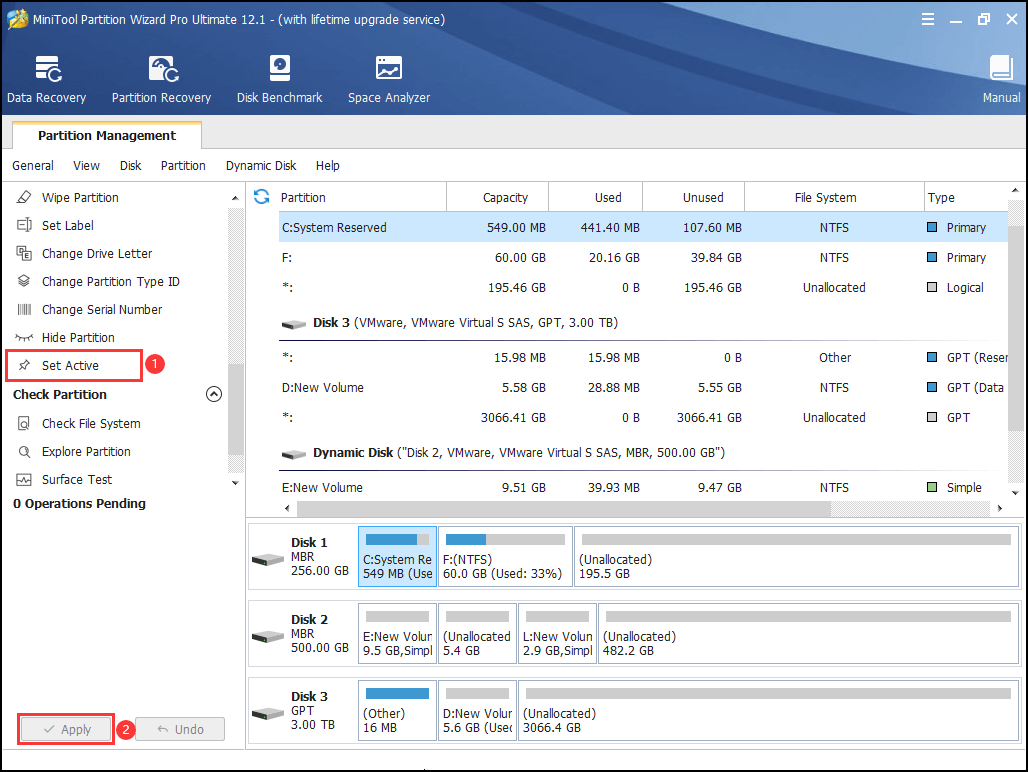
Boot your computer to the main interface of MiniTool Partition Wizard Bootable CD and then view the status of all the partitions on the boot disk. If you see no partition is set as active or a wrong partition is set as an active, just select the system partition and then choose Set Active from the action panel. Finally, click the Apply button on the tool bar.
Kind remind: you can also do this job in the command prompt of the Windows installation disk. Please set your computer to boot from the installation disc. Then press Shift + F10 at the same time to load the command prompt. Now, type these commands in order:
- Diskpart
- List disk
- Select disk 0 (System drive is always configured as disk 0. However, enter the correct number in your own case.)
- List partition
- Select partition 1 (System partition is always configured as partition 1. However, enter the correct number in your own case.)
- Active
- Exit
You might also be interested in reading Should a System Partition be an Active Partition for a Normal Boot.
Fix 7. Check Bad Sector
Many computer startup issues are caused by minor errors like bad sectors on the hard drive. The hard drive test will detect these errors for you to have a reference. Please make sure there is a good physical connection between the hard drive and the computer. Then, you can enter the main interface of your MiniTool Partition Wizard Bootable CD.
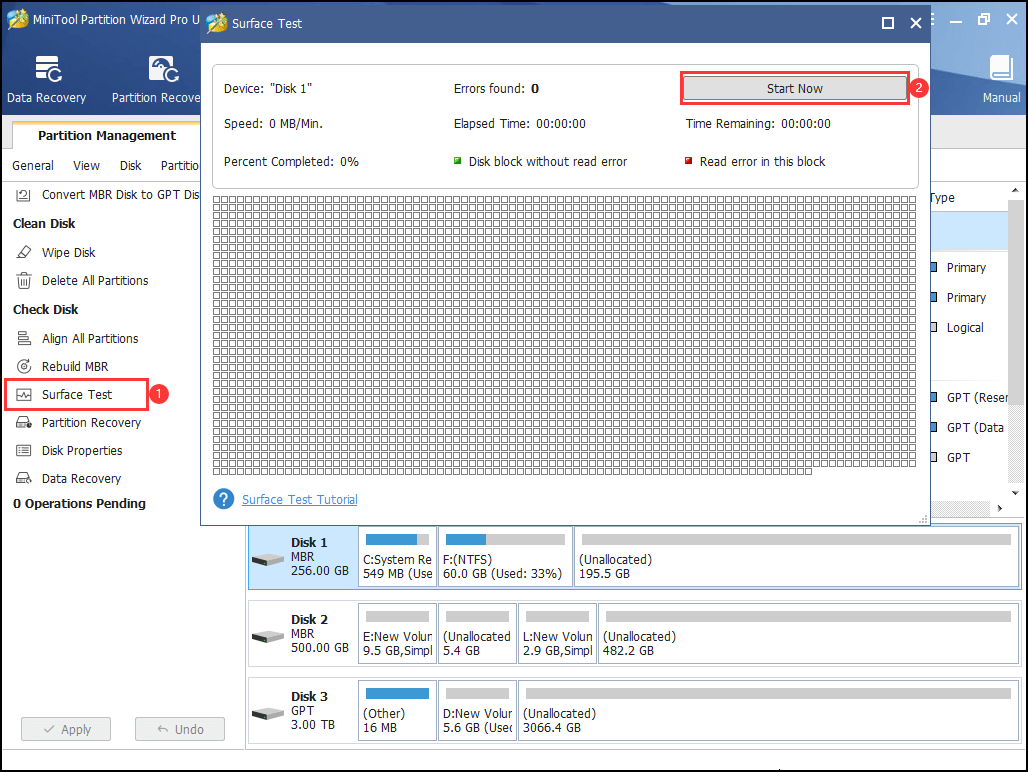
Step 1. Select the boot device and choose Surface Test from the action panel.
Step 2. In the pop-up window, click Start Now to begin the test. Note that if any error is found, the corresponding small block will be marked with red. If there are some bad sectors found, you should go ahead and follow Fix 8 below:
Fix 8. Replace Hard Drive and Reinstall OS
If there are a lot of bad sectors found on the drive, it most likely means your hard disk has crashed. We would recommend you back up all data immediately before it is too late. Then you may head to the repair center to shield the bad sectors and then reinstall Windows OR you may just replace the hard drive after the backup. (If you have the latest backup available, you can simply skip this part.)
Tip: before you back up the hard drive, it is necessary for you to check and fix the file system errors so as to copy the hard drive smoothly. Luckily, you can use a MiniTool Partition Wizard Bootable CD to complete both tasks.
How to Check and Fix a File System
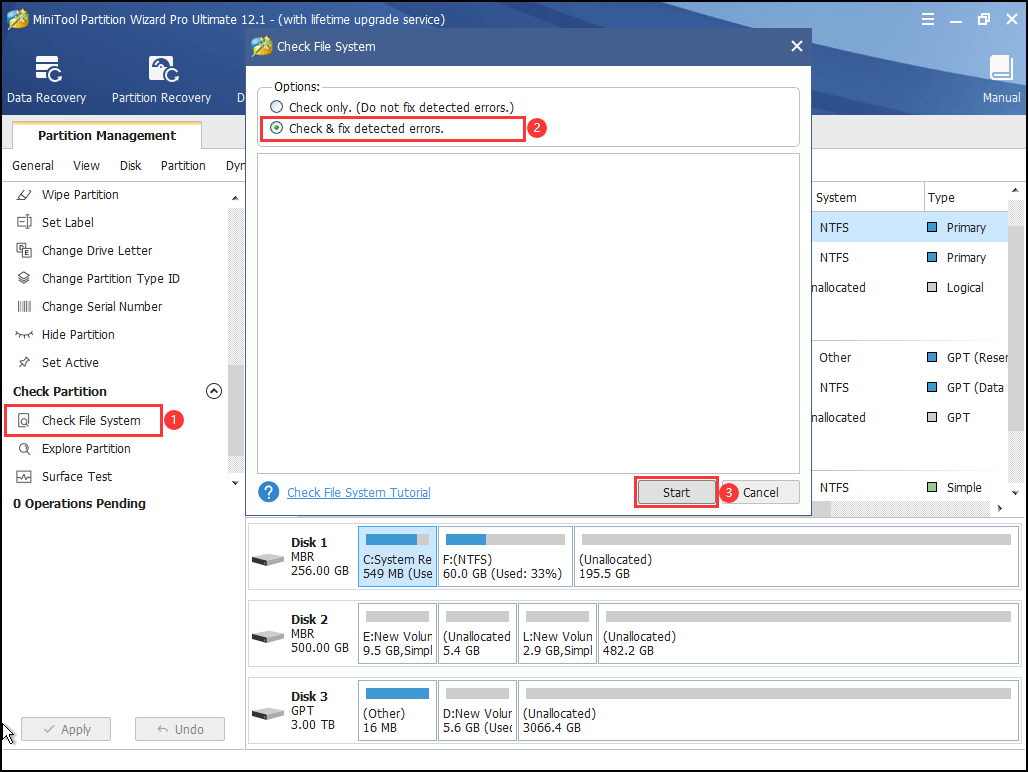
Step 1. Select a partition on the system disk and choose Check File System from the action panel.
Step 2. In the pop-up window, choose Check & fix detected errors and then press the Start button.
Repeat these steps on the rest of the partitions. When MiniTool Partition Wizard has finished checking and fixing all partitions on the boot drive, it is time for you to copy all data on it to make a backup in case this drive fails soon.
How to Back up the Boot Drive
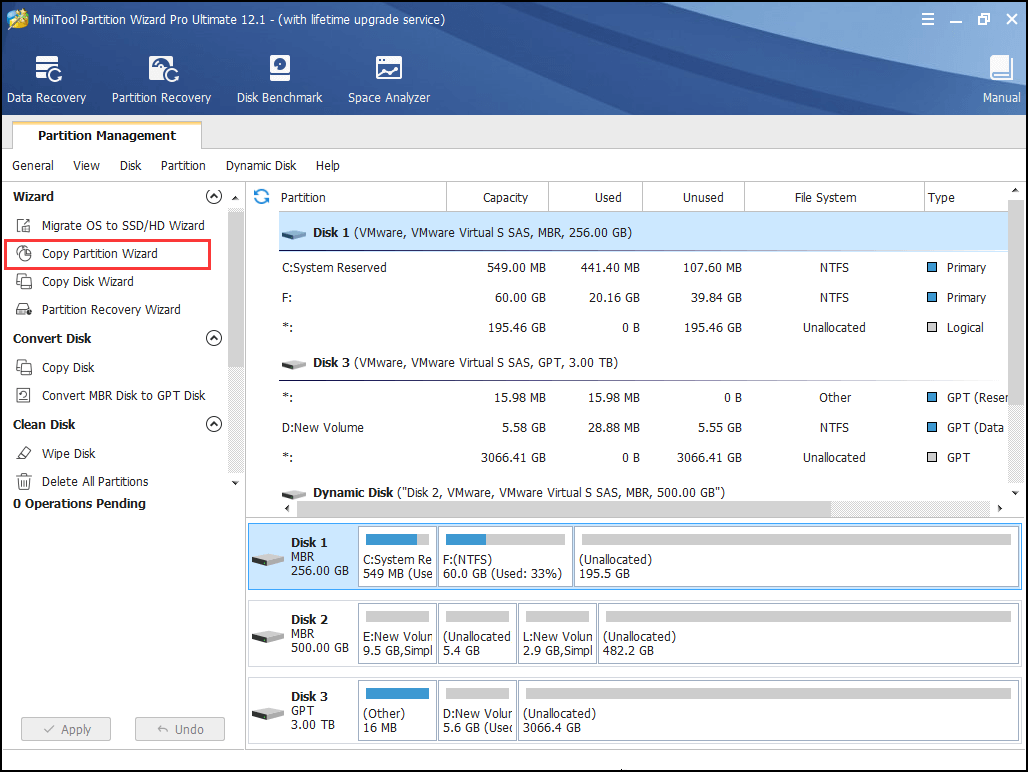
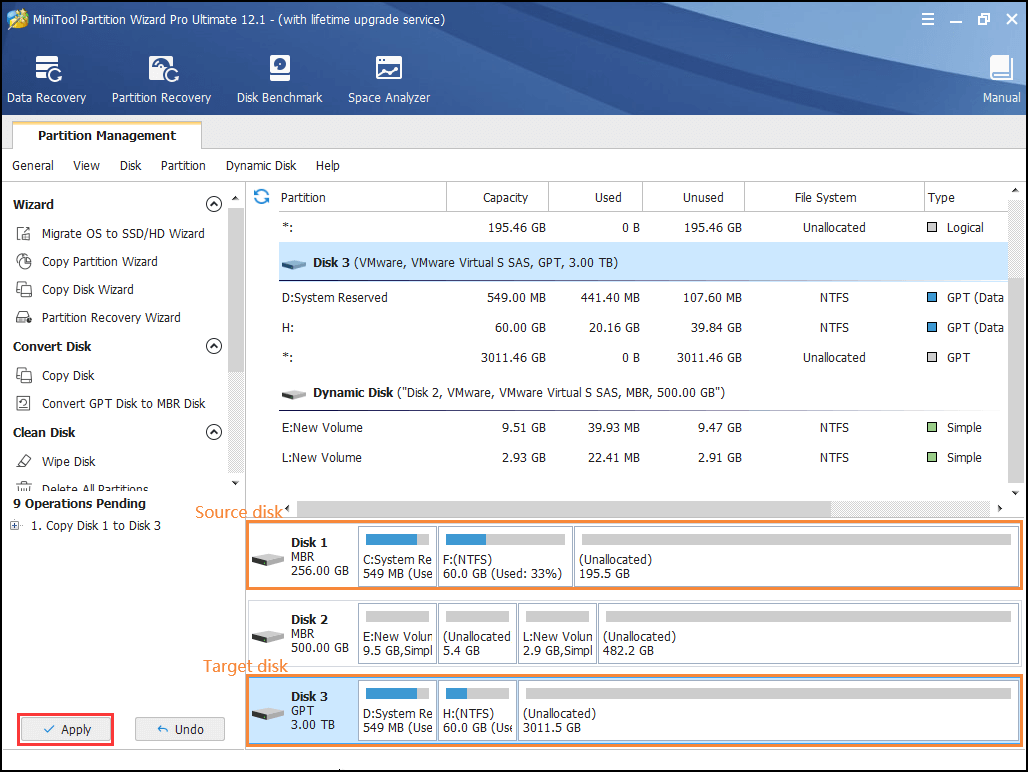
Step 1. Choose Copy Disk Wizard from the tool bar.
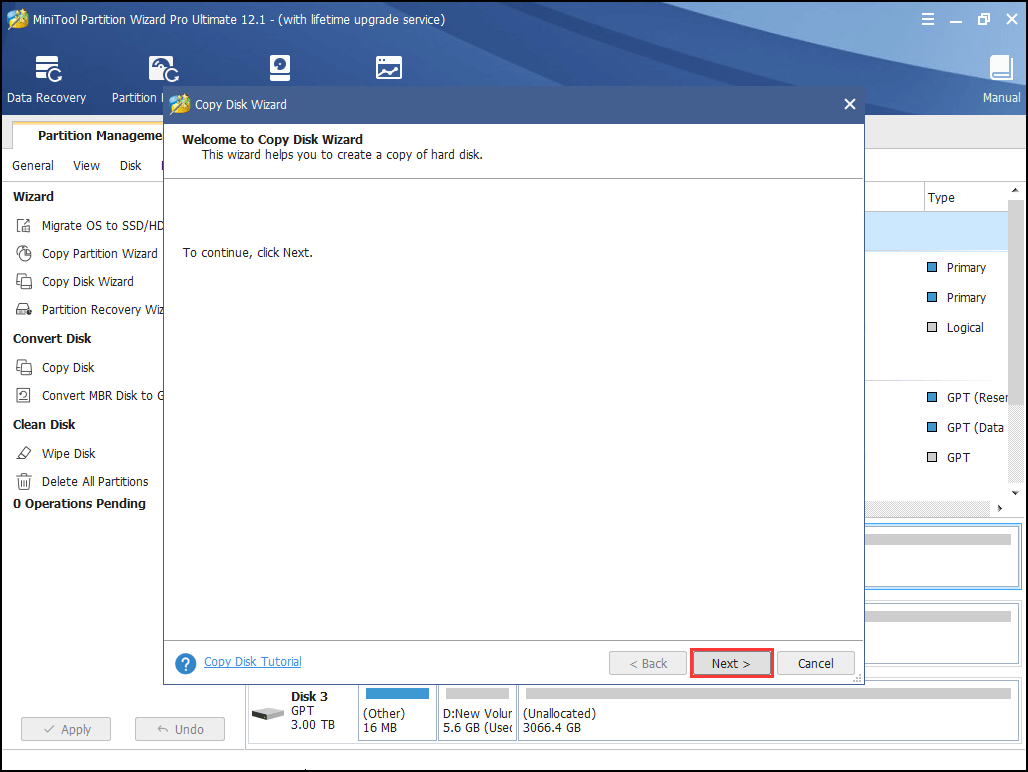
Step 2. Skip the welcome page by clicking Next.
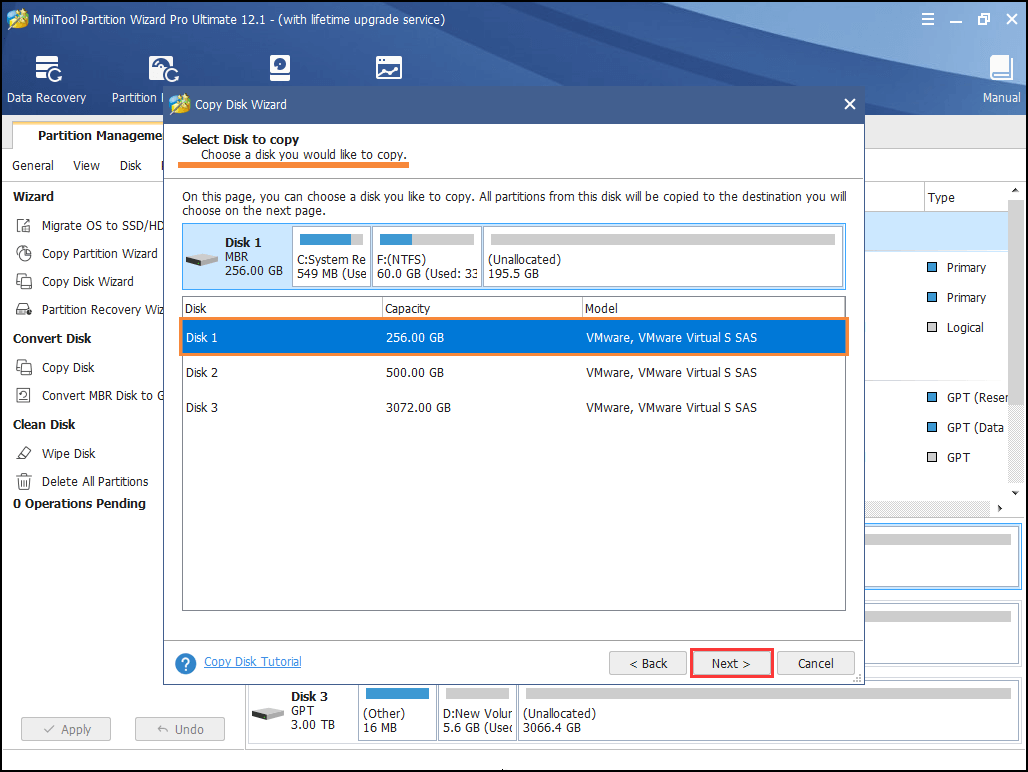
Step 3. Select the system disk as the drive you want to copy and then click Next.
Step 4. Select a hard drive as the target disk. Note that the target disk should be a basic disk, and all data on it will be removed. Hence, please make sure the selected target disk can be cleaned or back up the important data first if there is any. Then click Next to go on.

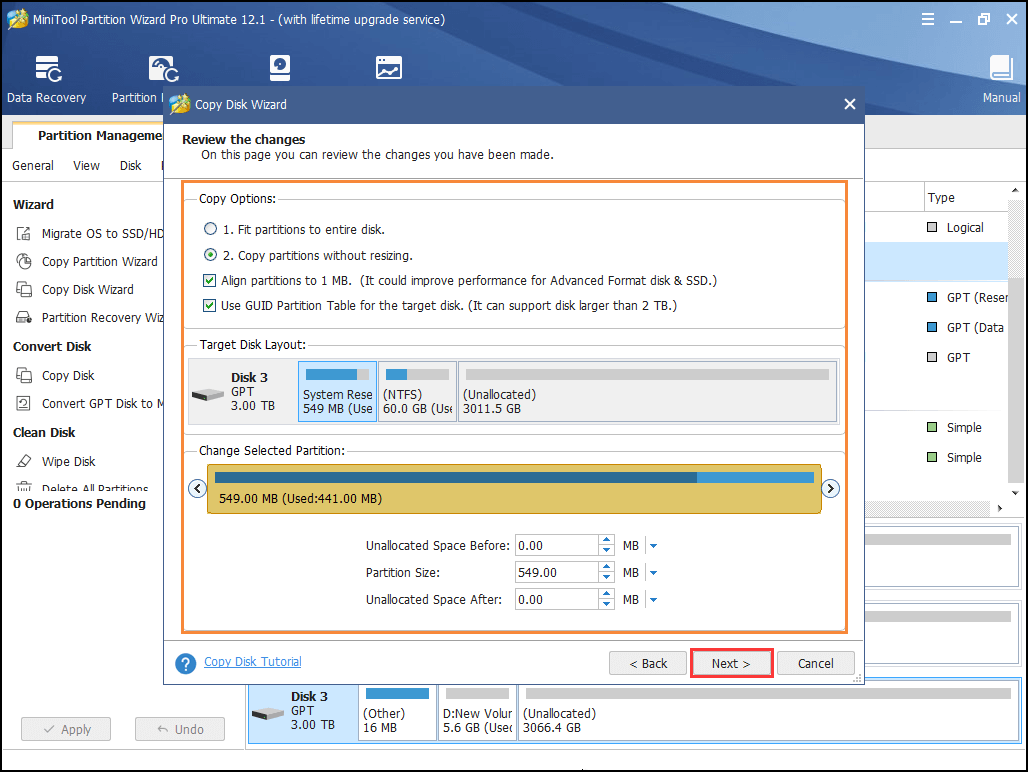
Step 5. In the next interface, you can preview the default disk layout of your target disk. Or you can choose other copy options and then drag the slider bar to adjust each partition size. Click Next to continue.
- Fit partitions to entire disk will automatically adjust each partition size to occupy the whole disk space.
- Copy partition without resize will copy all partitions there with their original partition size. This requires that the target disk is not smaller than source disk.
- Align partitions to 1 MB will improve the disk performance if the selected target disk is an SSD or advanced format disk.
- Use GUID Partition Table will turn the target disk to a GPT disk.
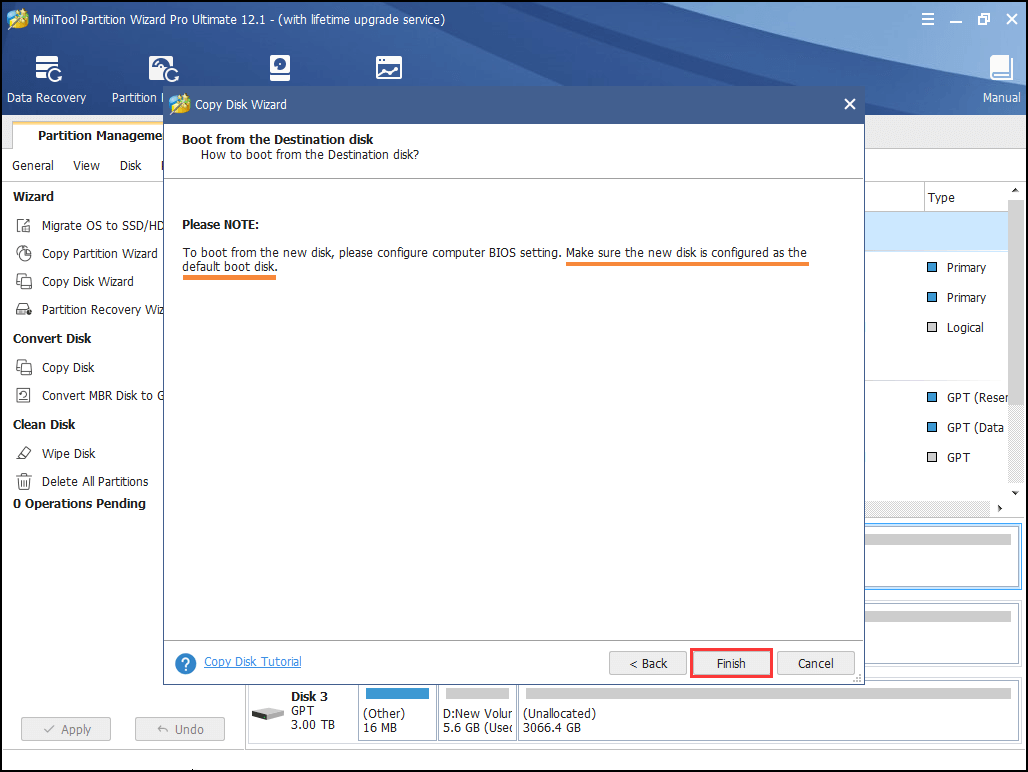
Step 6. Here you will be told how to boot from the target disk. Since the original operating system is unbootable, you can ignore this message and click Finish.
Step 7. Finally, click the Apply button to start the copy.
MiniTool Partition Wizard DemoClick to Download100%Clean & Safe
You might also be interested in Recover Data Back After OS Crashed During the Windows 10 Upgrade.
A kind reminder: The above solutions are all based on the condition that the system disk is successfully recognized in BIOS. If the system disk cannot be recognized even by the Windows installation media and no backup is available, you need to give the disk to a data recovery service which is likely to be an expensive option. In addition, to get a normal running OS, you will need to buy another hard drive and install the Windows operating system on it.
Summary
So, the bottom line here is that when your computer reports a “Non-System disk or disk error”, you can try the above methods one by one to try and solve the error message yourself. We hope you never need to try the last one. If you have any further questions or suggestions, type your idea in the following comment section. Or you can contact our support team via [email protected]. Thanks in advance!
About The Author

Position: Columnist
Rodin is an enthusiastic IT writer focusing on Windows trends, disk partition management and data recovery. She loves to write and share her idea about the useful tips and tricks on personal computers' maintenance. If you are looking for methods to improve your computer performance, manage hard drives and recover data from different devices, Rodin can provide reliable solutions for data management.
User Comments :