You may have received an error message saying “movie recording has been stopped automatically”, which prevents you from shooting the video. Why does this happen? This post from MiniTool Partition Wizard tells you the reasons and offers the corresponding solutions.
Why Did Movie Recording Stop Automatically?
When you use the camera to record, it may stop recording after a certain number of minutes. When this happens, it is usually followed by an error message “movie recording has been stopped automatically”.
The problem “movie recording has stopped automatically” may be caused by a variety of factors. Some common reasons are as follows:
- The most direct reason is that the camera’s battery is insufficient, so movie recording has been stopped automatically. The way to solve this problem is simple. You just need to charge the camera.
- If the camera gets hot, it may automatically shut down and stop recording. Once this happens, it is wise to turn off the camera and let it cool down for a while before continuing to shoot.
- If the SD card storage space is full, it means that there will be no more space for recording, causing video recording to stop. You need to delete some of your images and videos.
- The memory card in the camera may not be able to handle high-quality videos. Cards with slow writing and reading speeds will not be able to record high-quality video.
- The SD card has a FAT32 file system that supports a single 4GB file at most, so when the file size reaches the limit (4GB), the recording will automatically stop.
- A damaged SD card may cause video recording to stop automatically. So, you need to check or format your SD card.
Quick FIX: Photos on SD Card Not Showing on Computer
How to Fix the “Movie Recording Has Stopped Automatically” Error
Now you have already known the reasons of “movie recording has been stopped automatically”. How to solve this problem? Here are solutions. But the first 3 reasons and their solutions are very simple. Therefore, in this part, I only introduce solutions for the rest reasons in detail.
Method 1: Control the Bit Rate of the Camera
Bit rate refers to data transmission speed after the video is encoded and compressed. The higher the bit rate of the video file, the clearer the playback. Generally, the maximum bit rate of the camera is often the upper limit of its video recording bandwidth.
Therefore, if the bit rate of the camera is higher than the bit rate that the card can handle, it will also trigger the error “movie recording has been stopped automatically”. The camera provides several recording modes and video formats, and you need to choose the low-level mode and video format.
Method 2: Convert FAT32 to exFAT
If your SD card uses the FAT32 file system, you need to convert it to exFAT. To do that, please back up video and image files to a safe place and then reformat it to exFAT using Disk Management. Here is the guide:
Tip: exFAT can help you get rid of the file limit of 4GB. But to use exFAT file system, you should make sure your camera supports this file system.
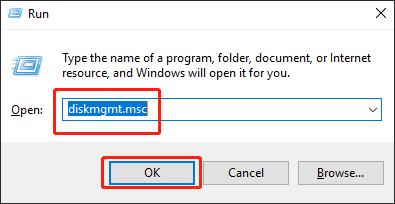
Step 1: Press the Win + R keys to open the Run window on the computer.
Step 2: Enter diskmgmt.msc and click OK or tap Enter to open Microsoft Management Console.
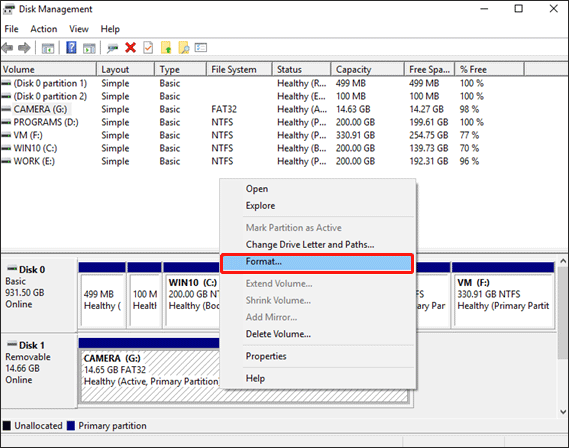
Step 3: Right-click on the target partition and select Format.
Step 4: In this interface, you need to choose exFAT file system, and then click OK.
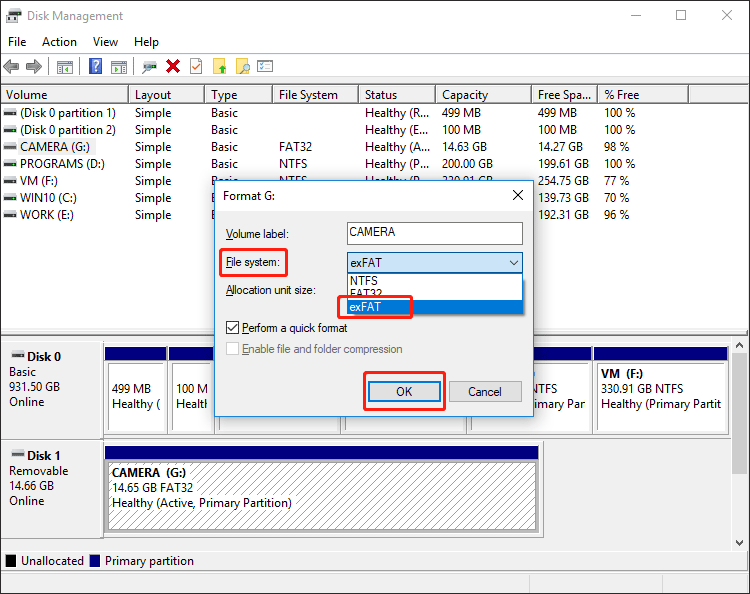
After formatting the FAT32 to the exFAT, you can use your cameras without recording limit.
NTFS vs. FAT32 vs. exFAT – Differences and How to Format to
Method 3: Check the SD Card
If your SD card doesn’t use FAT32, but exFAT instead, it means that the error is not caused by 4GB file limit. In this case, you should consider checking the SD card for errors. How to check it? You can do that with the help of MiniTool Partition Wizard.
In MiniTool Partition Wizard, Check File System is designed to check and fix a damaged file system or the partition. Using Check File System is very simple. Just insert the SD card into the computer, and then follow the steps below to check it:
Step 1: Download MiniTool Partition Wizard Free Edition by clicking the following button. Follow the on-screen instructions to install it on your computer.
MiniTool Partition Wizard FreeClick to Download100%Clean & Safe
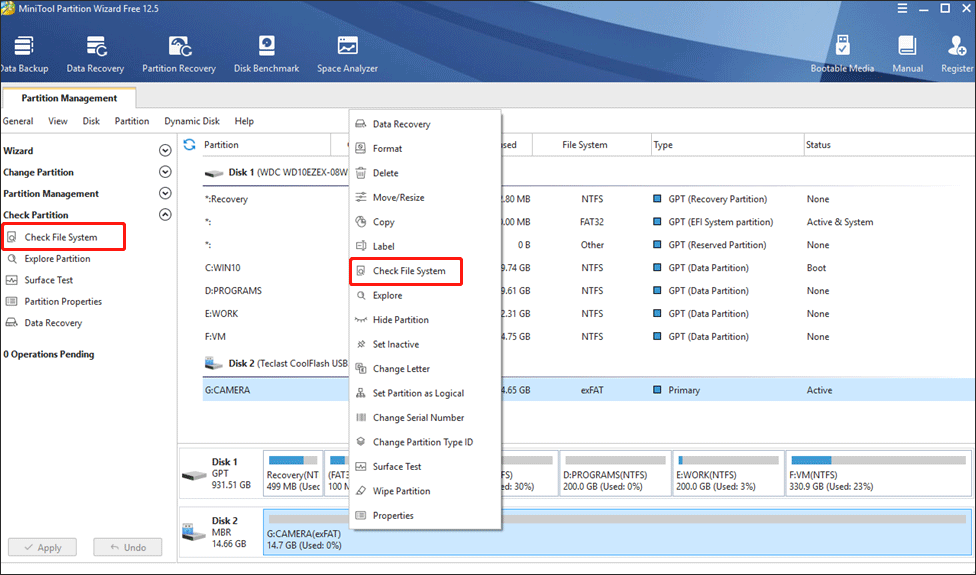
Step 2: Launch MiniTool Partition Wizard to its main interface. Choose one of the following ways to activate Check File System function:
- Click the target partition, and then click Check File System from the action panel.
- Right-click on the target partition and choose Check File System option from the context menu.
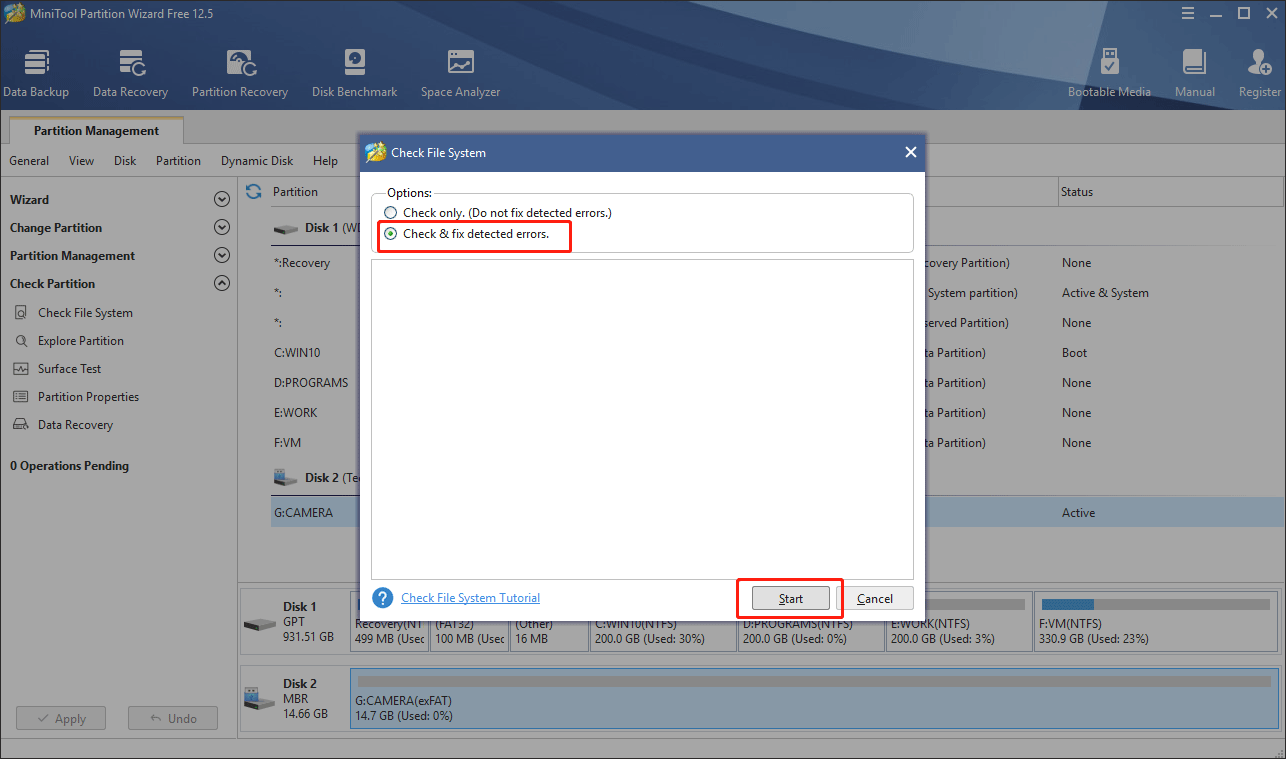
Step 3: In this interface, a new window with two options: Check only and Check & fix detected errors. Now you need to select the latter one to fix mistakes during the checking process. Then, click Start button and MiniTool Partition Wizard will check and fix the file system immediately.
Method 4: Format the SD Card
If you have checked and fixed your SD card, there is still a “movie recording has stopped automatically” error in the camera. At this time, you need to format the SD card and this may fix errors.
Cameras also have the format function. Take the Canon EOS 600D series as an example. The steps are as follow:
Step 1: Turn on the camera’s power button, flip the LCD screen, and display the parameters.
Step 2: Click the MENU in the upper left corner to enter the menu setting interface.
Step 3: Switch it to the seventh page, you can see the Format card option inside, select it.
Step 4: Enter the formatting interface, you can see the basic data situation, and then you can use Erase button to choose Low-Level format. The Low-Level format takes longer, but the formatting is more thorough.
Step 5: After selecting, click OK. The system will start formatting, and all the data originally stored in the memory card will be formatted.
Method 5: Choose a High-speed SD Card
How to Choose 4K Camera & Recommendations
Verdict
Now you have known the methods to solve the problem “movie recording has stopped automatically”. If the “movie recording has stopped automatically” error appears on your camera, you can try the above methods.
If you have any questions about how to fix the “movie recording has stopped automatically” error, please leave them in the comment zone and we will try our best to answer them. If you need any help when using MiniTool software, you can contact us via [email protected].
User Comments :