If you are experiencing Intel Optane Memory Pinning issue and seeking corresponding solutions, you are at the right place. In this post, MiniTool will give further information about Intel Optane Memory Pinning and provide several feasible workarounds.
The Intel Optane Memory is a smart technology that helps to access to data on your computer quickly. But most users reported that the Intel Optane Memory Pinning issue comes up after they update to the latest version of Windows 10. To get more details, just keep reading this post.
About Intel Optane Memory Pinning Error
Introduced by Intel in 2017, Intel Optane Memory is used for various Core-series processors and works to make computers more responsive. Intel Optane Memory can find, remember and store your most frequently used applications, files and so on to help you access to these data more quickly next time.
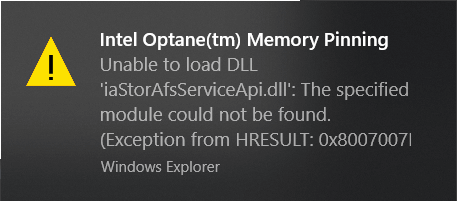
However, the Intel Optane Memory Pinning error has been reported by plenty of users. According to the report, this error appears after a Windows feature update version 1903. Commonly, it comes up with an error message: Intel Optane Memory Pinning unable to load DLL ‘iaStorAfsServiceApi.dll’: The specified module could not be found.
Why does this error occur? The Intel Optane Pinning Explorer Extension should be the culprit. After completing a major update, your Windows will try to reinstall all your system devices with the latest drivers. But there might be an instance when Windows throws an error and leaves your device half installed due to incompatibility.
In our case, the Intel Optane Pinning Explorer Extension might lack the required drivers and thus fail to access and load iaStorAfsServiceApi.dll. What can you do if you are facing this issue? Here, several solutions are listed for you and you can feel free to have a try.
Fix 1: Repair Intel Optane Explorer Extensions
At first, you can try repairing the problematic Intel Optane Explorer Extensions. To do that, you can refer to the steps below:
Step 1: Press Windows + S to open Search. Type control and click Control Panel from search results to open it.
Step 2: Go to Programs > Programs and Features.
Step 3: Choose Intel Optane Pinning Explorer Extensions from the lists and click Repair button.
You just need to wait until the repair process is completed. Then, restart your computer to check if Intel Optane Memory Pinning issue is fixed.
Fix 2: Uninstall Related Driver
If the problem still appears, you might need to uninstall the related driver which might become faulty during Windows update. Here’s the steps:
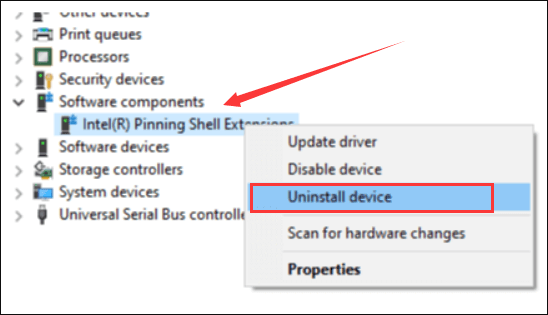
Step 1: Right-click the Start button and choose Device Manager to open it.
Step 2: Double-click Software components to expand the category.
Step 3: Right-click Intel® Pinning Shell Extensions and choose Uninstall device from the context menu.
Step 4: In the pop-up window, check Delete the driver software for this device and click Uninstall button to confirm the operation.
After uninstall the driver successfully, restart the device and your Windows will install the latest version of the drive automatically.
Fix 3: Remove Intel Optane Pinning Explorer Extensions
If the above solutions fail to fix Intel Optane Memory Pinning error, perhaps you need to remove the current Intel Optane Pinning Explorer Extensions. Just go to Programs and Features interface of Control Panel, right-click it and choose Uninstall. To get more methods to uninstall a program, you can check this post.
After that, you can visit the manufacturer’s website, download the latest version of Intel Optane Pinning Explorer Extensions and install it on your computer.

User Comments :