A motherboard is the most important part of a computer. All the components of the computer like CPU, RAM, etc. are plugged into the motherboard. This post from MiniTool Partition Wizard shows you how to install motherboard.
Things You Need to Know
Some people may want to know how to replace motherboard. Actually, if you know how to install motherboard, you can naturally know how to replace motherboard.
In general, the motherboard installation process is as follows:
- Install the CPU on the motherboard.
- Install the M.2 SSD on the motherboard if you have one.
- Install the CPU radiator on the motherboard.
- Install the motherboard to the PC case.
Why do you need to install the CPU, the M.2 SSD, and the CPU radiator to the motherboard before you fasten the motherboard to the PC case? The reasons are as follows:
- Before installing the motherboard to the case, the CPU and CPU cooler must be installed, because installing the CPU cooler may require screws to be installed from the back of the motherboard.
- The M.2 SSD slot is generally located under the CPU slot. Some CPU radiators will cover this place, affecting the installation of the M.2 SSD. It is recommended to install the M.2 SSD before the installation of the CPU cooler.
As for the installation of other PC parts like RAM, PC fans, PSU, GPU, SATA hard drives, etc., you can connect them to the motherboard after the motherboard is fastened to the PC case.
How to Install Motherboard
Stage 1. Install the CPU and the M.2 SSD
Taking an Intel CPU as an example, the CPU installation should be as follows:
Step 1: Push down on the metal arm next to the socket, pull it slightly away from the socket, and then lift it up. Then, lift up the metal frame covering the empty socket.
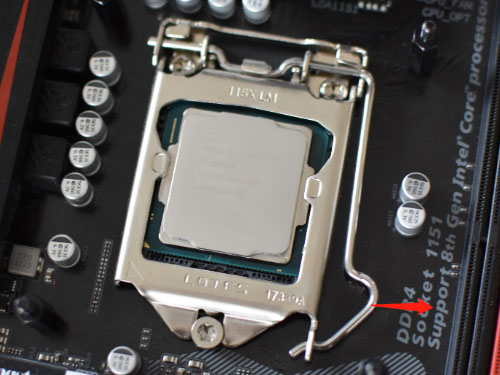
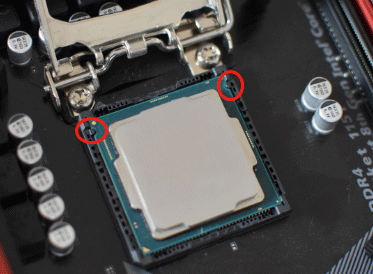
Step 2: Plop the processor into the slot. There are little notches on the side of the chip that align with tiny protrusions in the socket. They can help you insert the CPU into the slot correctly.
Step 3: Then, you just need to restore the metal frame and the metal arm to their original places.
For an AMD CPU, you just need to lift up the socket’s metal arm as far as it will go. The socket will slide sideways a little. Hold the processor so that the pins on the underside are aligned with the holes in the socket and then insert it. Then, press the metal arm down. This will slide both the socket and the inserted CPU chip into the former’s original position, locking both in place.
The M.2 SSD installation is very simple. You can refer to this post: How to Install an M.2 SSD on Windows PC [Complete Guide].
Stage 2. Install the CPU Radiator
At present, most of the CPU radiators on the market are side-blowing radiators. These types of radiators generally have two types of fasteners: pressure buckle and back-lock buckle. The CPU radiator installation process will vary depending on the type of buckle you use.
#1. Pressure Buckle
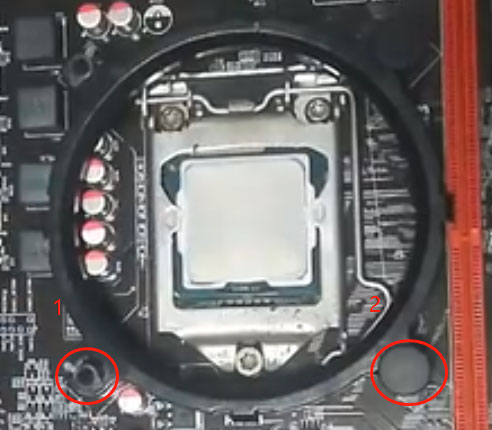
Step 1: Install the buckle.
- Adjust the transparent levers of the 4 holes on the round black bracket to correspond to the 4 holes around the processor slot, and then press down.
- Put 4 black upper plugs in the 4 holes of the bracket, and press them tightly.
Any pressure needs to be gentle. Otherwise, the motherboard may be bent.
Step 2: Coat the CPU with thermal grease (optional). If the CPU radiator is new, it may have thermal grease pre-applied on the bottom. Then, you can skip this step.
If you apply too much thermal grease, it may spill out and enter the socket. Such situations should be avoided, as they may damage the CPU and socket.
Step 3: Peel off the sticker on the radiator base. Place the CPU radiator on the CPU and then fasten it on the buckle. As for the fan direction, you can refer to this post: PC Fan Direction: How to Install Fans in PC.
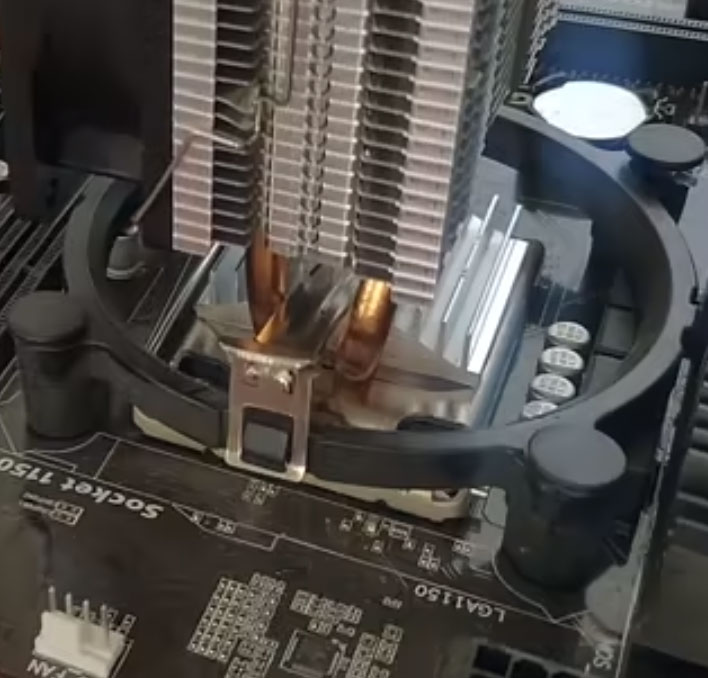
Step 4: Connect the radiator power supply cable to the CPU FAN slot above the CPU slot on the motherboard.
#2. Back-Lock Buckle
Step 1: Install the buckle.
- There are 4 holes around the CPU socket on the motherboard corresponding to the 4 screws of the buckle. Insert the screws of the buckle from the back to the front of the motherboard.
- On the front of the motherboard, install 4 large studs on the 4 screws, and tighten them with the attached nuts.
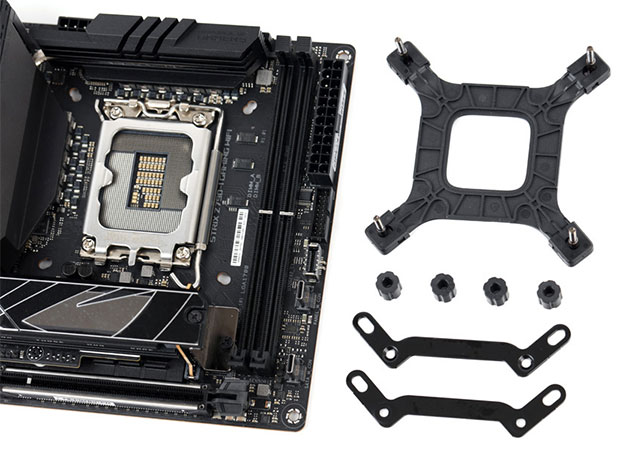
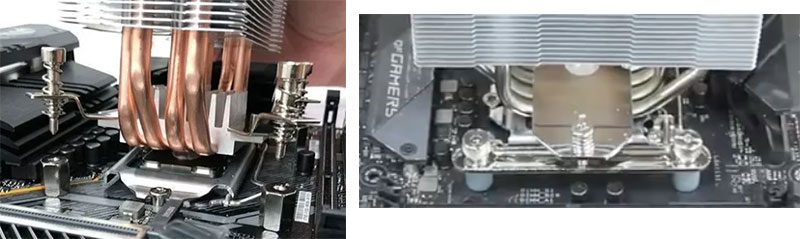
Step 2: Install the bracket of the CPU radiator. The bracket may be fastened to either the CPU radiator or the 4 large studs. It depends on the specific CPU radiator.
Step 3: Coat the thermal grease. Peel off the sticker on the radiator base. Fasten the CPU radiator with screws. Then, connect the radiator power supply cable
Stage 3. Install the Motherboard to the PC Case
Step 1: According to the position and quantity of screw holes on the main board, adjust the installation position of the copper pillars of the chassis accordingly. M-ATX boards generally have 6-8 pieces and ATX boards generally have 9 pieces.
Step 2. You need to do the following things before you fasten the motherboard on the PC case with screws.
- Adjust the PCI slot cover on the chassis. According to the position of the graphics card, remove the corresponding iron sheet. The iron sheet is generally pre-cut. You can remove it by turning left and right, leaving a place for the graphics card installation.
- Install the I/O panel shield. Note the direction of the I/O panel shield. The audio interface is located at the bottom, and the metal sheet of the interface hole faces the inside of the chassis.
- From the inside of the case, align the panel shield with the corresponding space and press it out. There are many raised dots around the panel shield, and the installation is successful if they are all snapped into place.
- Put the motherboard with the radiator installed into the case, align the position of the baffle interface (note that the metal sheet of the baffle interface does not get stuck on the motherboard interface) and the screw holes, and screw it on diagonally with small cap screws.
Then, you can fasten the motherboard to the PC case.
How to Install a Graphics Card in Your Computer? See a Guide!
Bottom Line
MiniTool Partition Wizard can help you clone the system, manage disks better, and recover data. If you have this need, you can download it from the official website.
About The Author

Position: Columnist
Linda has been an editor at MiniTool for seven years. She continuously learns about computers and puts her knowledge into practice. Moreover, she is particularly knowledgeable in disk management, data recovery, system installation, and PDF editing. Her articles typically reference multiple examples or are based on her own experience, providing users with the most suitable solutions.
User Comments :