Do you know Wake-on-LAN? Do you know it is rather useful for ordinary Windows users? In this post, MiniTool software will describe why you need to use Wake-on-LAN and provide the way to set up Wake-on-LAN.
Windows 10 provides a feature of Wake-on-LAN to allow turn on your computer remotely whenever you are away from it. Keep reading this post, you will get a brief introduction to Wake-on-LAN and how to enable it.
What Wake-on-LAN is and Why You Should Use It
Wake-on-LAN (WoL) is an Ethernet or token ring computer networking standard that allows a computer to be turned on or awakened by a network message, according to Wikipedia. It is a fantastic feature that can be of great use in many home and business networking scenarios.
Wake-on-LAN relies on “magic packets”. After enabling Wake-on-LAN, your computer will detect this package containing its MAC address and turn itself on. Thus, your PC can be woken up by sending it a magic packet from another device on the network.

To enable Wake-on-LAN feature and make it work, your computer has to meet some requirements:
- The computer’s network card should support WoL.
- The computer is connected with Ethernet.
- The computer must be in either Sleep, Hibernation, or Shut down (normal shutdown)

After applying Wake-on-LAN, you can benefit a lot:
- Access to files and resources on a network on-demand. You don’t have to keep your computer turned on all the time or during idle times.
- Save power. The power your computer consumes will reduction as it doesn’t need to run all the time.
- Manage your computer remotely conveniently.
After learning about Wake-on-LAN in detail, do you want to enable this feature for your computer? If your computer meets the requirements mentioned above, then continue reading and see how to enable it on your computer.
There are 2 parts for enabling WoL: you should enable it on Windows as well as BIOS. The detailed instructions are provided below.
Move 1: Enable Wake-on-LAN on Windows
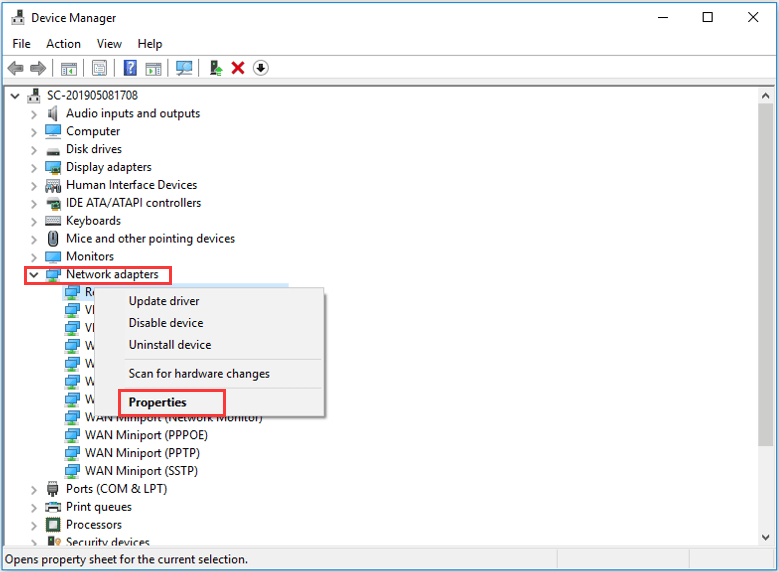
Step 1: Right-click Start button and select Device Manager from the menu.
Step 2: After opening Device Manager, locate and expand Network adapters. Now, find your network card and right-click it, then select Properties from the drop-down menu.
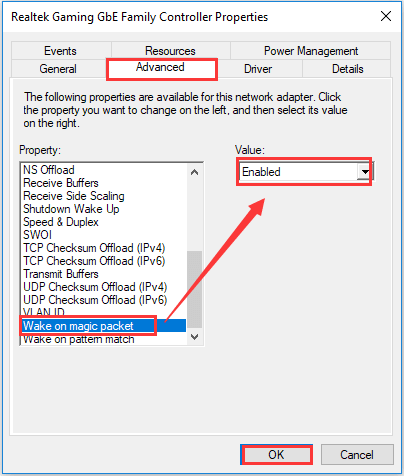
Step 3: In the pop-up window, switch to the Advanced tab and you will see all the properties available for this network. Then, find Wake-on-LAN property and set its value as Enabled and click OK.
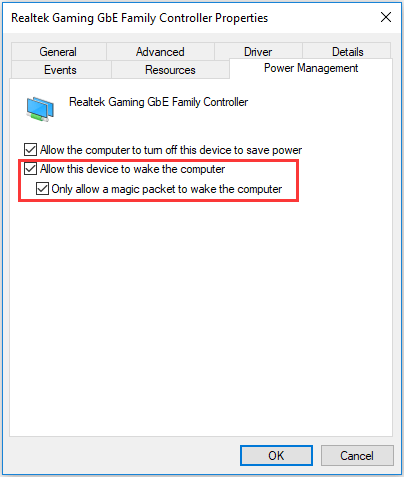
Step 4: Now, switch to Power Management tab. Make sure that Allow this device to wake the computer and Only allow a magic packet to wake the computer are checked, then click OK button.
In this way, you have enabled Wake-on-LAN on Windows
Move 2: Enable Wake-on-LAN BIOS
To make Wake-on-LAN work properly, you should also enable it on BIOS.
At first, you should enter your BIOS. You can do it by pressing a particular key according to the on-screen prompt while your computer is booting. Commonly, the key is Esc, Delete or F1.
In the BIOS menu, please switch to the Power tab and locate Wake-on-LAN entry. Set it as Enabled and save the change.

Troubleshooting Wake-on-LAN
Sometimes, Wake-on-LAN might not work even if you have enabled it successfully. It is most likely caused by the fast startup. To fix it, you should disable fast startup.

Just open your Control Panel and navigate to System and Security -> Power Options. Then, click Choose what the power buttons do from the left pane to get the following interface.
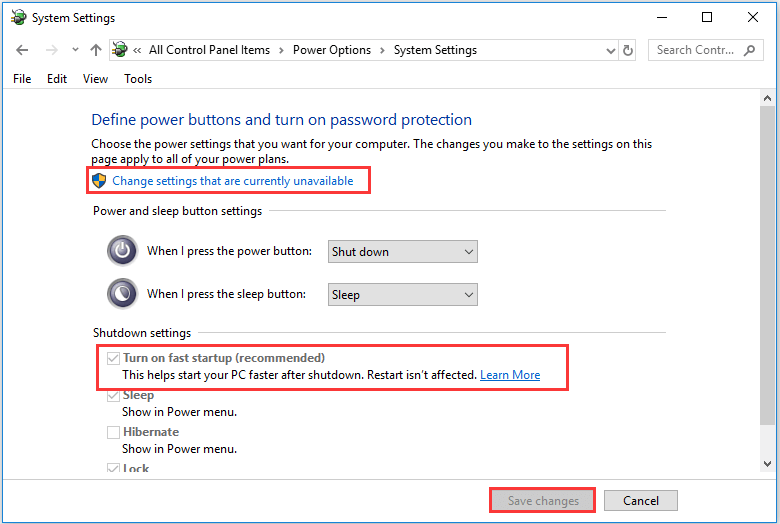
You can find Turn on fast startup option which is enabled by default under Shutdown settings. By default, the setting can’t be changed manually, so you need to click Change settings that are currently unavailable. Now, you can uncheck fast startup option to disable it and click Save changes.
Will you enable Wake-on-LAN on your computer? Follow the steps introduced above, you can enable it easily and fix the problem related to fast startup conveniently as well.
User Comments :