Sometimes, you may need to check the history of a printer to see what was printed. However, by default, your printed document history will be wiped after each document has finished printing. Therefore, to see what was printed can be somewhat difficult to monitor.
To make Windows 10 record your previously printed documents, you should enable logging within Windows 10.
Enable Short-Time Print History
You can easily view the list of items waiting to be printed (print queue) through the following steps:
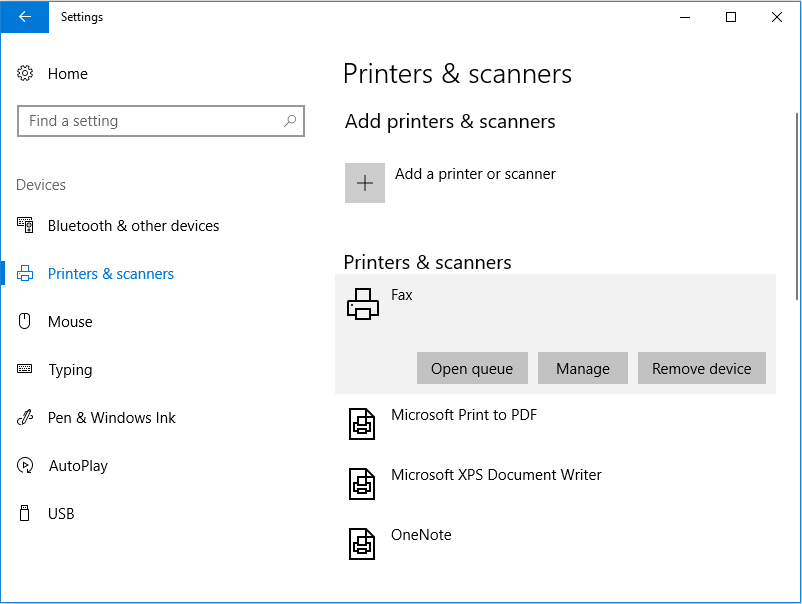
- Right-click the Windows Start menu button and select the Settings
- Navigate to Devices > Printers & Scanners.
- Under the Printers & Scanners section, click the printer whose printing history you want to check and then choose Open Queue. Then, a window pops up and you can see a list of current and subsequent print items.
By default, the print queue won’t show documents you’ve previously printed, but you can change some settings to make it record and display your previously printed documents for a short time. To do that, please refer to the following steps:
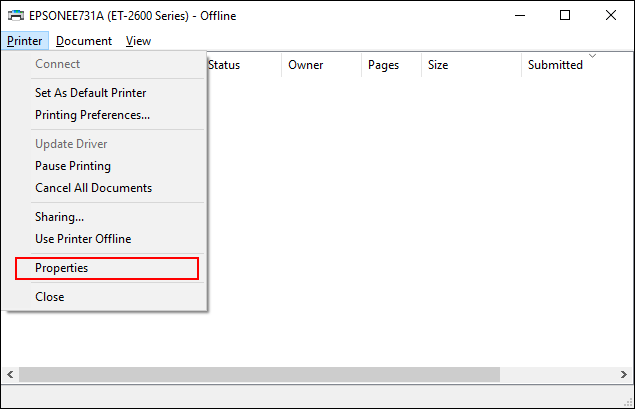
Step 1: Open the printer properties window through the following two ways:
- Open Settings window and navigate to Printers & Scanners section again. Then, click the printer and click Manage.
- Open the print queue window and then click Printer > Properties.
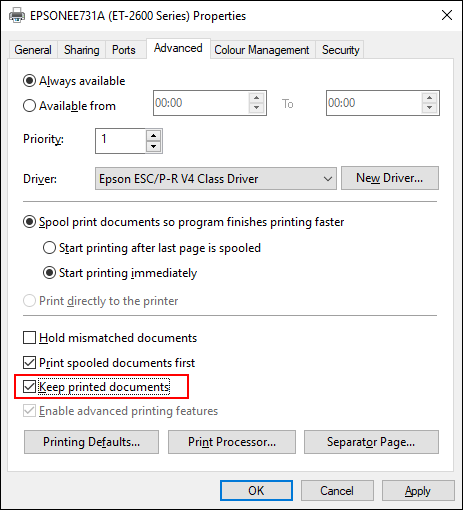
Step 2: Enable printer history through the following actions:
- After opening the printer properties window, click on the Advanced tab and then select the Keep Printed Documents
- Click OK to save your settings.
Although the print history is enabled and your documents will no longer disappear from your print queue after the printing process has completed, you should note that this method just provides a short-term overview of your previously printed documents. If you want to view a long-term list, you should use the next method.
Enable Long-Term Print History
Step 1: Press “Windows + X” keys simultaneously and then choose the Event Viewer option.
Step 2: Navigate to Applications and Services Logs > Microsoft > Windows. Then, scroll down to find the PrintService category.
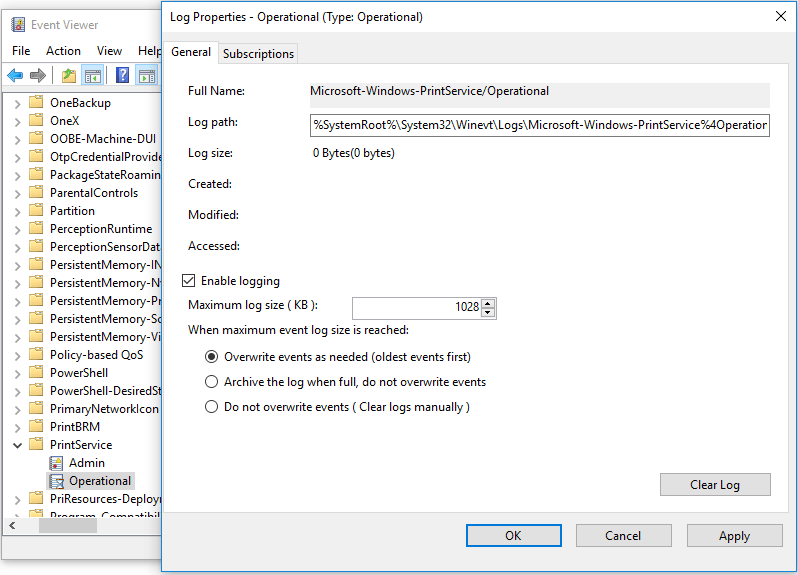
Step 3: Expand the PrintService category and right-click the Operational log. Then, click the Properties button, which will trigger a pop-up window.
Step 4: On the pop-up window, check Enable Logging option and then set a maximum size for the log. The larger the size, the longer Windows will record your printed document history. After that, click the OK button to save the setting.
Now, Windows will automatically save the printer history for all of your installed printers to a log file that you can access within Event Viewer. As for how to view the list of previously printed files in the Event Viewer, please refer to the following steps:
Step 1: Similarly, open the Event Viewer and navigate to the Operational log under the PrintService category.
Step 2: Click on the Operational log and then a history of all Windows printer events will be listed, from initial printer spooling to completed or failed prints.
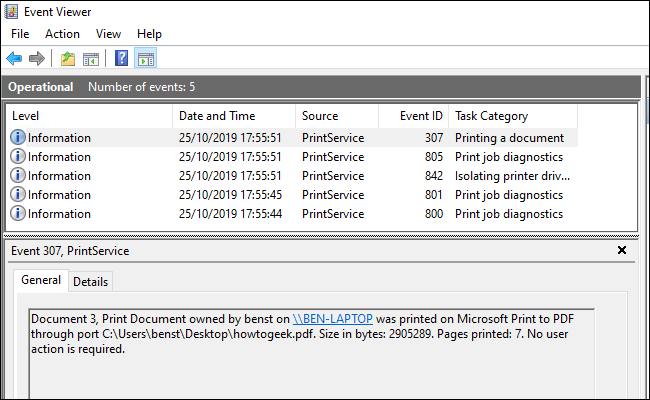

To make it easier to sort out the Printing a Document events, which indicate successful prints, you should right-click the Task Category heading and then click the Group Events by This Column button. Now, the print logs have been separated by categories.
Then, you can minimize the other categories, only leaving the Printing a Document category to be displayed.
About The Author

Position: Columnist
Linda has been an editor at MiniTool for seven years. She continuously learns about computers and puts her knowledge into practice. Moreover, she is particularly knowledgeable in disk management, data recovery, system installation, and PDF editing. Her articles typically reference multiple examples or are based on her own experience, providing users with the most suitable solutions.
User Comments :