Do you know how to connect a wireless printer to Windows 10? Here is an easy-to-follow guide for you. And you can use MiniTool Partition Wizard to speed up your Windows.
The Benefits of a Wireless Printer
Are you bothered with these times when you need to quickly print something but your printer is far away from you? Do you want to get away from a USB cable of your printer?
Connecting a wireless printer to Windows 10 PC will allow remote access, enabling Windows 10 to print, fax, and scan without being physically attached to the computer.
Let’s take a look at how to connect a wireless printer to Windows 10.
Connect a Wireless Printer to Windows 10
Stage 1: Connect the Printer to the Wi-Fi Network
To connect a wireless printer to Windows 10, you need to connect the printer to the Wi-Fi network first. Do the following things:
- Turn on the printer.
- Find an option to connect with theWi-Fi Usually, there is an user interface or Wi-Fi button which can help you make it.
You can see more details in the instructions provided in the box with your printer.
Related article: New Windows Update Causes Wi-Fi Issues on Surface Devices.
Stage 2: Add a Printer to the Computer
After you connect the printer to the Wi-Fi network, you need to add a printer to the computer.
Step 1: Right-click Start button, and choose Settings. Then select Devices from Windows Settings.

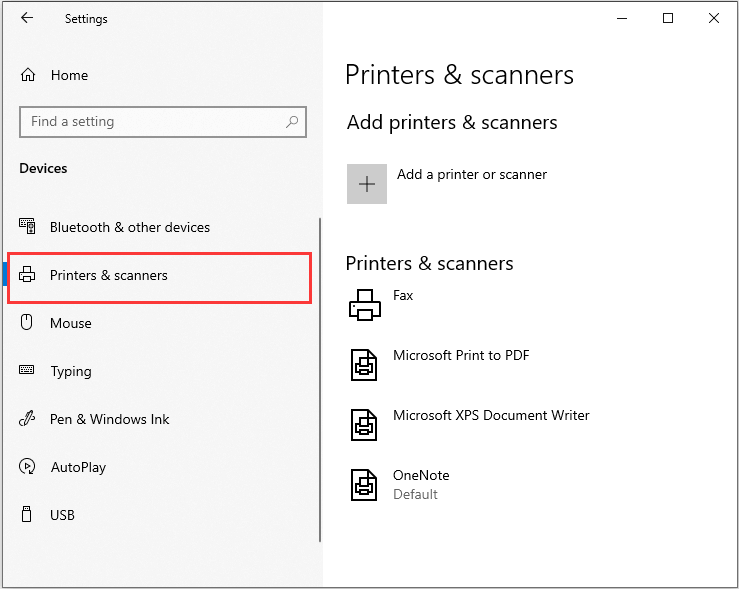
Step 2: Click Printers & scanners.
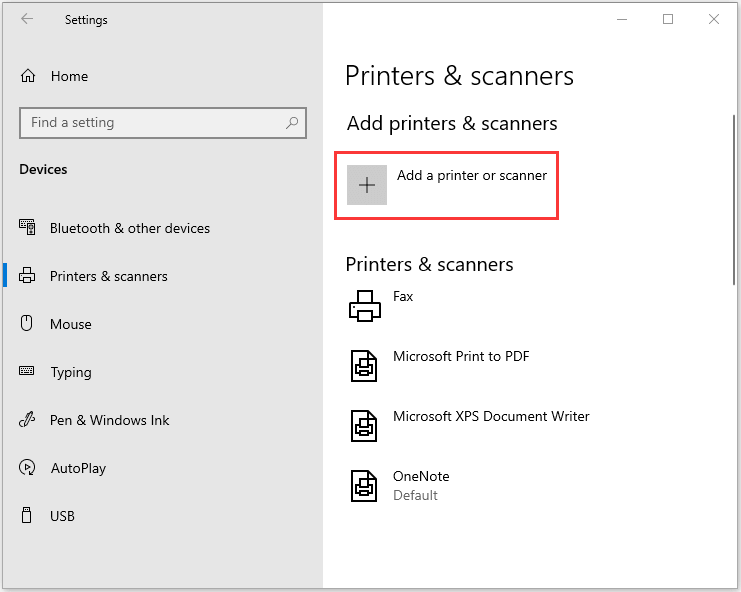
Step 3: Click Add a printer or scanner. Then Windows 10 will look for the printer during the process, and the found printer will be displayed in the result.
Step 4: Select the Wi-Fi printer and Choose Add device.
Read more: 18 Tips and Tricks Inside Windows 10 You Should Know
Stage 3: Install Printer Software
You can keep the default printer software offered by Windows 10. But if you use the printer driver software from the OEM, you can get better functionality and ink-saving modes. And you can save a scanned copy into one PDF automatically.
Stage 4: Change the Default Printer
Now, you need to set up a printer on Windows 10. Usually, Windows will attempt to set the default printer by selecting the one used most recently on the connected network.
If you don’t have any printer installed, the default printer in Windows is the one who saves into PDF files. If you had a printer earlier, you’d better change the default printer to the new one. Follow steps as below:
Step 1: Go to Printers & scanners as stage 2 tells you.
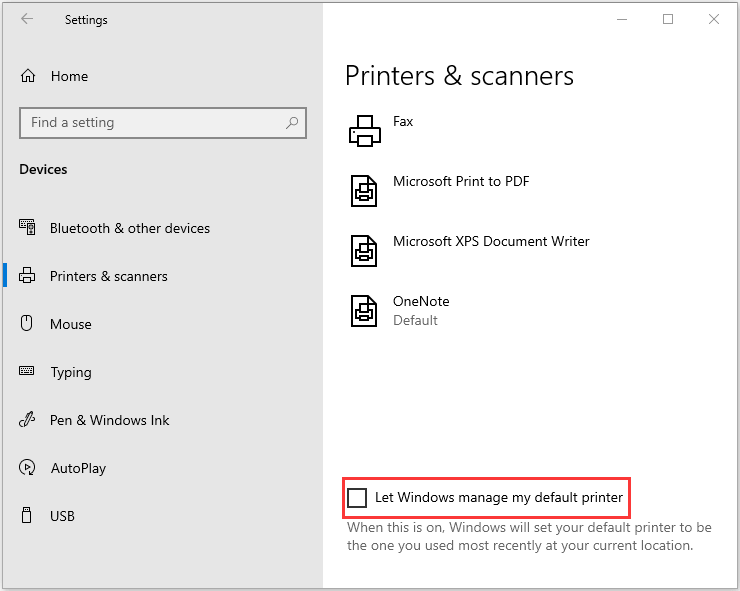
Step 2: Uncheck the box “Let Windows manage my default printer”.
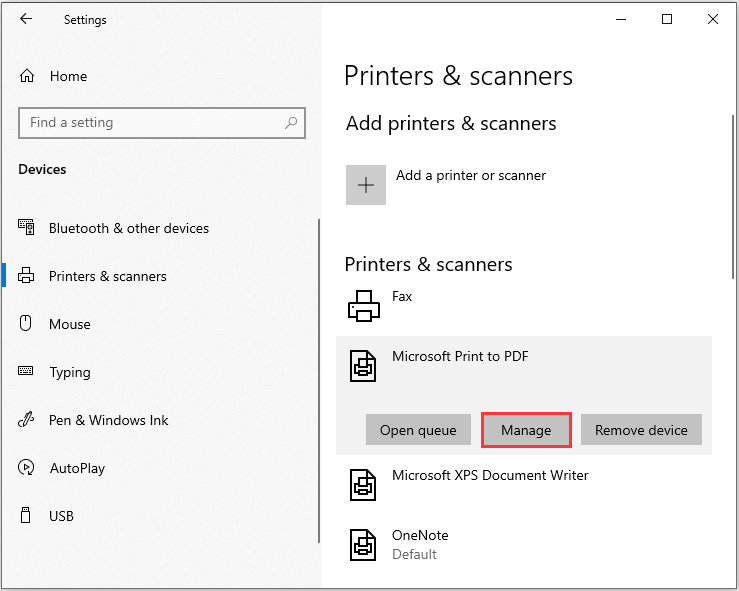
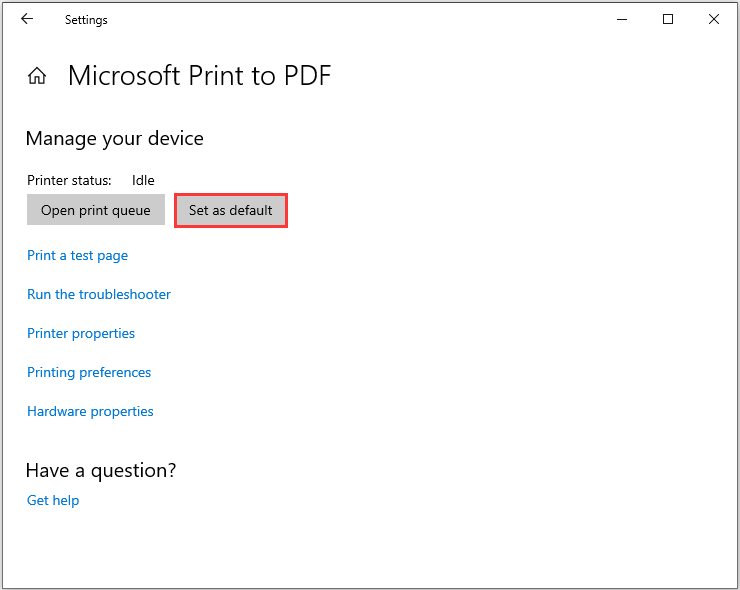
Step 3: Choose the printer you want to set as default and click Manage.
Step 4: Click Set as default.
Related article: What Is the Default Partition Style.
Stage 5: Troubleshoot Printers
If you have problems when you connect a wireless printer to Windows 10, you can try the two approaches.
1. Printer not found:
If you can’t find the printer, you can go to Settings>Update>Troubleshoot>Printer, and run Printer Troubleshooter.
2. Printer installed:
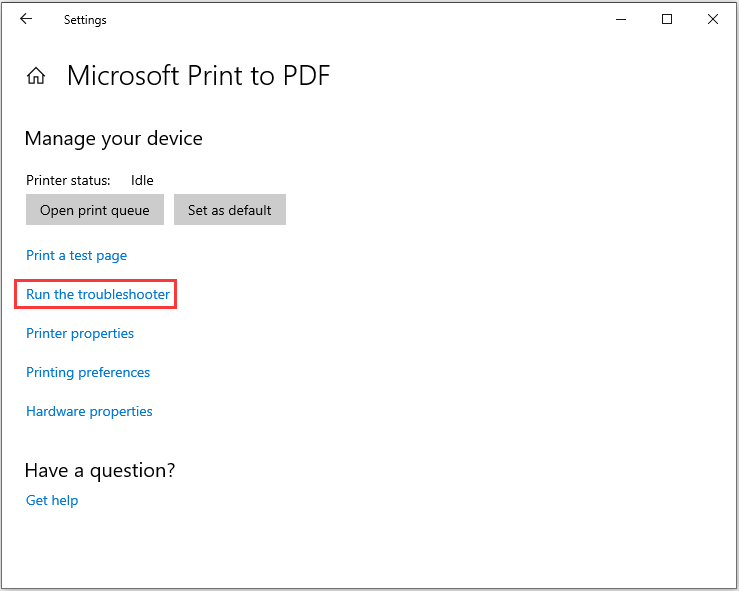
If you have installed a printer but there is something wrong, you can go to Printer & scanners. Then choose the printer which goes wrong and click Manage, trying to print a test page.
Next, click Run the troubleshooter to fix it.
If it doesn’t work, you can try to uninstall and reinstall the printer.
After reading this post, do you want to connect a printer to the computer wirelessly? Follow these steps and add a printer to the computer!
User Comments :