Many Wii users reported that they ran into the error code called 51330. The error code is associated with the internet. If you are struggling with Wii error code 51330, try the following solutions offered by MiniTool Partition Wizard.
Wii Error Code 51330
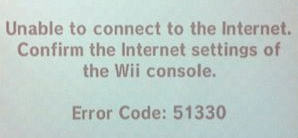
What does error code 51330 mean on the Wii? Woo error code 51330 is associated with the internet. More clearly, the error code is usually caused by a faulty configuration of a router.
How to fix Wii Error Code 51330?
Now, try the following solutions until the error code 51330 is removed.
- Check if the Wi-Fi password is correct.
- Reboot or reset your network device.
- Check for new modifications.
- Change your router’s channel setting to 1 or 11.
- Change IP Address & DNS.
Fix 1: Check If the Wi-Fi Password Is Correct
Do you receive the Wii error code 51330 after inputting the Wi-Fi password? If yes, the password may be not correct. So, type the Wi-Fi password again and see if the error code 51330 persists.
If you still receive the error code after typing a correct Wi-Fi password, please try the below solutions.
Fix 2: Reboot or Reset Your Network Device
Rebooting or resetting your network device may help you get rid of the Wii internet error code 51330.
You can first try rebooting your network device and see if the error code persists. If the error code reappears, try resetting your network device.
The details about rebooting and resetting a network device are displayed in the following recommended article.
![How to Get Rid of Error NP-40831-6 on PS4? [5 Ways]](https://images.minitool.com/partitionwizard.com/images/uploads/2021/01/np-40831-6-thumbnail.png)
Fix 3: Check for New Modification
Have you ever done some modifications to your network device, such as changing the security type from WEP to WPA or WPA2-PSK? If yes, please make the same change in your Wii.
Here are steps on how to change the security type to WPA2-PSK(AES):
- From the Wii Menu, select the Wii button using the Wii Remote.
- Choose Wii Settings.
- On the Wii System Settings menu, use the arrow on the right side of the screen to move to the second page and select Internet.
- Select Connection Settings.
- Select the connection file you want to edit and then select Change Settings.
- Use the arrow on the right side of the screen to move to the second page and then choose WPA2-PSK (AES).
- Select the white box that appears and then enter your wireless network’s password using the onscreen keyboard. Next, select OK.
After that, check for MAC Filtering in your router. If MAC Filtering is enabled, add system’s MAC Address to the allowed list. If you can’t manage to put the address in the allowed list, please disable the MAC Filtering.
Fix 4: Change Your Router’s Channel Setting to 1 or 11
Generally, most routers broadcast on channel 6, which overlaps with other channels and may be weaker. When the internet speed goes slow, it is hard to be accessed by Wii.
In this case, you need to change the router’s channel setting to 1 or 11 as these channels generally experience the least amount of wireless and interference. Steps are:
- Access your router’s settings.
- Locate your wireless channel setting. In most cases, the setting is located under the Wireless Network tab.
- Use the drop-down list to change the router’s wireless channel to 1 or 11.
- Save the change.
Fix 5: Change IP Address & DNS
Try setting up or changing IP Address & DNS manually when facing Nintendo Wii error code 51330.
Step 1: Go to Wii Menu and then choose System Settings.
Step 2: use the arrow on the right side of the screen to move to the second page and select Internet. Next, press A.
Step 3: Choose Connect to the Internet.
Step 4: Press X.
Step 5: Choose the Internet connection you have to use.
Step 6: Choose Change Settings.
Step 7: Use the arrow on the right side to select IP Address.
Step 8: Choose Don’t Auto-Obtain and enter the following information in the network settings (do not neglect “.” at the end of the numbers):
- IP address like 192.168.1.4.
- Subnet Mask such as 255.255.255.000.
- Tap Gateway
Step 9: Choose Confirm.
Step 10: Choose Configure when asked to configure the DNS settings.
Step 11: Choose Don’t Auto-Obtain and enter the following information.
- Primary DNS: 8.8.8.8
- Secondary DNS: 8.8.4.4
Step 12: Choose Confirm.
Step 13: When completed, choose Save.
Step 14: Choose Connection Test to test your connection. Choose OK if the connection test was successful.

User Comments :