A great many people get the “Recipient Address Rejected access denied” error when they send emails using Outlook. Don’t worry. This post of MiniTool summarizes 6 simple ways to fix the error.
According to user reports, the “Recipient Address Rejected: access denied” error message often comes with the codes 541 and 550. If you send an outbound mail to an email address that doesn’t exist, then you will encounter the error. In addition, some factors like corrupt DNS cache, an anti-spam filter, and the Directory-Based Edge Blocking (DBEB) are also responsible for the relay access denied error. Fortunately, we explore several ways to fix the error. Let’s start trying.
![Your Computer’s Trusted Platform Module Has Malfunctioned [FIXED]](https://images.minitool.com/partitionwizard.com/images/uploads/2021/11/your-computers-trusted-platform-module-has-malfunctioned-thumbnail.png)
Fix 1. Use the Correct Recipient
Before you start trying other solutions, you should double-check if the recipient’s email is valid. In addition, you need to make sure that the recipient email still has the clearance to get past the mail gateway. If you still receive the “550 5.4 1 Recipient Address Rejected access denied” error after you determine that you are using a correct recipient, move down to the next following fixes.
Fix 2. Make Sure All Public Folders Are Hosted On-Premise
Some users receive the “Recipient Address Rejected: access denied” error after configuring the email with Exclaimer Cloud via Microsoft 365. In this case, the error is probably related to the Directory-Based Edge Blocking option. It can reject external emails addresses that are not found inside the Azure Active Directory.
To fix the error, you can try the 3 potential fixes below:
- Make sure that all public folders are hosted on-premise
- Make sure that your public folders are hosted in Exchange Online
- Disable Directory-Based Edge Blocking (not recommended)
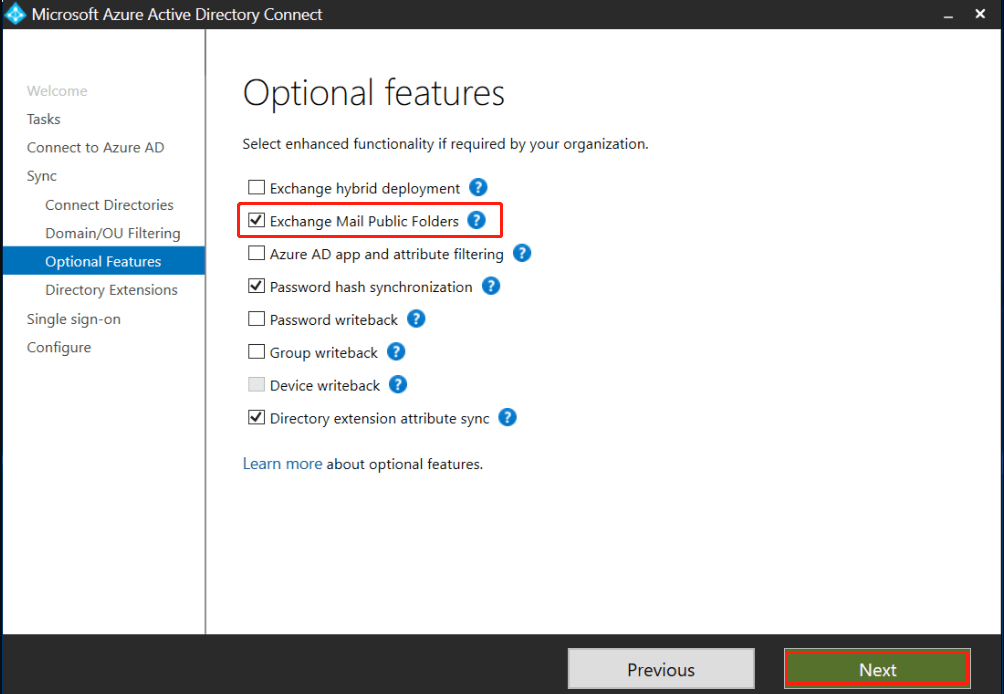
Step 1. Open the Microsoft Azure Active Directory Connect screen.
Step 2. Select Optional Features from the left vertical menu and tick the checkbox for Exchange Mail Public Folder from the right-hand pane.
Step 3. Click on Next to save changes. After that, you can send the email again and see if the “550 permanent failure for one or more recipients” error gets solved.
Fix 3. Make Sure Your Public Folders Are Hosted in Exchange Online
Since the DBEB option is not yet supported for Mail Enabled Public Folders hosted in Exchange Online, you need to access the Main flow menu and establish an exception list. Here you can follow the guide below to make sure that your public folders are hosted in Exchange Online:
Step 1. Click here to sign in to Exchange Online with your account.
Step 2. Once signed in, navigate to the Main flow section and access the Rules tab.
Step 3. Select Identify Messages to send to Exclaimer Cloud from the list of rules and click on Edit. Then scroll down to the bottom of the screen and click on Add Exception.
Step 4. Select The recipient…is this person from the Use the following connector section.
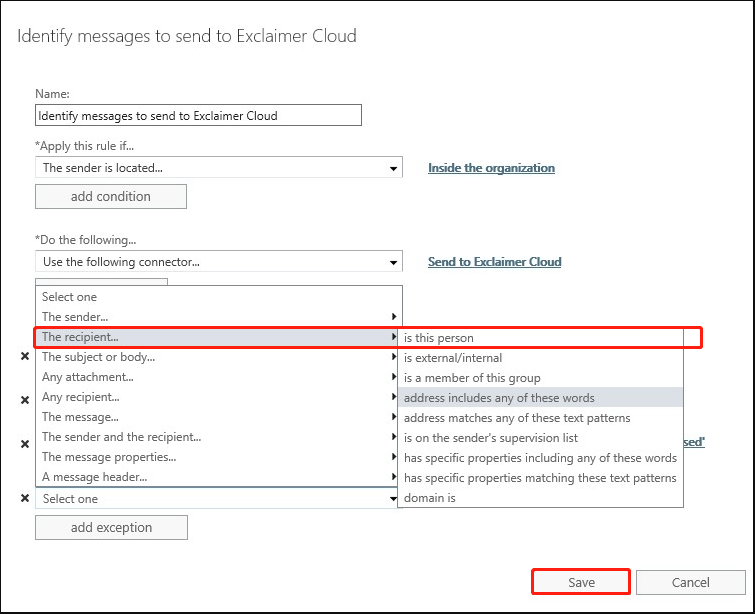
Step 5. Select all mailboxes for public folders that you are using and click on Add to enforce the change, and then click on OK to execute it.
Once done, you can re-send the affected email and see if the “550 5.4 1 Recipient Address Rejected access denied” error is fixed.
Fix 4. Disable the Directory-Based Edge Blocking
Another method to prevent the DBED option from blocking your email is to disable it completely. If the above 2 fixes fail to work, you can try this method.
Step 1. Sign in to Exchange Online again, and then go to Mail flow and access the Accepted domains tab.
Step 2. Select the root domain of your public folders and click on Edit.
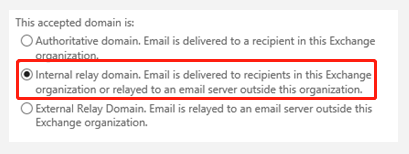
Step 3. Select the Internal relay domain option under the This accepted domain is section, and then click on Save to disable DBEB.
After that, you can check if the “relay access denied” error is gone.
Fix 5. Perform a DNS & TCP/IP Reset
The “Recipient Address Rejected: access denied” error can occur due to a bad DNS cache or a glitch with the network adapter. To fix it, you can try performing a DNS and TCP & IP reset.
Step 1. Type cmd in the Search box, and then right-click the Command Prompt app and select Run as administrator. Then click on Yes when you are prompted by the UAC window.
Step 2. In the elevated Command Prompt window, type the following commands in order and hit Enter after each one.
- ipconfig /flushdns
- nbtstat -R
- nbtstat -RR
- netsh int reset all
- netsh int ip reset
- netsh winsock reset
Once completed, you can try sending the email to the same recipient again and see if it works.
User Comments :