Miracast is a good choice you can make to connect your PC screen with other displays like TV or Projector. A great many users are looking for answers on Google about how to enable Miracast on Windows 10. In today’s article, MiniTool Solution will walk you through to enable Miracast on Windows.
What Is Miracast
Miracast on Windows 10, a wireless technology, was designed by Wi-Fi Alliance to mirror your PC screen to TVs, projectors, and other media players. With Miracast, you don’t have to look for any wires or converters that can be compatible with your device, so it is a great convenience.
Besides, you can send the PC screen up to 1080p HD video (H.264 codec) and 5.1 surround that is more than enough for average users.
How to Check If Your Windows PC Supports Miracast
The first step you need to do is to check if your device supports the Miracast on Windows 10. You can follow the steps below to do.
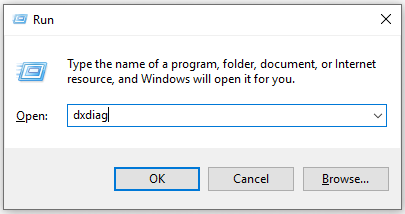
Step 1. Press Win + R keys to open the Run dialog box and then type dxdiag and hit Enter.
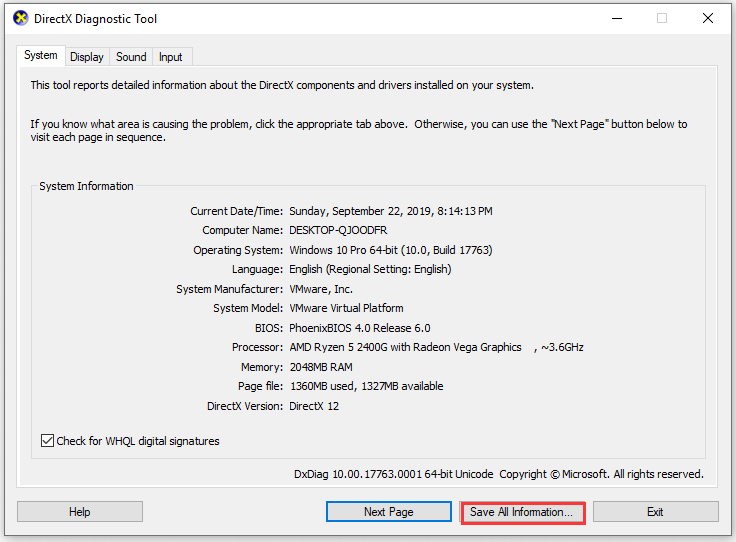
Step 2. Press the Save all information button on the bottom to save the text file at the desired location.
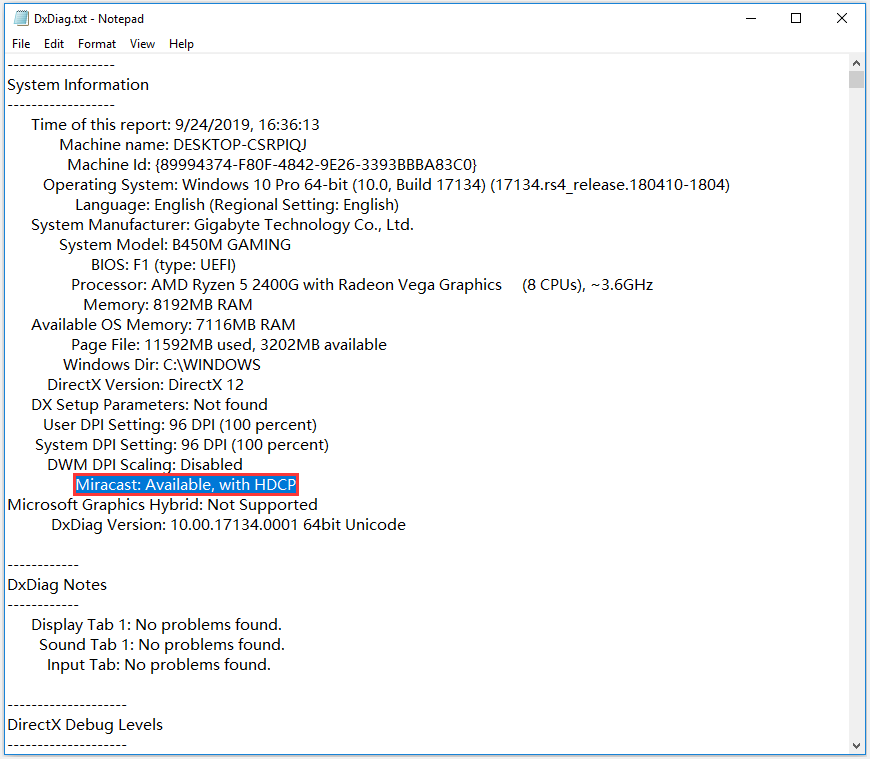
Step 3. Now open the text file and navigate to the Miracast, and then check if it is available at the current status.
After checking the Miracast on Windows 10 is available, the more important thing is how to enable Miracast on Windows 10. Please keep reading the following part.
How to Enable and Use Miracast on Windows 10
Step 1. If your TV or projector comes with built-in Miracast support, just turn it on. If not, you need to connect the external displayer with the HDMI port of the TV and power it on.
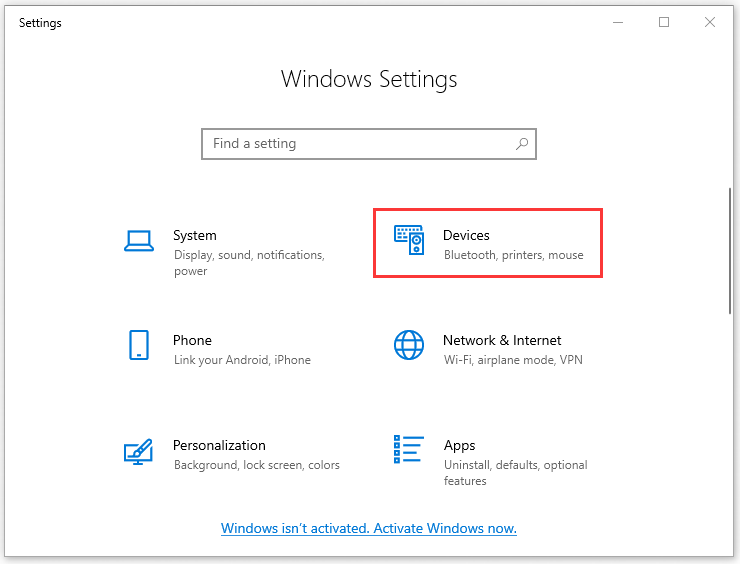
Step 2. Right-click on the Start menu on the bottom left of your PC, and select Settings.
Step 3. Inside the Settings window, navigate to the Device and double-click it.
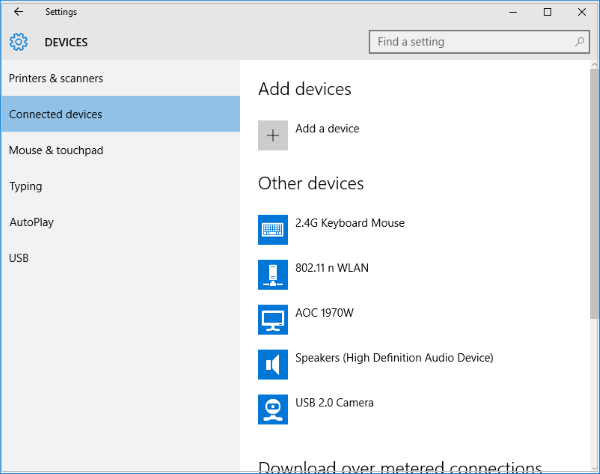
Step 4. Now select the Connected devices on the left tab and click on the Add a device on the right side.
Step 5. Then wait for the displays to appear in the list. Click on the receiving display. After that, you can enable the Miracast on Windows 10 successfully.
Right now, you can press Win + P to configure both the Miracast on Windows and the display.
What Can I Do If Miracast on Windows 10 Not Working
It is reported that some users encounter the problem “Miracast on Windows 10 not working” sometimes. Here are several suggestions that might help you.
- If Miracast fails to work, the first step you need to do is check if your device drivers are up to date, including all the displays and Wi-Fi drivers And make sure your PC supports the Wi-Fi directly.
- If this problem is still not resolved after installing the updated devices drivers, then it is recommended that you try another Adapter like Microsoft Wireless Display Adapter.
- If the above solutions fail to solve your problem, you can consult the respective manufacture to get a solid solution.
Well, all information about how to get Miracast on Windows 10 and other useful tips are told to you.
User Comments :