Some Windows 10 users may encounter the Live Kernel Event 193 error on their computers when they leave their computers in an idle mode. Why does this happen, and how to solve this problem? Well, this post from MiniTool Partition Wizard will tell you the reason and offer you corresponding solutions.
The Live Kernel Event 193 error is a hardware error with the name “Problem Event Name: LiveKernelEvent” and the error description “A problem with your hardware caused Windows to stop working correctly.”
There are various reasons for the Live Kernel Event 193 error, including corrupted system files, a corrupted Intel Wi-Fi driver, etc. If you are encountering this Live Kernel Event 193 error on your computer, there are two methods to solve this problem.
So, how to fix the Live Kernel Event 193 error on Windows 10? Scroll down to know the detail.
Method 1: Run the Hardware and Devices Troubleshooter
If there is an external drive or additional peripherals on your computer, you may receive this message “A problem with your hardware caused Windows to stop working correctly.” In this case, the first method to fix the Live Kernel Event 193 error is to run the Hardware and Devices troubleshooter. Here is how to do that:
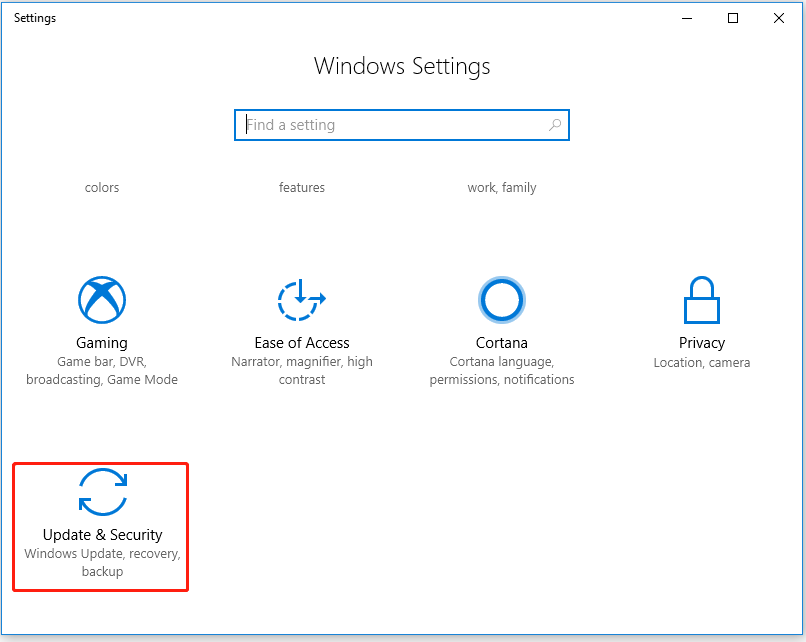
Step 1: Click the Start button, click the Settings button, and then choose Update & Security.
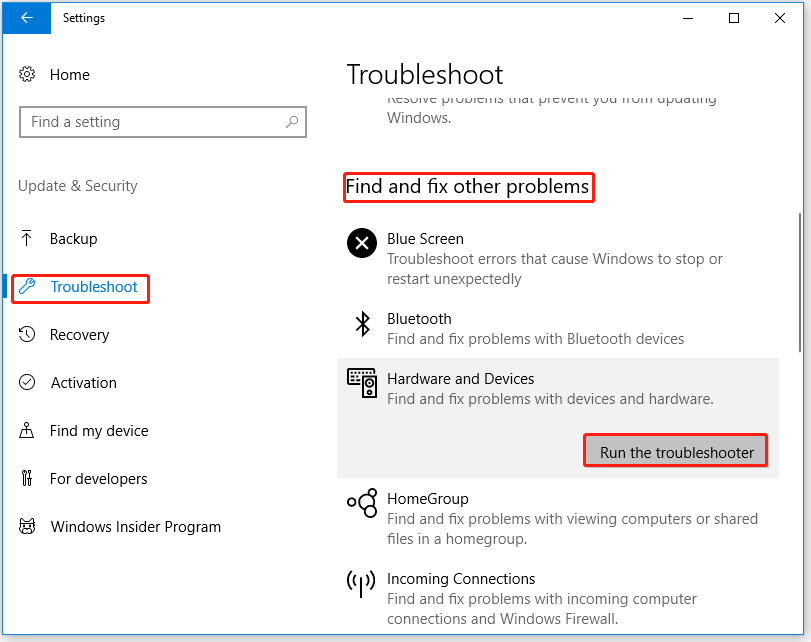
Step 2: Then, choose Troubleshooter on the left panel. Under the Find and fix other problems option, click Hardware and Devices and then click the Run the troubleshooter button.
Step 3: Wait until the initial scan is complete. If there are some errors about Hardware and Devices, please click Apply this fix.
After that, restart your computer to see if the issue “A problem with your hardware caused Windows to stop working correctly” is fixed.
Method 2. Update the Intel Wi-Fi Driver for Windows 10
An outdated or corrupted Intel Wi-Fi driver is one of the most common reasons for the Live Kernel Event 193 error. Under this circumstance, you need to update the Intel Wi-Fi driver for Windows 10. How to do that? Here is the guide:
Step 1: Click this link to visit the official download page of the Intel Dual Band Wireless-AC driver.
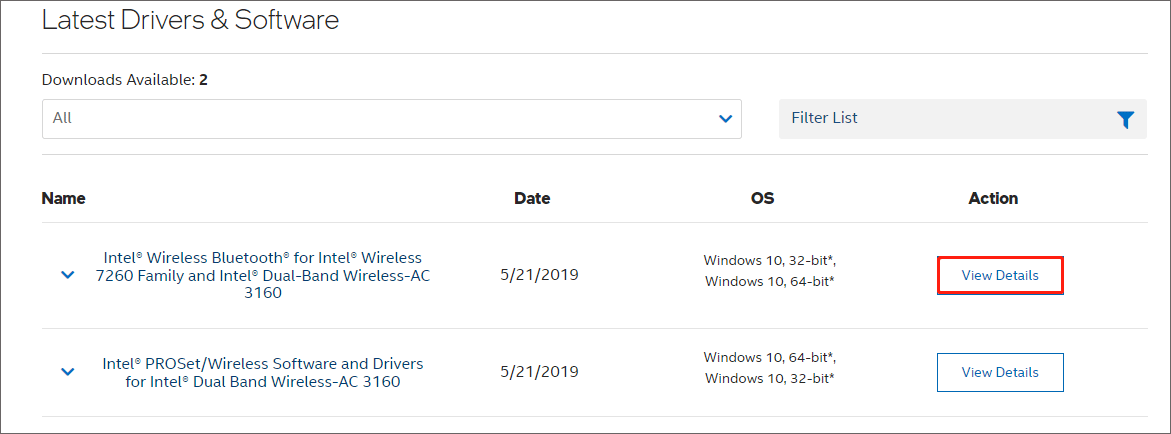
Step 2: Once you are inside this page, click the View Details button associated with the Family and Intel® Dual-Band Wireless-AC 3160 driver.
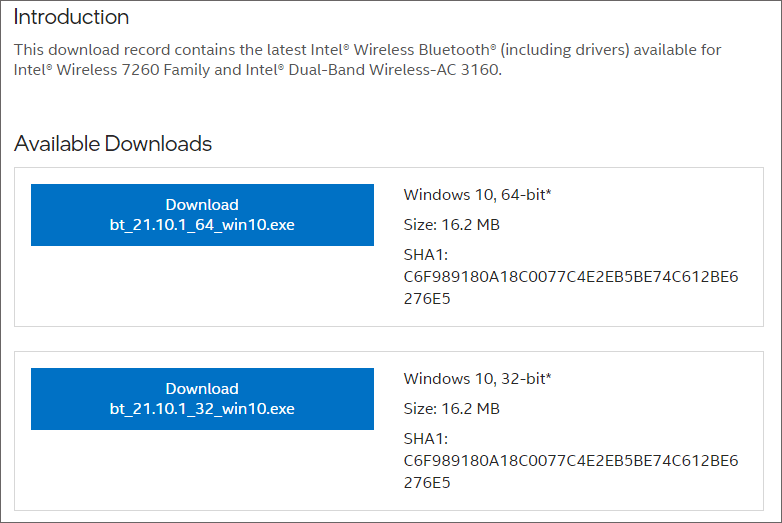
Step 3: Click the Download button associated with the architecture compatible with your operating system.
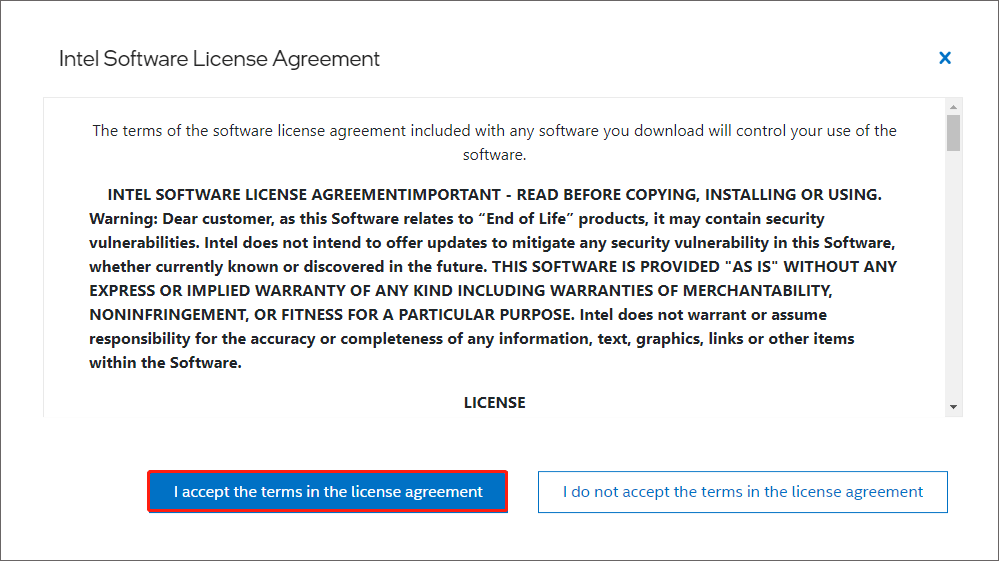
Step 4: Then, click I accept the terms in the license agreement. Wait until the download is complete.
Step 5: Once the driver is downloaded, double-click it and follow the on-screen instructions to install the driver.
Once done, please restart your computer to see if the problem is resolved.
In addition to the above methods, you can also try to update Chipset drivers, or reinstall Windows to fix the Live Kernel Event 193 error.
That’s all about how to fix the Live Kernel Event 193 error on Windows 10. Do you have any questions about this topic? Please leave them in the comment zone and we will try to answer them as soon as possible.
User Comments :