IPVanish not connecting is a vexing problem that bothers a great many VPN users. If you are struggling to resolve this problem as well, you come to the right place. In today’s article, MiniTool wants to share you with 4 accessible ways to fix the IPVanish error.
IPVanish provides you with better security and privacy for VPN service. But due to various reasons, your IPVanish keeps disconnecting. There are several common causes of the issue “IPVanish won’t connect”.
- Your VPN Server location can impact the IPVanish connection. For this issue, you can try changing its location to fix.
- Your router does not support IPVanish or is configured for PPTP VPN.
- Your Firewall prevents the IPVanish from connecting to your device.
Now, let’s see how to fix the IPVanish not working issue.
Fix 1. Check Your Primary Internet Connection
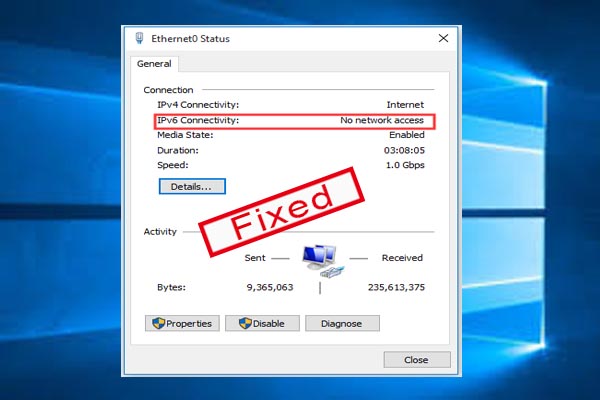
First of all, you should check if there is any problem with your primary Internet connections. It is very simple to operate. Disconnect your device from the IPVanish VPN and then try to access the Internet. After that, you may get the following results.
- If you can access and start websites successfully, you can reconnect IPVanish VPN and check if the IPVanish not connecting Windows 10 is resolved.
- If you cannot access the Internet after disconnecting your IPVanish, the problem may be caused by your Internet connection of ISP. You should resolve it by rebooting your router and device and then check your network settings.
Fix 2. Ping the VPN Server
If your IPVanish cannot access the VPN Server, you may also encounter the problem. Here is a guide that can help you check if you can access the VPN Server when connecting the Internet.
Step 1. Press Win + R keys to call out the Run box, and then type cmd in it and hit Enter.
Step 2. In the command prompt, type ping 8.8.8 (you can also type the address that you want to ping) command and hit Enter.
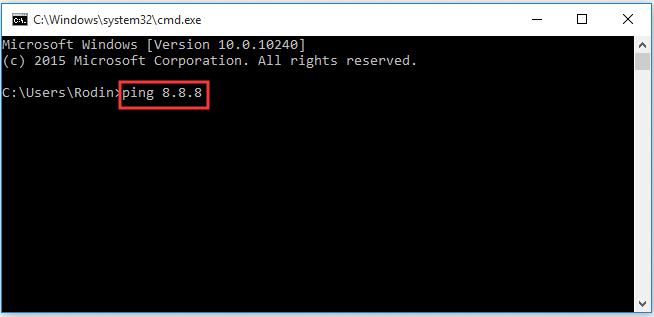
After that, you can try reconnecting and check if the IPVanish not connecting issue is fixed or not.
Fix 3. Disable UAC
Disabling UAC (User Account Control) can help you check if OpenVPN and PPTP connections are allowed to work. Here’s how to do that.
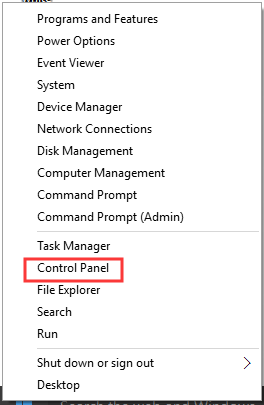
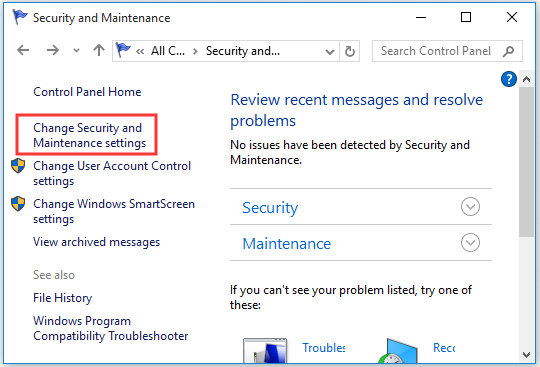
Step 1. Right-click the Start button and select Control Panel from the contextual menu.
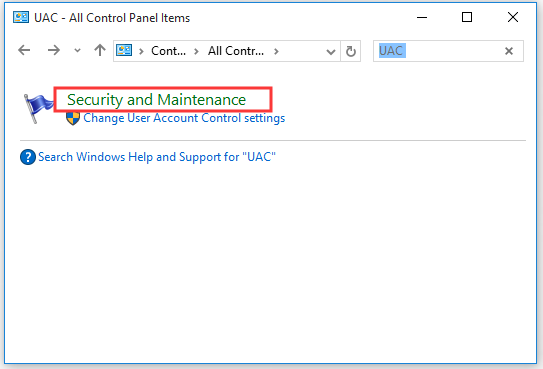
Step 2. In the new window, type UAC in the control panel search box and click the Security and Maintenance section.
Step 3. Then click on the Change Security and Maintenance settings tab on the left pane.
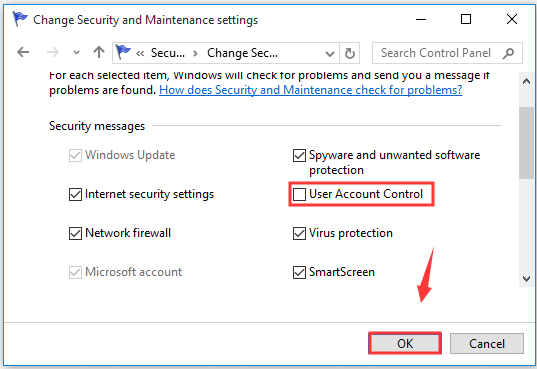
Step 4. Uncheck the box of User Account Control and click OK to save the change.
Step 5. Restart your computer and try reconnecting the IPVanish.

Fix 4. Use a Different VPN Protocol
Sometimes the WiFi connection or ISP that you are using may block certain VPN protocols on their network. For this situation, you can switch to a different VPN protocol and reconnect IPVanish. You can follow the steps below to change the VPN protocol on Windows 10.
Step 1. Login to your IPVanish account, and then click the Settings on the left pane and navigate to the Connection tab.
Step 2. Go to the Active Protocol drop-down menu and select a protocol that you prefer to. Click CONNECT on the upper right corner.
Now, you can check if the issue “IPVanish not working” still persists.
User Comments :