A large number of users are bothered by the IPv6 no network access error. Do you know what causes this error? How to fix it? In today’s article, MiniTool will walk you through serval methods to fix the vexing problem.
What Causes the IPv6 Connectivity No Network Access Error
IPv6 is the latest Internet Protocol version that will replace the Internet Protocol version 4 (IPv4). However, you may encounter the “IPv6 no Internet access” issue and you won’t be able to use the Internet.
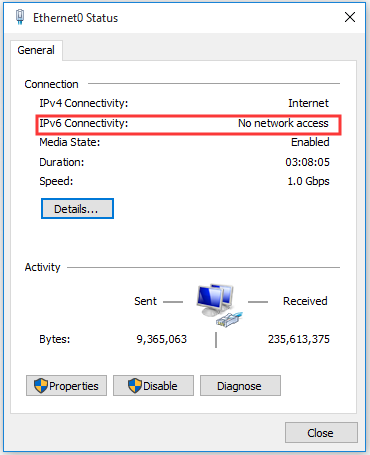
To resolve this error smoothly, you need to find the possible causes of it. There are three common factors that may trigger the IPv6 no connectivity problem.
- Outdated Networking Drivers: If your networking drivers are outdated or faulty, you should replace them with the latest version to resolve the error.
- Firewall and Antivirus Programs: Sometimes your antivirus programs will prevent the IPv6 from working properly. For this situation, you can disable them temporarily and check if your problem is resolved.
- Incorrect HT Mode: Incorrect HT mode settings can also trigger the “IPv6 connectivity no network access” problem.
Now, let’s see how to fix IPv6 no Internet access problem.
Solution 1. Restart the Winsock and TCP/IP Stack
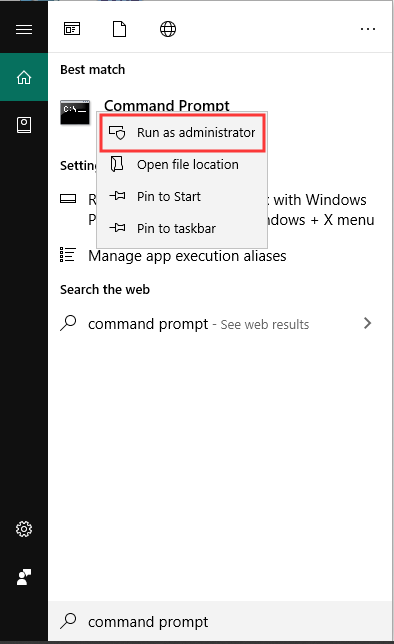
Resetting Winsock is an effective way to resolve the IPv6 no Internet access problem. This method requires you to use an elevated command prompt. Here is a full guide.
Step 1. Type command prompt in the search box, and then right-click it and select Run as administrator option from the submenu.
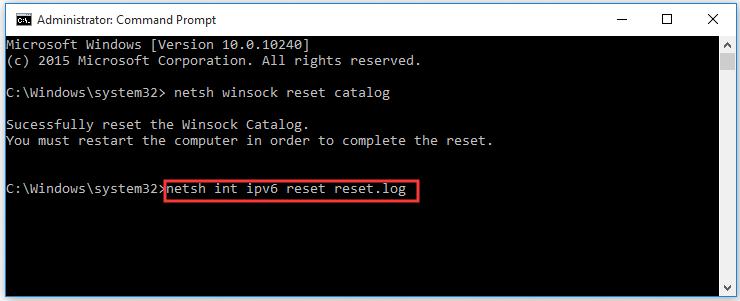
Step 2. In the elevated command prompt, type netsh winsock reset catalog command and hit Enter.
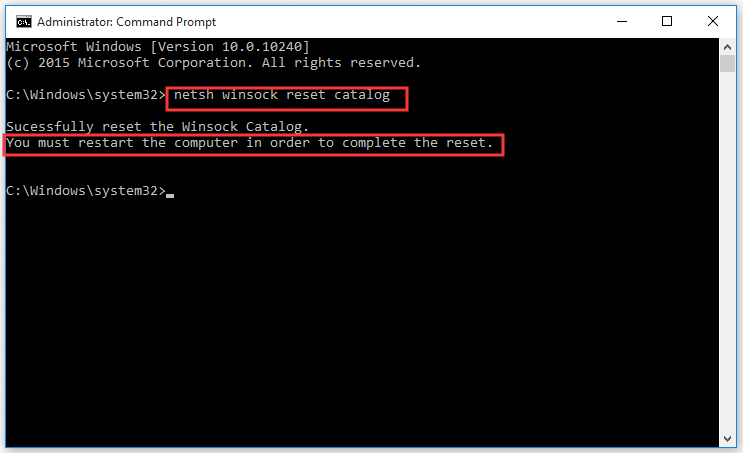
Step 3. Type netsh int ipv6 reset reset.log command and hit Enter.
Step 4. Restart your computer and see if the IPv6 no network access windows 10 error is resolved. If this method fails to work, move on to the next solutions.
Solution 2. Disable IP Helper Service
IP Helper is a built-in Windows service that provides the tunnel connectivity for your computer by using IPv6 transition technologies. Disabling IP Helper service can help you fix the problem. Here is how to do that.
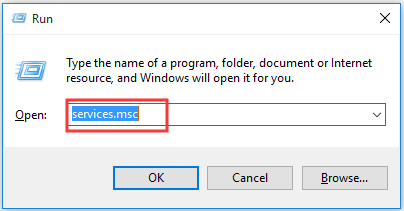
Step 1. Press Win + R keys to open the Run box, and then type services.msc in the box and hit Enter.
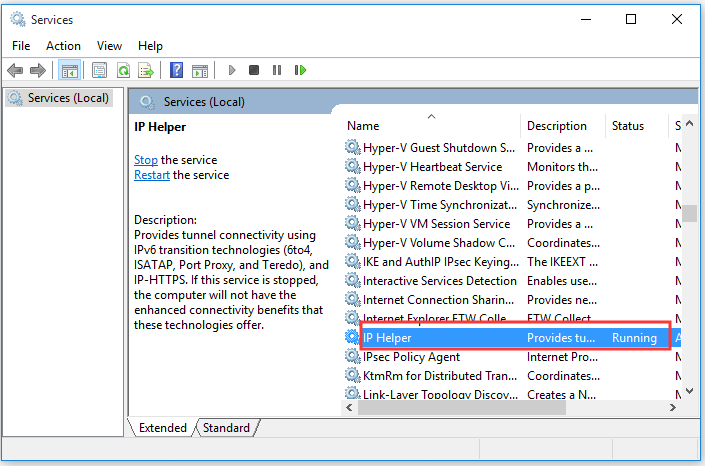
Step 2. Go to the IP Helper service in the list of Windows services, and double click it to open its Properties.
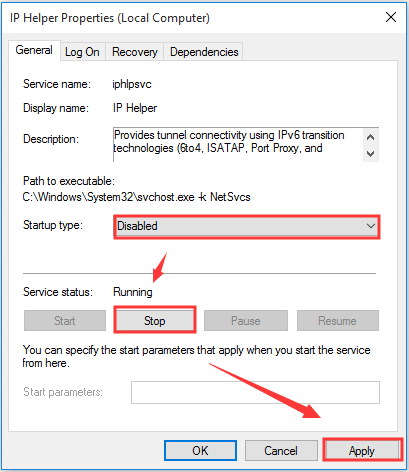
Step 3. In the pop-up window, change the Startup type to disabled and click the Stop button. After that, click Apply to execute the change and exit the service.
After disabling the service, you can check if the IPv6 no connectivity is fixed or not.
Solution 3. Run Internet Connections Troubleshooter
Running Internet Connection troubleshooter is the most common way to fix the issues related to Internet connectivity. This tool can diagnose and resolve problems automatically. Let’s see how to do that.
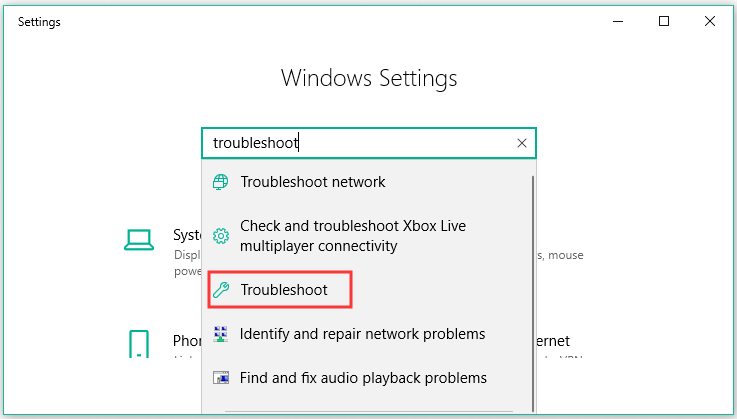
Step 1. Press Win + I keys to open the Windows Settings window. And then type troubleshoot in the top search box and select troubleshoot from the list.
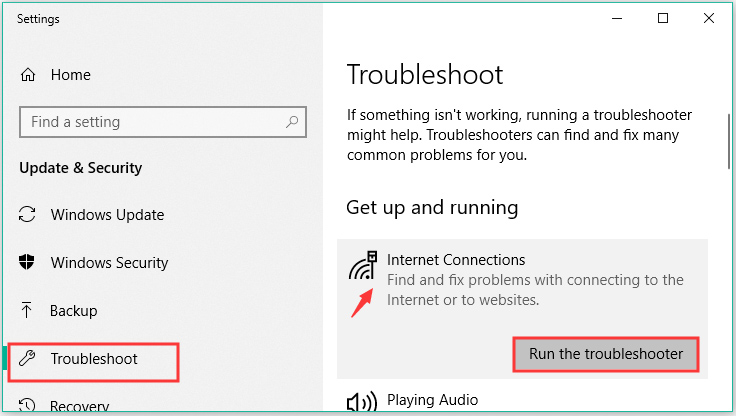
Step 2. Navigate to the Internet Connections section, and then double click it and click the Run the troubleshooter button.
Now, this tool will detect problems with Internet Connections. After this process ends, you can check if your problem still exists.
Solution 4. Disable Windows Firewall and Your Antivirus Software Temporarily
As mentioned above, the Firewall and antivirus program may block your device from accessing the Internet and lead to “IPv6 no network access”. You can try disabling them temporarily and check if it is helpful.
Step 1. Right-click the Start menu and select Programs and Features from the list.
Step 2. Find the Antivirus software that you have installed, and then right-click on it and select Uninstall. Then you can follow the on-screen prompts to complete the uninstallation.
Well, if this method doesn’t resolve your problem, you can reinstall them.
Now, let’s see how to disable the Windows Firewall service temporarily.
Step 1. Press Win + R keys to open the Run box, and then type services.msc in the box and hit Enter.
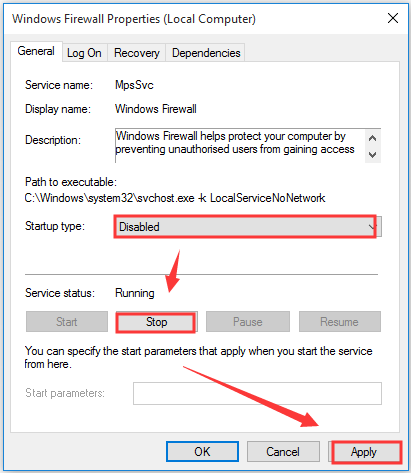
Step 2. Go to Windows Firewall service and double click it to open the properties.
Step 3. Change the Startup type to disabled, and then click the Stop button. Click Apply to save the change.
Then you can check if it resolves your problem. If not, you can turn on it again.
Solution 5. Update Your Network Drivers
Outdated or inappropriate Networking drivers also might trigger the IPv6 no connectivity issue. You can try updating them. Here’s how:
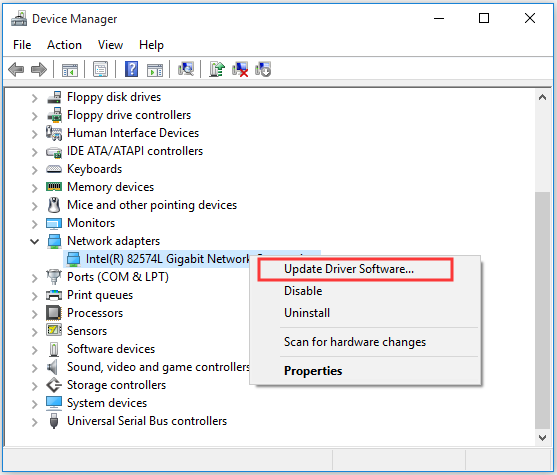
Step 1. Right-click the Start button and select Device Manager from the list.
Step 2. Expand the Network adapters, and then right-click the networking device and select Update Driver Software from the submenu.
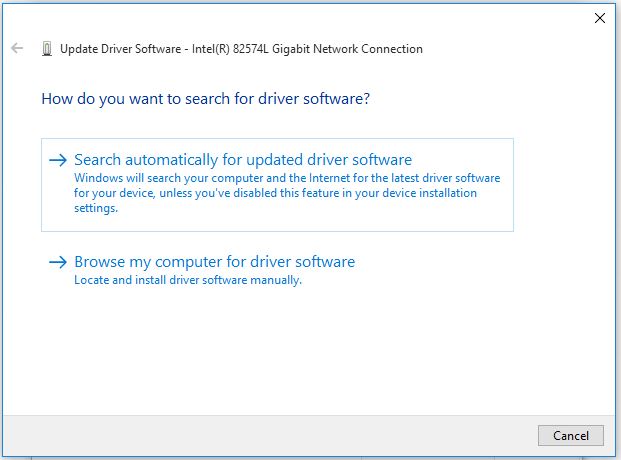
Step 3. Then you will find 2 options to update the drivers: automatically or manually. You can choose one based on your needs and follow the on-screen instructions to complete the operation.
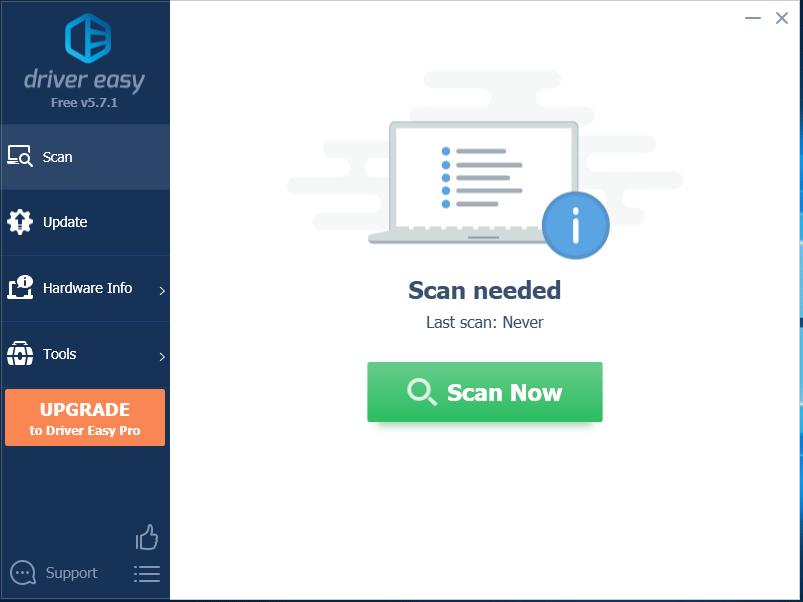
If the above method failed to update drivers, you can use a professional third-party program to do that. Driver Easy Pro can detect all outdated drivers and update them with just one click. Here is the guide:
Step 1: Install Driver Easy and launch it. Click the Scan Now button.
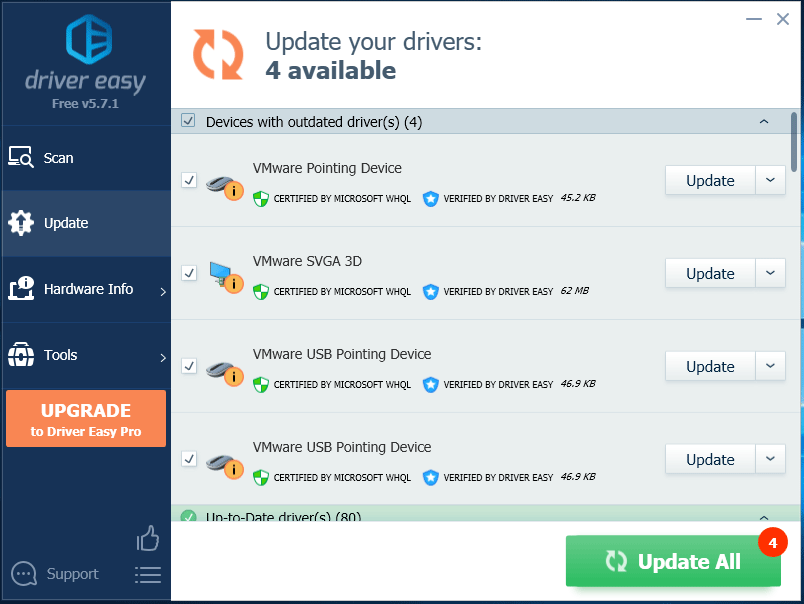
Step 2: After the scanning process is completed, click the Update All button to download and install the latest drivers for all devices with outdated drivers.
Solution 6. Change HT Mode
Some users have tried this way that fixes the “IPv6 connectivity no network access” issue successfully, perhaps you may have a try.
Step 1. Open the Control Panel, and then change the View by to Category and click Network and Internet.
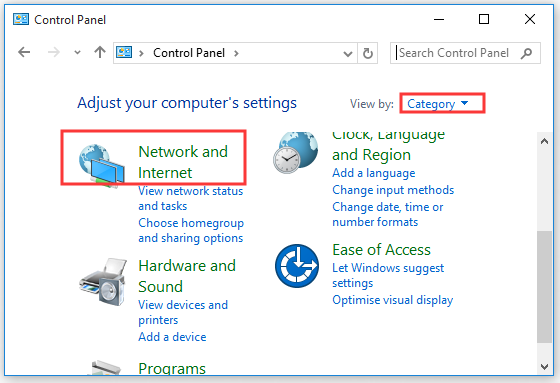
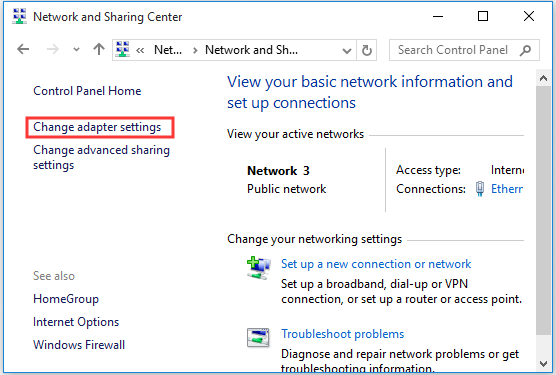
Step 2. Then click on Network and Internet; Change adapter settings one by one.
Step 3. In the pop-up window, double click your active Network Adapter to open its Properties and click Configure button in the properties window.
Step 4. Go to the Advanced tab, and then select the HT Mode option and click OK.
Step 5. Restart your computer to apply this change and see if your problem is fixed.
User Comments :