You might use PowerShell commands to manage your computer sometimes. With the releasement of PowerShell 7, many new features are added. In this post, MiniTool offers a step-by-step guide on how to install PowerShell 7, and you can feel free to have a try.
What Is PowerShell 7
PowerShell is a Microsoft framework for automating tasks, consisting of a command-line and associated scripting language. It allows users to automate tasks that manage operating systems and processes.
On March 4, 2020, Microsoft released the latest update to PowerShell, PowerShell 7. There are some new features announced by Microsoft:
- Pipeline parallelization with ForEach-Object -Parallel.
- New operators: ternary operator “? :”, pipeline chain operators “||” and “&&”, and null coalescing operators “??” and “??=”.
- A simplified and dynamic error view and Get-Error cmdlet for easier investigation of errors.
- Automatic new version notifications.
What’s more, Microsoft has added some other improvements and is keeping updating PowerShell 7, and you can check out the PowerShell 7.0 release notes from the official websites to know more information. If you want to have a look at it, please keep reading to know how to install the new version.
How to Install PowerShell 7
PowerShell 7 is available on Windows, macOS and Linux. In this post, I will introduce you how to install PowerShell 7 on Windows 10.
Generally, there are two methods: download an MSI package and use a command. Detailed steps are displayed in the following contents, and you can choose one method you prefer.
Method 1: Download an MSI package to install PowerShell 7
This way is quite easy and you just need to download the package and follow the instructions to install the program.
Step 1: Open your browser and go to PowerShell Github releases page.
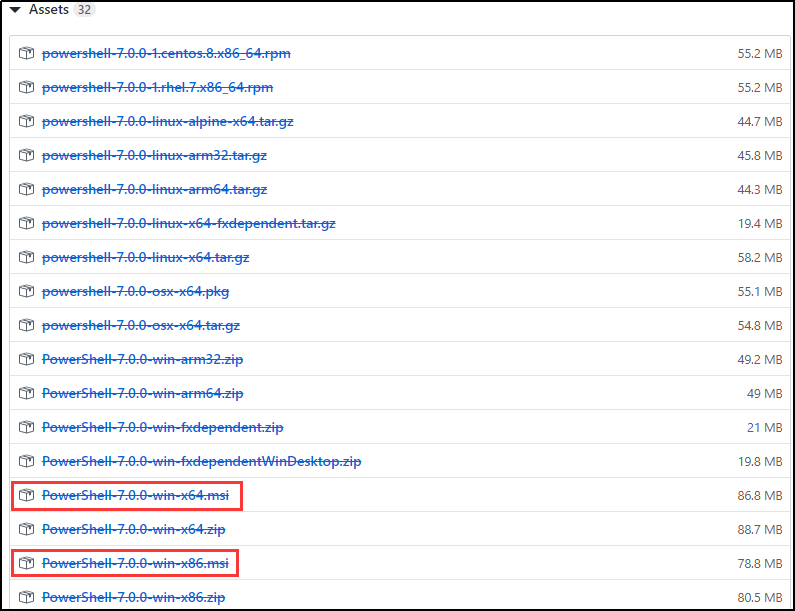
Step 2: Locate Assets section and choose the right package according to the version of your operating system (x64 for 64-bit, x86 for 32-bit).
Step 3: In the pop-up window, select a destination to save the package you want to download and click Save. If you have set a default destination to save the download files for your browser, just jump to the next step.
Step 4: Open the folder where the MSI package is stored. Then double-click the package to perform the installation.
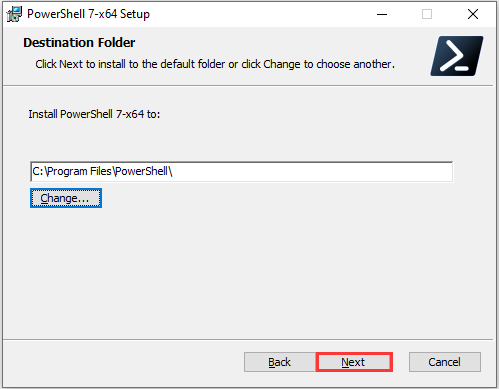
Step 5: Click Next when the installation wizard pops up. Then select a location to install PowerShell 7 and click Next to continue.
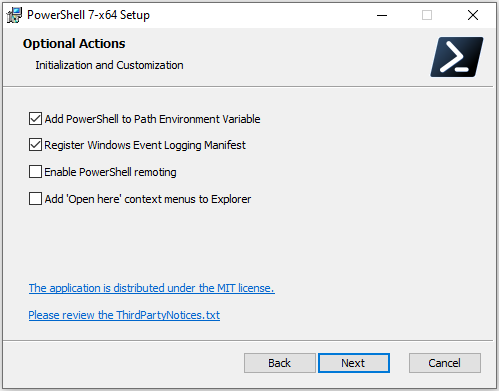
Step 6: Check the features you want to enable and click Next.
Step 7: Then follow the wizard to complete the left steps. Click Finish to exit when the setup is completed.
![How to Run PowerShell Script on Windows 10? [Full Guide]](https://images.minitool.com/partitionwizard.com/images/uploads/2019/12/powershell-script-thumbnail.jpg)
Method 2: Use a Command to Install PowerShell 7
You can also use a PowerShell command to install the new version. You just need to:
Step 1: Press Win + S to open Search. Then type PowerShell in the search box and click Windows PowerShell from the search results.
Step 2: Copy and paste the following command line. Then press Enter to execute it:
iex “& { $(irm https://aka.ms/install-powershell.ps1) } -UseMSI”
Then PowerShell will start to download the new version PowerShell 7 automatically. When the setup wizard opens, just follow the instructions to install it.
Here is how to install PowerShell 7 on Windows 10. Hope it’s helpful for you!
User Comments :