When you are trying to save a file in Excel, you might get an error message of “Document not saved”. What can you do if you are experiencing this issue? In this article, MiniTool Partition Wizard puts together some fixed which may help you get out of the trouble.
It is true that you might encounter certain problems while saving Excel documents. In today’s post, you will learn about Excel document not saved issue and some possible solutions. When you receive the problem, you will be unable to save the current document and get an error message” Document not saved”.
In some other cases, you might also receive different messages when you fail to save an Excel file, like “the disk is full” and “the document not fully saved”. The reasons for Excel document not saved issue could be various, but you may fix it with the solutions below.
Without any further ado, let’s check these solutions one by one.
Fix 1: Save Excel Document to Another Location
If you have problem saving a document in a normal way, you should try saving it to another place first, which is helpful especially when you are prompted that the disk is full. To do that, you just need to click File > Save As. Then, choose a different location in another driver and click Save button.
Sometimes, you also need to rename the file while saving it to another place. Because this issue might occur if you have already saved a file with a similar name.
Fix 2: Remove Excel Add-ins
Add-ins can help you enjoy more useful features indeed, but they might get corrupted for odd reasons and this may cause document not saved in Excel. So, you can try disabling your add-ins in Excel.
Step 1: In an Excel file, click File > Options.
Step 2: In the pop-up Excel Options window, click Add-ins in the left pane.
Step 3: Choose the type of add-ins you want to disable and click Go.

Step 4: In the new window, uncheck the target add-in and click OK to disable it.
If the issue disappears after you disable a certain add-in, then it is the problematic on and you need to keep it disabled or remove it. If all the add-ins work fine, you can proceed with the next solution.
Fix 3: Launch Excel in Safe Mode
Some users also recommend launching Excel in safe mode. This is an alternative method of Fix 2, and it’s also an effective solution that allows users to safely use the program when there are any problems with it. So, you can feel free to have a try.
To do that, you need to press Windows + R, input excel /safe in the Run window, and click OK button. In this way, your Excel will launch with only the basic editor, without any external interference from the plugins or extensions. Now, you can try saving your document again.
Fix 4: Disable Antivirus Temporarily
Besides, your antivirus program could also interferer with the process and prevent you from saving Excel file. To solve the problem, you can try disabling your antivirus temporarily and then save the file again. You should also disable Windows Defender antivirus if you are using it.
If the antivirus is the culprit, you might need to remove it and choose another reliable tool to protect your computer. If Excel document not saved issue appears again, just re-enable your antivirus and try the next fix.
Fix 5: Check the Permissions
If the current user doesn’t have permission for the location where you are saving the file, you might also receive the problem. In this case, you need to change the permissions for the target folder. Here’s a simple guide:
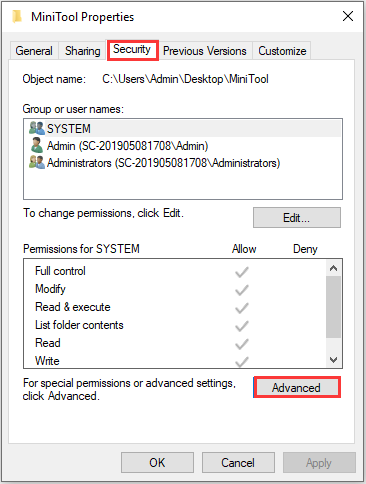
Step 1: Locate the folder where you want to save the Excel file, right-click it, and choose Properties.
Step 2: Switch to the Security tab and click Advanced button.
Step 3: Click Change next to Owner. In the pop-up window, enter the username of your account and click Check Names and OK button.
Step 4: Check Replace owner on subcontainers and objects and Replace all child object permission entries with inheritable permission entries from this object. Then, click Apply and OK to save changes and exit.
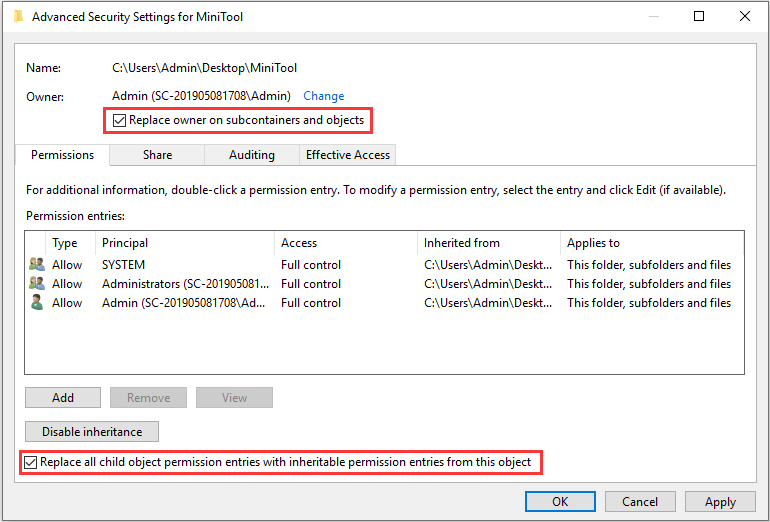
Step 5: Go to Advanced Security settings of the folder again and click Add button this time.
Step 6: Click Select a principal and enter the username as you did in Step 3. When the Basic permissions section is editable, check all the listed permissions and the option below. Click OK button to save changes.
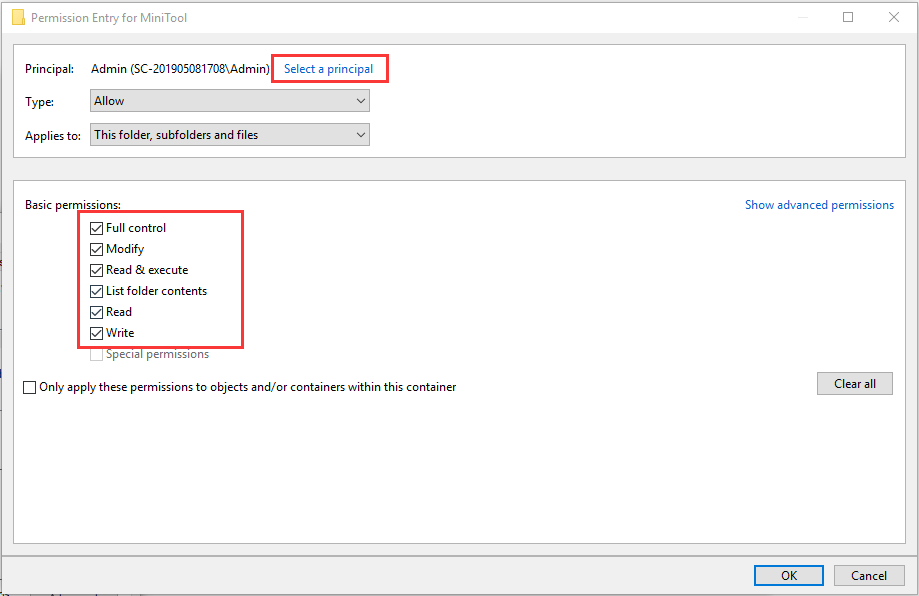
Now, you have a full control of the target folder and you should be able to save the Excel file to this folder without problems.

User Comments :