DNS_PROBE_FINISHED_NXDOMAIN is one of Chrome’s most common DNS errors. If you encounter this error when you try to open a website with Google Chrome, you can find solutions in this post from MiniTool.
When you try to visit a website in Google Chrome, you may come across the error DNS_PROBE_FINISHED_NXDOMAIN. When the error occurs, you are unable to open the website and view its content. To help you visit the website successfully, the following are some effective solutions that can get rid of error DNS_PROBE_FINISHED_NXDOMAIN in Google Chrome.
Solution 1. Temporarily Disable Antivirus Software
It is possible that the antivirus software or the firewall blocks the DNS, causing DNS_PROBE_FINISHED_NXDOMAIN Windows 10 error. To verify if it is caused by the antivirus software, you can temporarily disable the antivirus software on your PC and then check if the DNS_PROBE_FINISHED_NXDOMAIN error disappears.

If it still shows the DNS_PROBE_FINISHED_NXDOMAIN error when you open a website in Google Chrome, then try the following methods.
Solution 2. Change Your DNS to Google’s Public DNS
If you’re using the ISP’s default DNS or the router’s DNS, you may encounter the DNS_PROBE_FINISHED_NXDOMAIN error in Google Chrome. In this case, you can change your current DNS to Google’s public DNS (8.8.8.8 and 8.8.4.4). If you don’t know how, you can follow the steps below.
Here are detailed steps.
Step 1. Type control in the Windows 10 Cortana search box and click the best match Control Panel to open it.
Step 2. On the Control Panel window, set View by Small icons. Then choose Network and Sharing Centers.
Step 3. Choose Change adapter settings. Then select the network you are using now and choose Properties.
Step 4. Find the Internet Protocol Version 4 (TCP/IPv4) and double-click it.
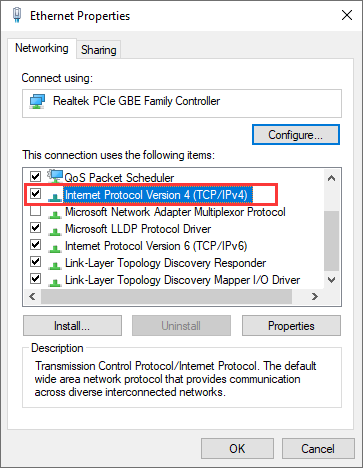
Step 5. Select Use the following DNS Server addresses under the General tab.
Step 6. Set the Preferred DNS Server to 8.8.8.8 and Alternate DNS Server to 8.8.4.4.

Step 7. Then click the OK button to save changes.
Then you can open the website in Google Chrome again and check if DNS_PROBE_FINISHED_NXDOMAIN Windows 10 error gets fixed.
Solution 3. Restart the DNS Client Service
Restarting DNS client service may help you get rid of DNS_PROBE_FINISHED_NXDOMAIN Chrome error. If you still encounter the DNS_PROBE_FINISHED_NXDOMAIN error after trying the first solution, you can try this one. The following will show you how to restart the DNS client service with detailed steps and screenshots.
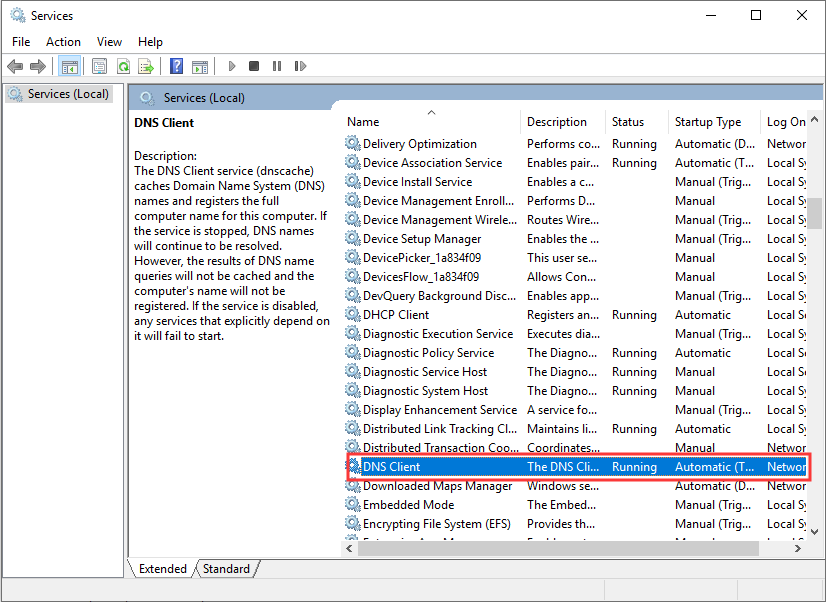
Step 1. Press Windows log + R keys together on your keyboard to bring up the Run dialog box. Then input services.msc and hit Enter.
Step 2. Locate the DNS Client from the list and right-click it to choose Restart.
Step 3. Close Google Chrome browser. Then re-launch it and open the website you tried to open before.
Solution 4. Temporarily Disable the VPN
If you encounter the DNS_PROBE_FINISHED_NXDOMAIN problem when you are using a VPN, you can temporarily disable the VPN. When the VPN is disabled, the Ethernet’s DNS will be used. Then you can open the website in Google Chrome and check if the DNS_PROBE_FINISHED_NXDOMAIN error disappears.
Conclusion
After reading this post, have you fixed the DNS PROBE FINISHED NXDOMAIN Google Chrome error? Which solution works for you? If you have better solutions, please don’t hesitate to share it with us.
User Comments :