
Device encryption vs BitLocker: what’s the difference? Device Encryption and BitLocker are both Windows security features that protect data through full-disk encryption, but they are designed for different users. This article from MiniTool Partition Wizard explains the specific differences between the two and how to turn them on.
Device Encryption and BitLocker are both Windows security features designed to protect data through full-disk encryption, but they differ in availability, management options, and target users.
Quick Answer:
| Feature | Device Encryption | BitLocker |
| Target users | Home users | Professional/business users |
| Availability | Automatic on supported devices | Automatic on supported devices |
| Management | Limited | Advanced |
| Control level | Basic | Full |
Understanding Device Encryption vs BitLocker
Windows provides two encryption options: Device Encryption and BitLocker. Both use BitLocker technology, but they offer different levels of control and management.
What Is Device Encryption in Windows
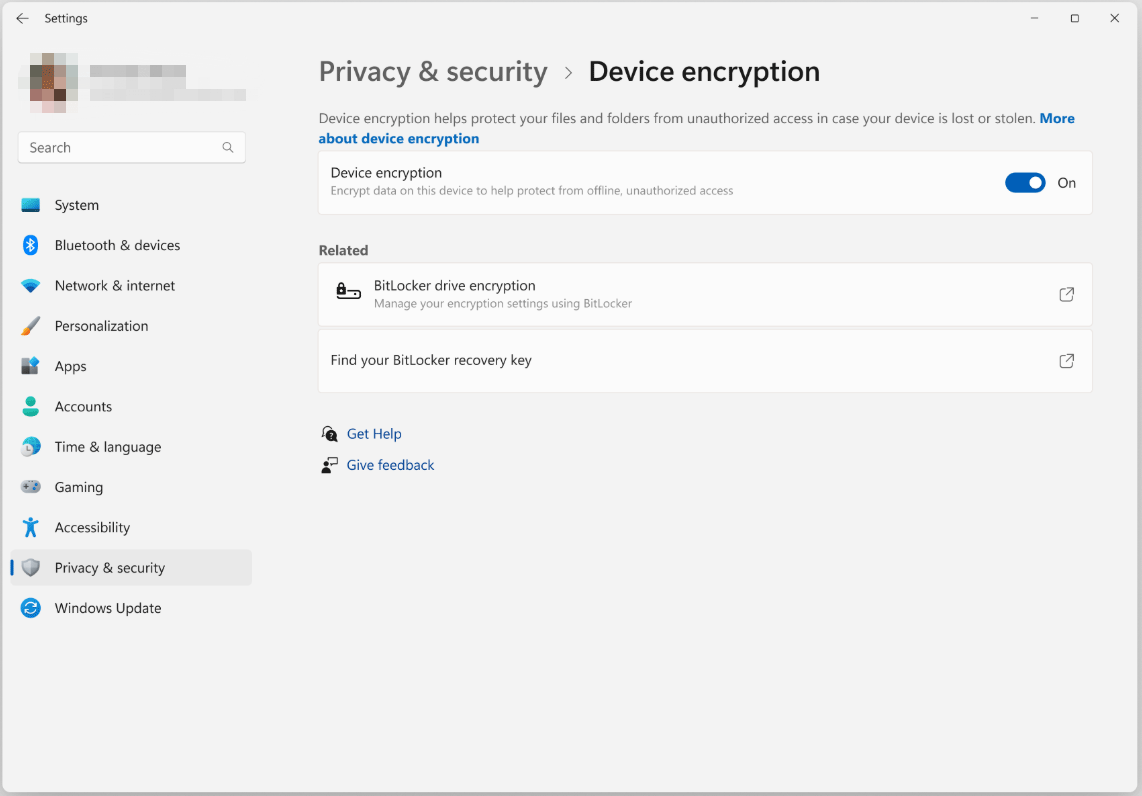
Windows Device Encryption is a built-in security feature that uses BitLocker technology to automatically protect your files on supported devices. It helps keep your data safe if your PC is lost or stolen.
How It Works:
- Automatically starts encryption after you sign in with a Microsoft account on a supported device.
- Uses the Trusted Platform Module (TPM) to securely store encryption keys.
- Automatically backs up the recovery key to your Microsoft account.
What Is BitLocker in Windows
BitLocker is a built-in Windows encryption tool that protects your data by encrypting your drives, making them inaccessible without proper authentication.
How It Works:
- Encrypts the entire drive using BitLocker encryption algorithms.
- Uses TPM, a PIN, a password, or a startup key to verify access during startup.
- Decrypts data transparently after successful authentication, allowing normal use while keeping stored data encrypted.
Windows Device Encryption vs BitLocker: Main Difference
While both Device Encryption and BitLocker use BitLocker technology, they differ in availability, control, authentication, and management options.
1. Availability and Windows Edition Support
BitLocker:
- Available on Windows Pro, Enterprise, and Education editions.
- Designed for users who need advanced encryption features.
Device Encryption:
- Available on supported Windows Home and Pro devices.
- Depends on hardware requirements such as TPM and Secure Boot.
2. Encryption Control and Customization
BitLocker:
- Automatically enabled on supported devices.
- Capable of encrypting system drives, data drives, and removable storage devices.
Device Encryption:
- It can be automatically enabled once hardware requirements are met.
- Primarily encrypts the system drive.
3. Authentication and Unlock Methods
BitLocker:
- Supports advanced options such as TPM + PIN, passwords, and USB keys.
Device Encryption:
- Mainly relies on TPM and normal Windows sign-in for automatic unlocking.
4. Recovery Key Management
BitLocker:
- Allows recovery key management through manual backup, Active Directory, Microsoft Entra ID, or Intune.
Device Encryption:
- Automatically backs up the recovery key to a Microsoft account.
5. Target Users and Use Cases
BitLocker:
- Best for businesses, IT professionals, and users who need advanced control.
Device Encryption:
- Best for personal users who want basic protection without managing settings.
How to Turn on Device Encryption and BitLocker
Device Encryption and BitLocker are the two most common disk encryption solutions. The choice between them depends on your Windows version, hardware support, and management requirements.
Below, we provide a detailed guide on how to turn on Device Encryption and BitLocker in Windows 10/11, helping you quickly set up disk protection.
Turn on Device Encryption on Windows 10/11 Home
Before enabling encryption, please confirm that you have administrator privileges and are signed in with a Microsoft account, and ensure your device supports TPM 2.0 or 1.2 and Secure Boot to meet the requirements for Device Encryption.
Here are the steps to turn on Device Encryption in Windows 10/11 Home:
- Press Windows + I to open Settings.
- Go to Privacy & security > Device encryption.
- Turn the Device encryption switch to On.
Turn on BitLocker
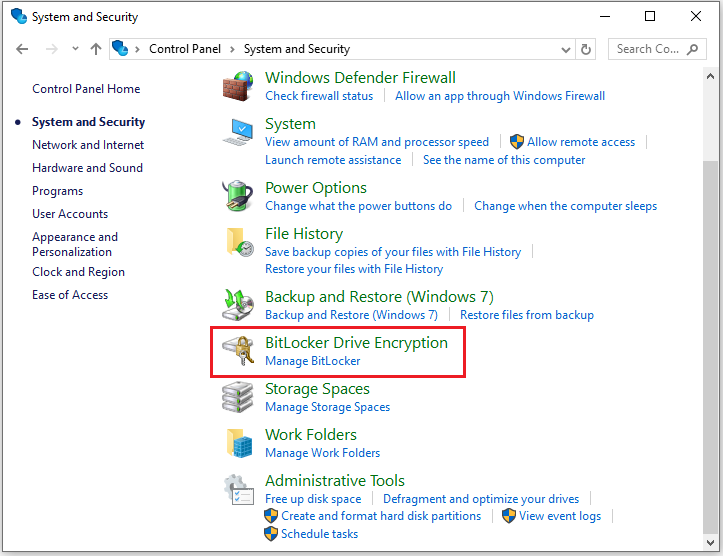
Windows offers various ways to enable BitLocker; you can perform disk encryption via Control Panel, Settings, the Command Prompt, or third-party tools.
The following section uses MiniTool Partition Wizard as an example to demonstrate how to enable BitLocker disk encryption.
Furthermore, the tool supports disabling BitLocker and locking or unlocking encrypted drives, allowing you to manage encrypted disks more conveniently.
MiniTool Partition Wizard FreeClick to Download100%Clean & Safe
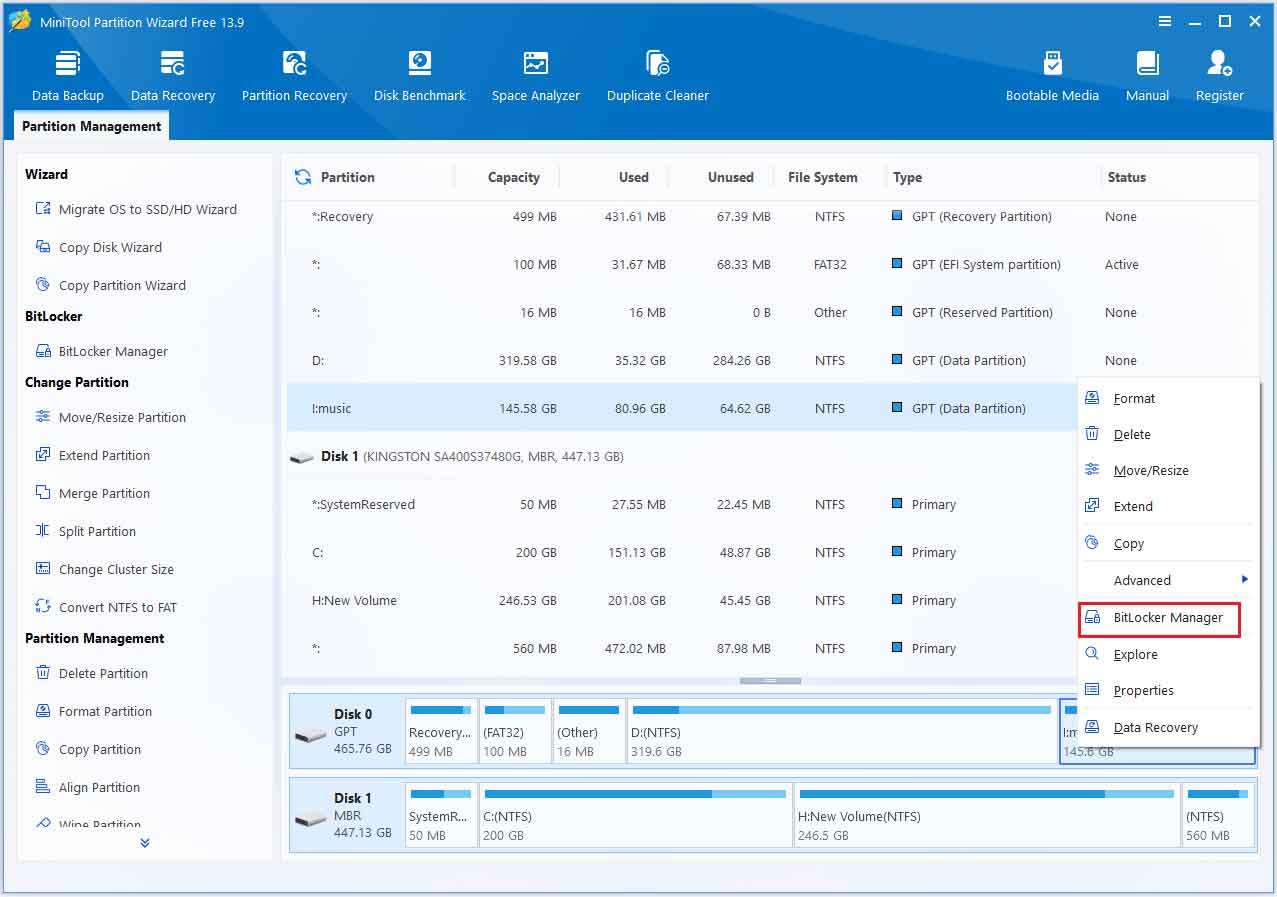
Step 1: Run MiniTool Partition Wizard, right-click your desired drive, and click BitLocker Manager from the context menu.
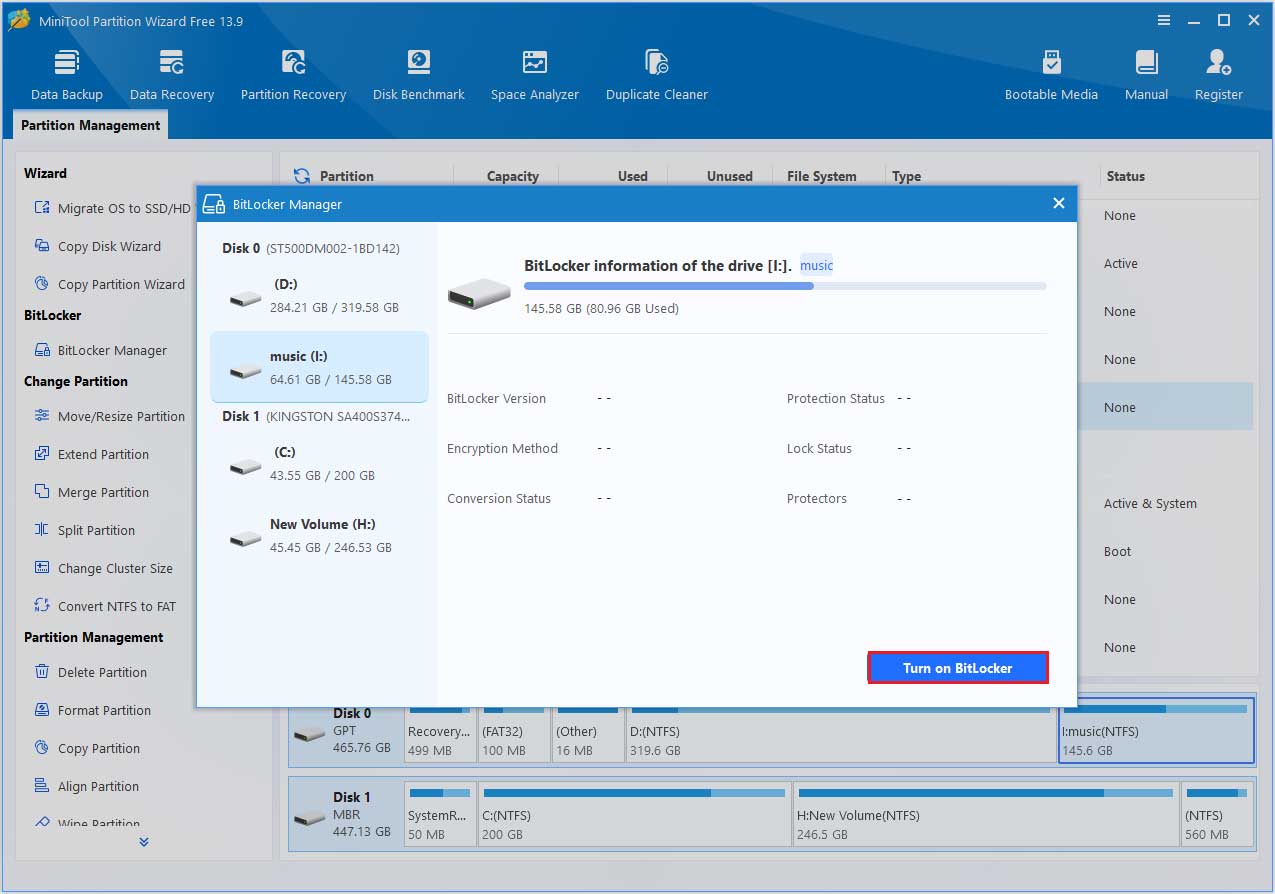
Step 2: From the pop-up window, click the Turn on BitLocker button.
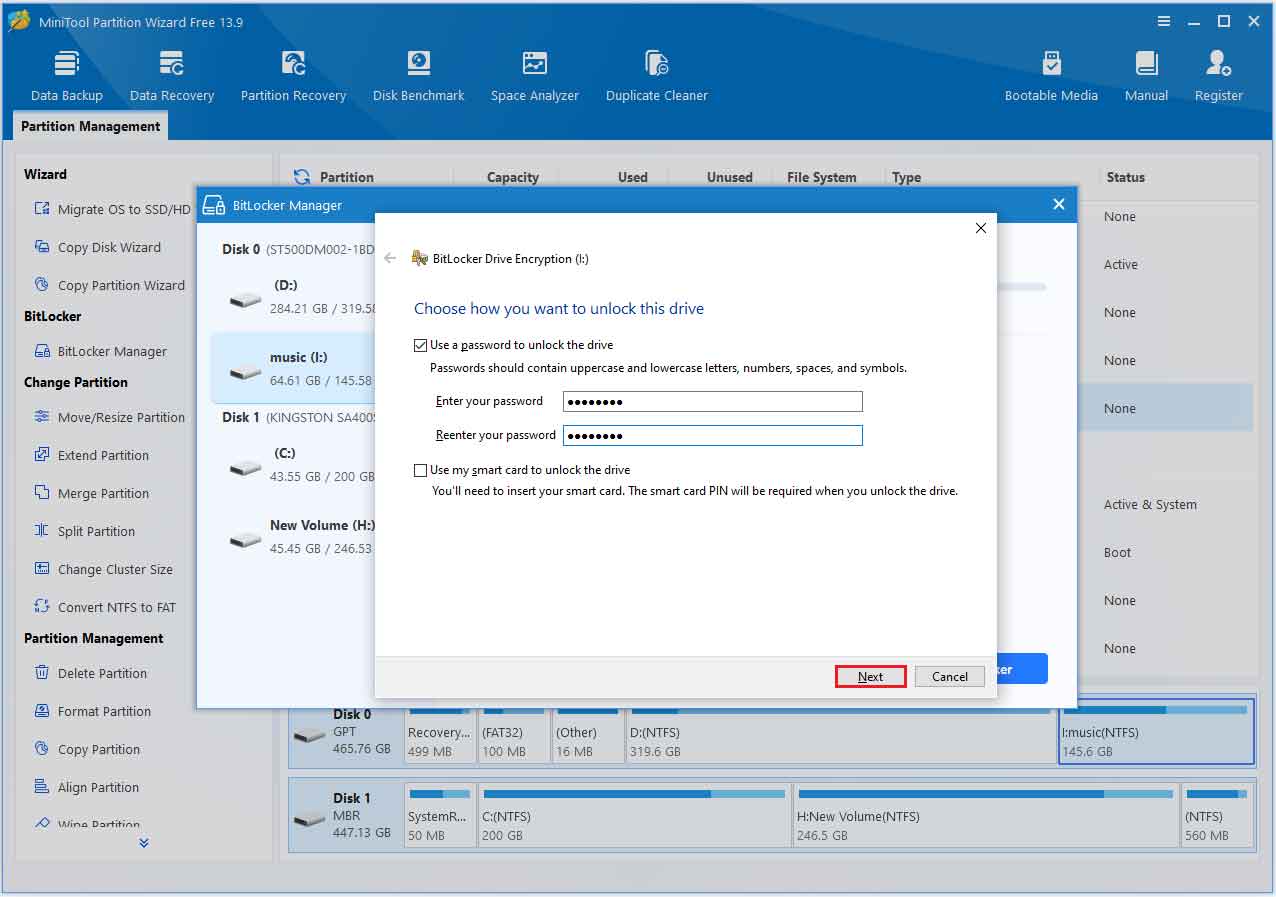
Step 3: Choose a method to unlock the drive, enter the password, and then click Next.
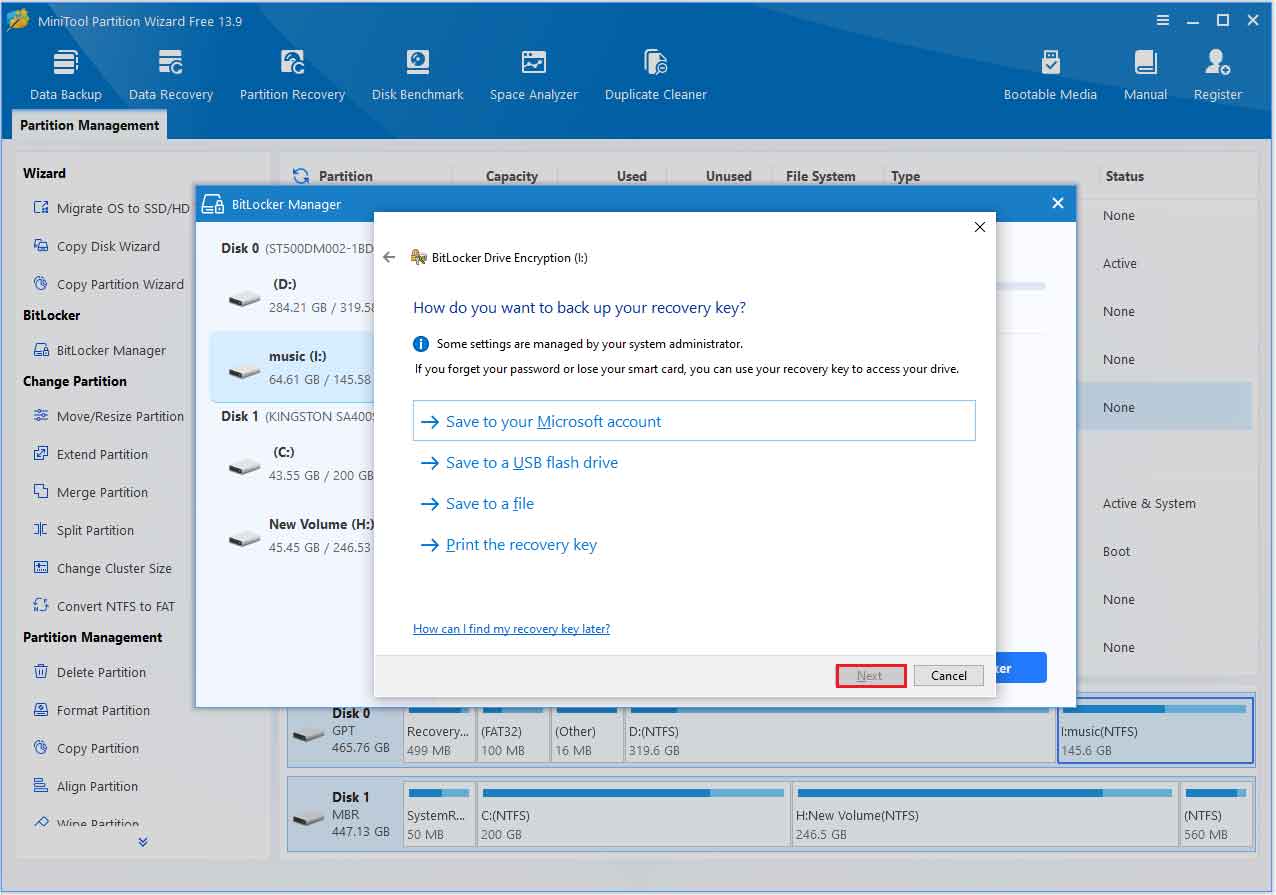
Step 4: Choose where to save the recovery key. Here, we take Save to a file, for example. Click it and then choose a location to save the recovery key, then click Save > Next.
- Save to your Microsoft account: Stores the recovery key in the user’s Microsoft account.
- Save to a USB flash drive: Saves the recovery key to a USB drive, allowing you to keep an offline backup.
- Save to a file: Stores the recovery key in a .TXT file on a different drive.
- Print the recovery key: Creates a printed copy of the recovery key for safekeeping.
Step 5: Choose which portion of the drive to encrypt and click Next to continue.
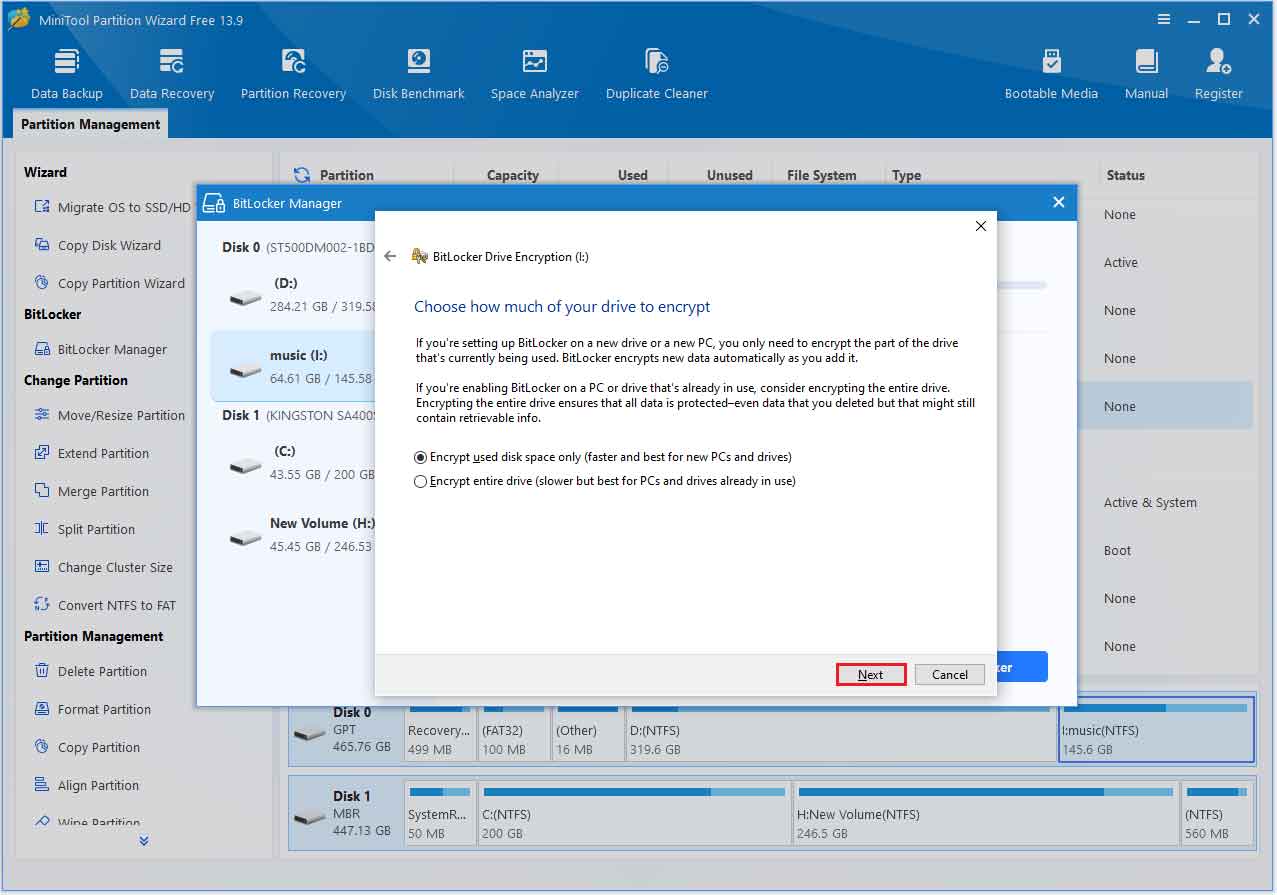
Step 6: Select the encryption mode and click Next.
Step 7: Click Start encrypting to begin the encryption process.
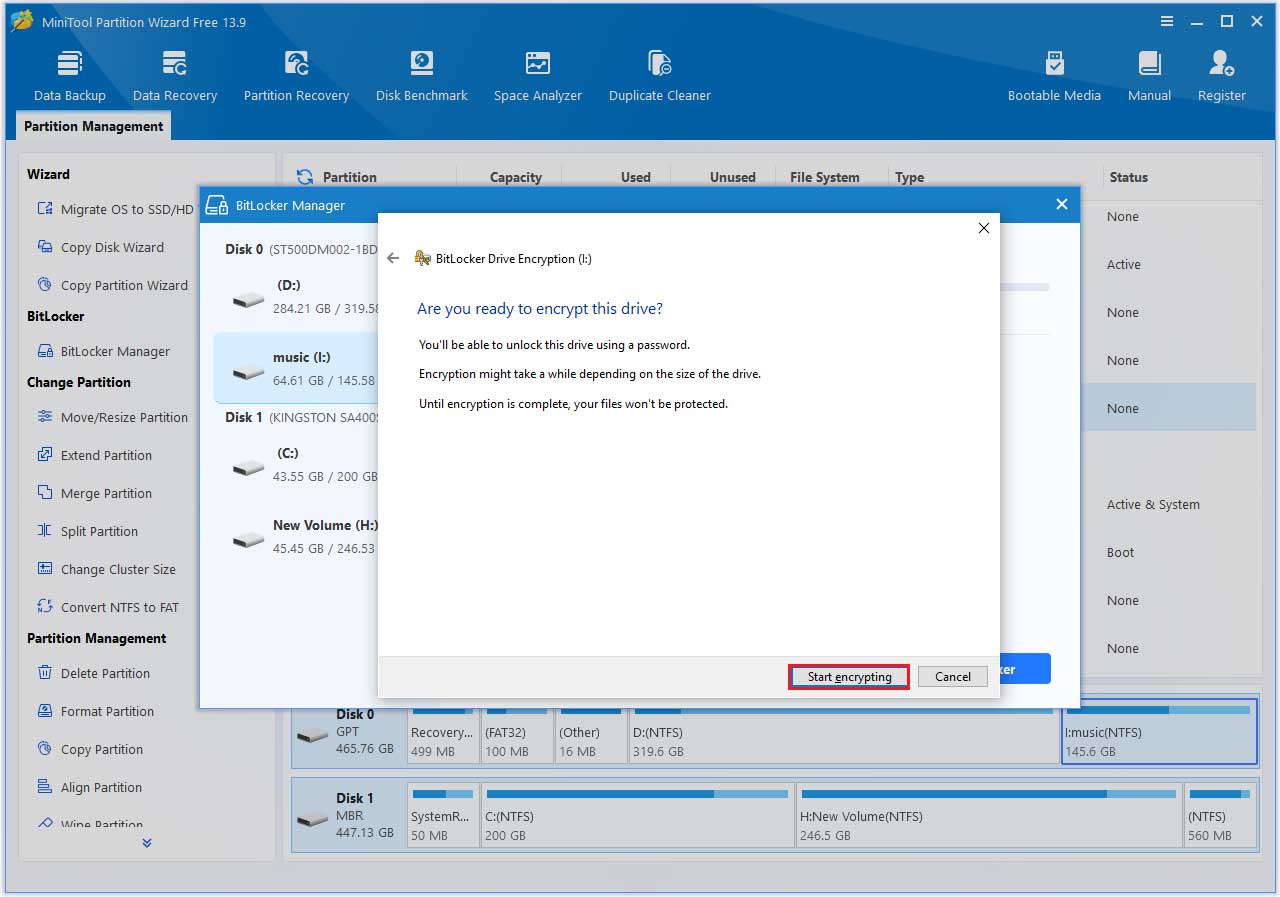
Step 8: After the process is complete, click Close to return to the main interface. The target drive will now show an unlocked lock icon, indicating that BitLocker has been enabled successfully.
Bottom Line
In this article, we explored Windows 11 Device Encryption vs BitLocker, explained their key differences, and provided step-by-step instructions on how to enable both encryption features.
If you have any questions or feedback about MiniTool Partition Wizard, feel free to contact our support team at [email protected] for additional help.
User Comments :