According to user reports, the “there are no more files on Windows 10” error can occur due to the following reasons.
- Damaged or corrupted files or folders
- Virus attacks on your computer
- Malware slipped into your computer while surfing the Internet
- Missing DLL, SYS, and EXE files
- Malfunction in the Registry
- Firewall down
- Third-party or inbuilt software incompatibility
Solution 1: Stop the ADSM Service
ADSM (ASUS Data Security Manager) stops you from copying, saving, and downloading files to other folders except the desired one. Once you receive the there are no more files error, check if ADSM is installed on your PC. If so, stop or uninstall it immediately.
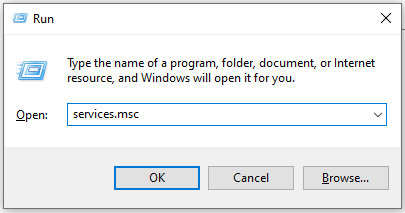
Step 1: Open the Run window by holding Windows and R keys.
Step 2: Type services.msc and press Enter.
Step 3: In the Services window, find and right-click on the ADSM service and click the Stop option.
Solution 2: Perform a Clean Boot
It is recommended to perform a clean boot to disable all third-party programs. A clean boot stops other background apps or services from starting automatically, which may help you solve the “there are no more files” error. Follow the steps below to clean boot your PC now!
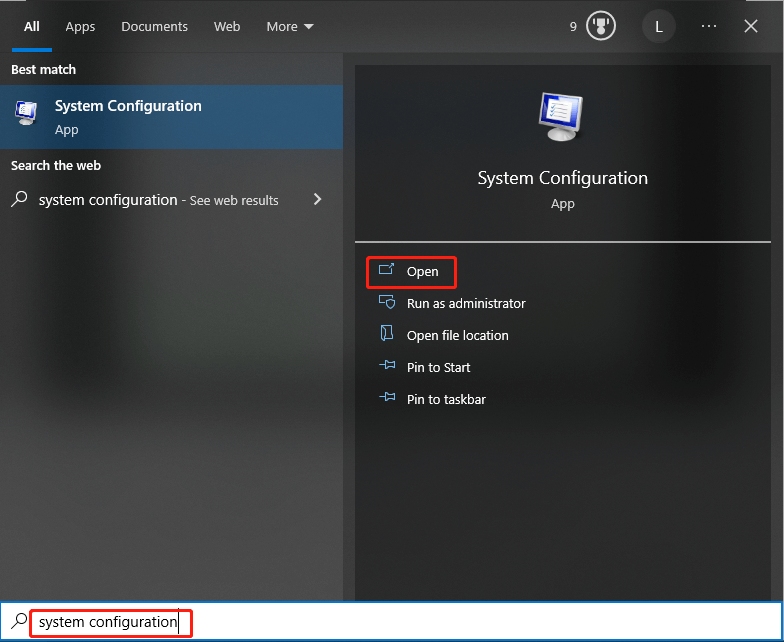
Step 1: Type system configuration in the search box and then click the Open option under the target app.
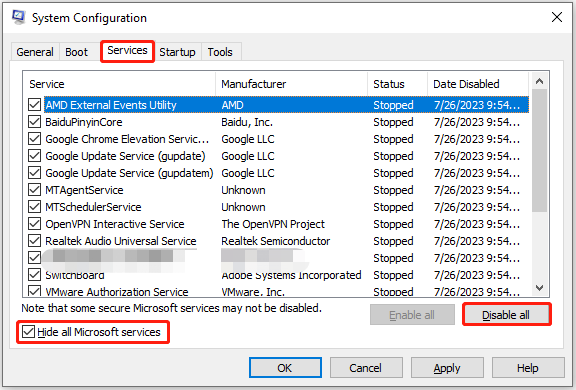
Step 2: Switch to the Services tab, check the Hide all Microsoft services option, and click Disable all.
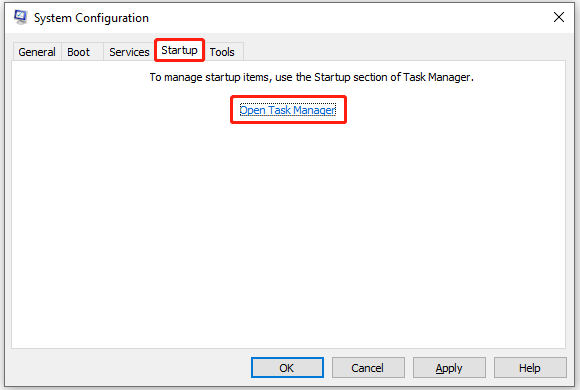
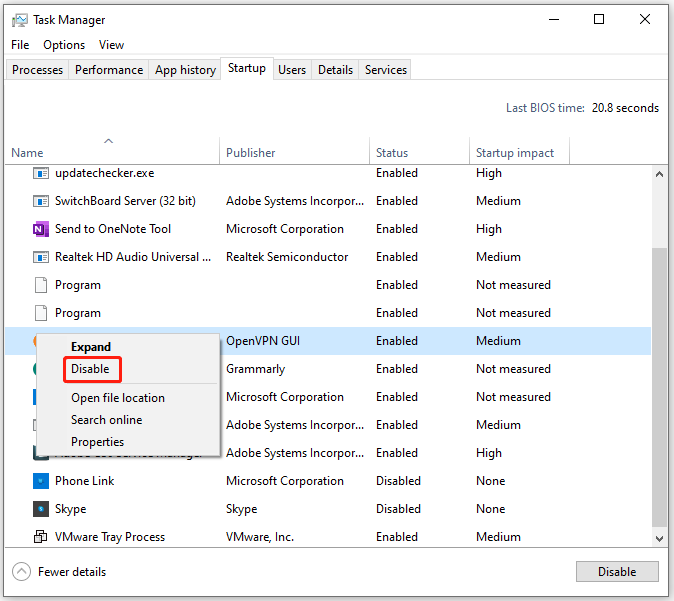
Step 3: Navigate to the Startup tab and click the Open Task Manager link.
Step 4: Under the Startup tab, right-click on the item and click Disable. Repeat this operation until all the non-critical Microsoft services and third-party applications are disabled.
Step 5: Restart your computer and check if you can save any file on the computer successfully.
Solution 3: Check the Hard Drive for Errors
If there are any errors with your hard drive, you will see the “there are no more files on Windows 10” error. You’d better check your hard drive for errors when the discussed issue occurs. MiniTool Partition Wizard – a multifunctional partition manager for Windows PCs, can help you find if there are bad sectors and file system errors on the disk.
Download and install MiniTool Partition Wizard on your computer. Then launch it and follow the steps below to check your hard drive for errors.
MiniTool Partition Wizard FreeClick to Download100%Clean & Safe
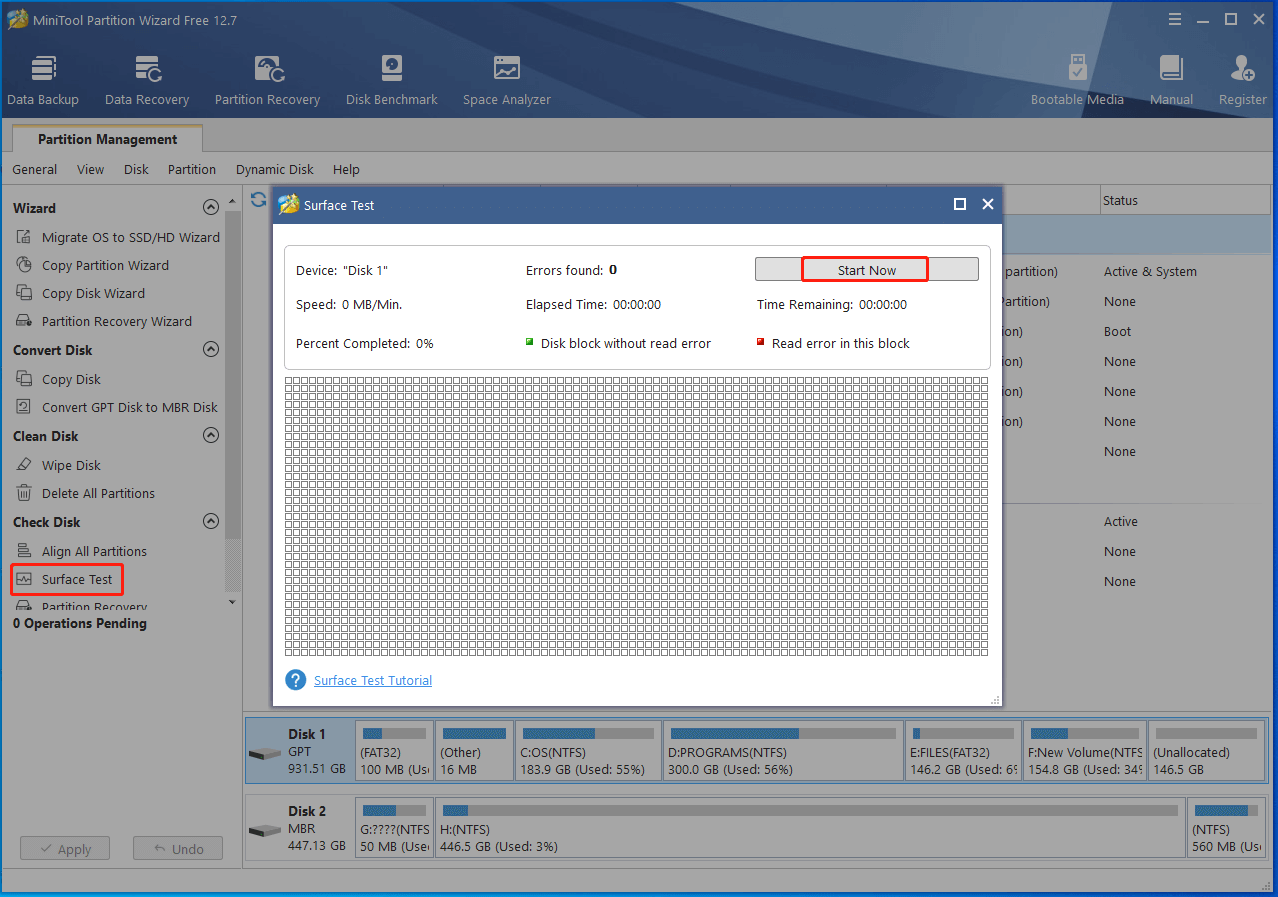
Step 1: Click on the whole disk or a specific partition and click Surface Test in the left panel.
Step 2: In the prompted window, click the Start Now button to begin the process. You will see the complete scan result after the scanning process ends. If there are any blocks marked with red, it means that the disk/partition contains bad sectors. Based on the specific situation, shield the bad sectors or replace the disk.
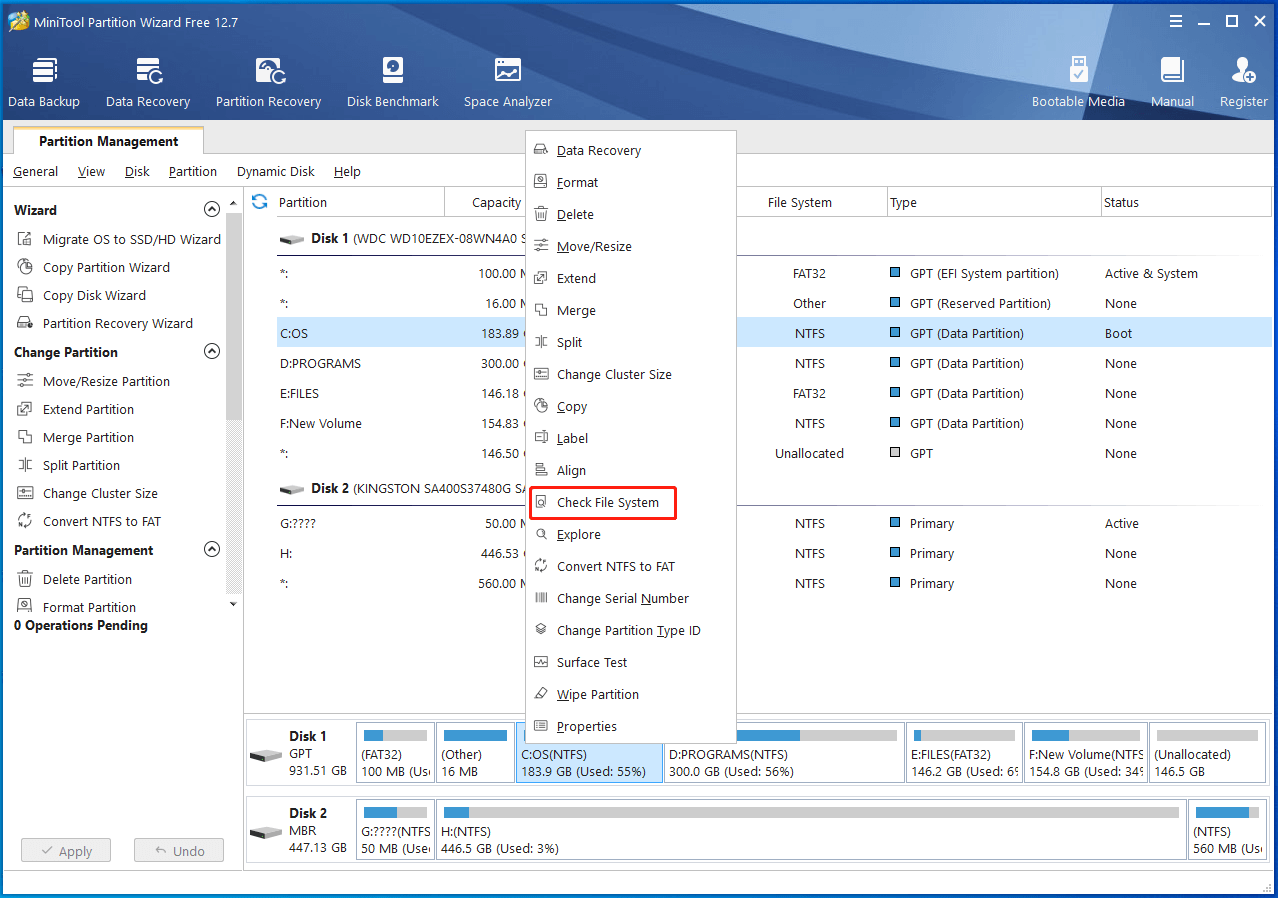
Step 3: To detect and fix file system errors on the drive, right-click on a certain partition and hit the Check File System option.
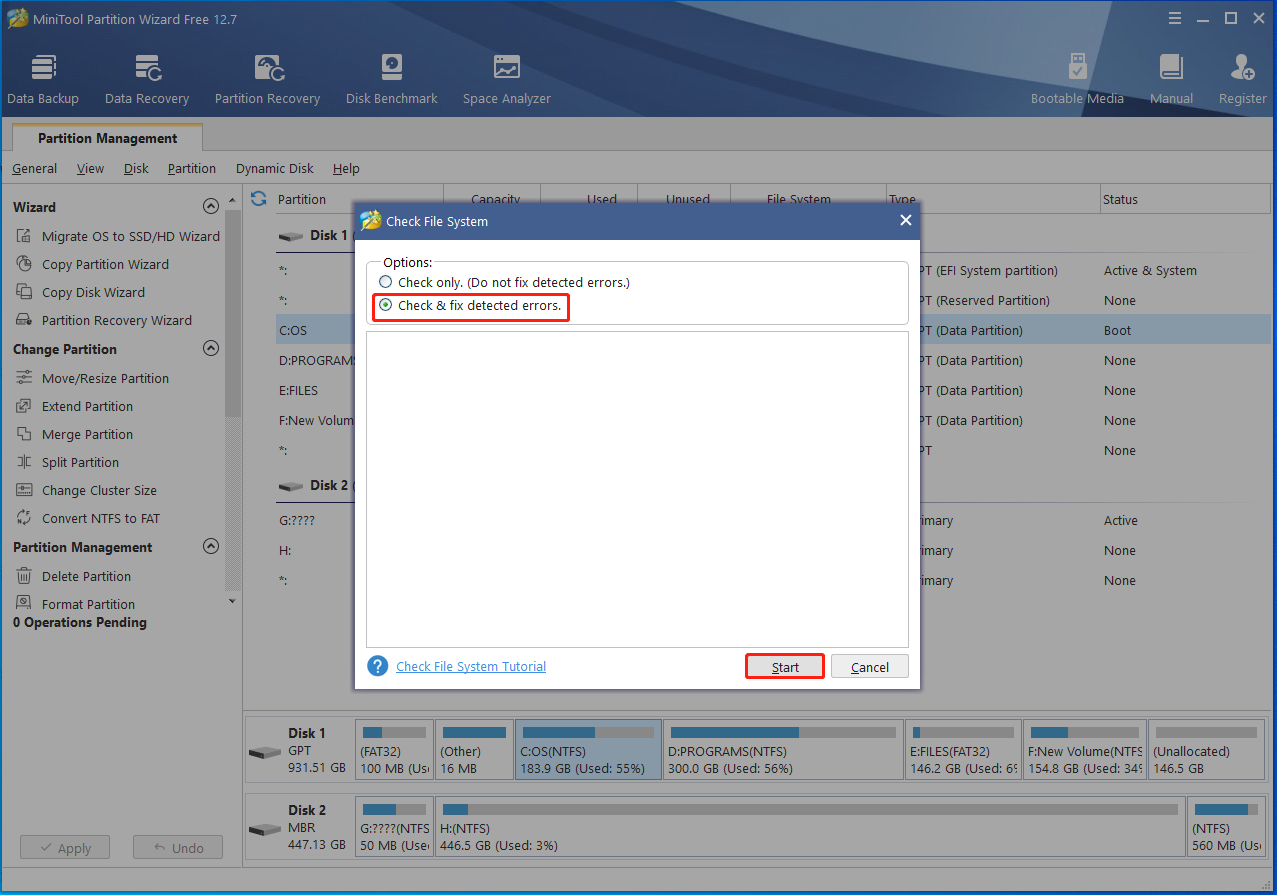
Step 4: In the pop-up window, choose Check & fix detected errors and click Start. After that, this partition software will automatically find and fix file systems errors on the selected partition.
Also read: 2 Ways to Replace GRUB with Windows Boot Manager
Solution 4: Perform an SFC Scan
Once system files are missing or corrupted, you will encounter various errors including there are no more files error. So, it is vital to run an SFC scan to repair missing or damaged system files after you receive the error.
Step 1: Open the Run window, type cmd, and then hold Ctrl + Shift + Enter keys to run Command Prompt as administrator.
Step 2: In the Command Prompt window, type sfc /scannow and hit Enter.
Step 3: Wait for the finish of the process.
![Windows Can’t Check the Disk While It’s in Use [Solved]](https://images.minitool.com/partitionwizard.com/images/uploads/2023/07/windows-cant-check-the-disk-while-its-in-use-thumbnail.jpg)
Solution 5: Run a Full System Scan
As malware and viruses can result in errors like there are no more files, running a full system scan for viruses is recommended. The following steps show you how to do that.
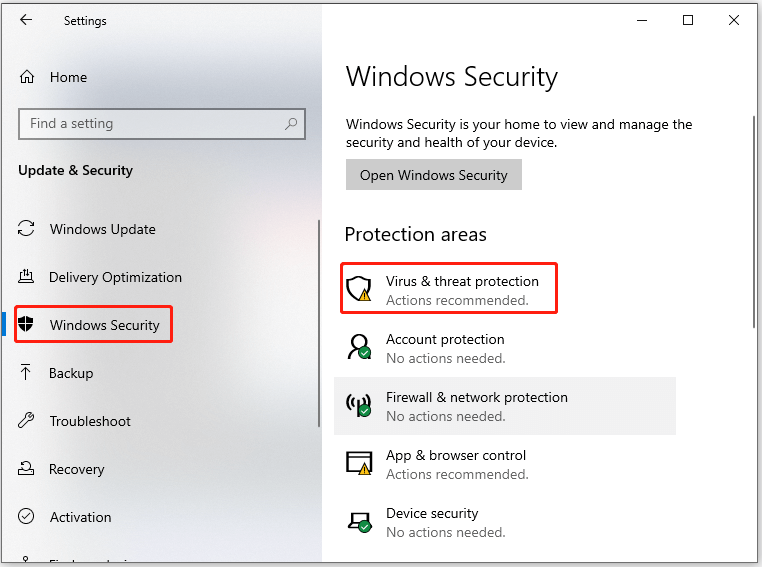
Step 1: Open Settings by pressing Windows and I keys.
Step 2: Click Update & Security > Virus & threat protection.
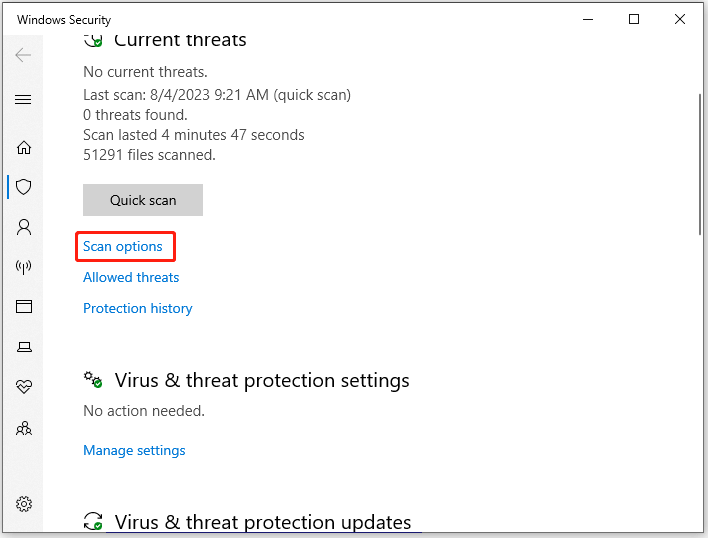
Step 3: In the next window, click Scan options.
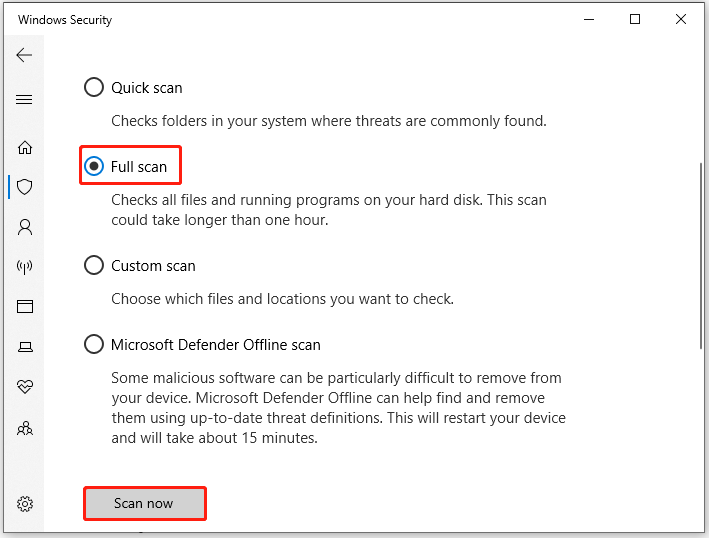
Step 4: Tap on Full scan and then click Scan now to start the process.
Step 5: Wait patiently until the process ends.
You may also like this: Here’re 2 Ways to Remove Virus from SD Card Without Formatting
User Comments :