How to recover lost photos from Vivitar camera? If you are looking for Vivitar camera photo recovery software, Partition Magic is a good choice. It offers you a full data recovery tutorial.
Causes of Photo Loss from Vivitar Camera
Vivitar Camera is a well-known camera brand. You can take beautiful photos and videos with Vivitar Camera. However, when using Vivitar Camera, you may accidentally lose your precious photos due to the following reasons:
- Accidental deletion: Accidental deletion of photos while browsing photos or performing camera operations.
- SD card formatting: Accidental formatting of the camera’s memory card will cause all stored photos to be deleted.
- SD card corruption: Physical damage, file system errors, or sudden power outages can cause memory card corruption and make photos inaccessible.
- Virus or malware attack: The camera’s memory card is infected by malware, causing photos to be unreadable or deleted.
- Camera malfunction: The camera has technical problems or firmware failures, resulting in photo loss.
Whatever the reason, the photos from your Vivitar camera are lost. Faced with lost photos, you may wonder: Is it possible to recover lost photos from Vivitar camera?
Of course you can. If your photos are deleted accidentally, the storage space will be marked as available to accommodate new data. The deleted photos will remain there until they are overwritten by new data. Therefore, when you find that your photos are lost, you should stop using the camera immediately.
How to Recover Lost Photos from Vivitar Camera
To perform the Vivitar camera photo recovery, we recommend you use this professional data recovery tool – MiniTool Partition Wizard, which can help you perform formatted hard drive data recovery quickly and effectively.
Additionally, it is an all-in-one partition manager that allows you to perform various operations related to disks/partitions. It can partition a hard drive, clone a hard drive, convert MBR to GPT without data loss, migrate OS to SSD/HD, etc.
Here is how to recover deleted photos from Vivitar camera using MiniTool Partition Wizard.
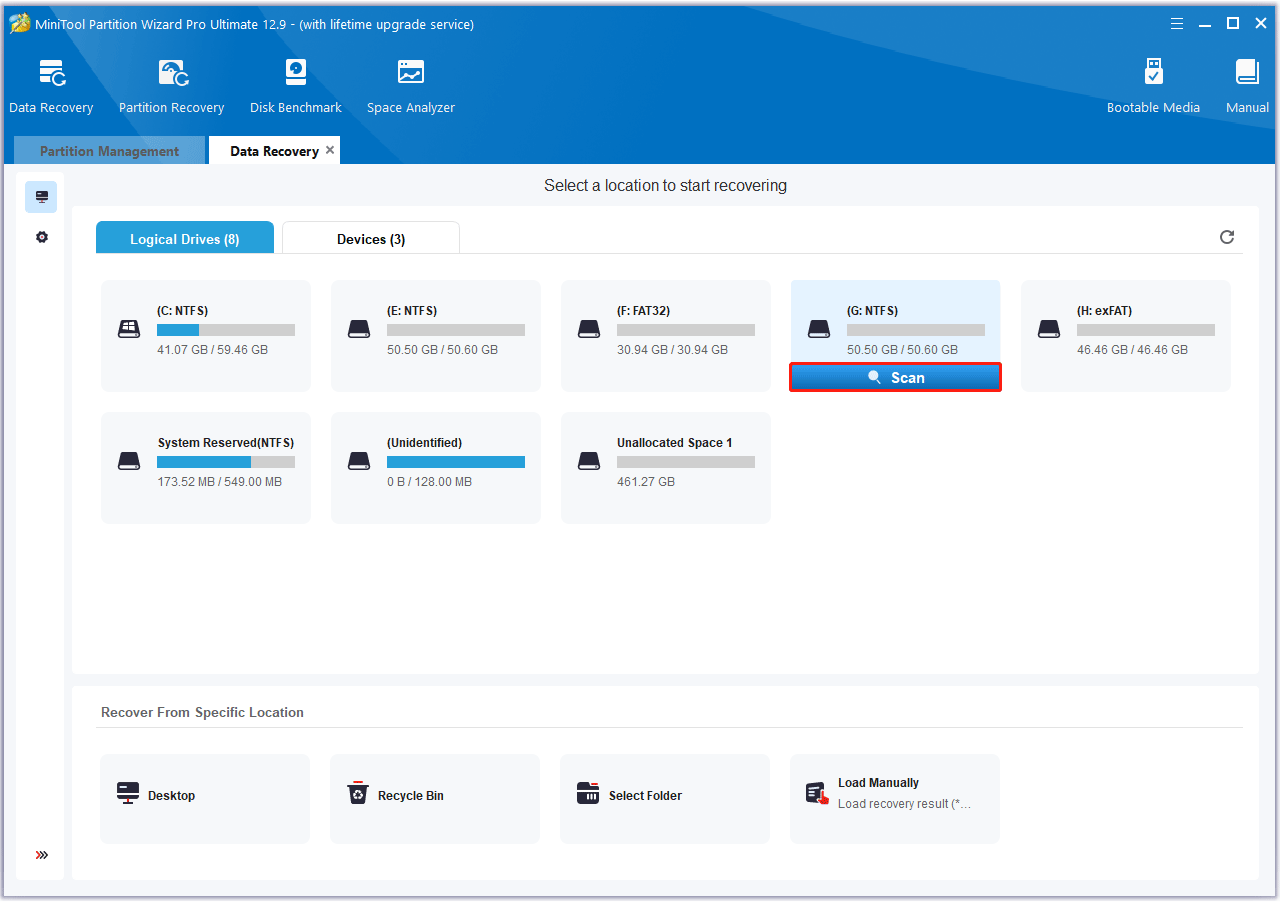
Step 1. Remove the SD card from Vivitar camera, and then use a card reader to connect it to your PC. Then launch the MiniTool software to enter its main interface and click Data Recovery in the top toolbar.
MiniTool Partition Wizard DemoClick to Download100%Clean & Safe
Step 2. In the pop-up window, under the Logical Devices tab, select the partition on the SD card and click Scan.
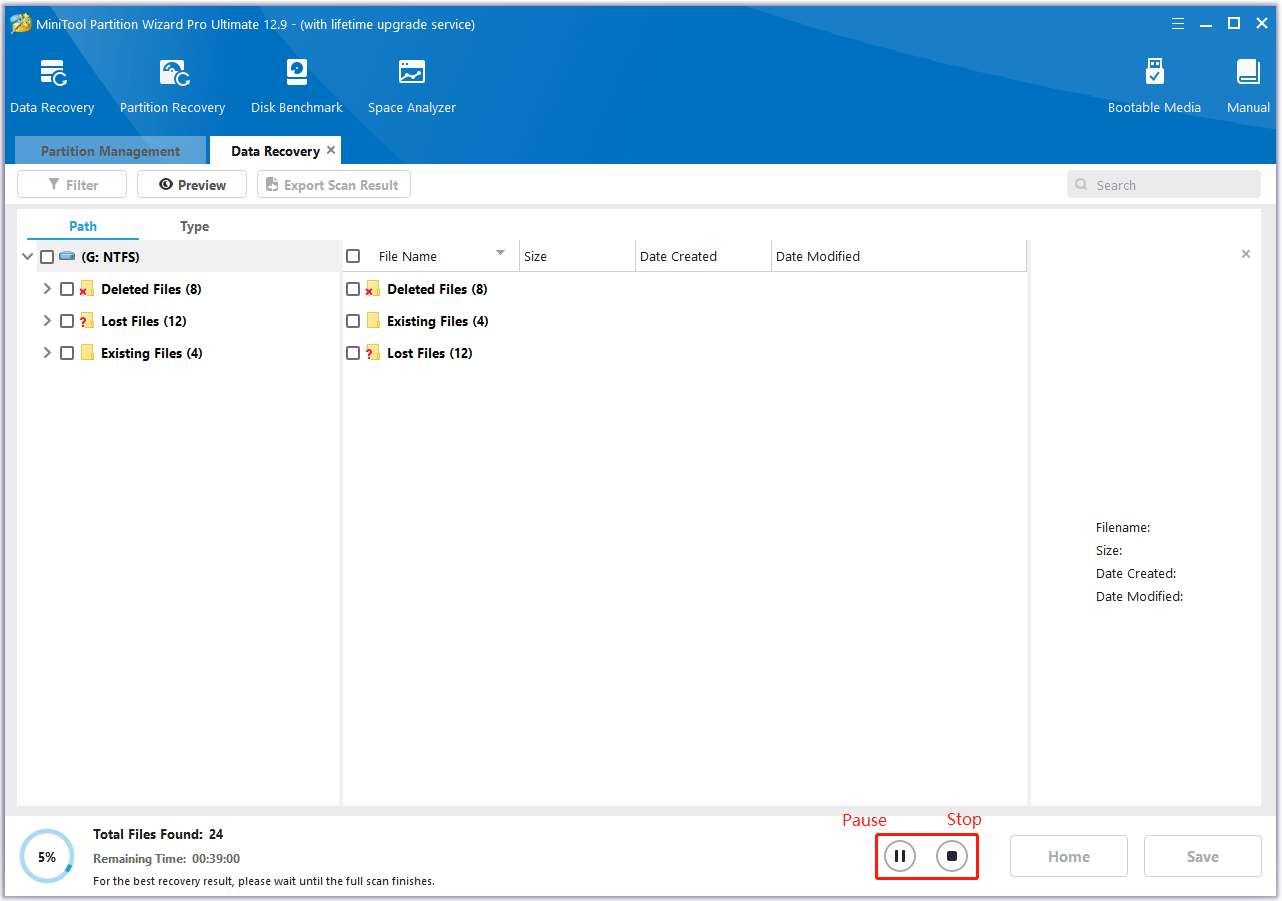
Step 3. Then, wait for the scan to complete. If the desired data is found, you can click the Pause or Stop icon to get instant data recovery.
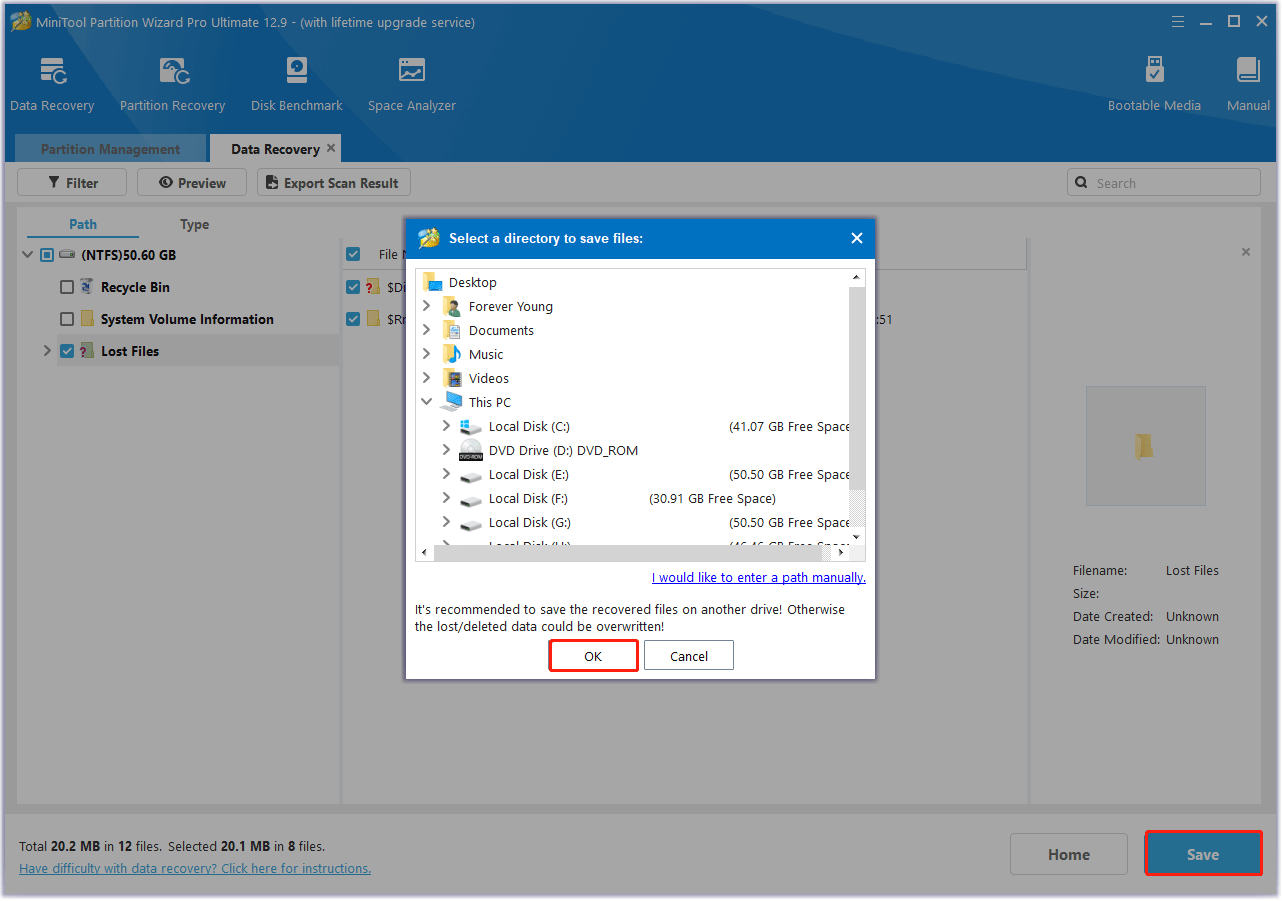
Step 4. After completing the scan, you can click the Search box in the upper right corner and type the specific file name to quickly find the needed file. Then, make sure to tick the checkboxes of the folders/files you want to recover and click Save. Here, you can click the Preview button to preview the files/folders.
Step 5. In the pop-up window, select the location to save the selected files/folders and click OK to confirm this action.
Losing photos from your Vivitar camera can be very worrying. How to minimize the risk of losing photos from your Vivitar camera’s SD card? You can follow these suggestions:
- Backup regularly: Back up your Vivitar camera data to your computer frequently.
- Handle properly: Eject the SD card safely and avoid exposing the camera to extreme conditions.
- Battery check: Make sure the camera is fully charged before use to avoid interruptions during recording.
- Avoid multitasking: Avoid performing multiple operations, such as deleting and recording on the camera at the same time.
Bottom Line
How to recover deleted photos from Vivitar camera? This article will provide a professional data recovery tool to help you get your photos back. In addition, this article also provides some tips to prevent Vivitar camera SD card data loss.
About The Author

Position: Columnist
Vega enjoys helping people with computer problems, including disk management, data recovery, data backup, and more. She is constantly expanding her knowledge in related fields. And she will continue to bring more easy-to-understand professional articles to help people solve various problems on the PC.
User Comments :