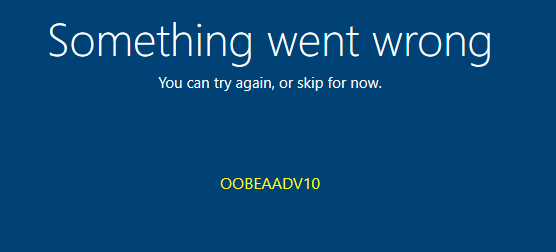
What can cause the OOBEAADV10 error? How to fix it? If you are curious about the answers to these questions, this post is worth reading. Here, MiniTool Partition Wizard provides the possible reasons that may trigger this error and how to fix it.
About OBEAADV10 Error
OOBE, abbreviated from out-of-box experience, refers to the user experience that takes place after software installation and immediately following the first launch of a software product. In the Windows system, it always shows when you first use your PC or after a version update.
The OOBE can help users use their PC more smoothly. However, some users encounter errors during this process, like the OBEAADV10 error.
The OBEAADV10 error can be caused by various reasons. Here are some of the most common reasons:
- Corrupt Registry entries
- Incorrect drivers
- Software conflicts
- Hardware issues
- Corrupt system files
- Unstable network issues
Have you also encountered the same error? Do you want to know how to fix the OOBEAADV10 error? If you also have the need, you can keep reading to get some useful solutions.
Way 1. Try Some Basic Tricks
Before you try other advanced solutions to the OOBEAADV10 error, you should try some basic tricks.
- Click the Try again button.
- Restart your PC.
- Install Windows Updates.
- Remove the connection of peripheral devices.
- Temporarily disable the antivirus app.
Way 2. Repair Registry Entries
If there is something wrong with your Registry entries, you may also encounter the OOBEAADV10 error. In this case, you can try repairing Registry entries to fix this error. Here’s the way:
For Windows 10:
- In the OOBE screen, press the Shift and F10 keys simultaneously to launch Command Prompt.
- Type “regedit” and press Enter to open Registry Editor.
- Navigate to this path: “HKEY_LOCAL_MACHINE\SOFTWARE\Microsoft\Windows\CurrentVersion\Setup\OOBE“.
- Right-click an empty location in the right pane.
- Then select New > DWORD (32-bit) Value.
- Name it “SetupDisplayedOOBEAADV“.
- Double-click it and type “00000001” in the data value option.
- Next, click OK. Exit the Registry Editor window and click the Try Again button to access the setup windows.
For Windows 11:
- In the OOBE screen, press the Shift and F10 keys simultaneously to launch Command Prompt.
- Type “regedit” and press Enter to open Registry Editor.
- Follow the path: “Computer\HKEY_LOCAL_MACHINE\SYSTEM\CurrentControlSet\Control\Session Manager\Memory Management”.
- Right-click CommitLimit and select Delete.
- Click Yes to confirm the changes.
- Close the Registry Editor window and reboot your computer.
Way 3. Reload OOBE Screen Again
If the OOBEAADV10 error is caused by corrupted files or an unstable Internet issue, you can try reloading the OOBE screen again to fix this error. To do that, you can do as follows:
- Press the Shift and F10 keys simultaneously to launch Command Prompt.
- Then type “%windir%\System32\Sysprep\sysprep.exe /oobe /reboot” and press Enter.
- After that, the PC will restart and load the OOBE screen.
Way 4. Using Local or Temporary Account
Some people report that using a local or temporary account helps them fix the OOBEAADV10 error successfully. You can also have a try with these steps:
Step 1. Press the Shift + F10 keys simultaneously to launch Command Prompt.
Step 2. Copy the following commands and replace the newuserpassword and newusername as per your choice:
net user administrator /active:yes
net user /add newusername newuserpassword
net localgroup administrators newusername /add
cd %windir%\system32\oobe
msoobe.exe
Step 3. Then, press Enter. Wait for the process to be complete.
Step 4. If your PC is turned off, turn it on again. Then you can see the login screen.
Step 5. Sign in with your given username and password.
Step 6. Once the desktop is loaded, press the Windows + R key simultaneously.
Step 7. Next, type “lusrmgr.msc” and press Enter.
Step 8. Select Users, and then right-click Administrators.
Step 9. Select Properties, and check Account is Disabled. Then, click Apply and OK.
Step 10. Now, right-click Defaultuser0 and select Delete.
Step 11. Press the Win + I key simultaneously, go to Accounts > Your info, and then click Sign in with Microsoft account.
Step 12. Follow the instructions to complete the account setup.
Way 5. Run Windows Update Troubleshooter
If you encounter the OOBEAADV10 error after a version update, you can try running the Windows update troubleshooter to fix this error. Here’s how to do it:
- Press the Windows + I key simultaneously to open the Settings window.
- Navigate to Update & Security > Troubleshoot, and click Additional troubleshooters.
- Then, select Windows Update and click Run the troubleshooter.
- Follow the on-screen to complete the process.
Way 6. Run SFC
Running SFC may also help you fix the OOBEAADV10 error. You can have a try. To do that, you can refer to this post: Run System File Checker (SFC) to Repair Corrupted System Files.
Way 7. Reset the PC
If none of the methods can help you fix the OOBEAADV10 error, you can try resetting the PC to fix this error. After resetting the PC, many errors can be fixed. If you don’t know how to reset the PC, you can follow the guide in these posts:
In addition, MiniTool Partition Wizard is a professional and feature-rich disk manager that can not only help you manage your partition or disk but can also recover your lost or deleted files.
If you forgot to back up your system hard drive before you reset your PC and lost all the data, you can use MiniTool Partition Wizard’s Data Recovery feature to get the data back.
MiniTool Partition Wizard DemoClick to Download100%Clean & Safe
Bottom Line
How to fix the OOBEAADV10 error? Now, you may already get the answers. This post provides 7 effective solutions to this error. You can try them one by one until you fix it successfully.
About The Author

Position: Columnist
Charlotte is a technology columnist with a strong focus on the Windows operating system, specializing in disk management, backup, and data recovery. She is passionate about analyzing computer errors, identifying root causes, and delivering practical solutions. In her free time, she stays updated on the latest developments in computer systems and hardware while continuously learning new technologies to broaden her expertise. Her writing style is clear and easy to understand, making complex technical topics accessible even to users with limited computer knowledge.
User Comments :