In this post, MiniTool Partition Wizard tells you a step-by-step guide on Lexar data recovery. If you want to recover data from Lexar SD card, you can try the Lexar recovery tool provided in this post.
Lexar is a brand of flash memory products, including USB flash drives, memory cards, and solid state drives (SSDs). These storage devices are widely used to store data for various digital devices, such as cameras, smartphones, tablets, and computers.
Your Lexar SD card may encounter data loss due to various reasons, such as:
- Accidental file or partition deletion
- SD card formatting
- Reformatting
- Bad sectors
- Malware and virus infection
- SD card damage
- …
How to perform Lexar data recovery? There are some Lexar recovery tools that can help you recover data from Lexar SD card.
#1. Use MiniTool Partition Wizard
When you encounter data loss on the Lexar storage device, such as SD cards, USBs, or SSDs, you can use a reliable Lexar recovery tool to recover your lost files. Here, we recommend you use MiniTool Partition Wizard, which is a powerful and professional data recovery tool that can help you recover various files from damaged, formatted, and inaccessible drives.
In addition, MiniTool Partition Wizard also enables you to recover partitions, check partition for errors, migrate OS to another disk, clone disks, increase the storage space, etc.
Now, here is the guide on how to perform Lexar data recovery using MiniTool Partition Wizard.
Step 1. Download and install MiniTool Partition Wizard on your computer.
MiniTool Partition Wizard DemoClick to Download100%Clean & Safe
Step 2. Connect your Lexar device to your computer using a card reader or a USB cable.
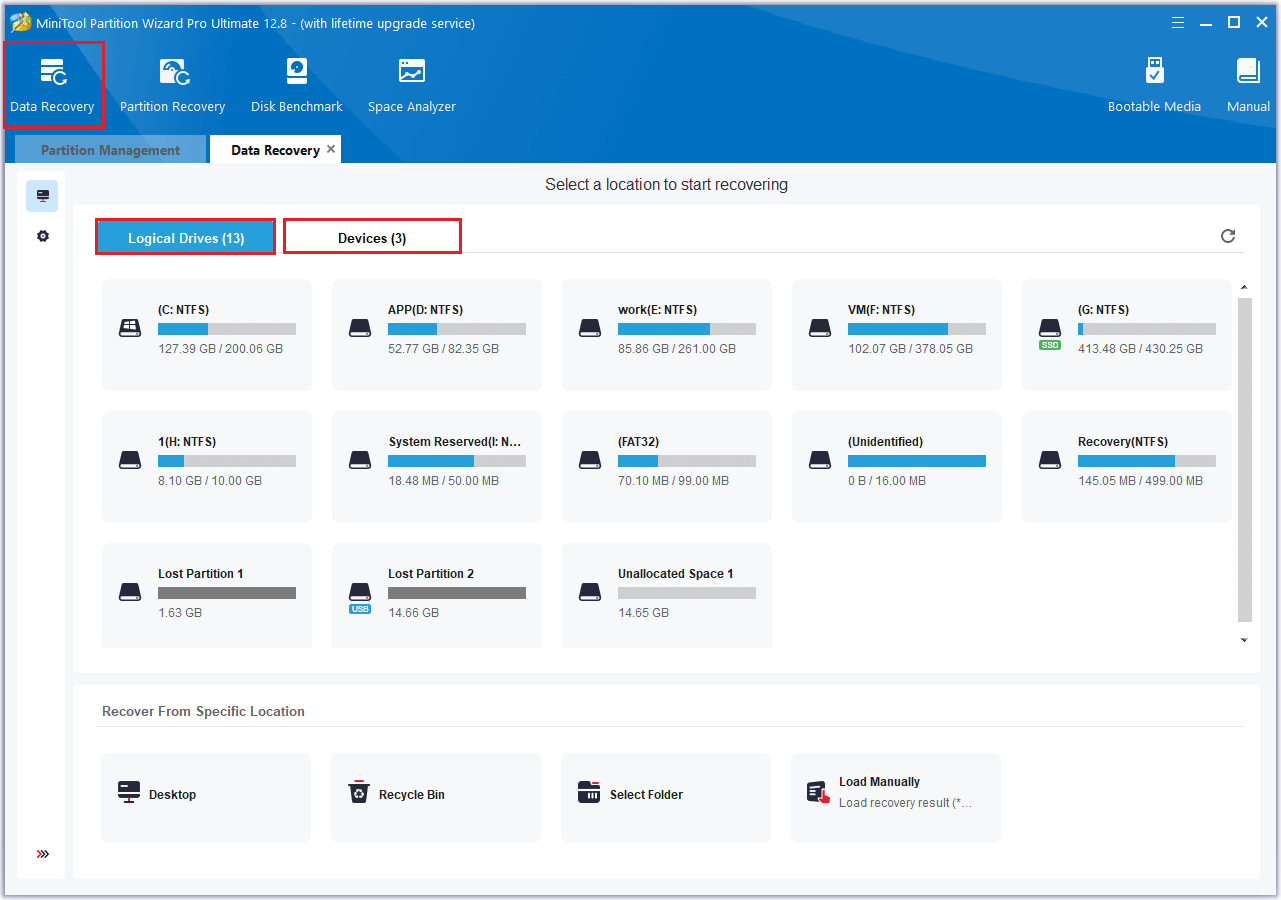
Step 3. Launch MiniTool Partition Wizard and click Data Recovery on the top toolbar.
Step 4. In the next window, select your Lexar device from the list of drives.
Step 5. Wait until the scan is completed. Once done, you can preview the recoverable files.
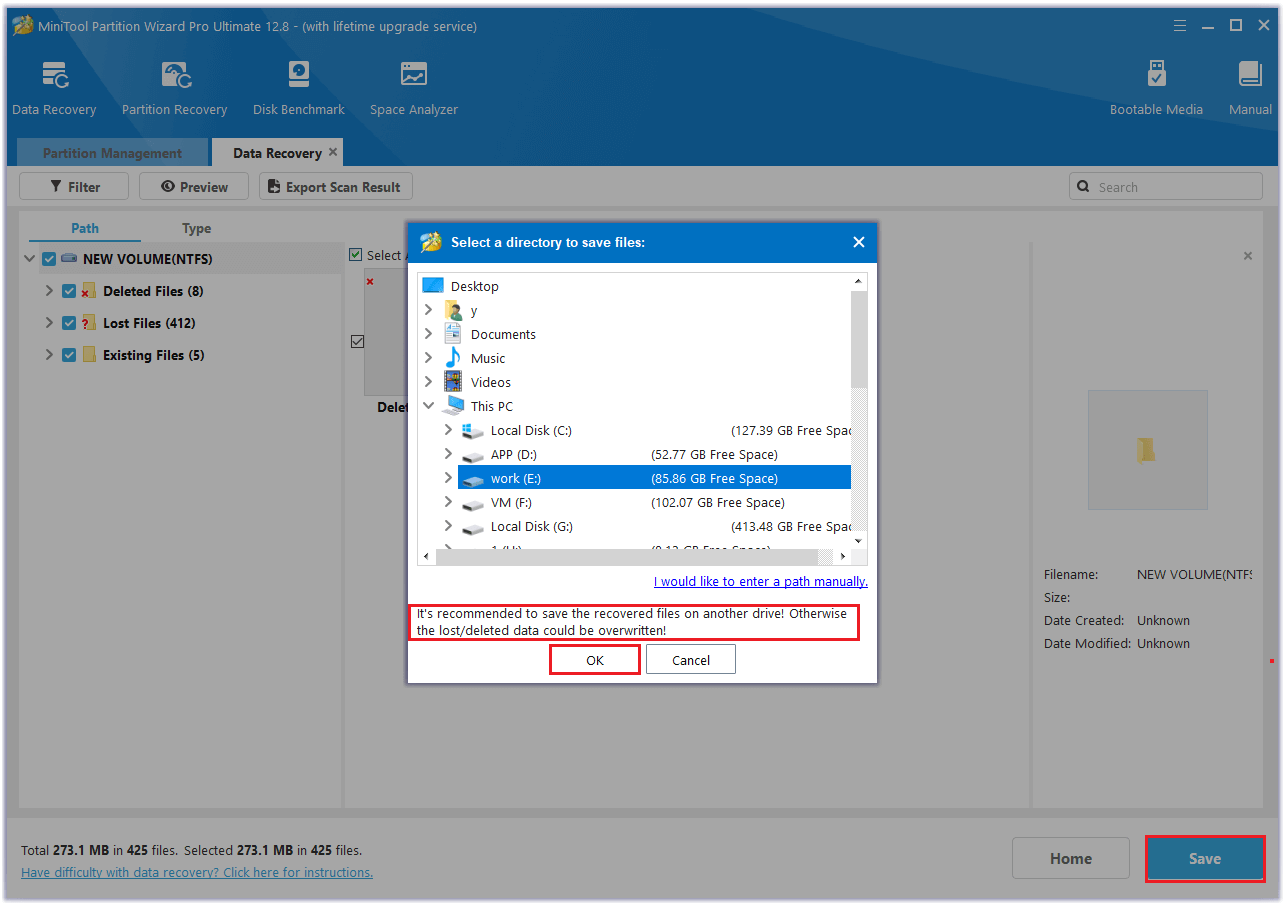
Step 6. Then choose all the files that you want to recover and click the Save button.
Step 7. In the prompted dialog box, choose a safe directory to save the recovered files. Then click OK to confirm the operation.
If your SD card is not showing up, you can read this post to fix it.
#2. Use Lexar Recovery Tool
Another method to do Lexar data recovery is to use the Lexar Recovery Tool. It is official software provided by Lexar to help users recover data from their Lexar products. It can recover various types of files from different file systems, such as FAT32, exFAT, and NTFS. To use this Lexar recovery tool, follow these steps:
- Connect your Lexar device to your computer.
- Launch the Lexar Recovery Tool and select your Lexar device from the list of drives.
- Then select where you want to save your recovered data and click Next.
- Select the file types you want to recover and click Next.
- After the process completes, select the files that you want to recover and click Recover.
Bottom Line
In this post, we have learned a step-by-step guide on Lexar data recovery. If you have any suggestions or other nice Lexar recovery tools, just feel free to leave a comment below.
User Comments :