For some reason, you need to enable all CPU cores on the computer. In this post, MiniTool Partition Wizard tells you the reasons and detailed steps for doing that.
Why Do You Need to Enable All CPU Cores
CPU cores on the computer are only used when required to accelerate tasks. Based on your demands, you can manually enable some or all of them. For instance, if you want to speed up your PC, enable all cores Windows 10/11 by yourself.
In addition to enabling all CPU cores, you can also use PC optimizer, such as MiniTool Partition Wizard, to achieve optimal PC performance. It’s a free partition manager.
MiniTool Partition Wizard can also enable you to create/format/resize/delete partitions, clone a hard drive, convert MBR to GPT without data loss, external hard drive recovery, etc.
MiniTool Partition Wizard FreeClick to Download100%Clean & Safe
What to Do Before You Enable All CPU Cores
Before you enable all CPU cores, you should enable Multi Core Support and HyperThreading in the BIOS/UEFI settings. To do that, follow the steps below.
Step 1: Restart your PC and keep pressing the BIOS key (like F2, Del, Esc, etc.) while the PC loads up. By doing so, you can enter the BIOS setup screen.
Step 2: Navigate to Multi Core Support and choose the All option.
Step 3: Find HyperThreading settings in BIOS and then choose the Enabled option.
Step 4: Press F10 > Enter keys to save the changes and exit BIOS.
You should also check the maximum CPU cores and processors on your PC. The maximum number of physical CPUs and cores (logical processors) is limited strictly depending on the version and edition.
- Windows 10 x86 (Enterprise Pro, Home): up to 2 CPUs and 32 logical processors (both physical and Hyper-Threading virtual cores are considered)
- Windows 10/11 x64: up to 2 CPUs and 256 logical processors
- Windows Server 2022/2019/2016/2012R2: up to 64 physical processors with 640 logical cores
- Windows Server 2008 R2: 256 logical cores
Now, it’s time to enable all CPU cores in Windows 11/10 computers by using the methods below.

#1: Enable All CPU Cores from Task Manager
Here’s the tutorial on how to enable all cores Windows 10 via Task Manager.
Step 1: Right-click the Windows icon to open the Start menu and then click Task Manager.
Step 2: In the Task Manager window, navigate to the Performance tab and then click CPU in the left panel. Then you can see the number of cores and logical processors on the right side of the window.

Step 3: Open the Run window by holding the Windows and R keys. Then type msconfig and click OK.

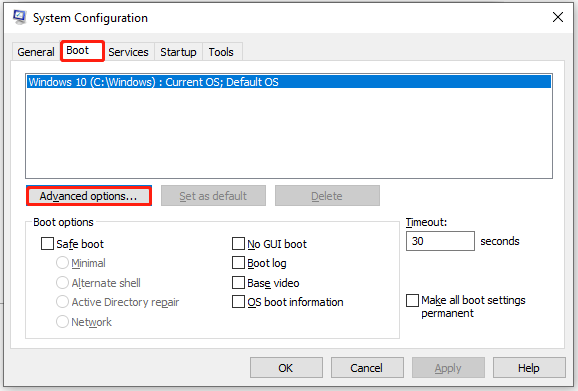
Step 4: Navigate to the Boot tab and click Advanced options.
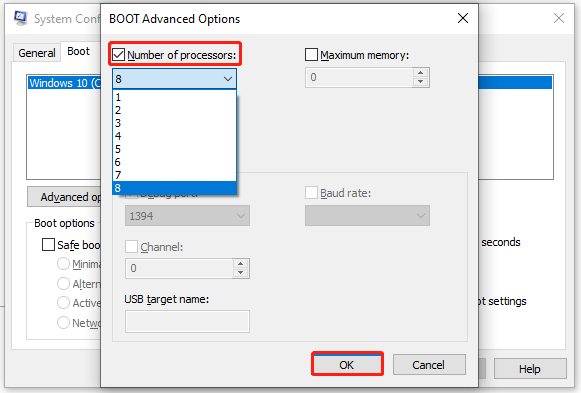
Step 5: In the BOOT Advanced Options window, tick the Number of processors option and select the processors available on your PC from the drop-down menu. After that, click OK to save changes.
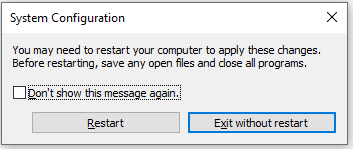
Step 6: In the prompted window, click Restart to take the changes into effect.

#2: Enable All CPU Cores from System Properties
It is also available to enable all CPU cores in Windows 11/10 via System Properties. Here are the steps for you.
Step 1: Open the System Properties panel.
- Type system properties in the search box.
- In the pop-up window, find and click Advanced system settings.

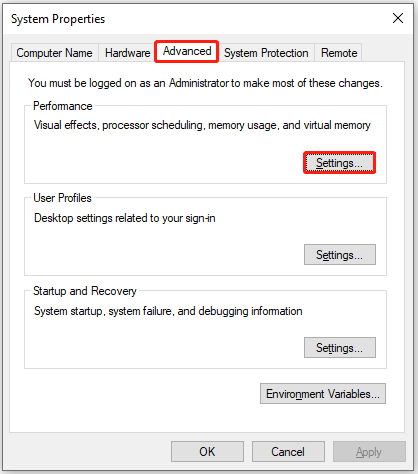
Step 2: In the System Properties window, go to the Advanced tab and then click the Settings button under Performance.
Step 3: In the Performance Options window, tap the Advanced tab and tick the Background Services option. This enables the operating system to use all available cores for performing various tasks. Then click OK to save changes.

Step 4: Restart your computer to make changes to take effect.
About The Author

Position: Columnist
Cecilia has been an editor at MiniTool for two years. She primarily focuses on disk and partition-related content, with particular expertise in disk cloning, partition recovery, and PDF document conversion. She is dedicated to providing users with clear and accurate solutions to help them efficiently resolve common computer problems.
User Comments :