What Causes the 0x800700b7 – 0x2000a Error?
The Windows update error 0x800700b7 – 0x2000a can be caused by various reasons. Here, we summarize some possible causes, such as:
- Incompatible hardware
- Corrupted system files
- Outdated drivers
- Third-party antivirus app
How to repair the 0x800700b7 – 0x2000a error? You can try the methods below.
Way 1. Check System Requirements
Before you attempt to upgrade your Windows, you should make sure that your device meets the minimum system requirements for Windows 11 or Windows 10 updates. If your device does not meet the requirements, you may need to upgrade your hardware or use a different device.
If there is not enough disk space to install Windows updates, you can use MiniTool Partition Wizard to increase disk space.
MiniTool Partition Wizard FreeClick to Download100%Clean & Safe
Way 2. Run the Windows Update Troubleshooter
To fix the 0x800700b7 – 0x2000a error, you can run Windows Update troubleshooter, which is a built-in tool to automatically detect and fix common problems with Windows Update. To run this tool, follow these steps:
Step 1. Right-click the Windows icon and select Settings. Then click Update & Security > Troubleshoot > Additional troubleshooters.
Step 2. Then select Windows Update and click on Run the troubleshooter.
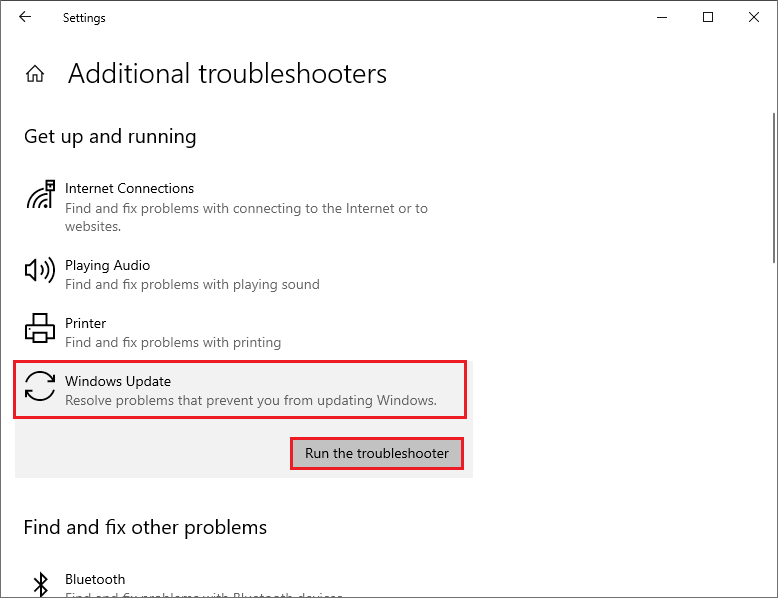
Step 3. In the prompted dialog box, follow the on-screen wizard to complete the process. Once done, reboot your device and try to upgrade your Windows again.
Way 3. Run SFC and DISM
To get rid of the error 0x800700b7 – 0x2000a, you can run SFC (System File Checker) and DISM (Deployment Image Servicing and Management). They are two command-line tools that can scan and repair corrupted system files and Windows images. Here is how to run these tools:
Step 1. Press Win + R to open the Run box and type cmd. Then press Ctrl + Shift + Enter to run Command Prompt as administrator.
Step 2. In the Command Prompt window, type sfc /scannow and press Enter.
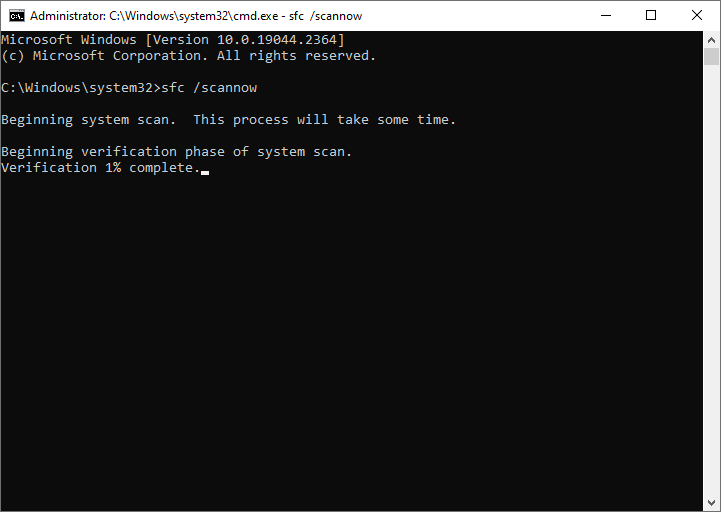
Step 3. After the SFC scan is completed, reboot your system. If the issue still exists, run Command Prompt as administrator again.
Step 4. Then run the following command and press Enter to run the DISM scan.
DISM /Online /Cleanup-Image /RestoreHealth
Step 5. Once done, restart your computer and check if the error is resolved.
Way 4. Update Device Drivers
Outdated or faulty device drivers can also cause the error 0x800700b7 – 0x2000a. To fix this, you can try updating your drivers with the following steps:
Step 1. Press Win + X and select Device Manager to open it.
Step 2. In the prompted window, expand the category of the device that you want to update and right-click on it.
Step 3. Then select Update driver from the context menu.
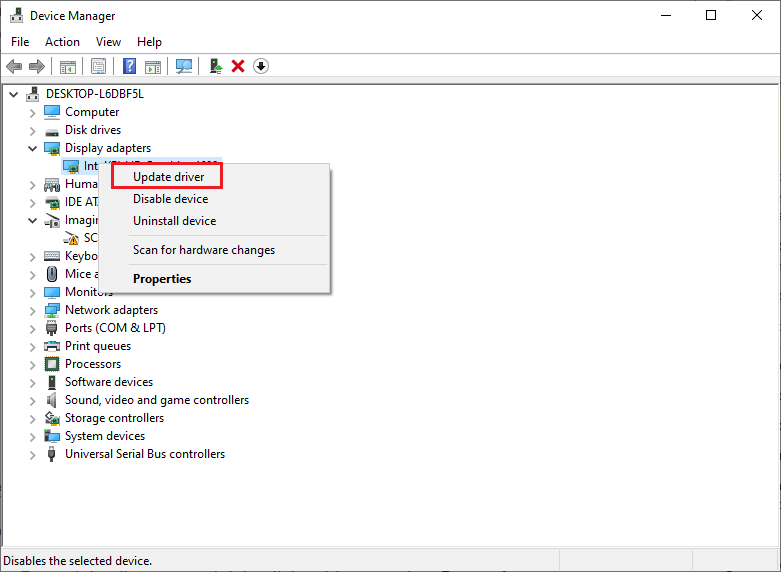
Step 4. In the pop-up window, click Search automatically for drivers and follow the wizard to complete the process.
Step 5. Once done, reboot your PC and check if the issue disappears.
Way 5. Reset the Windows Update Components
If none of the above methods work, you can try resetting the Windows update components to fix the 0x800700b7 – 0x2000a error. To do it, you can refer to this guide: How to Reset Windows Update Components in Windows 11/10?
In addition to the above methods, you can try disabling the antivirus program, disabling Fast Startup, or upgrading your Windows in a clean boot state to fix the 0x800700b7 – 0x2000a error.
Conclusion
In this post, we have learned some methods to fix the Windows update error 0x800700b7 – 0x2000a. We hope that you can solve your issue successfully. Do you have any suggestions or nice methods to fix the Windows update error? You can feel free to share them with us in the following comment part.
User Comments :