Many Windows 7 users may be familiar with this error “Windows failed to start. A recent hardware or software change might be the cause.” The error message will also give users a couple of options to resolve the issue like running Startup Repair or starting Windows normally, as the following screenshot shows.
See: What Should Be Done if a System Cannot Boot from the Hard Drive
There are various Windows boot errors and this one is a typical error for Windows Vista, Windows 7, Windows 8 and Windows 8.1 operating systems. What leads to this error? The following contents will show you the most common causes.
Reasons for Windows Failed to Start Error
the following reasons are possible causes of a Windows failed to start error.
1. Missing or Corrupted BCD File
The most likely cause of the Windows failed to start error is the missing or corrupted BCD file. The reasons for BCD file missing or corruption are various. There could be disk write errors or power outages and so on. If the BCD file is missing, your computer will show the error “Windows failed to start. A recent hardware or software change might be the cause.”
2. Bad or Outdated Driver Issues
Sometimes bad drivers can cause the Windows failed to start Windows 7 error as Windows begins to load.
3. The Corruption of System Files
The file system itself may become corrupt or damaged due to some reasons. If you turn off a PC while it is in the middle of writing crucial data to the boot sector, you may encounter this Windows 7 failed to start error. System file corruption may also cause boot issues like error “Recovery your PC needs to be repaired” if you use Windows 10.
When people come across the Windows failed to start error, what they worry about the most is the data saved on the computer. Well, how to get files off the unbootable computer?
How to Get Files off from an Unbootable Computer
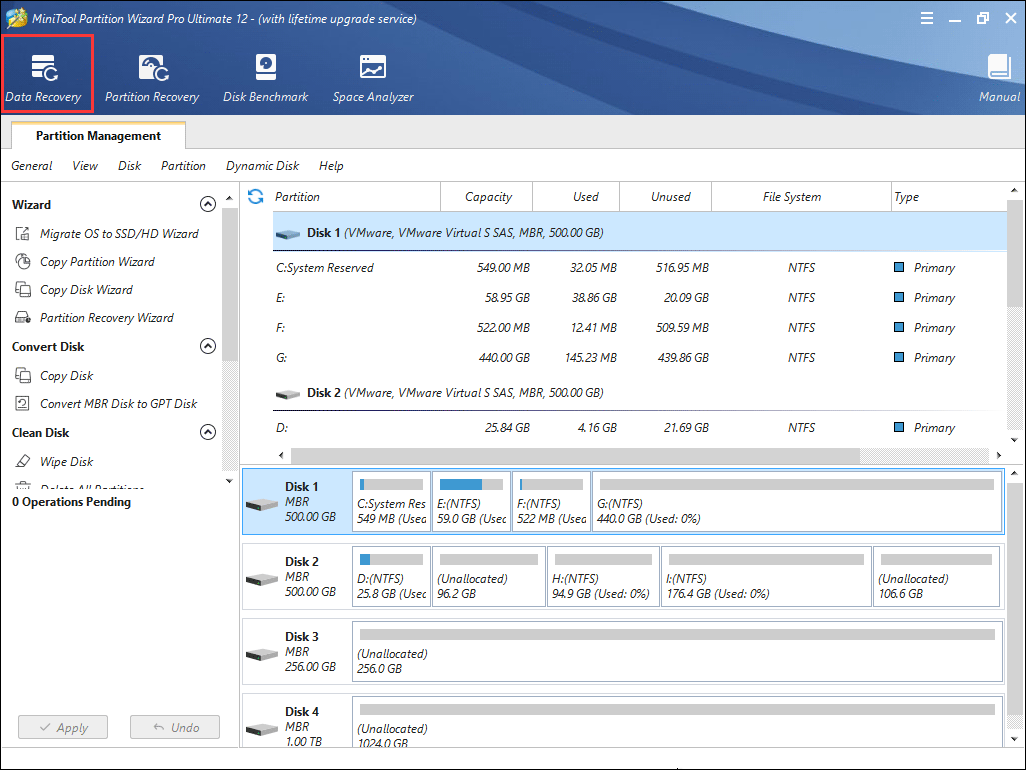
You can try MiniTool Partition Wizard’s Data Recovery feature to recover important files from the computer with Windows failed to start error immediately. Just follow the steps as below.
Step 1. Get MiniTool Partition Wizard Pro Ultimate from the following button and install it on a normal computer.
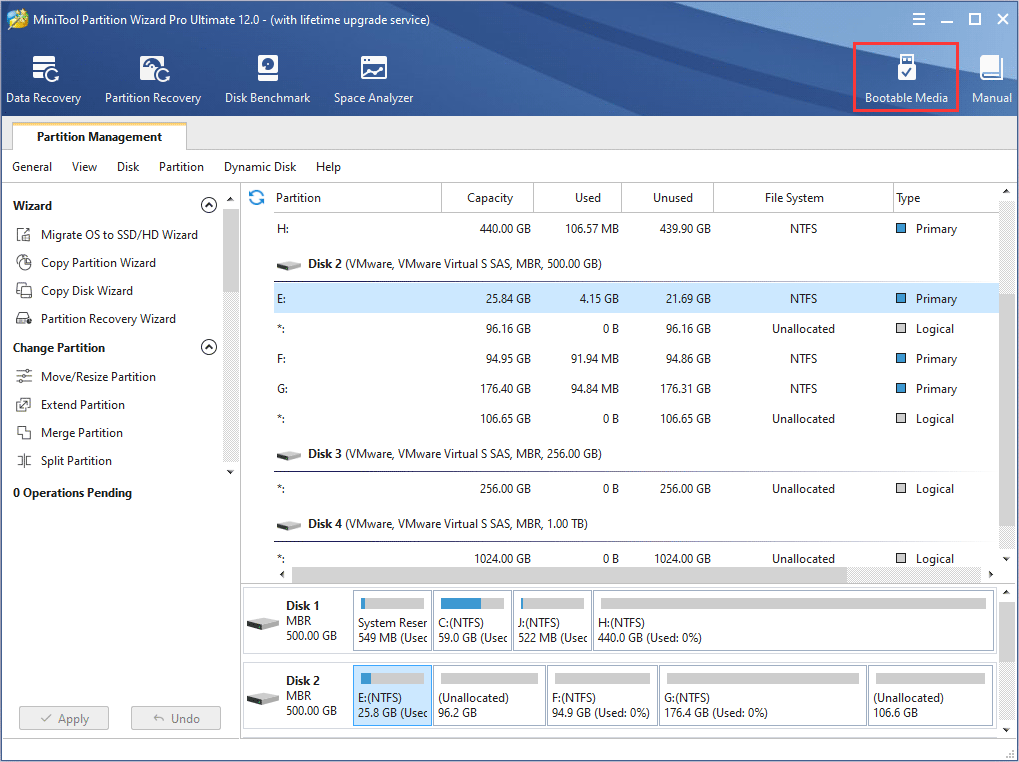
Step 2. Create a bootable USB drive or CD/DVD disc using the Bootable Media embedded in this software to boot the computer with the Windows failed to start error.
Step 3. Connect the boot disk you’ve made to the computer with Windows failed to start error.
Step 4. Enter the BIOS settings menu of your computer to give the bootable USB drive or disc boot priority. Then boot from the disk.
Step 5. When you get to the interface of MiniTool Partition Wizard, launch the Data Recovery wizard.
Step 6. After launching the Data Recovery function, you can see that all the detected disk partitions are arranged by drive letters.
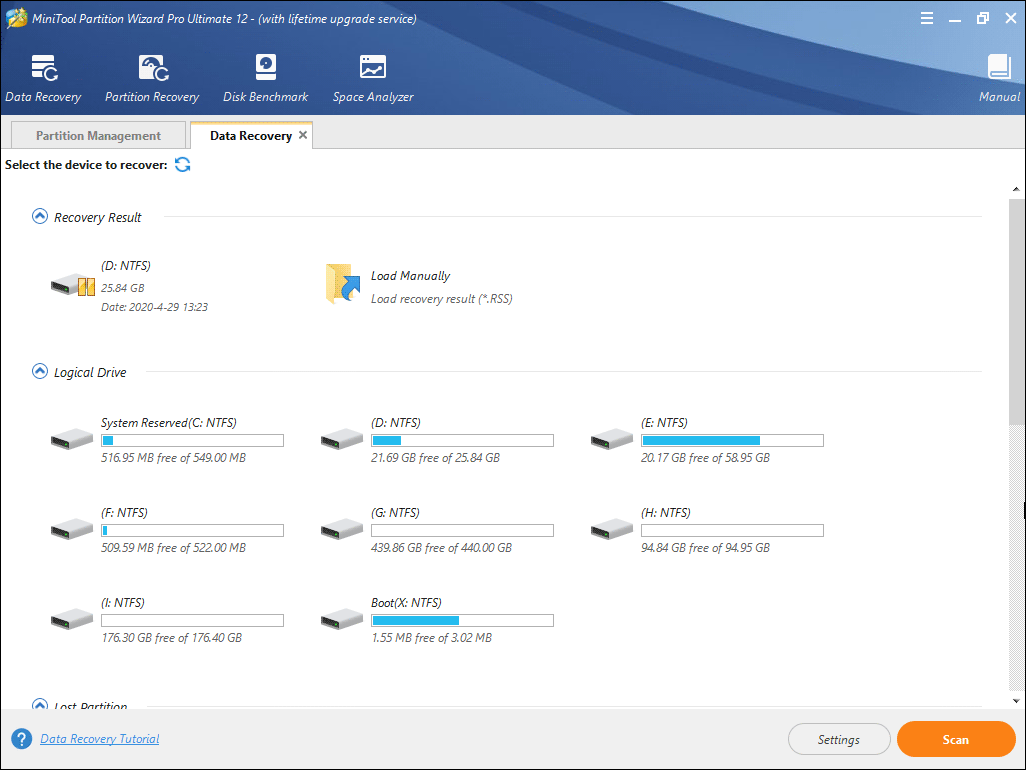
Here Data Recovery will list 5 parts, and every part is different from each other.
- Recovery Result: this section will show the last scanning result record and you can manually load scanning result to check recovered files directly.
- Logical Drive: this section will show all existing partitions on your computer including removable devices.
- Lost Partition: this section will show all lost partitions detected by Data Recovery and then you can recover data from lost partitions.
- Unallocated Space: this section will show all unallocated spaces on your computer.
- Hard Disk: this section will list all hard disks on the computer. Users can also select a hard disk to scan.
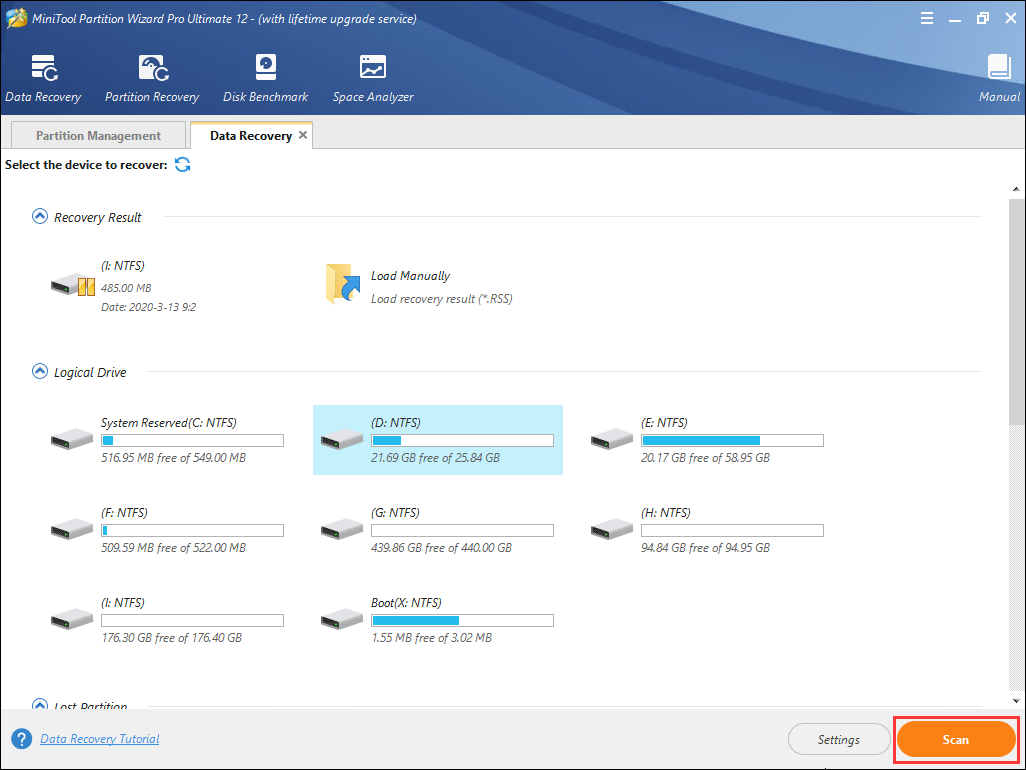
Step 7. You can select a partition and click Scan. Here I take partition G as an example.
Note: In the bootable edition, every partition has its drive letter including the system reserved partition. So, the drive letter of the system partition can be changed. You can pay attention to the partition size to make sure you choose the right partition to recover.
Step 8. Waiting for the scanning completion. During the process of scanning, you can pause or stop the scanning by clicking the Pause or Stop button if you find what you need.
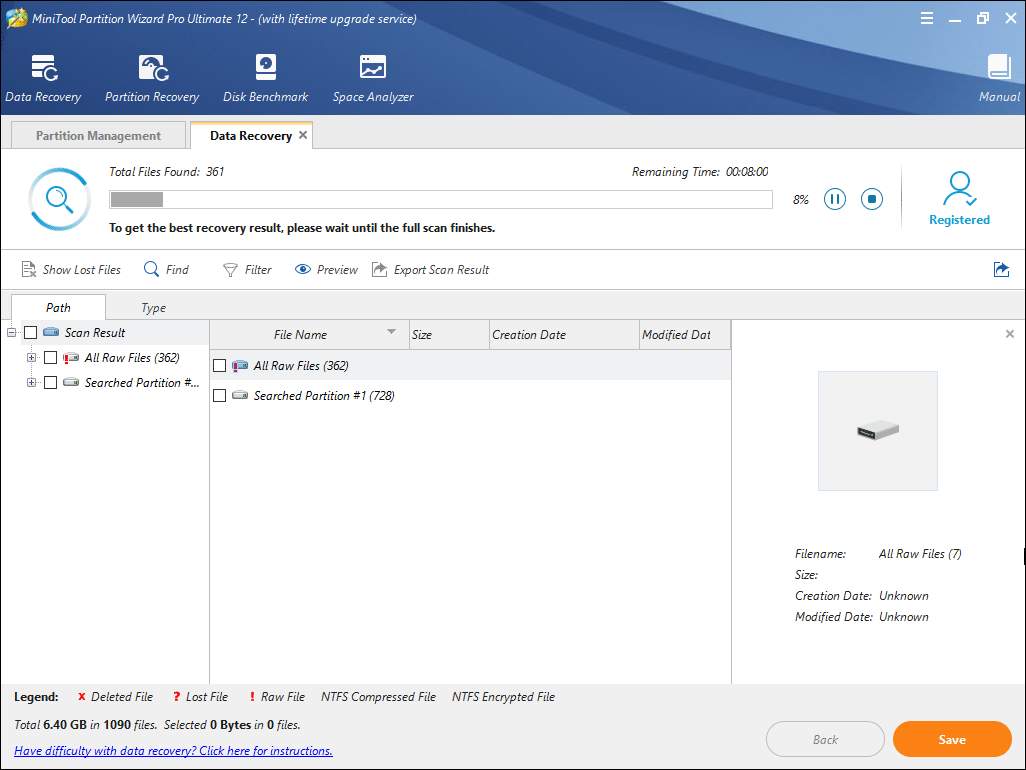
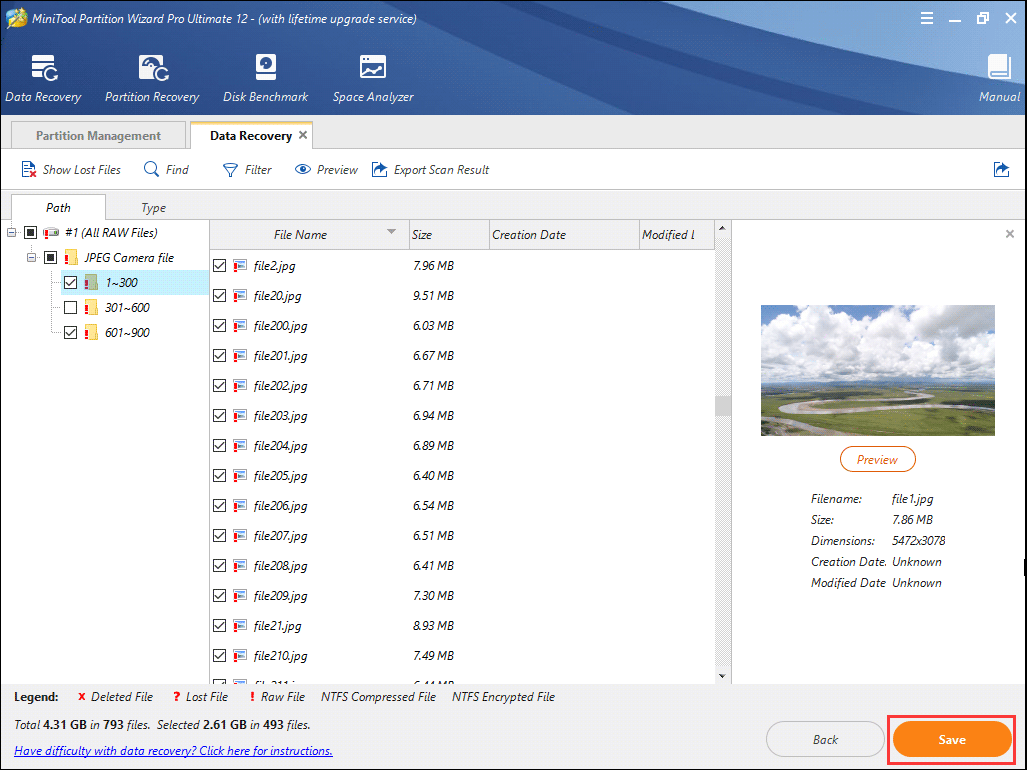
Step 9. After completing the scan, you can check items that you need and click Save button.
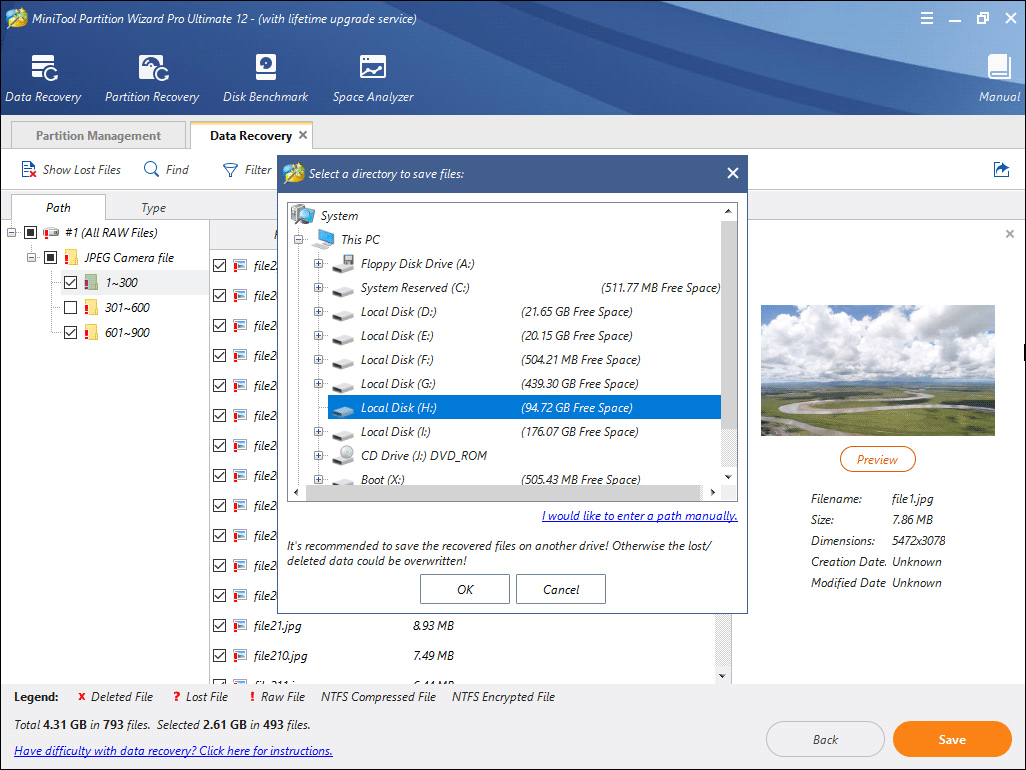
Step 10. At last, choose a directory to save selected files. It is recommended to save the recovered files on another drive. Otherwise, the lost/deleted data could be overwritten. You can save the files to a USB drive or other external devices.
This is how to get files off with MiniTool Partition Wizard Pro Ultimate when computers won’t boot. If you want to rescue important files immediately, try this.
Well, after recovering the essentials, how can we fix the Windows failed to start Windows 7 error? To fix this issue, use the following top 7 solutions to fix “Windows failed to start. A recent hardware or software change might be the cause.”
7 Solutions to Fix Windows Failed to Start Windows 7 Error
Solution 1. Remove Newly Installed Hardware or External Devices and Reboot.
If you installed any hardware (such as printers or scanners) before you met the “Windows failed to start. A recent hardware or software change might be the cause.” error, just remove the hardware you installed (especially all other unnecessary hardware with only the mouse and keyboard kept) and restart the computer.
Solution 2. Use the Last Known Good Configuration to Boot up Windows
When you are faced with “Windows failed to start. A recent hardware or software change might be the cause.” error, you can try booting into the Last Known Good Configuration option, which might save your computer.
Step 1. Restart your computer and press F8 continuously until you see the list of boot options.
Step 2. Choose Last Known Good Configuration (Advanced) from the list and press Enter.
Step 3. Wait and see if Windows can boot up successfully.
If not, you may try using Startup Repair with detailed steps in Solution 3.
Solution 3. Run Startup Repair
Step 1. Insert a Windows installation disc into the computer with Windows failed to start error.
Step 2. Restart the computer with its power button. You should be able to see “Press any key to boot from CD or DVD”. Follow the instructions and boot.
Step 3. Choose your language and other preferences and then click on Next.
Step 4. On this screen, click on Repair your computer in the bottom left corner.
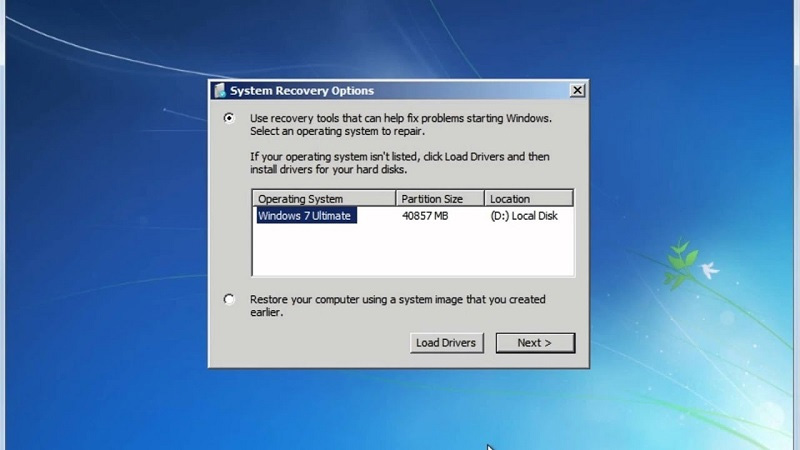
Step 5. Select the operating system you want to repair and then select Next.
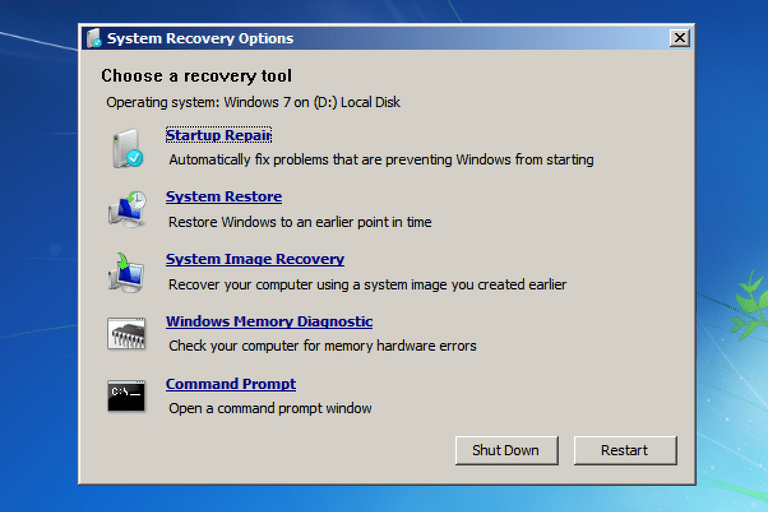
Step 6. On the System Recovery Options menu, select Startup Repair, and then follow the on-screen instructions. When it completes, restart your computer to see if it fixed the problem.
When the startup repair process is done, you may restart your computer and check if Windows failed to start Windows 7 error disappears.
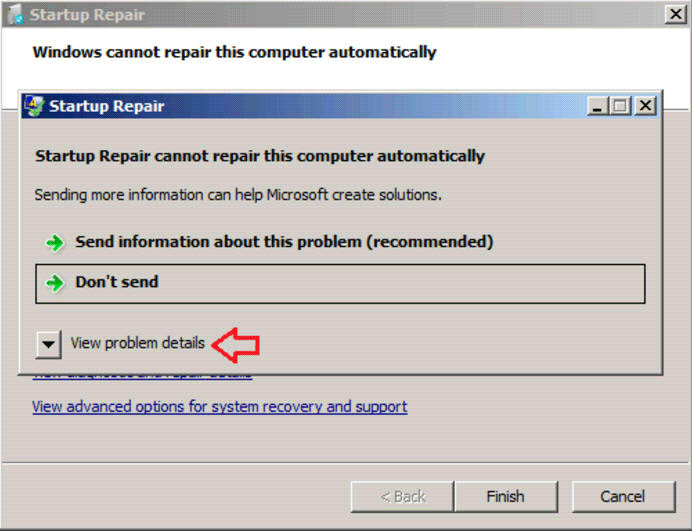
When you receive the following message in the picture, it means that the startup is unable to solve Windows failed to start error and you might resort to another method instead.
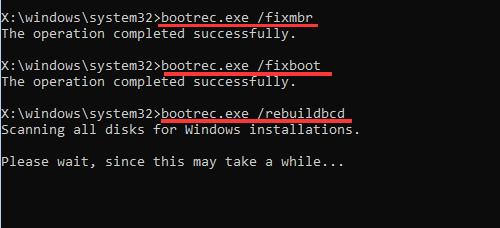
Solution 4. Rebuild BCD Configuration
The missing or corruption of BCD file is also a critical reason for the Windows failed to start error. You can follow the steps as below to rebuild BCD in command prompt.
Step 1. Insert the Windows 7 installation disc and restart your computer.
Step 2. Boot from the disc by pressing any key when the “Press any key to boot from CD” message appears.
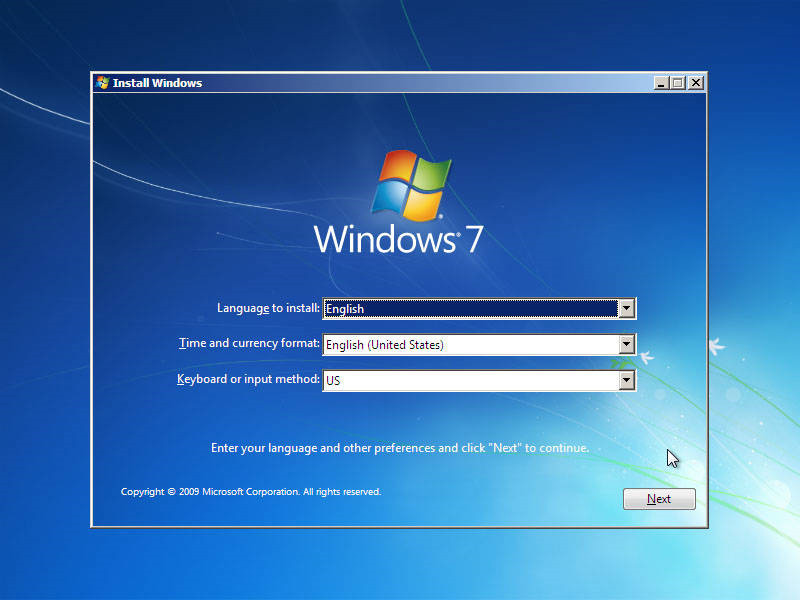
Step 3. On the Install Windows page, choose your language and other preferences, and then select Next.
Step 4. Select the Windows operating system you want to repair, and then select Next.
Step 5. On the System Recovery Options page, choose Command Prompt.
Step 6. Then input the following commands in the Command Prompt window and press Enter after each command.
- bootrec.exe /fixmbr
- bootrec.exe /fixboot
- bootrec.exe /rebuildbcd
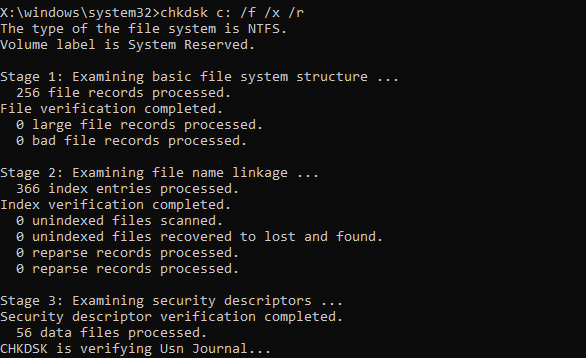
Solution 5. Run CHKDSK Utility
Step 1. Insert the Windows 7 installation disc and restart your computer.
Step 2. Boot from the disc by pressing any key when the “Press any key to boot from CD” message appears.
Step 3. On the Install Windows page, choose your language and other preferences, and then select Next.
Step 4. Select the operating system you want to repair, and then select Next.
Step 5. On the System Recovery Options page, select Command to open a command prompt window.
Step 6. Input the following command and press Enter.
chkdsk c: /f /x /r
Solution 6. Perform a System Restore
Step 1. Insert the Windows install disc.
Step 2. Press a key when the “Press any key to boot from CD or DVD” message appears on your screen.
Step 3. Click on Repair your computer after selecting a language, time and keyboard method.
Step 4. Select the drive where you installed Windows (usually C:) and click Next.
Step 5. Select System Restore from the System Recovery Options window.
Step 6. Follow the System Restore wizard instructions to select a restore point.
Step 7. Restore your PC by clicking Finish.
Solution 7. Reinstall Windows Operating System
If none of the solutions listed works, you may need to reinstall Windows altogether. Since reinstalling Windows will clear all of the data and third-party programs on your computer, you’d better backup everything on the disk.
Step 1. Also, get MiniTool Partition Wizard Pro Ultimate to create a bootable USB drive on a normally running computer.
Step 2. Boot your computer with the USB drive/disc and get the main interface of MiniTool Partition Wizard. Select the disk that you want to copy and click on Copy Disk.
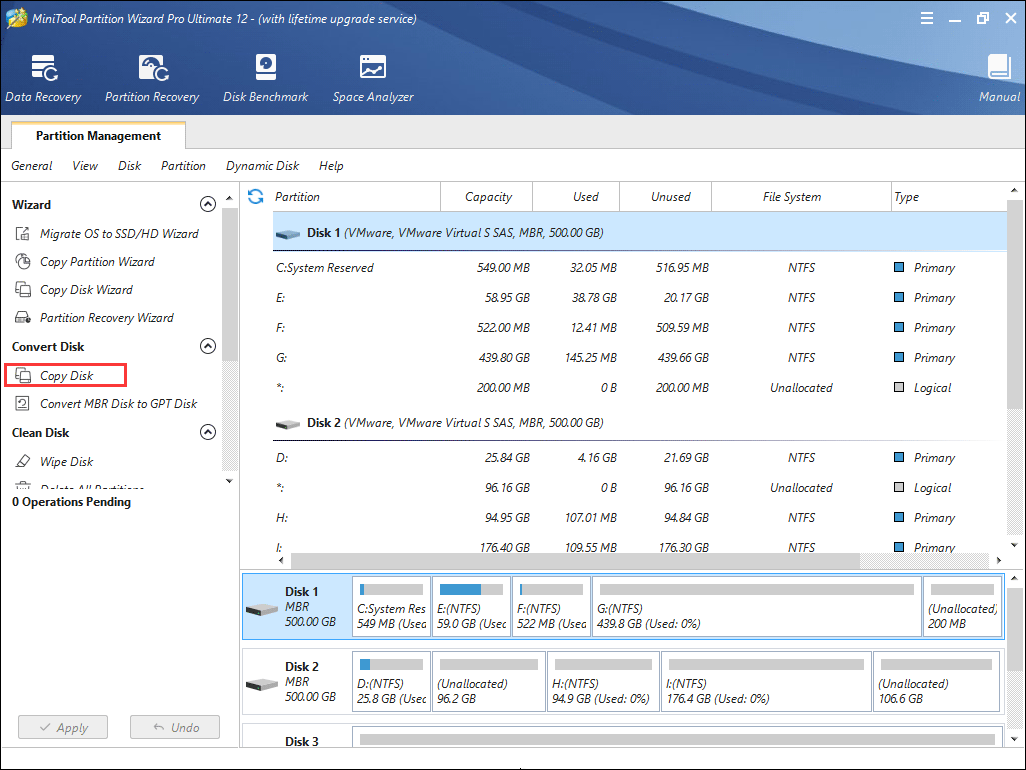
Step 3. Follow the instructions on the Partition Wizard and at last click Apply on the upper left corner.
Then you can reinstall Windows 7.
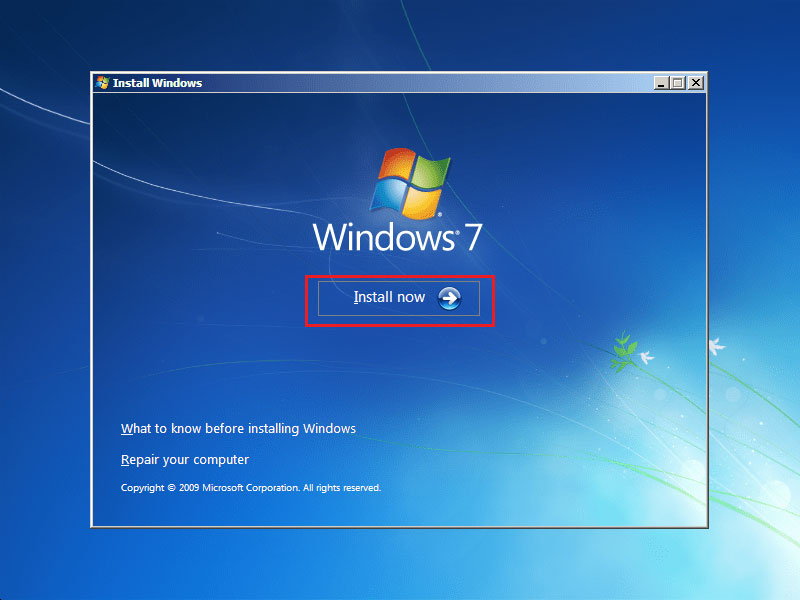
Step 1. Insert a Windows installation disc into the computer with Windows failed to start error.
Step 2. Restart the computer with its power button. Press any key to boot when you see “Press any key to boot from CD or DVD”.
Step 3. Choose your language and other preferences and then click on Next.

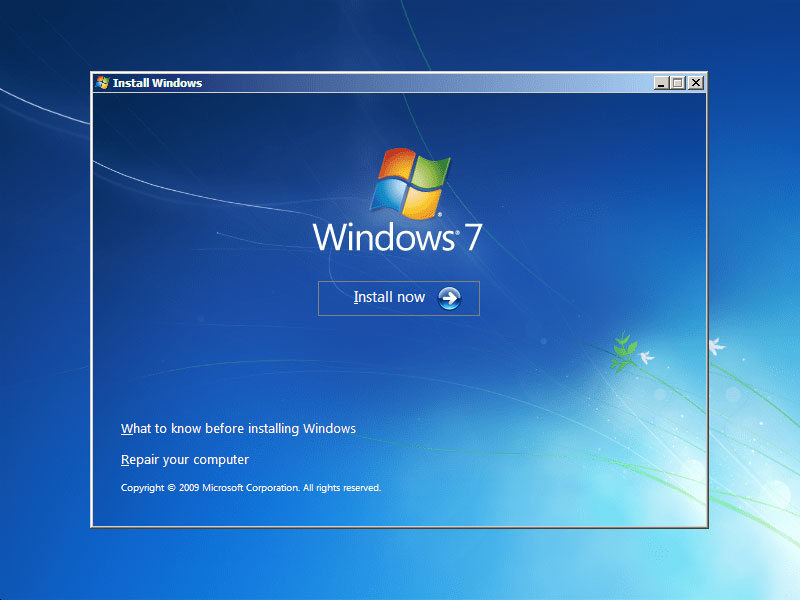
Step 4. On this screen, click on Install now to start Windows 7 reinstallation.
After reinstallation, you can manage Windows 7 disks and partitions with a professional Windows 7 partition manager and backup Windows 7 regularly in case of any accidental boot failure.
Bottom Line
After reading this post, have you resolved the issue after trying the above solutions for the Windows 7 failed to start error? Hope you were able to fix the problem via these methods.
If you have any other good solutions for the “Windows failed to start. A recent hardware or software change might be the cause.” Windows 7 error, you can leave a message on the following comment zone and we will respond as soon as possible. If you need any help when using MiniTool software, you can contact us via [email protected].
User Comments :