If you come across verifying DMI pool data stuck when loading operating system, don't worry. This article from MiniTool will show you how to recover data from the computer and fix the error with some reliable methods.
DMI is short for Desktop Management Interface, which is a process that verifies the computer’s software and hardware compatibility. When you boot up your operating system, it checks for some related hardware and software.
When there is hardware or software change that leads to component incompatibility, the error verifying DMI pool data would appear at Windows startup. In this case, you are unable to boot into Windows as normal.
When you cannot boot into Windows, what you worry about most must be the important files you stored on your PC. How to retrieve data back when you encounter the Verifying DMI Pool Data error message?
Well, the following will show you how to recover data from the PC with error verifying DMI pool data Windows 10 and how to fix the error with top 4 fixes.
Recover Data from the Computer with Error Verifying DMI Pool Data
It is possible to recover data from the computer with verifying DMI pool data. You can try MiniTool Partition Wizard’s Data Recovery feature to recover the important files, which is capable of recovering data from various storage devices such as HDD, SSD, USB drive, SD card and so on.

If you need to recover files from a computer that stuck on verifying DMI pool data, you can follow the steps below.
Step 1. Get MiniTool Partition Wizard Pro Ultimate from the following button and install it on a normal computer.
Step 2. Create a bootable USB drive or CD/DVD disc with the Bootable Media embedded in the MiniTool Partition Wizard Pro Ultimate. You need to prepare a blank USB drive or CD/DVD disc first.
Step 3. Connect the bootable USB drive or CD/DVD disc you’ve made via Bootable Media.
Step 4. Enter the BIOS settings menu of your computer to give the bootable USB drive or disc boot priority. Then boot from the disk.
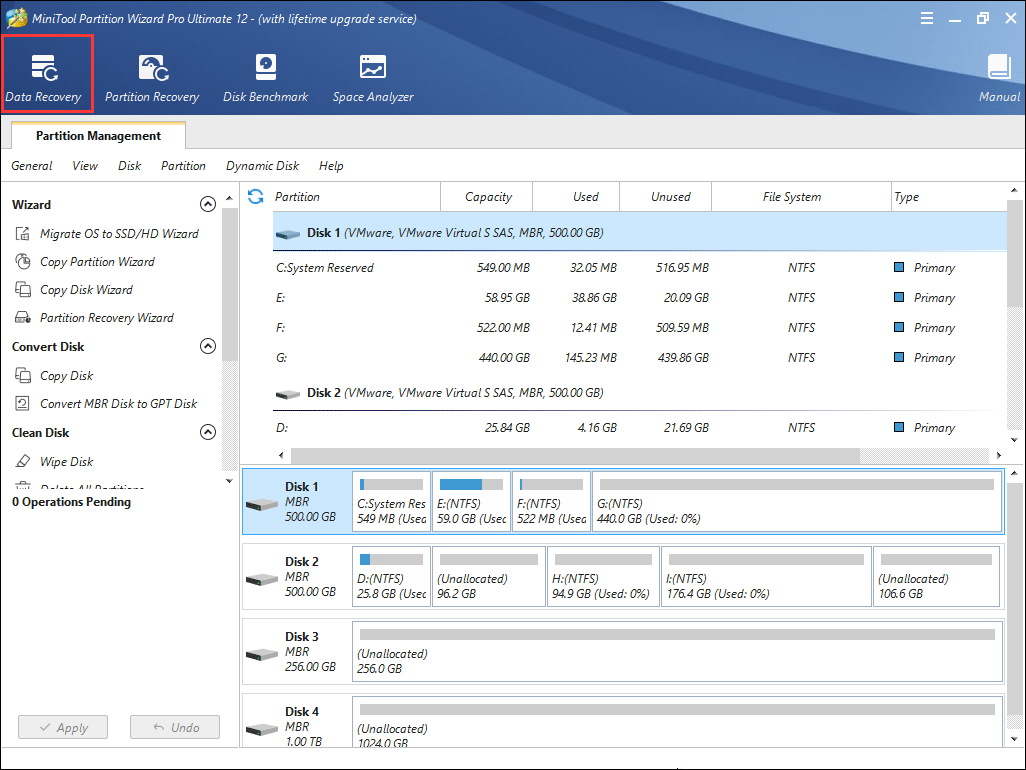
Step 5. When you get the main interface of MiniTool Partition Wizard, launch the Data Recovery wizard.
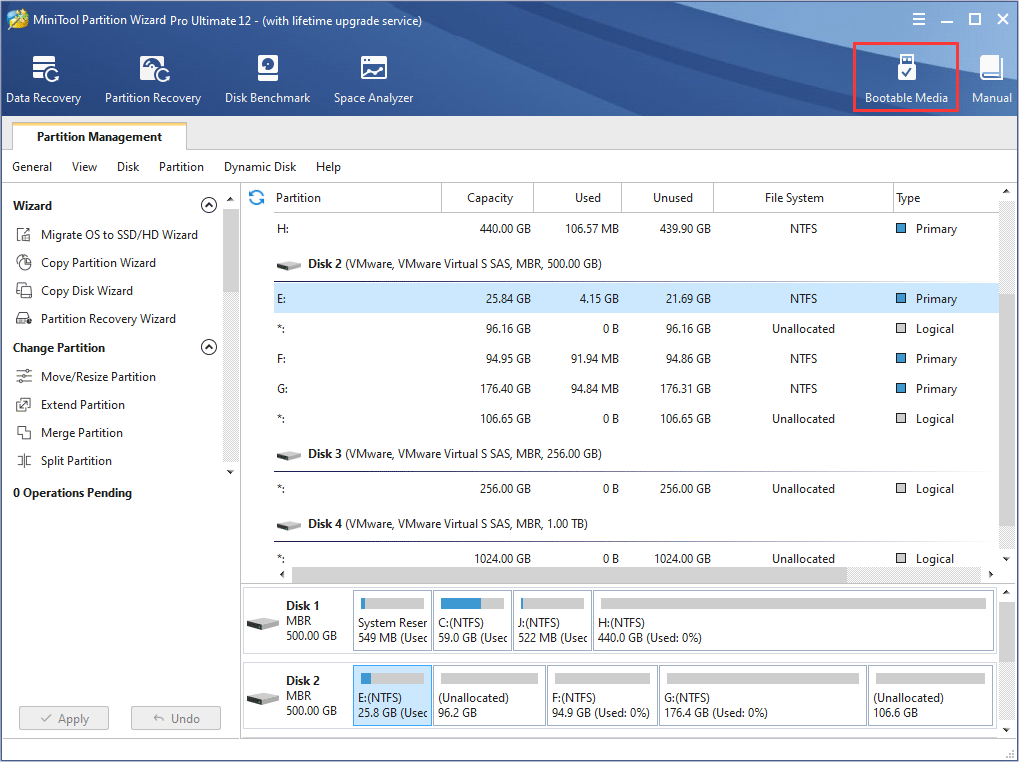
Step 6. After launching Data Recovery function, you can see all the detected disk partitions. Select a partition which contains important files and click Scan.
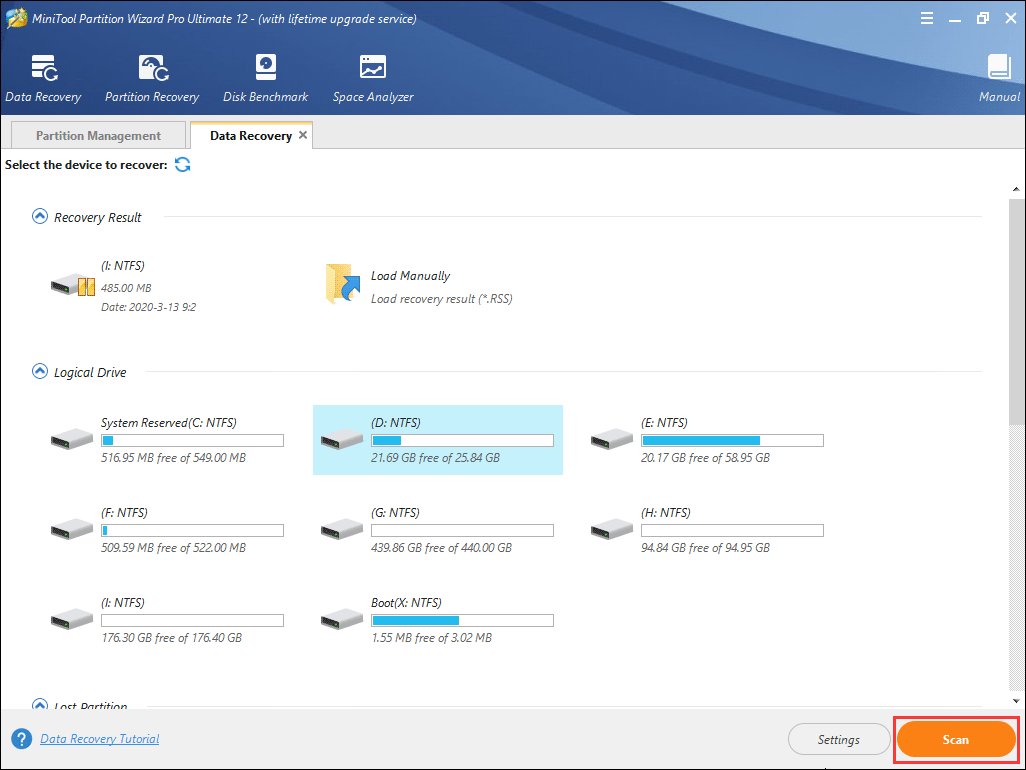
You may notice the 5 parts on the Data Recovery interface, and here is a brief introduction.
- Recovery Result: this section will record the last scanning result and you can manually load scanning result that you saved previously.
- Logical Drive: this section will show all existing partitions on your computer.
- Lost Partition: this section will show all lost partitions on your PC, and then you can choose to scan a lost partition.
- Unallocated Space: this section will show all unallocated spaces on your computer.
- Hard Disk: this section will list all hard disks on the computer. You can also select a hard disk to scan.
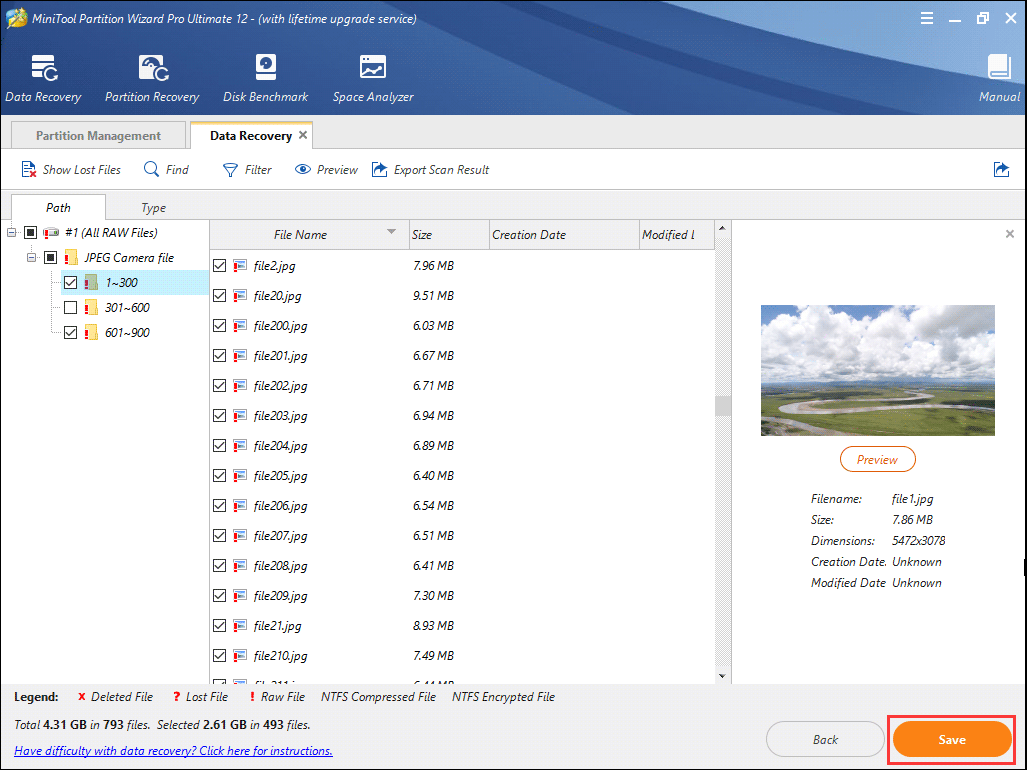
Step 7. Waiting for the scanning completed. During the process, you can pause or stop the scanning by clicking the Pause or Stop button if you find the needed files.
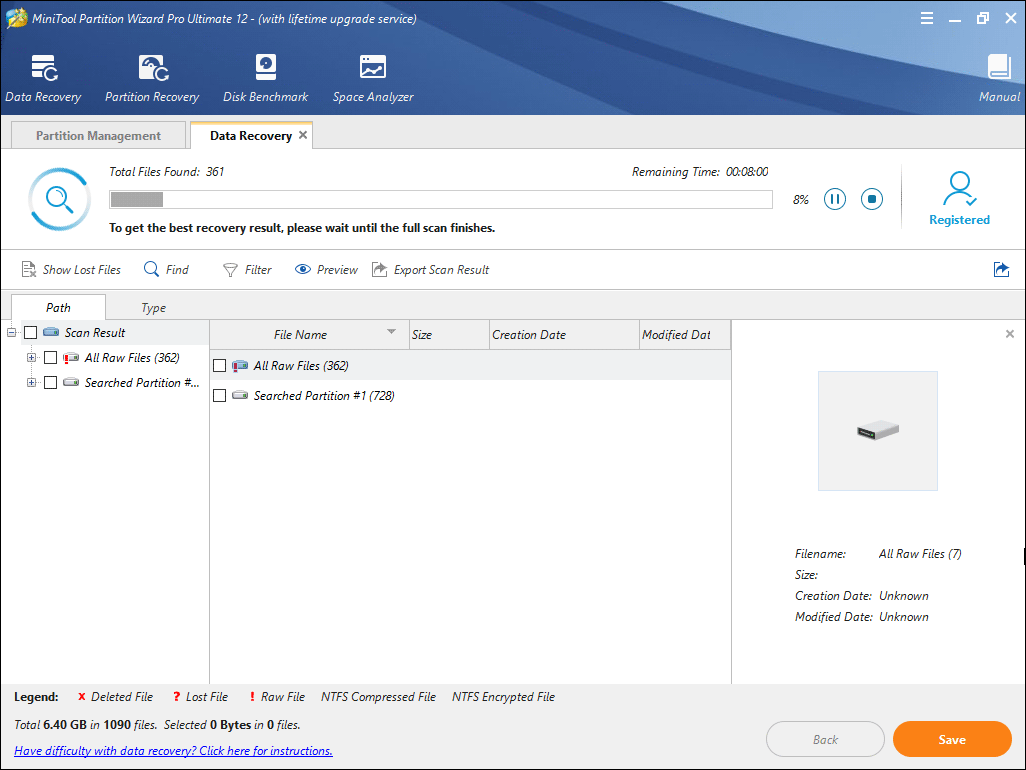
Step 8. After completing the scan, check the items you need and click Save button. The features on the top tool bar can help you find needed files quickly.
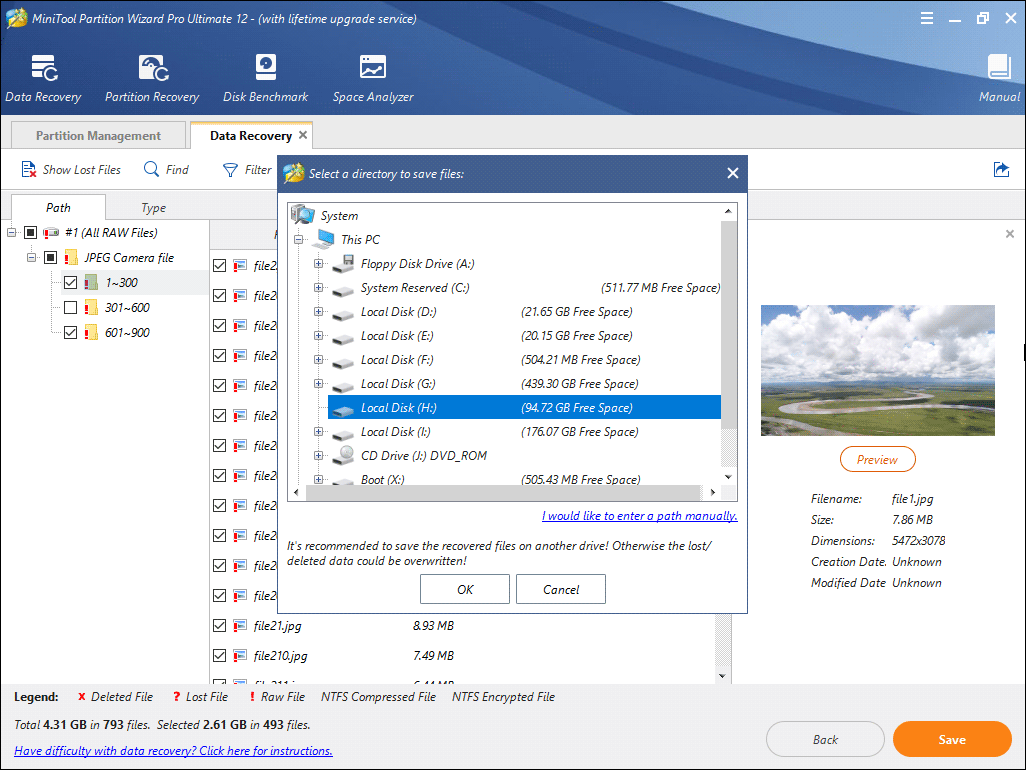
Step 9. At last, choose a directory to save selected files. It is recommended to save the recovered files on another drive. Otherwise, the lost/deleted data could be overwritten. You can save the files to a USB drive or other external storage devices.
Now you should know how to recover data from computers with verifying DMI pool data. With MiniTool Partition Wizard Pro Ultimate, you can always rescue important files in time.
Get one and recover your files now!
4 Ways to Fix the Verifying DMI Pool Data Stuck
If your computer stuck at “Verifying DMI pool data,” the following 4 fixes are recommended to help you remove the error. Let’s follow the detailed steps below.
Fix 1. Disconnect the Newly Installed Hardware
If you recently installed new hardware on your computer, the error message verifying DMI pool could occur.
How to identify if the error is caused by a faulty or improperly installed hardware?
For example, if there are new disk drives graphics cards or additional RAM installed on your computer, disconnect or uninstall the new hardware. Then try booting Windows again. If your computer boots successfully without the hardware, it indicates that the verifying DMI pool data error is caused by a faulty hardware or incorrect installation.
In this case, removing the newly installed hardware can fix the error verifying DMI Poor Data.
However, if you still encounter the error after uninstalling the hardware, it indicates that the error verifying DMI pool data is not caused by newly installed hardware. You can try the next fix to solve the issue.
Fix 2. Reset Your BIOS to Its Default Setting
Resetting your BIOS to its default setting can resolve some incorrect information in your BIOS configuration. So if you Windows operating stuck at verifying DMI pool data, you can try resetting BIOS to the default setting.
To reset the computer’s CMOS or BIOS settings to the default settings, you can refer to the following steps.
Step 1. Enter BIOS setting. Usually, you can enter BIOS by pressing a function key such as F1, F2, F3, F10, or F12), the ESC or Delete key. The key to enter BIOS can be different due to different computer manufacturers.
Step 2. When you are in BIOS, look for an option to reset the CMOS values to the default setting. The shortcut for loading the BIOS default settings could be a function key such as F9 shown in the following screenshot.
Step 3. Then you will be asked if you’re sure to load the defaults. You can press Y on the keyboard for yes or arrow to the yes option.
Step 4. At last, save and exit the BIOS.
After resetting BIOS, you can restart your PC and check if the message verifying DMI pool data goes away.
If resetting BIOS to the default values cannot help resolve your boot issues, you may also want to reset the configuration data. Find the Reset Configuration Data option and change the value from Disabled or to Enabled. Then try booting Windows again.
Fix 3. Fix Boot Issue
You can also use a bootable USB drive to fix the boot issues with CMD. If you have made a bootable USB drive with MiniTool Partition Wizard Pro Ultimate, you can use the bootable USB drive directly. The Command Prompt section can be found in the MiniTool PE loader interface.
If not, you need to create a Windows installation USB drive which is very simple. Let’s see detailed steps.
Step 1. Create installation media with a USB flash drive or a DVD via the Windows 10 Media Creation Tool, which can be downloaded on a normal computer with Internet connection.
Step 2. Enter the BIOS setting to set the CD/DVD bootable disc or USB flash drive as the first boot device. Then boot from the installation media.
Step 3. Select your language preferences, and click on Next button to continue.
Step 4. Then choose Repair your computer on the bottom left corner.
Step 5. Choose Troubleshoot to go on.
Step 6. At the Advanced options page, choose Command Prompt.
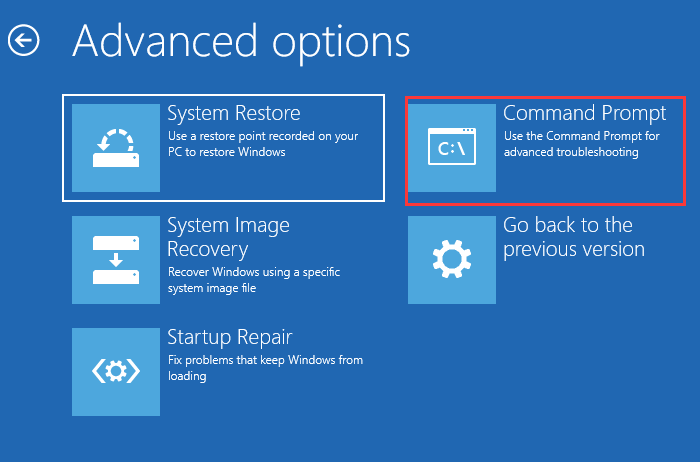
Step 7. Type bootrec.exe/fix boot and hit Enter.
Then restart your PC and check if verifying DMI pool data gets fixed.
Fix 4. Perform a Clean Install
After trying above fixes, if your computer still freezes at the DMI message verifying DMI pool data, it may be a sign that one of your hardware components is malfunctioning. In this case, I suggest you perform a clean install.
Step 1. Boot from the Windows installation USB drive. If you do not have one, create one with Windows Media Creation Tool.
Step 2. On the Windows setup page, choose language preferences, and then click Next to continue.
Step 3. Click Install Now.
Step 4. Enter the license key or click I don’t have a product key to skip it and enter the license key later.
Step 5. Choose the operating system you want to install and click Next.
Step 6. Choose [Custom: Install Windows only (advanced)] to perform a clean install.
- [Upgrade: Install Windows and keep files, settings, and applications]: This method will keep all your files, settings and applications saved in the system partition. However, it is only available when a supported version of Windows is already running on your PC.
- [Custom: Install Windows only (advanced)]: This method will remove all your personal files, settings and applications and give you a clean install of Windows 10. And all of your personal data will be removed.
Then just follow the on-screen instructions to complete the clean install. When it’s finished, you should be able to boot into Windows successfully and the verifying DMI pool data error should be removed.
Bottom Line
Have you fixed the error verifying DMI pool data Windows 7/8/10? If you have any question about how to fix Windows stuck at verifying DMI pool data error message, you can leave a message in the following comment zone and we will reply as soon as possible. If you have other better solutions, please share it with us.
If you need any help when using MiniTool software, you may contact us via [email protected].
User Comments :