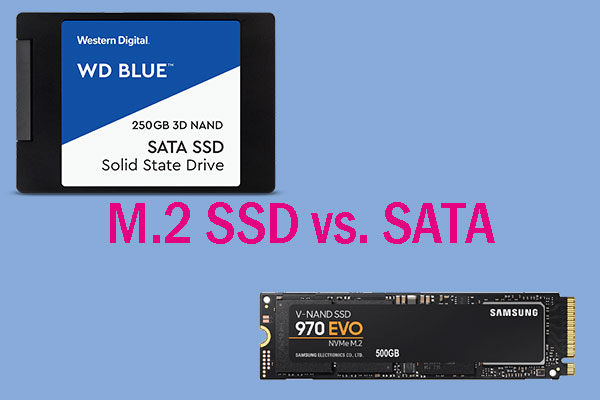
What Is M.2 SSD
An M.2 SSD is a solid-state drive that uses the M.2 interface. It’s a small, high-performance SSD that connects directly to the motherboard.
M.2, also known as the Next Generation Form Factor (NGFF), is a new generation interface standard designed specifically for Ultrabooks, intended to replace the mSATA interface.
Key features of M.2 SSDs:
- Form factor: Typically 22mm wide, with varying lengths (usually 2280mm or 22mm x 80mm).
- No cables required: They plug directly into a dedicated M.2 slot on the motherboard.
- Interface: M.2 drives can use either the SATA interface (slower) or the modern PCIe/NVMe interface (much faster, up to 7,000+ MB/s).
- Key: The notch on the connector determines its compatibility (e.g., M Key for PCIe/NVMe, B+M Key for SATA).
Advantages of M.2 SSDs:
- Speed: PCIe NVMe M.2 SSDs offer significantly faster transfer speeds than traditional SATA SSDs.
- Space saving: Ideal for small devices like Ultrabooks and the PlayStation 5.
Install Windows 10 on an M.2 SSD
Make sure that you have followed the correct steps to install Windows on an M.2 SSD, as any mistake you make during installation may cause Windows 10 not booting from M.2 SSD issue.
Step 1. Create a Windows 10 installation USB drive with Windows Media Creation Tool.
Step 2. Restart your PC and enter the boot menu, and select the USB drive to boot from it.
Step 3. Then Windows 10 will automatically enter setup mode. Select language to install, time and currency format, and keyboard or input method. Then click Next.
Step 4. Click Install Now to continue.
Step 5. On the “Where do you want to install Windows?” page, choose your M.2 SSD drive as the system drive.
Step 6. Enter your Windows 10 license key. If you don’t, you will be required to enter the license key later.
Step 7. Accept the license terms and click Next.
Step 8. Choose a way to install Windows 10. If it is a new M.2 SSD without data stored on it, choose [Custom: Install Windows only (advanced)]:.
Step 9. Start installing Windows 10 on your M.2 SSD drive now. Just wait patiently. It won’t be too long.
After installing Windows 10 onto your new M.2 SSD, you can enjoy incredibly fast start-up times which can only take a few seconds.
If you don’t want to install Window onto your new M.2 SSD, you can also choose to migrate OS to M.2 SSD with the help of third-party software, which will move all the contents to your M.2 SSD.
The process of installing Windows 10 on an M.2 SSD seems very simple. However, many users report that they are unable to load Windows from M.2 SSD.
How to fix it if your PC won’t boot after installing M.2 SSD? You may read the following contents to resolve M.2 not booting issue.
Fixes to Unable to Load Windows from M.2 SSD
If you are unable to load Windows from M.2 SSD, what should you do? How to fix it? Here are 4 solutions for your reference.
- Before you go, you can simply try the M.2 SSD on another computer. If it is a faulty SSD, you are absolutely unable to load Windows from M.2 SSD. And you can request a replacement. If it works then try the other solutions.
- Mistaken operations will cause unexpected data loss or render your PC completely unbootable. So backup important files in advance.
Fix 1. Disconnect Any Other Storage Drive on Your PC
When you are unable to load Windows from M.2 SSD, you can disconnect other storage devices on your computer and leave the NVMe M.2 drive the only storage drive connected.
And then reboot your computer to see if that works. Some users reported that they fixed the issue in this way. So you can have a try.
Fix 2. Disable the CSM Module
CSM is short for Compatibility Support Module, which is a part of some UEFI firmware implementations. It provides legacy BIOS compatibility by emulating a BIOS environment, allowing legacy operating systems and some option ROMs that do not support UEFI to still be used.
Well then, how to disable CSM in BIOS? Now, let’s see the detailed steps.
Step 1. Enter the BIOS setting on your PC. The key to enter BIOS varies from PC to PC. It depends on your PC’s manufacturer and model.
Step 2. Locate to the Boot section.
Step 3. Depending on the model of your PC or laptop and the EFI firmware, the setting to change CSM can be different. Notice the possible setting names. Turn it off or disable it.
- Legacy Support
- Boot Device Control
- Legacy CSM
- Launch CSM
- CSM
- UEFI/Legacy Boot (set to UEFI Only)
- Boot Mode (set to No Legacy Support)
- Boot Option Filter (set to UEFI Only)
- UEFI/Legacy Boot Priority (set to UEFI Only)
Step 4. Save the change and exit the BIOS setting.
When you encounter the Windows not booting after installing M.2 SSD issue, you may try this way to get rid of the problem.
Fix 3. Update BIOS
Another reason for M.2 SSD not booting is that the motherboard of your computer is not updated to be able to recognize to boot from M.2 SSD. In this case, your PC won’t boot after installing M.2 SSD.
So, always make sure you have the latest revision of BIOS installed on your PC. You can go to the manufacturer’s website to get the latest BIOS update (.cap file) or check out the user manual to find out the way to update your computer’s BIOS.
Install the update from BIOS and reboot. Then the M.2 SSD should be able to be boot you’re your Windows PC.
Fix 4. Change the SATA Port
According to a forum user report, plugging into the incorrect port may cause the inability to load Windows from M.2 SSD.
Certain SATA ports on motherboards share bandwidth with M.2 slots, meaning plugging a SATA cable into specific ports can disable the NVMe SSD, causing it to not be detected during Windows installation.
To fix this, change the SATA port used or set the BIOS storage mode to AHCI.
To set the BIOS storage mode to AHCI, restart your computer and enter the BIOS setup. Navigate to Advanced or Storage Configuration, find the SATA Mode or Configure SATA as option, change it to AHCI, save changes, and exit.
How to Retrieve Data If Your PC Won’t Boot after Installing M.2 SSD
If you are unable to load Windows from M.2 SSD, how to get files off the computer if there is an important file on your PC.
Try using MiniTool Partition Wizard Pro Ultimate to get files off the unbootable computer. MiniTool Partition Wizard Pro Ultimate can recover various files on your computer such as documents, photos, videos, audio, music, emails and so on.
How to utilize this professional data recovery software, here are the detailed steps.
Step 1. Get MiniTool Partition Wizard Pro Ultimate by clicking the following button. Install it on a normal computer.
Step 2. Create a bootable USB drive with the Bootable Media feature embedded in this software.
Step 3. Connect the bootable drive you’ve made to the computer with the M.2 not booting.
Step 4. Enter the BIOS settings menu and change the boot order to boot from the USB drive.
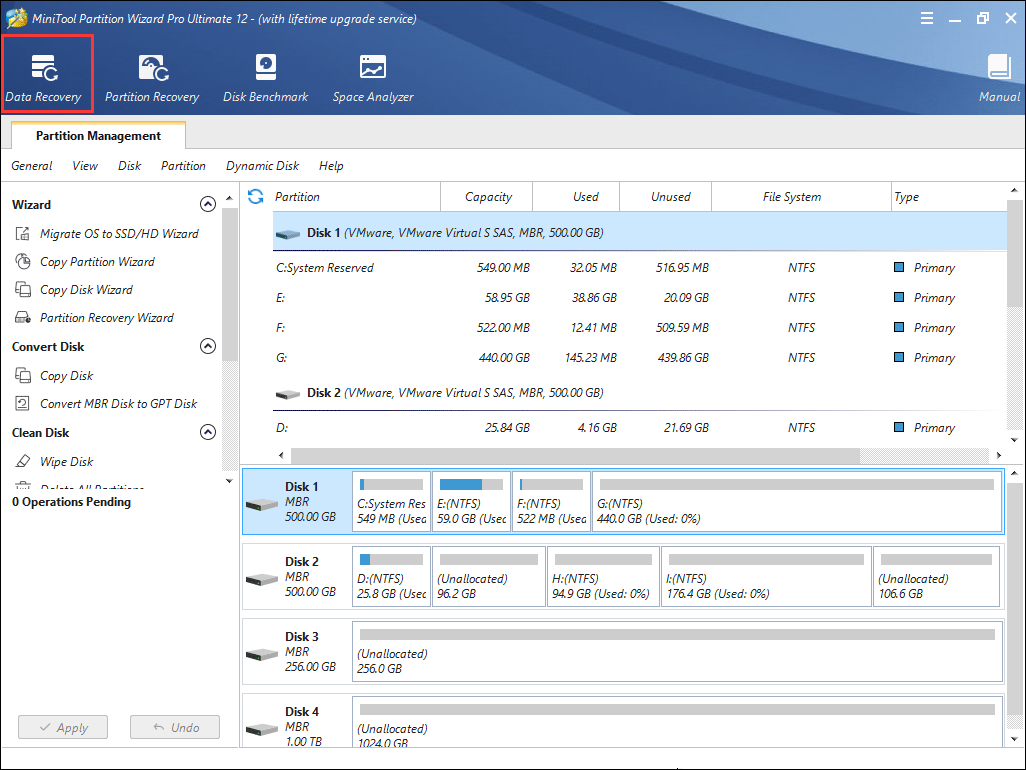
Step 5. When you get the interface of MiniTool Partition Wizard, launch the Data Recovery wizard.
Step 6. On the Data Recovery interface, select the partition that contains important files on it and click Scan.
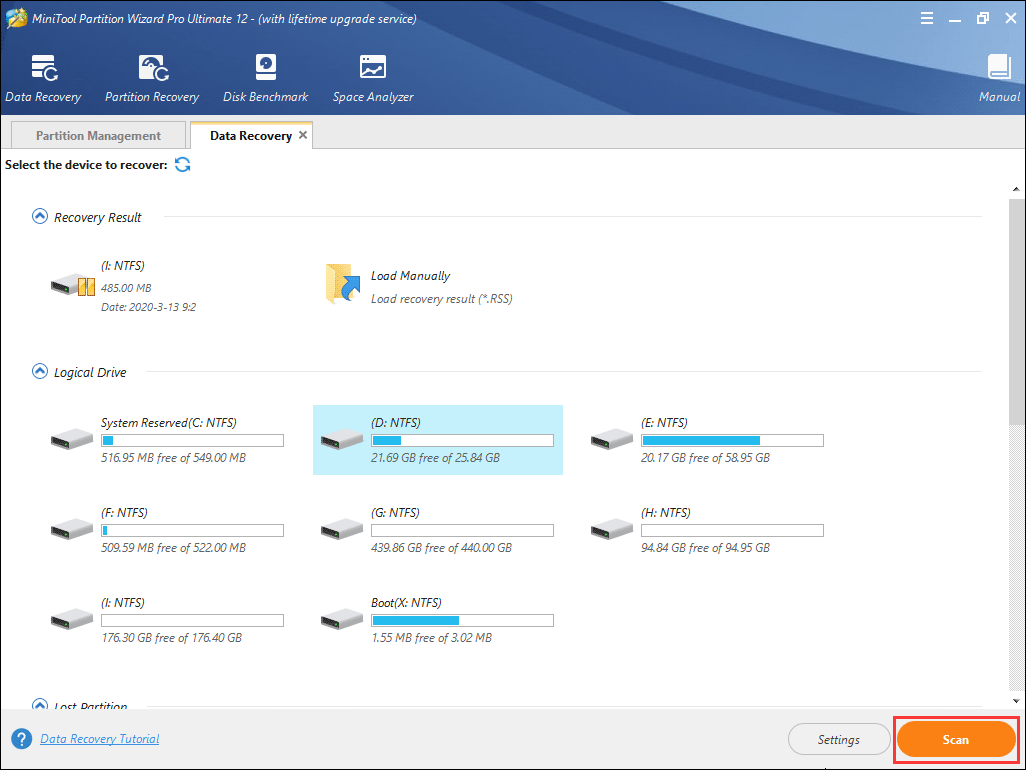
Here Data Recovery will list 5 parts, and every part is different from each other.
- Recovery Result: this part shows the last scanning result record.
- Logical Drive: this part shows all existing partitions on your computer.
- Lost Partition: this part shows all lost partitions on your PC.
- Unallocated Space: this part shows all unallocated spaces on your computer.
- Hard Disk: this part lists all hard disks on the computer. You can also select a hard disk to scan.
Step 8. The software is scanning your drive now. During the process, you can pause or stop the scanning by clicking the Pause or Stop button near the progress bar if you find the files you need.
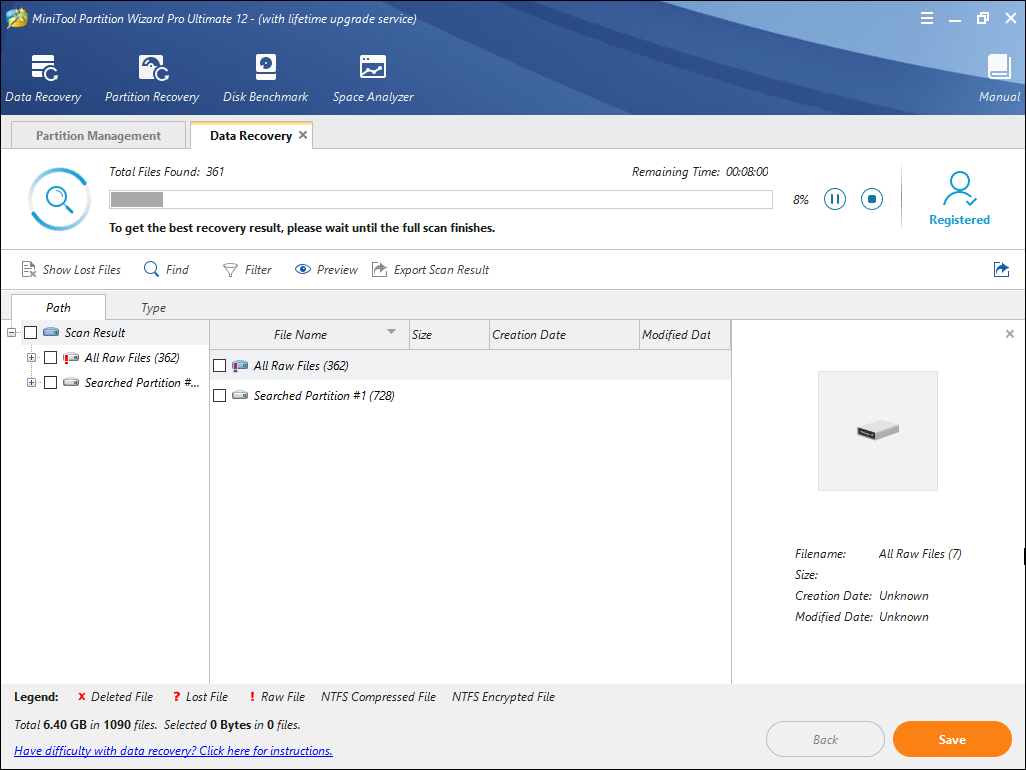
Step 9. Check items you need from the recovery result and click Save button.
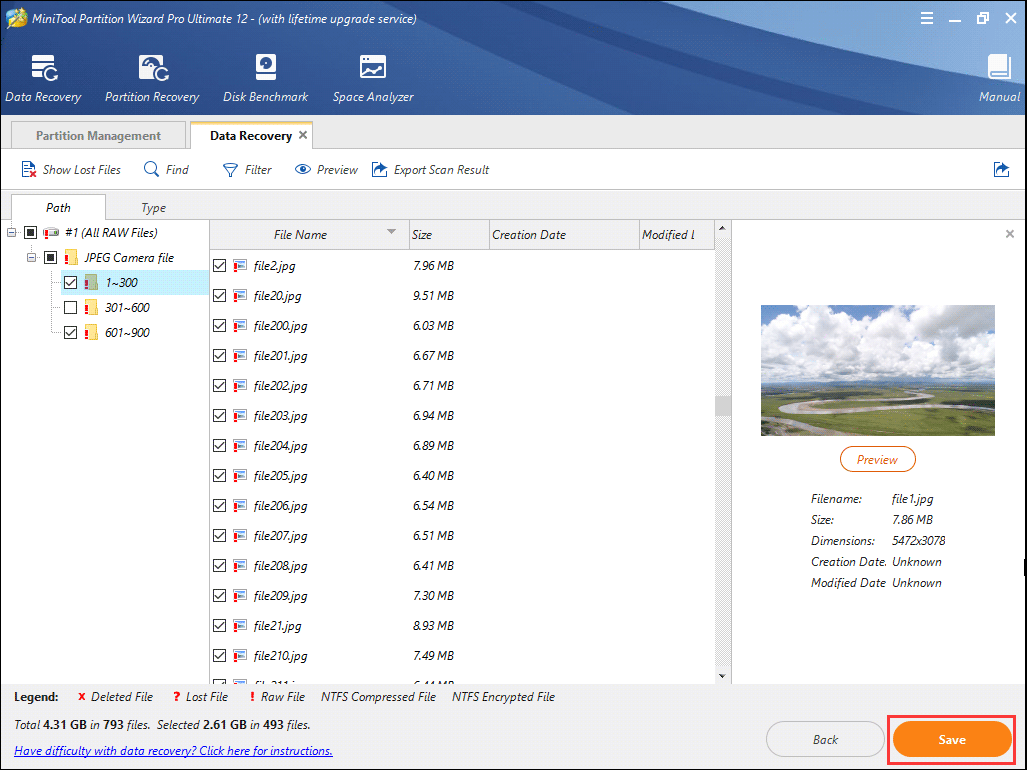
To find needed files quickly, you can utilize the following three tools
- Show lost file: by utilizing this feature, you can only see the lost files on the recovery result.
- Find: With the Find tool, you can search a specific file by matching case or matching word.
- Filter: You can search for files by their filename/extension, file size, creation or modification date with this function.
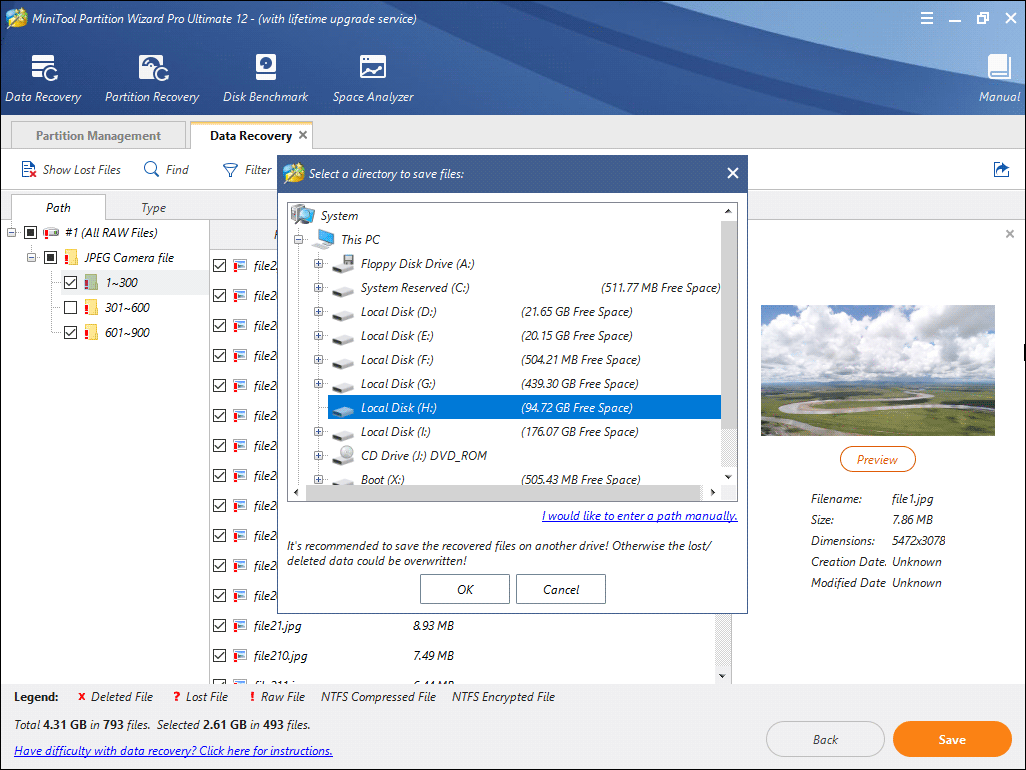
Step 10. Choose a directory to save needed files. It is recommended to save the recovered files on another drive. Otherwise, the lost/deleted data could be overwritten.
This is how to get files off an M.2 SSD not booting with MiniTool Partition Wizard Pro Ultimate. If you want to access important files immediately, try this way.
Bottom Line
Does this article help you when you are unable to load Windows from M.2 SSD? Now you should know how to boot into Windows from M.2 SSD.
If you have any other good solutions that help you fix the issue, please don’t hesitate to tell us.
If you need any help when using MiniTool software, you can contact us via [email protected].
About The Author

Position: Columnist
Vega enjoys helping people with computer problems, including disk management, data recovery, data backup, and more. She is constantly expanding her knowledge in related fields. And she will continue to bring more easy-to-understand professional articles to help people solve various problems on the PC.
User Comments :