
If you receive “The partitions on the disk selected for installation are not in the recommended order” while installing Windows 11/10, don’t panic.
This warning is usually related to the GPT partition layout rather than disk failure. In this guide, we’ll explain the causes and show you effective methods to fix it.
Quick Answer:
| Question | Answer |
| What does this warning mean? | Windows Setup detected that the GPT partitions are not arranged in Microsoft’s recommended order |
| Can you continue installing Windows? | Yes. In many cases, Windows can still be installed successfully. |
| Should you fix it? | Yes. Recreating the recommended partition layout helps avoid future boot or recovery issues. |
| Will fixing it erase data? | It depends. Methods like DiskPart clean or deleting partitions remove existing partition information, so back up important files first. |
Why the Partitions on the Disk Are Not in the Recommend Order
After analyzing extensive user reports, we found that the partitions on the disk selected for installation are not in the recommended order error often appears when reinstalling or clean installing Windows 10. When reinstalling or clean install, all the critical partitions including Recovery, EFI, MSR, and OS partitions will be deleted.
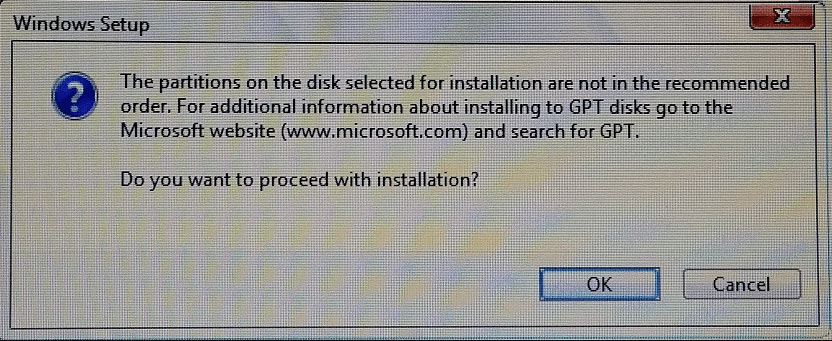
There are 2 main cases when the partitions on the disk are not in the recommended order error occurs:
Case 1: Reinstall Windows 10 from an ISO image that’s stored on an external drive like a USB.
Case 2: Reinstall Windows 10 to the partition where Windows 8 or 7 was previously installed, while other partitions like the EFI partition are ordered earlier in the list.
How to fix the Microsoft GPT order problem? Let’s keep reading.
How to Fix “The Partitions Are Not in the Recommended Order” Issue
Although many users report that Windows installs successfully after ignoring this warning, Microsoft recommends recreating the GPT partition layout to prevent potential boot or recovery issues.
The following methods show you how to clean the disk safely and reinstall Windows with the recommended partition order.
Step 1. On the Windows 10 Setup Partition screen, press the Shift + F10 keys to open the DOS prompt window.
Step 2. Type the following commands one by one and hit Enter after each one.
The clean command will delete all partitions on the hard disk. So, make sure you have backed up all imprtant data beforehand.
- diskpart
- list disk
- select disk=0 (which will activate your disk)
- list partition
- clean
- list partition
- exit (which will close DiskPart)
Step 3. Navigate back to the already-in-process Windows 10 Setup screen where the old partitions should still display, and then click on Refresh.
Step 4. Click on New and Apply to accept the recommended disk size.
Step 5. Click on OK on the “To ensure Windows 10 features work correctly, Windows might create additional partitions.” screen.
Step 6. After that, you can proceed with your Windows 10 installation on the disk.
Bonus Tip: How to Restore Lost Partitions
As you know, reinstalling Windows 10 or a clean installation will delete the critical partitions. If you haven’t make a backup in advance, the system partitions will be removed. How to restore the lost partition? Here MiniTool Partition Wizard can help you restore lost partitions easily. It is a reliable partition manager that boasts many powerful features like rebuild MBR, convert FAT to NTFS, convert GPT to MBR, etc.
MiniTool Partition Wizard DemoClick to Download100%Clean & Safe
User Comments :