Secure Boot Violation is a startup error that can prevent Windows from booting when UEFI fails to verify trusted boot files. The issue is commonly caused by BIOS changes, corrupted boot files, or invalid Secure Boot keys. In this guide from MiniTool Partition Wizard, you’ll learn what causes the error and how to fix it step by step.
Secure Boot Violation – Invalid Signature Detected is a startup error that appears when your computer’s UEFI firmware cannot verify the digital signature of a bootloader, driver, or operating system component. As a result, Windows may fail to boot and display a Secure Boot warning screen instead.
If your PC displays this error, the most effective fixes are restoring the factory Secure Boot keys, repairing the Windows boot files, or temporarily disabling Secure Boot for troubleshooting. If the error appears after a BIOS update or firmware change, restoring the default Secure Boot keys is often the quickest solution.
In the following sections, we’ll explain what Secure Boot Violation means, why it happens, and walk you through several proven methods to fix the error on Windows 10/11.
What Is Secure Boot Violation?
Secure Boot is a security feature in UEFI firmware that only allows trusted software to boot.
Seeing “Secure Boot Violation – Invalid Signature Detected” on startup?
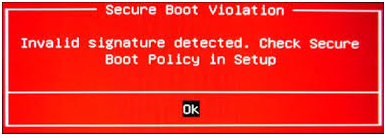
This error appears when the system detects untrusted boot files or when digital signatures fail verification. It means your system detected an unauthorized or invalid boot file.
This causes Windows to fail to boot, or you get stuck at the BIOS/UEFI screen.
Now that you know what Secure Boot Violation is, the next step is to understand why it occurs.
What Causes Secure Boot Violation
Secure Boot Violation can be triggered by several different issues. The table below summarizes the most common causes and explains why they lead to the error.
Common Cause | Description |
Driver or Windows Updates | Boot files or drivers were modified, causing signature verification to fail |
Missing or Invalid Secure Boot Keys | Secure Boot keys are missing, corrupted, or incorrectly configured |
Unauthorized Bootloader | An unsigned or modified bootloader cannot be verified by UEFI |
Hardware or BIOS Changes | BIOS updates or hardware changes reset Secure Boot settings |
Incorrect BIOS Configuration | UEFI, Legacy, or Secure Boot settings are configured incorrectly |
Once you’ve identified the possible cause, follow the troubleshooting methods below to resolve the “Secure Boot Violation – Invalid Signature Detected” error.

Method 1. Disable the Secure Boot
Many users reported that they solve this problem easily by disabling the secure boot. This method needs you to enter BIOS and change its settings. Please keep reading the steps carefully to solve the secure boot violation invalid signature detected.
- Restart your computer and press the BIOS key when you see a message like “Press _ to enter Setup.” Common BIOS keys include F1, F2, Del, and others, depending on your device manufacturer.
- Once inside the BIOS Setup, use the arrow keys to navigate to the Security Find Secure Boot Configuration and press Enter to open it.
- Press F10 to access the Secure Boot Configuration menu. Select Secure Boot, then use the arrow keys to change the setting to Disable.
- Press Enter to save your changes.
- Your system will continue to boot into Windows. After restarting, check whether the Secure Boot Violation error has been resolved.
Method 2. Reset Factory Keys
If you want to keep Secure Boot enabled, you can reset the factory keys. This can fix signature mismatch issues. Here is the guide:
- Enter BIOS again, and then go to Advanced Menu > Security
- Expand the Secure Boot settings, then enter the Key Management
- Click each of the keys one by one (Platform Key, Key Exchange Keys, Authorized Signatures), and select the “UPDATE” option of each of those. It’ll ask if you want to Reset it to Factory Defaults, select Yes. Do it for all 3 types of keys.
- Press F10 to Save changes & Exit the BIOS to restart.
Method 3. Disable the Digital Driver Signature Enforcement
The digital drive signature is another possible cause of the error. Disabling the driver has helped many users solve this problem. Here is how to do this.
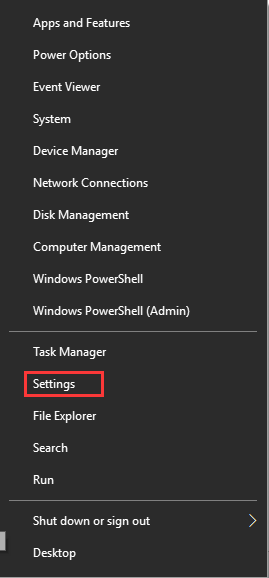
Step 1. Right-click the Start menu and select the Settings from the context menu.
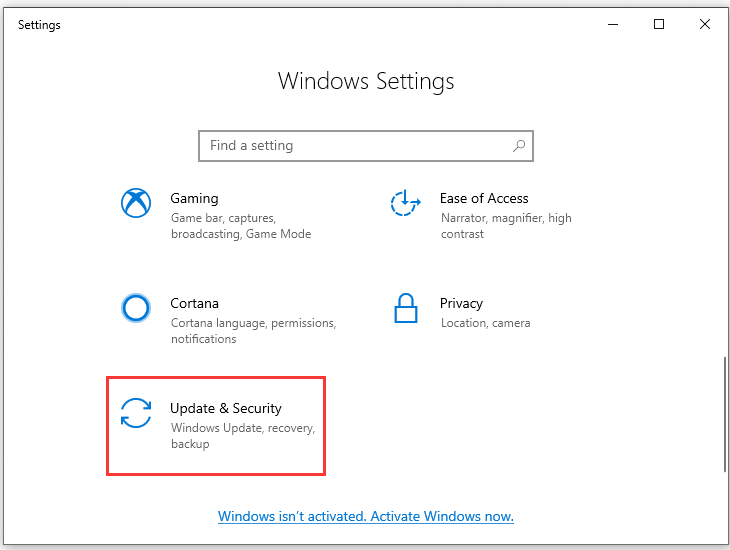
Step 2. Click on the Update & Security inside the bottom of the setting window.
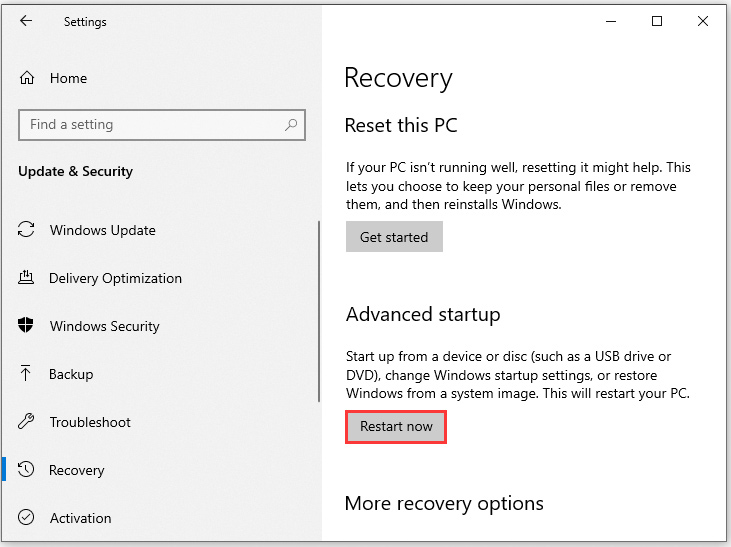
Step 3. Then click on the Recovery on the left pane.
Step 4. In the new Settings window, navigate to the Advanced Startup location at the bottom right. Then click on Restart now button to access the Advanced Startup Options.
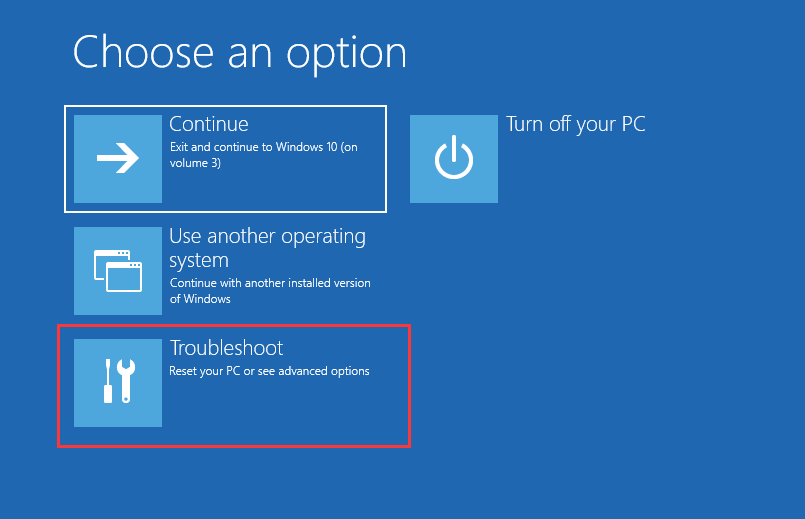
When you have accessed the Advanced Startup Options successfully, click on the Troubleshoot in the Choose an option window.
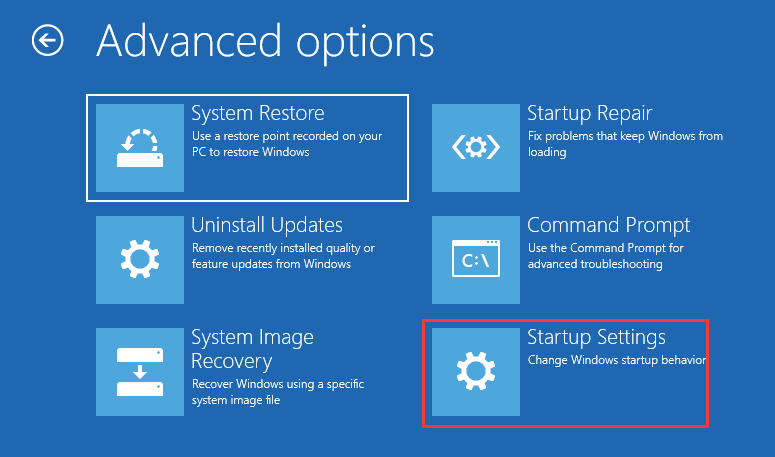
Step 6. Navigate to the Advanced Options, Startup Settings in order by following the prompts of the screens.
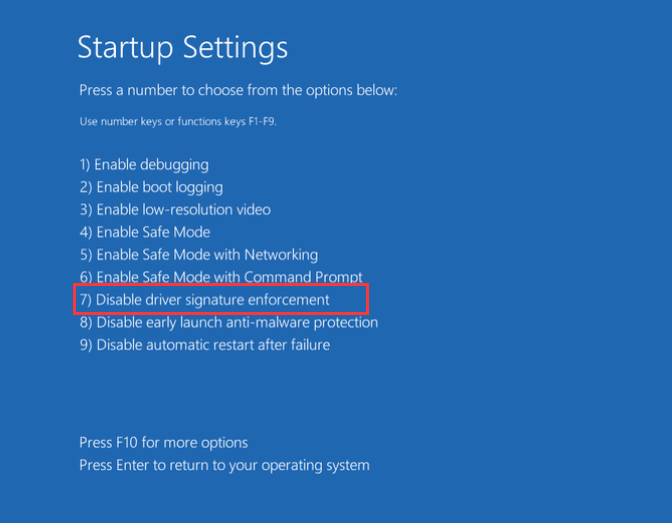
Step 7. Inside Startup Settings, navigate to the Disable driver signature enforcement. Usually, you can press the F7 function key to disable this driver. Then press Enter to go back to the OS and check if this problem still persists.
Method 4. Repair the Windows Boot Manager
According to user reports, this issue can be solved by repairing the Windows boot manager. Here’s how to do it:
- Enter BIOS.
- Go to Security > Secure Boot > Enroll EFI IMAGE, and then choose the right partition. (Do not choose a partition where your Windows files are.)
- Choose the right folder EFI > Microsoft > Boot > bootmgfw.efi.
Method 5. Change OS Type
Changing the OS Type is a highly effective way to fix the “Secure Boot Violation” error, especially on ASUS motherboards.
In many modern BIOS versions, the OS Type setting acts as a toggle for Secure Boot enforcement. Changing it to “Other OS” tells the system to stop strictly verifying digital signatures, which bypasses the violation error.
Follow these steps to locate and adjust the setting:
- Enter BIOS.
- If you see a simple “EZ Mode” screen, press F7 to switch to Advanced Mode.
- Navigate to the Boot or Security tab and look for the Secure Boot sub-menu.
- Locate the OS Type option. Change it from “Windows UEFI Mode” to “Other OS“.
- Press F10 and select Yes to save changes and restart.
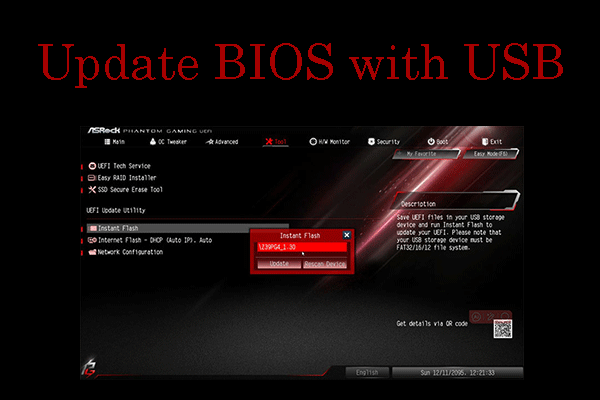
Method 6. Update BIOS
Update the motherboard BIOS to the latest version, as this can fix signature recognition issues.
Secure Boot Violation FAQ
Bottom Line
A Secure Boot Violation error may look serious. But in most cases, it’s just a configuration mismatch, not a hardware failure. And you can fix it in minutes with BIOS or boot repair.
About The Author

Position: Columnist
Cecilia has been an editor at MiniTool for two years. She primarily focuses on disk and partition-related content, with particular expertise in disk cloning, partition recovery, and PDF document conversion. She is dedicated to providing users with clear and accurate solutions to help them efficiently resolve common computer problems.
User Comments :