No bootable image found may occur due to incorrect boot order/options, hard drive issues, misconfigured BIOS settings, or OS corruption. To fix it, you can try changing the boot order/option, checking disk errors, or replacing the hard drive.
By pressing the power button, users can access the main Windows interface within a few seconds. However, some users report seeing a frustrating error message: “no bootable image found, notebook will be shutdown” when trying to start their computers.
For example, this is a user report from HP Support Community:
...I was working on my laptop and it started making strange sounds... I shut down the laptop for a bit and turned it on again. This time, the system would just not boot, I keep getting the error "No bootable image found, notebook will be shutdown."…https://h30434.www3.hp.com/t5/Notebooks-Archive-Read-Only/quot-No-bootable-image-found-notebook-will-be-shutdown-quot/td-p/4606172
If you experience the same issue on your computer, you don’t need to worry. This post from Partition Magic shows the reasons and solutions to this error.
What Causes No Bootable Image Found, Notebook Will Be Shutdown
The error “no bootable image found notebook will be shutdown” signals that the system is unable to find the bootable image, file, or device required to complete the booting process.
This error usually occurs when your computer can’t find a bootable operating system during startup. After showing this error message, your computer will shut down automatically. Normally, this error stems from the following reasons:
- Incorrect boot order/options
- Misconfigured BIOS settings
- Hard drive errors
- Hard drive connection issue
- Corrupted system file
- Operating system corruption
- USB device interference
Now, you already know the possible causes of the “no bootable image found notebook will be shutdown” error. Continue reading to get some solutions.
Do Preparation: Recover Data When No Bootable Image Found
Before you fix the “no bootable image found notebook will be shutdown” error, you’d better use a data recovery tool to help you recover data to a safe location first to avoid data loss. To do this, I highly recommend MiniTool Partition Wizard.
It is a professional disk partition manager that offers the Data Recovery feature to help you perform USB drive/SD card/HDD/SSD data recovery easily. Also, you can use this powerful and feature-rich tool to clone HDD to SSD, check disk for errors, convert MBR to GPT, etc.
Here’s the guide:
Step 1. Download and install MiniTool Partition Wizard on a working computer. Then, launch this software to enter its main interface.
MiniTool Partition Wizard DemoClick to Download100%Clean & Safe
Step 2. Create a MiniTool USB bootable media.
- Connect a USB flash disk to the working computer.
- Launch MiniTool Partition Wizard to enter its main interface.
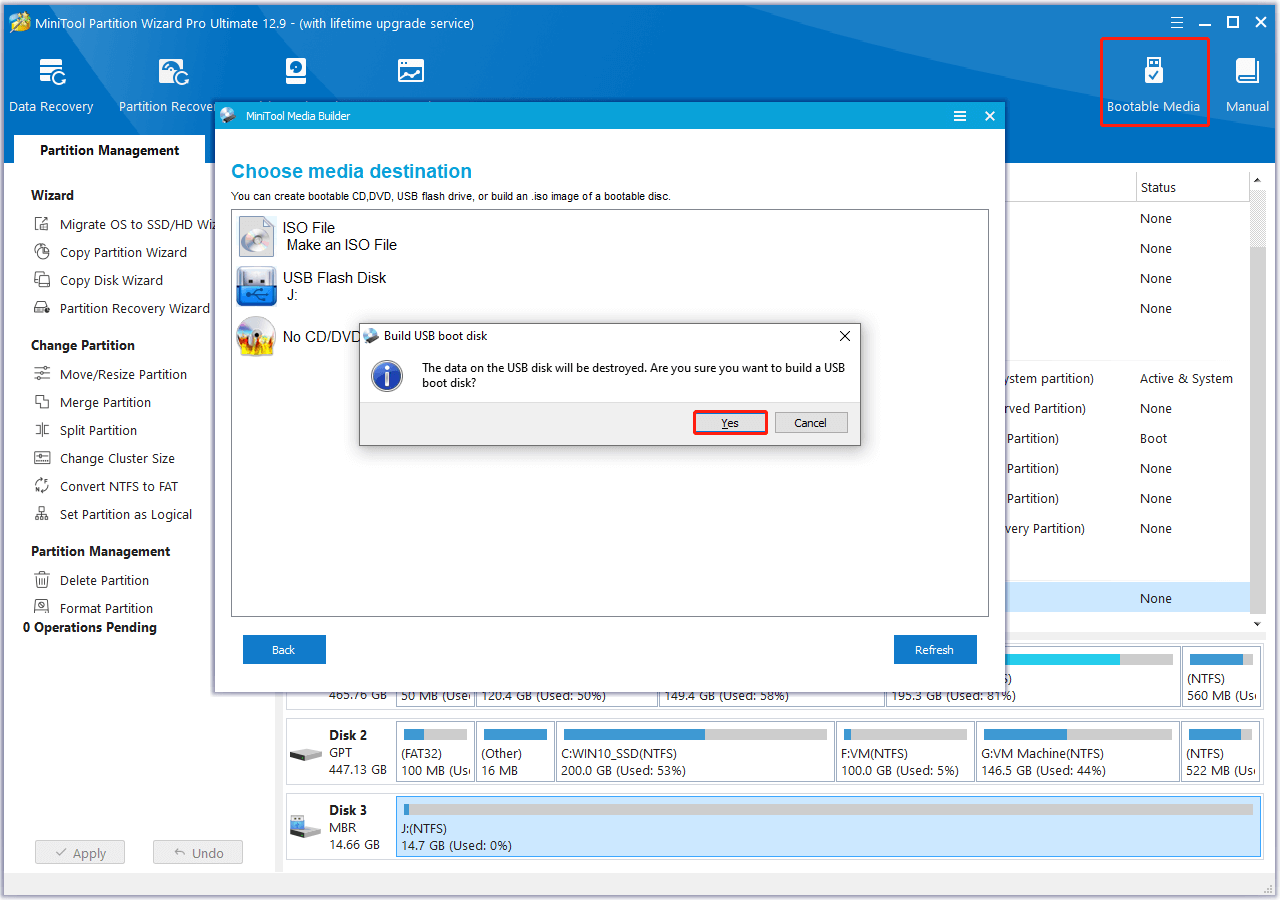
- Click Bootable Media in the upper right corner.
- Choose WinPE-based media with MiniTool plug-in.
- Select USB Flash Disk.
- Click Yes in the pop-up window.
- Once done, click Finish.
Step 3. Connect the MiniTool Bootable Media to the problematic PC and boot from it.
- Power on the problematic PC.
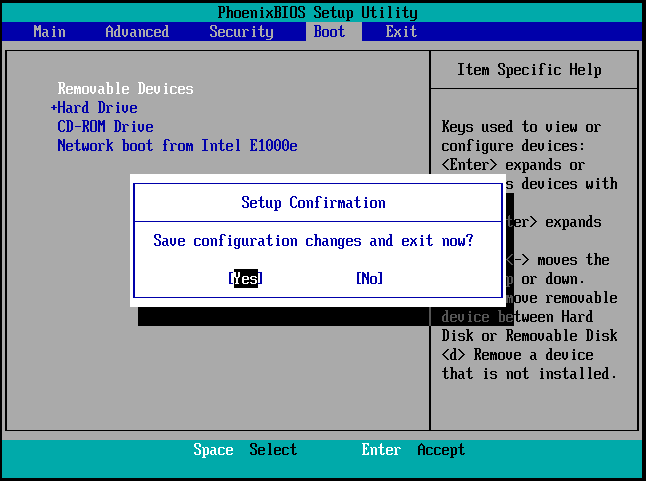
- Boot your computer into BIOS.
- Go to the Boot tab.
- Use the plus key “+” to move the Removable Devices to the top.
- Then, press F10 and the Enter keys to save the changes.
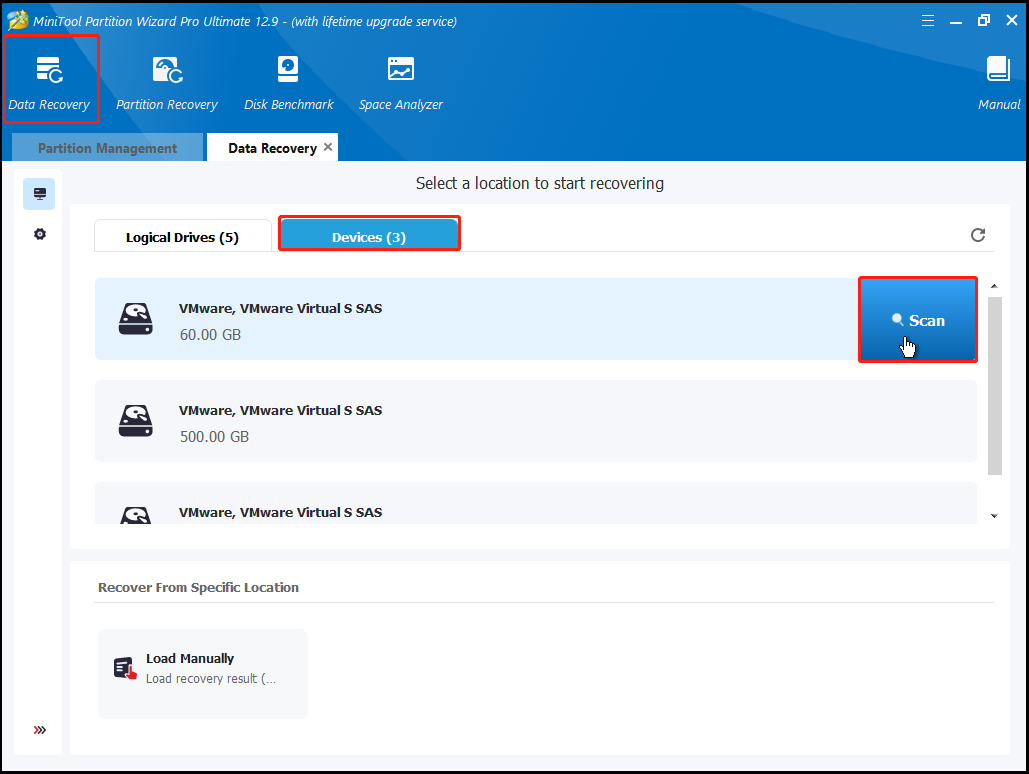
Step 4. Once MiniTool Partition Wizard launches, click Data Recovery from the top toolbar.
Step 5. Then, go to the Devices tab and click Scan.
Step 6. Then, the program will start scanning. Here are some tools that can assist you:
- Path: All lost files here are listed by directory order.
- Type: All lost files here are classified by type.
- Search: You can find files by their names.
- Filter: Filter files by Type, Date Modified, Size, and Category.
- Preview: Preview up to numerous types of files, but installation of a package is required first.
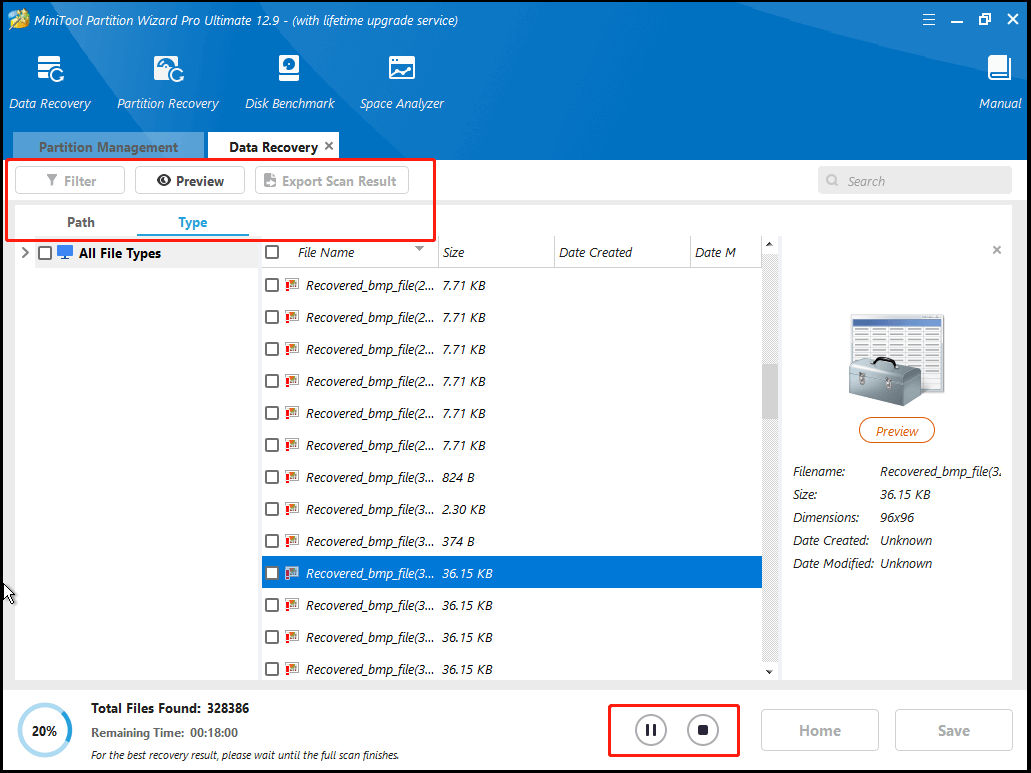
Step 7. During the scanning process, you can preview the files.
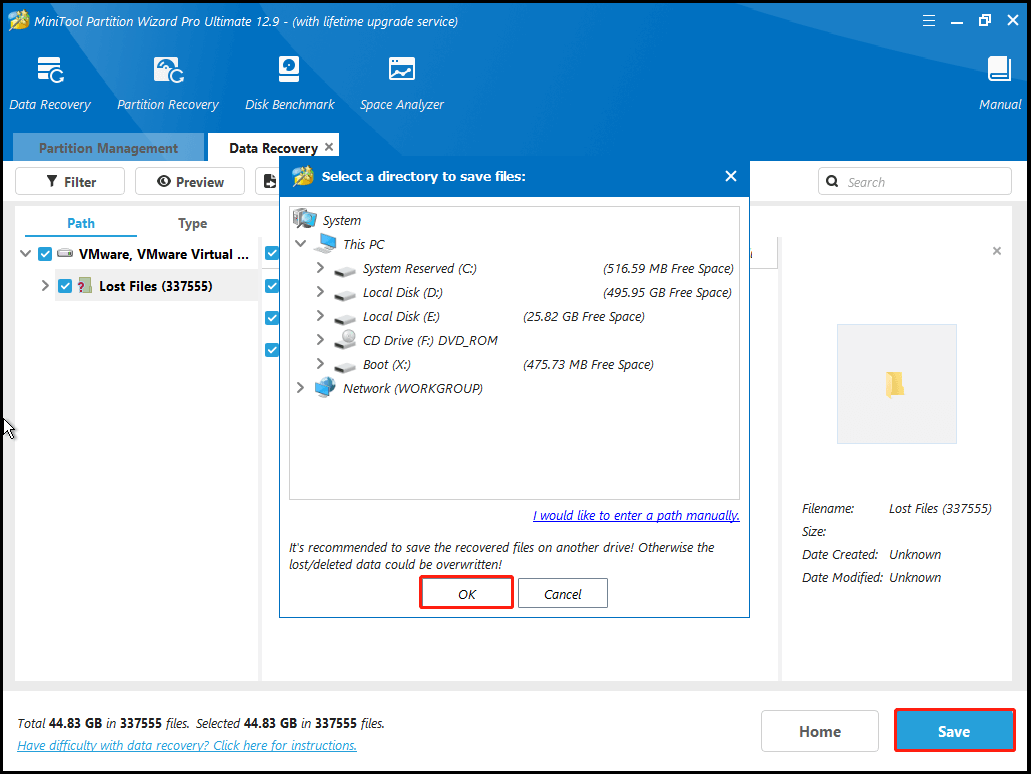
Option 1. If you find the files you need
- Click pause or stop to end the scanning.
- Then, check the files you want.
- Click Save.
- Choose a safe location to store the recovered files.
- Next, click OK to confirm.
Option 2. If you don’t find the files you need
During the scanning process, if you don’t find the files you want to recover, you just need to wait for the process to end.
Step 8. Once done, check the files that you want to recover. Next, click Save > choose location > OK.
Once done, you can start fixing the “HP laptop no bootable image found” error without any concerns.
How To Fix No Bootable Image Found, Notebook Will Be Shutdown
To fix the “no bootable image found notebook will be shutdown” error, you can try changing boot order, modifying UEFI/BIOS boot options, resetting BIOS settings, performing startup repair, reinstalling Windows, checking disk errors, or reinstalling/replacing the hard drive.
Here are the detailed steps for these fixes:
Fix 1. Change Boot Order
The wrong boot order is one of the reasons for the “HP laptop no bootable image found” error. So, you can enter the BIOS menu, change the boot order, and then save the changes to remove the error. Here are the detailed steps:
- Reboot your computer and enter the UEFI/BIOS setup utility.
- Navigate to the Boot tab.
- Move the drive containing your operating system to be the first boot option.
- Press the F10 and Enter keys to save the changes.
- Restart your PC and check if the error is fixed.
Fix 2. Change UEFI/BIOS Boot Options
BIOS Boot Options can decide how your system starts. If you encounter the “no bootable image found Windows 10” error, you can access the BIOS menu, deactivate Secure Boot, and enable Legacy as a boot option to fix the error. Here are the detailed steps:
- Enter the UEFI/BIOS setup utility.
- Go to the System Setup option.
- Disable Secure Boot here.
- Navigate to Boot Maintenance Manager > Advanced Boot Options.
- Choose Boot Mode.
- Select Legacy from the pop-up list.
- Save the changes and exit UEFI/BIOS.
After that, your computer will restart. Then, check if the error has been resolved.
Fix 3. Reset BIOS to Default Settings
Misconfigured BIOS settings can cause the “no bootable image found Windows 10” error as well. If you are unable to fix the error by changing the boot order and boot option, you can try resetting your BIOS settings back to default to fix the error. Here’s how to do that:
- Enter the BIOS/UEFI settings menu.
- Locate the Load setup defaults or similar option here.
- Select it and press Enter.
- Then, press Enter again to confirm.
- Once done, exit the BIOS setup utility and restart your PC.
- Check if the error is fixed.

Fix 4. Check for Disk Error
Hard drive errors can also lead to the “no bootable image found Windows 11” error. In this case, you can use MiniTool Partition Wizard’s Check File System feature to check and fix disk errors, and the Surface Test feature to scan bad sectors. Then, run CHKDSK to resolve the issue.
Here’s how to do that:
Step 1. Launch MiniTool Partition Wizard to enter its main interface.
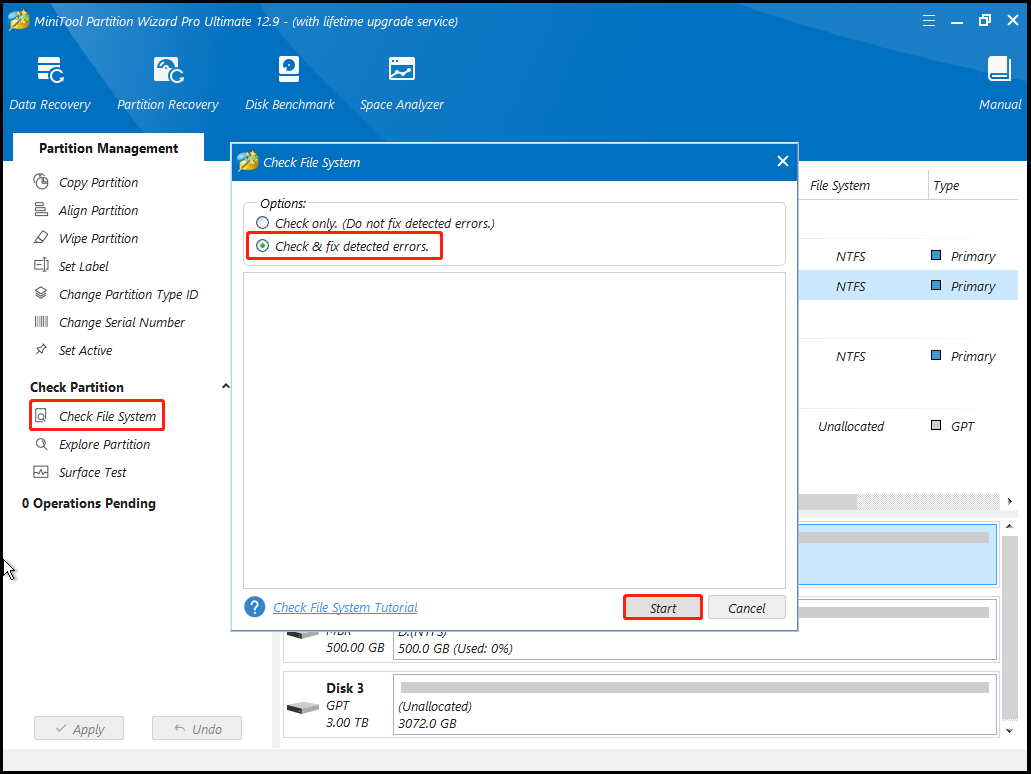
Step 2. Run the Check File System feature to check and fix disk errors.
- Choose the system partition from the disk map.
- Select Check File System from the left panel.
- Choose Check & fix detected errors.
- Then, click Start.
- Once done, you can see the scanning result in the window.
- Click the Exit icon to close the window.
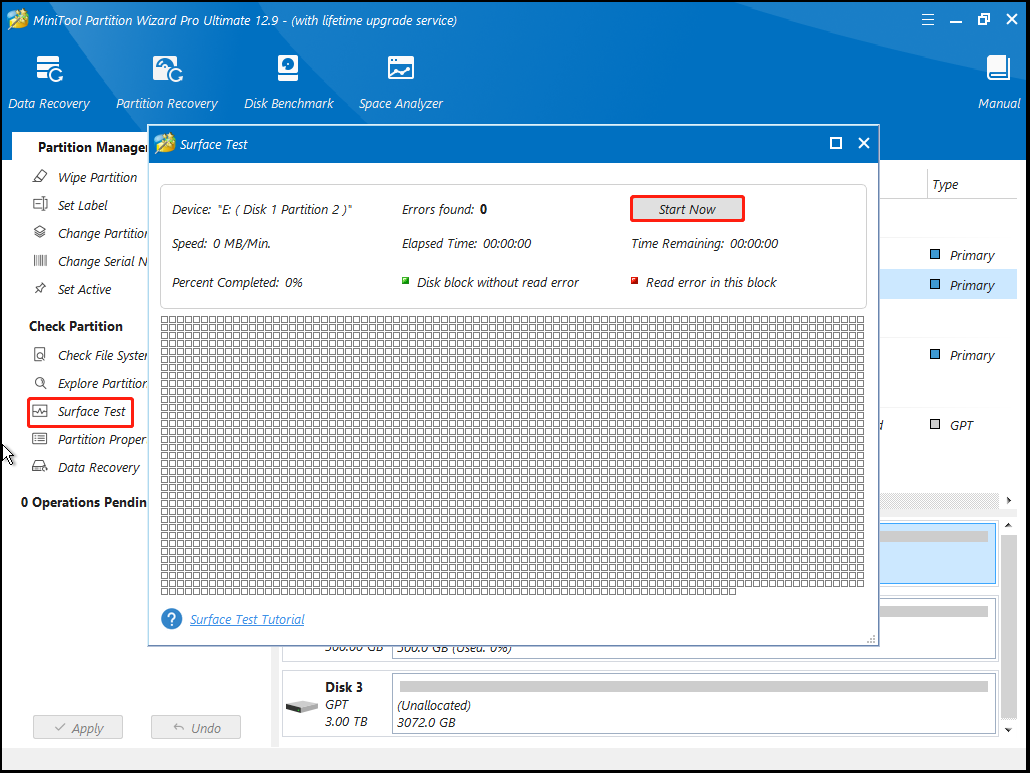
Step 3. Run the Surface Test feature to scan bad sectors.
- Choose the system partition or disk.
- Select Surface Test from the left panel.
- Click Start Now.
- Once done, the bad sectors will be marked as red.
- Click OK to confirm the scanning results.
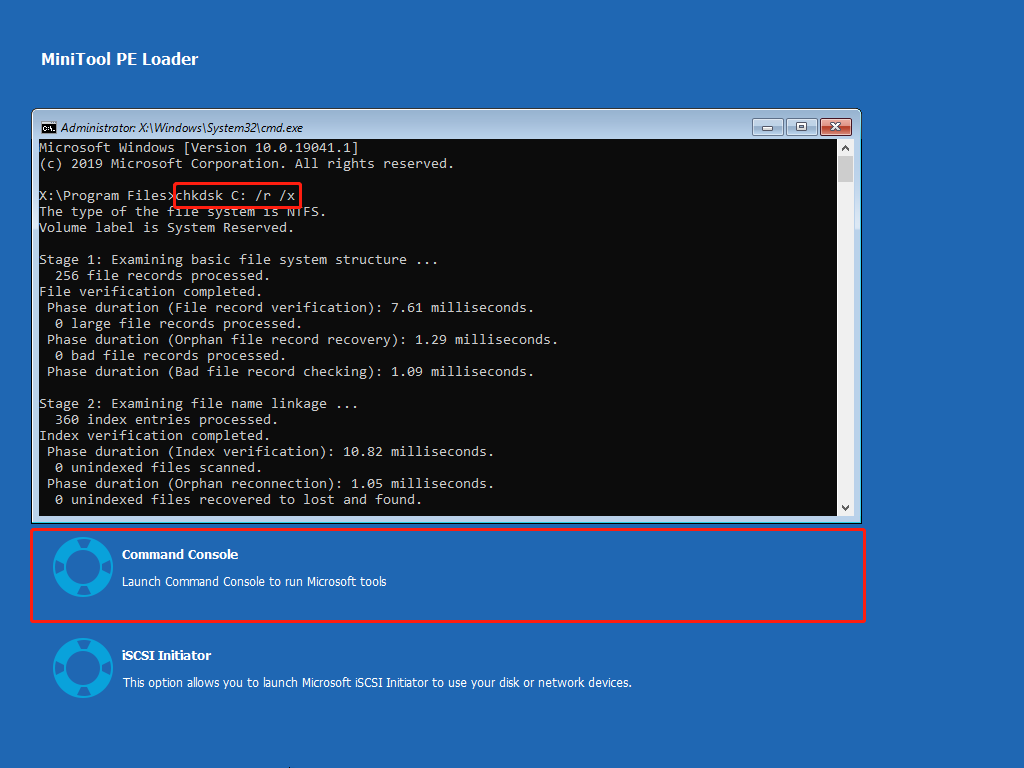
If the Surface Test feature finds some bad sectors on your partition or disk, you can close MiniTool Partition Wizard and run “chkdsk C: /r /x” in the Command Console window to mark bad sectors, and then make Windows avoid writing data to them. Here’s the guide:
- Close the MiniTool Partition Wizard window.
- Select the Command Console from the list.
- Type “chkdsk C: /r /x” and press Enter.
- After that, close the window.
Once done, restart your computer and check if the “no bootable image found notebook will be shutdown” error is fixed. If not, continue and try the following fixes.
Fix 5. Perform Startup Repair
Startup Repair is a Windows troubleshooting tool that automatically fixes common issues preventing your computer from starting up correctly. Therefore, you can perform Startup Repair to fix the “no bootable image found Windows 11” error.
The whole process can be divided into three steps. Here’s the way:
# 1. Download the Media Creation Tool
Step 1. Go to the Download Windows 10 or Windows 11 website on a working PC.
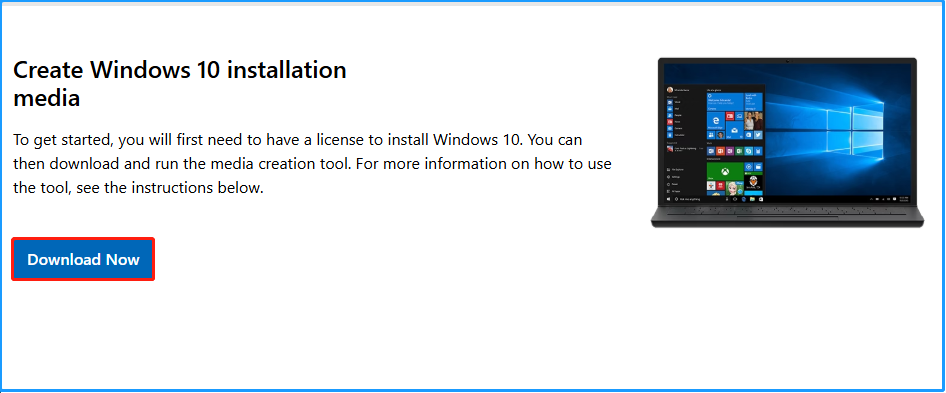
Step 2. Find the Create Windows 10/11 Installation Media section.
Step 3. Click the Download Now button.
# 2. Create a Windows installation media
Step 1. Connect your USB flash drive to the working PC.
Step 2. Double-click the downloaded MediaCreationTool.exe file.
Step 3. Read the Applicable notices and license terms, and click Accept.
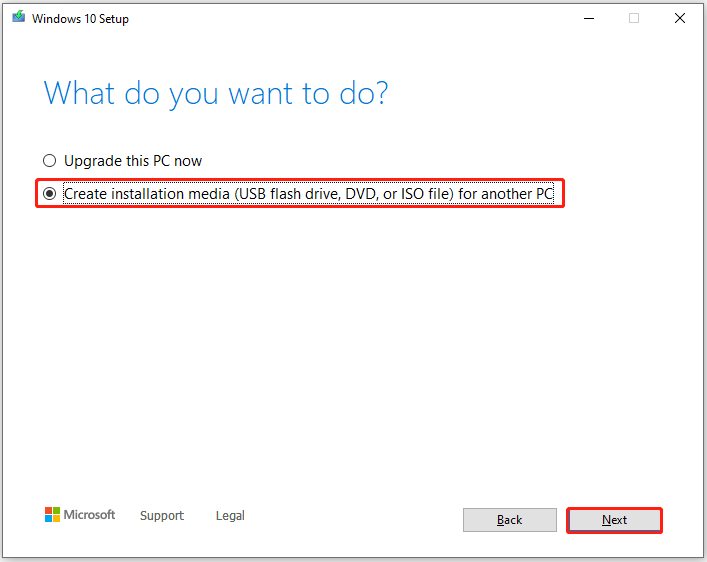
Step 4. Choose Create installation media (USB flash drive, DVD, or ISO file) for another PC, and click Next.
Step 5. In the next window, select language, architecture, and edition, and then click Next.
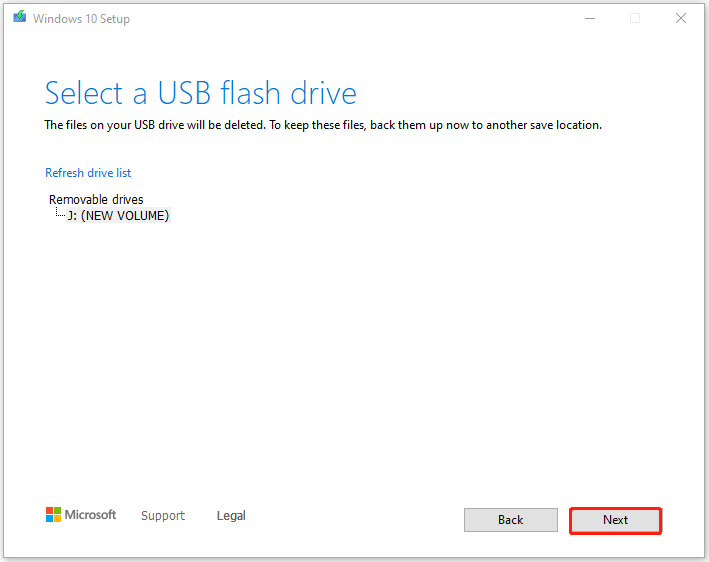
Step 6. Choose USB flash drive and click Next.
Step 7. Wait for the process to complete. Once done, click Finish to confirm.
# 3. Perform Startup Repair
Step 1. Insert the Windows installation media into your computer, and boot from the media.
Step 2. Click Next in the Windows Setup screen.
Step 3. Then, click Repair your computer from the bottom left of the screen.
Step 4. Next, choose Troubleshoot > Advanced options > Startup Repair.
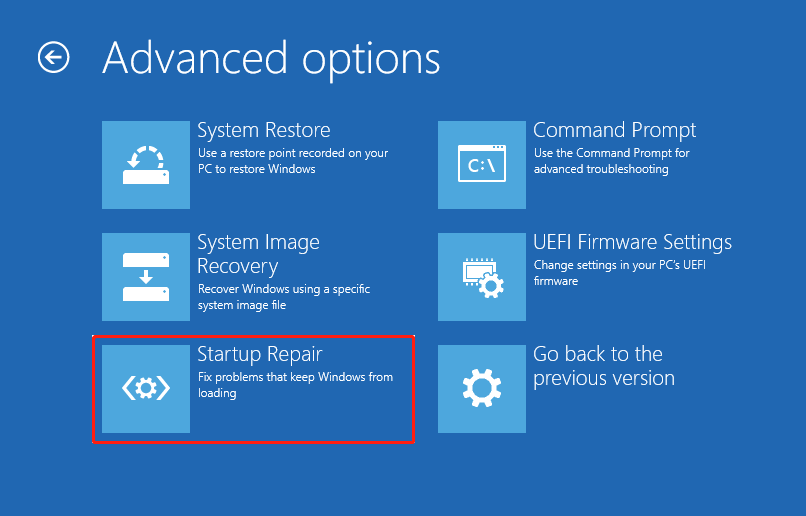
Step 5. After that,follow the on-screen instructions to complete the repair process.
Step 4. Once done, restart your computer and check if the “no bootable image found notebook will be shutdown” error is fixed.
Fix 6. Reinstall Windows 10/11
Reinstalling Windows will erase the current operating system and install a new copy, which can resolve many serious issues. So, if performing the Startup Repair doesn’t help you fix the “no bootable image found” error, you can try reinstalling Windows 10/11 to fix the error.
Here’s the step-by-step guide on how to reinstall Windows 10:
Step 1. Boot your computer from the Windows 10 installation media.
Step 2. On the Windows Setup screen, set the desired language and other preferences. Then, click Next.

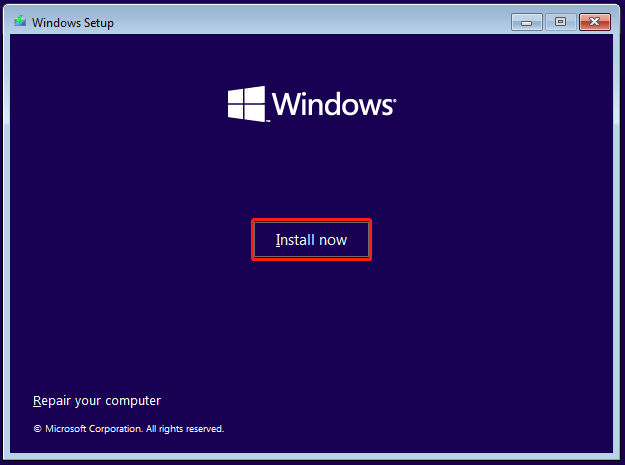
Step 3. In the next screen, click Install Now.
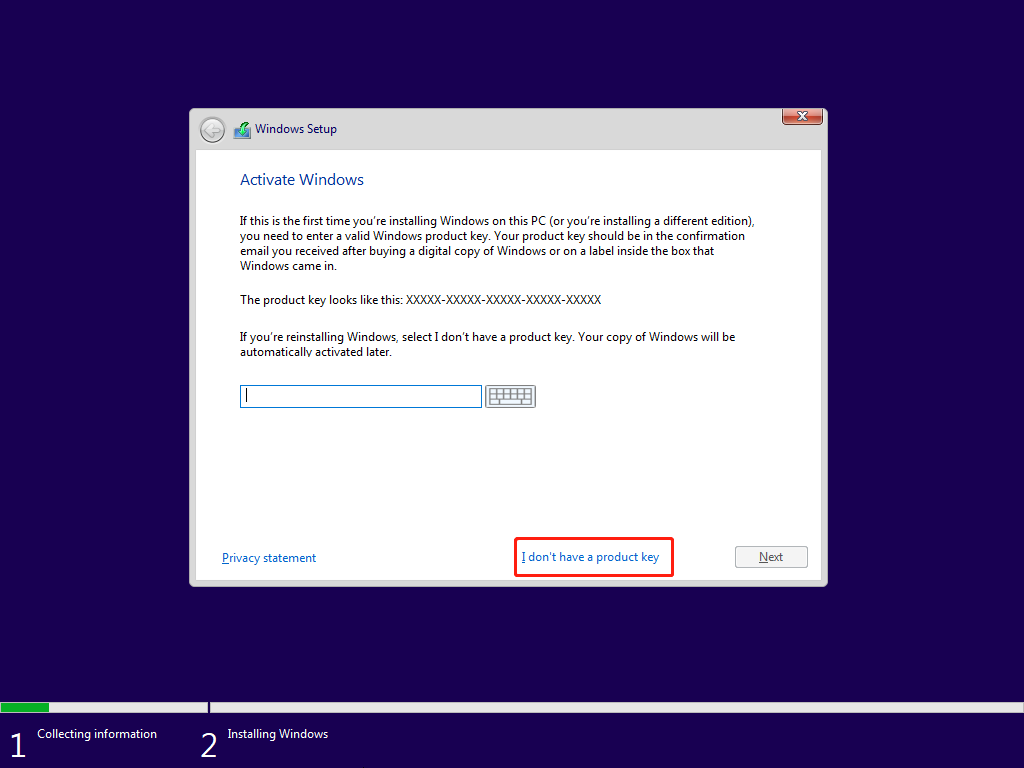
Step 4. Enter your product key or click I don’t have a product key. Then, click Next.
Step 5. Choose the Windows edition that you want to install and click Next.
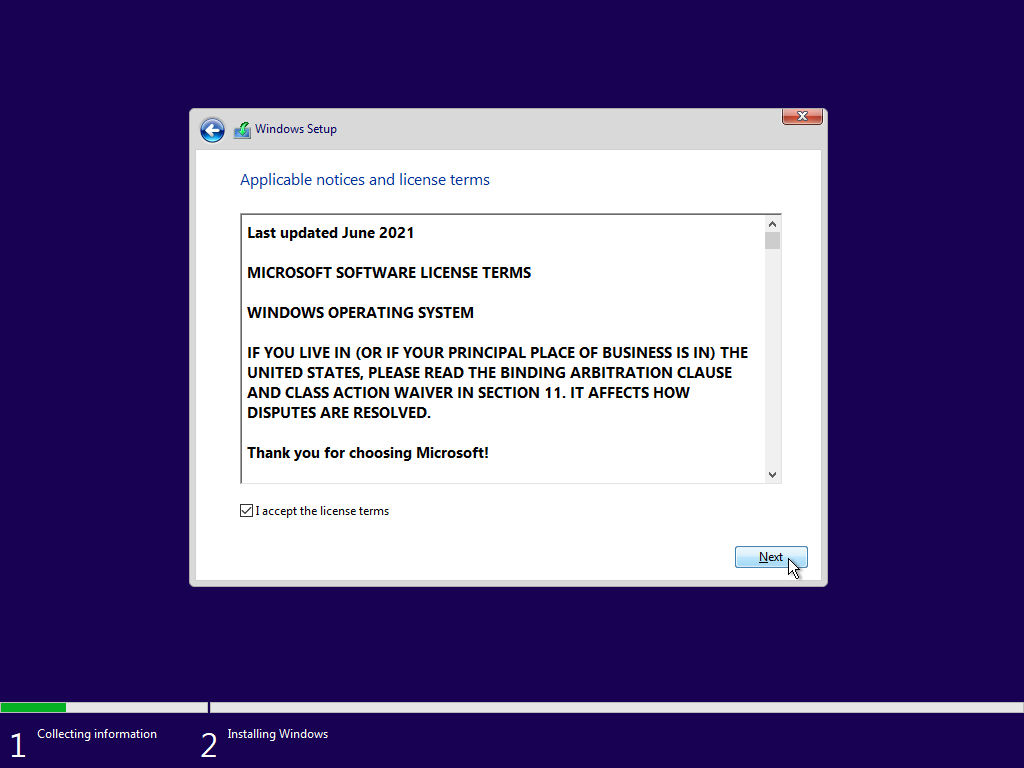
Step 6. Tick the box of I accept the license terms and click Next.
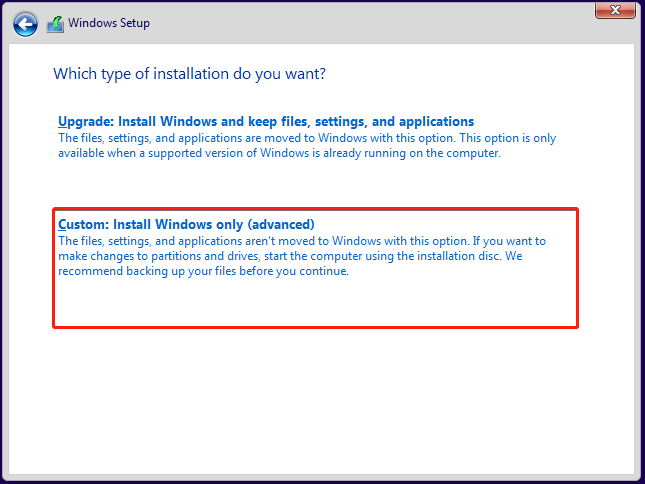
Step 6. After that, select Custom: Install Windows only (advanced).
Step 7. Choose a location to install Windows and click Next. Then follow the on-screen instructions to complete the installation process.
Fix 7. Reinstall Hard Drive
If the error persists, you can suspect that there’s something wrong with the hard drive connection. In this case, you can try reinstalling the hard drive to fix the “no bootable image found” error. To do that, please follow the steps:
- Remove all the cables from your laptop.
- Turn off the system.
- Flip the laptop upside down, unscrew all the screws.
- Remove the lid.
- Remove the battery and hold the power button to drain any remaining charges.
- Carefully remove the drive and reconnect it. Make sure that the drive is securely plugged into the socket.
- Insert the battery, cover the lid, and screw it.
- Next, turn on your system and check if the error has been resolved.
Fix 8. Replace Hard Drive
If none of the above fixes can help you solve the “no bootable image found notebook will be shutdown” error, you can suspect that your hard drive is corrupted. To verify it, you can remove the hard drive by following the steps in Fix 7, and connect it to another computer.
Case 1. Work on Another Computer
If the hard drive is working on another computer and you don’t recover its data to another location, you can use MiniTool Partition Wizard’s Copy Disk feature to clone all the data to the new hard drive to avoid data loss. Here’s how to do that:
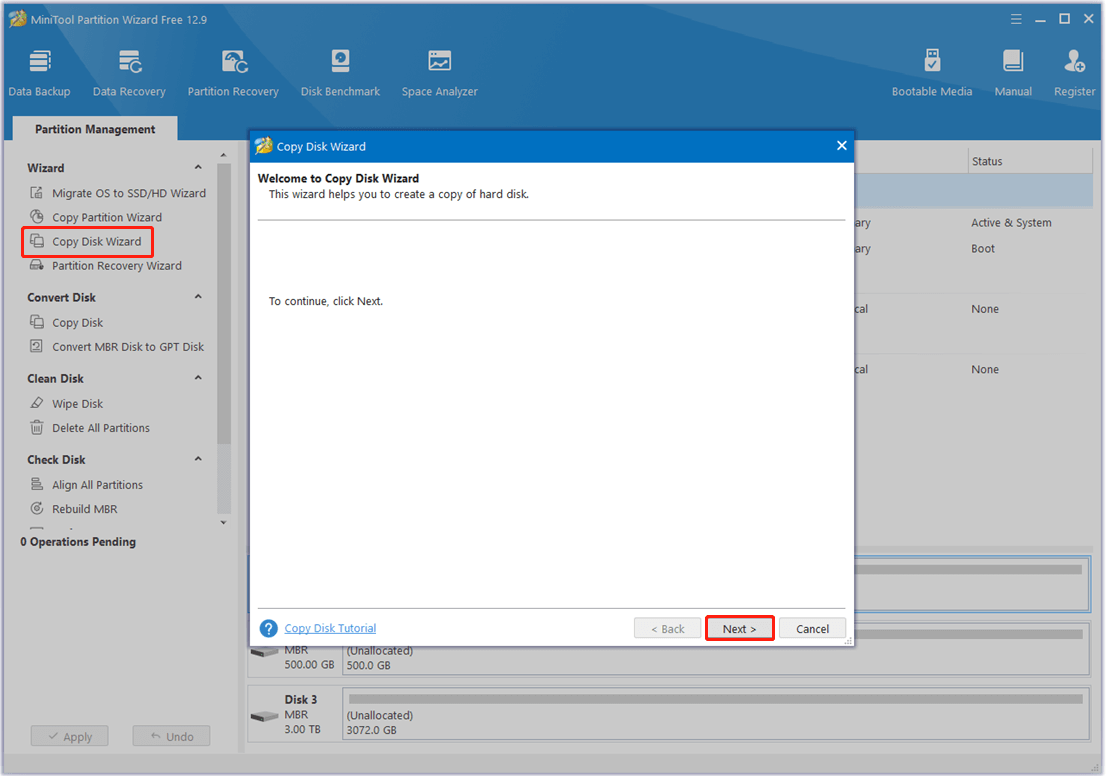
Step 1. Launch the MiniTool Partition Wizard app to enter its main interface, select Copy Disk Wizard from the left panel, and then click Next in the prompt window.
MiniTool Partition Wizard FreeClick to Download100%Clean & Safe
Step 2. Choose the previous hard drive from the disk map and click Next.
Step 3. Choose the target disk and click Next. Note thatthe Target should be large enough to hold all the data on the source disk.
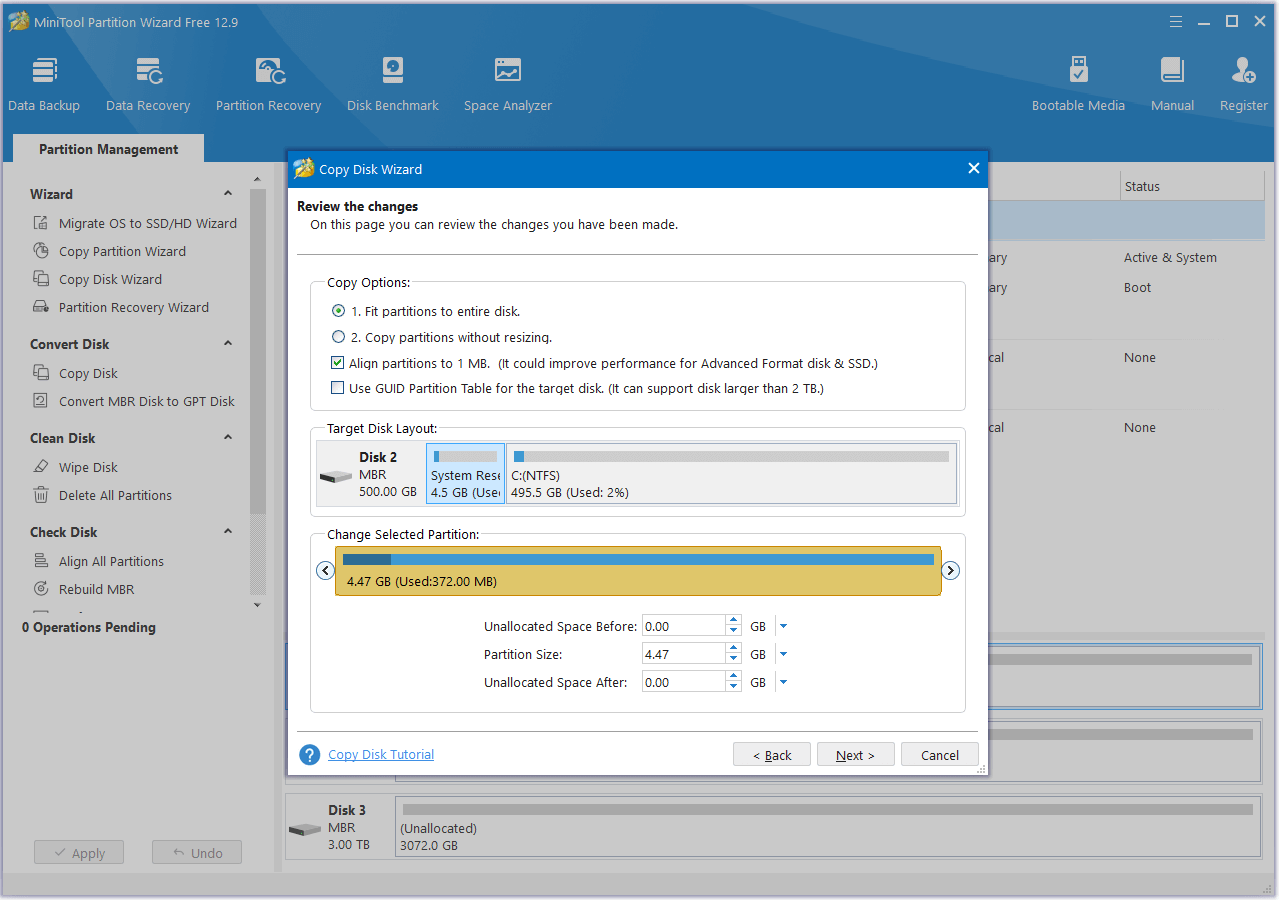
Step 4. Next, choose the proper Copy Options and adjust the Target Disk Layout. Then, click Next to move on.
- Fit partitions to entire disk: Selecting this option will automatically adjust the target disk partition size to fit the entire disk.
- Copy partitions without resizing: Selecting this option will apply the source disk partition sizes to the new disk.
- Align partitions to 1MB: Selecting this option will help users enhance performance for SSDs and advanced format disks. If users are using such devices, it is necessary to keep it selected.
- Use GUID Partition Table for the target disk: Selecting this option will help users to use the full capacity of a hard disk larger than 2TB. Note that users need to enable UEFI boot in the BIOS settings.
Step 5. In the next window, read the Note carefully and click Finish to continue.
Step 6. After that, click the Apply and Yes to execute the pending operation. Once done, you can clone all data from the previous hard drive to the new one successfully.
Case 2. Unable to Use on Another Computer
If the hard drive cannot be used on another computer, it means that the disk is damaged. In this case, you just need to replace the hard drive and reinstall Windows 10/11 with the steps in Fix 6.
In Conclusion
How to solve no bootable image found? After reading this post, you may already know the answer. If you run into the same error on your computer, you can try the above fixes one by one to resolve the error.
What’s more, if you have any suggestions or encounter any issues while using MiniTool Partition Wizard, you can contact us by sending an email to [email protected]. We will get back to you as soon as possible.
FAQs about No Bootable Image Found
Reset BIOS to default
Hard reset your computer or laptop
Fix corrupted MBR
Check the hard drive connection
Contact a professional
Perform a hard reset
Check power connections
Run HP PC Hardware Diagnostics
Check battery issues
Hardware component checks
Reset BIOS to default
Contact HP Support
Method 1. Change computer’s boot order in BIOS
Method 2. Run Automatic Repair/Startup Repair
Method 3. Run the SFC Scan
Method 4. Run CHKDSK
Method 5. Check File System through MiniTool Partition Wizard
Method 6. Rebuild the boot sector
Run Startup Repair
Reset the BIOS settings to default
Update BIOS with USB
Rebuild MBR
Replace CMOS battery
About The Author

Position: Columnist
Charlotte is a technology columnist with a strong focus on the Windows operating system, specializing in disk management, backup, and data recovery. She is passionate about analyzing computer errors, identifying root causes, and delivering practical solutions. In her free time, she stays updated on the latest developments in computer systems and hardware while continuously learning new technologies to broaden her expertise. Her writing style is clear and easy to understand, making complex technical topics accessible even to users with limited computer knowledge.
User Comments :