The “SSD is full” issue may be caused by excessive temporary files or system files, or too many installed programs. To solve this problem, you can uninstall unused programs, move large files to another drive, or use MiniTool Partition Wizard to upgrade the SSD.
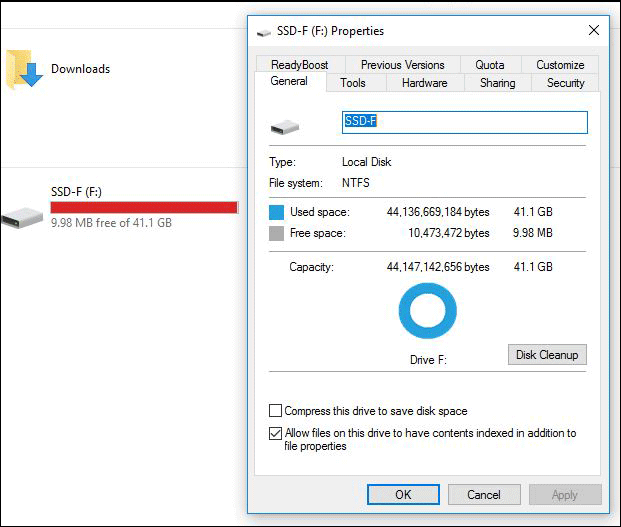
When accessing Windows File Explorer, you can see how much storage is used; some may discover their SSD has reached full capacity.
The following is a real experience shared by a forum user.
Why is my SSD always full? I have this issue where my SSD (120GB)/ my boot drive is always filling up. I moved all of my personal files from the SSD to the HDD, but it makes no difference.
What Happens If the SSD Is Full?
If your SSD is full for no reason, your system may become extremely slow, experience errors, or even become unstable.
This is because the operating system cannot access sufficient space to store temporary files, install updates, or perform background tasks.
SSD space exhaustion may manifest in the following situations:
- Degraded performance: Due to insufficient free space on the SSD, data read and write speeds decrease, impacting overall performance.
- Update and installation failures: Due to insufficient free space, Windows updates or new software installations may not complete because the system cannot write the required new files.
- Errors and instability: When there is insufficient space for temporary files or required system operations, the system may become slow, unresponsive, or even display error messages.
- Unable to boot: In extreme cases, a full system SSD may prevent the computer from booting properly.
Why Is My SSD Full?
SSD space running out can be caused by a variety of reasons, including the accumulation of junk files, large personal files, hidden files, and malware.
I’ll explain each of these below.
#1. Large File Accumulation
- Temporary Files: The operating system and applications generate temporary and cached files, which accumulate over time.
- Large Files: Files like photos and videos can quickly take up a significant amount of space on your drive.
- Hidden Files: Some files are hidden by default but still take up disk space.
#2. System-Related Issues
- File System Errors: File system errors can cause inaccurate disk space calculations, making the drive appear full.
- Malware: Some malicious programs can secretly write large files, taking up disk space.
#3. Other Factors
- After files are deleted, they are moved to the Recycle Bin, but the Recycle Bin still takes up hard drive space.
- Automatically created restore points or backup files can take up tens of gigabytes of space.
How to Fix SSD Is Full for No Reason?
In this section, I’ve outlined 10 practical solutions for you, with step-by-step instructions provided below.
Feel free to give them a try.
#1. Managing Your Files and Applications
Fix 1: Uninstall Unused Apps
Removing unused Apps not only keeps your system organized but also frees up storage space and lowers background resource consumption.
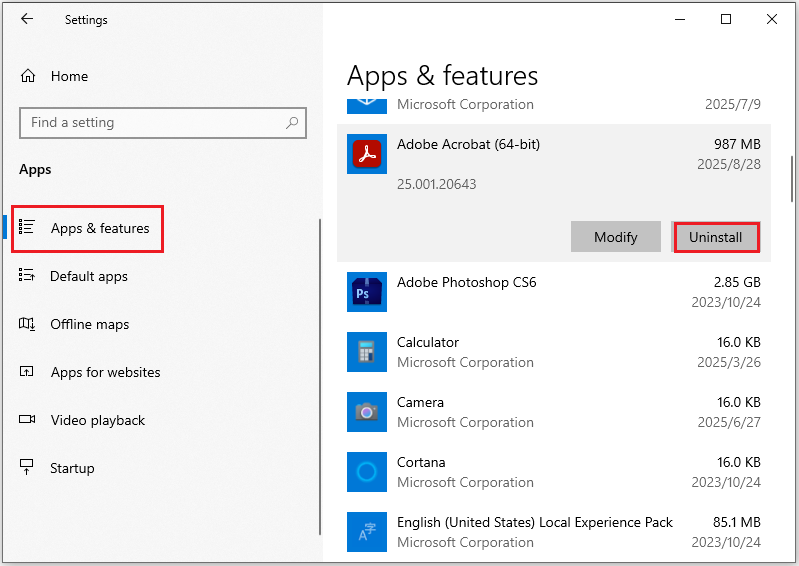
Step 1: Press Windows + I to open the Windows Settings window.
Step 2: Click Apps. In the Apps & features section, find the program you don’t use, click it, and select Uninstall.
After confirming the uninstall option, the program will be uninstalled from your computer immediately.
Fix 2: Find and Remove Large Personal Files
Open File Explorer to locate and remove unnecessary large files, like old documents, videos, or pictures, in your Downloads folder.
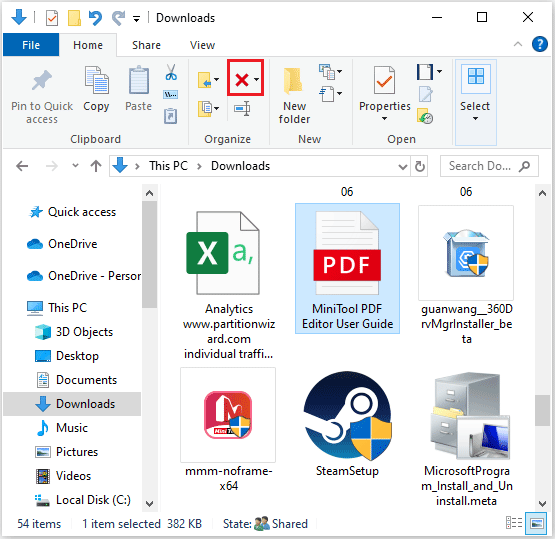
Step 1: Press Windows + E to open File Explorer.
Step 2: Then click Downloads, Music, Pictures, or Videos from the left panel.
Step 3: Select the unnecessary files and click the Delete icon at the top.
Fix 3: Empty the Recycle Bin
After deleting files, don’t forget to empty your Recycle Bin. Otherwise, they’ll still take up valuable space on your SSD.
By permanently removing them from the Recycle Bin, you can fully reclaim that storage and ensure your system runs more efficiently.
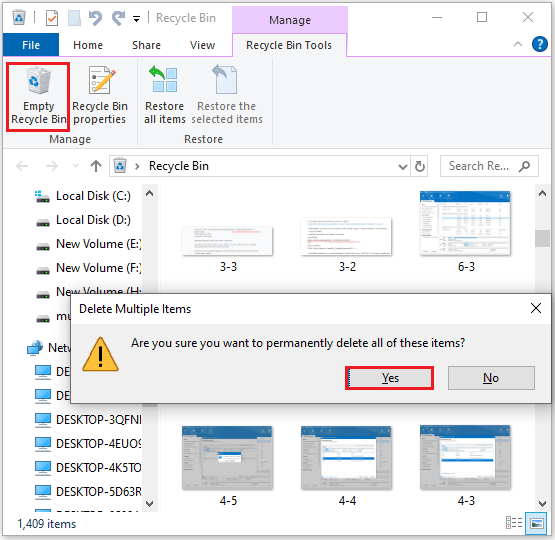
Step 1: Double-click on the Recycle Bin icon to open it.
Step 2: Click Empty Recycle Bin at the top.
Step 3: Click Yes when you see the following prompt.
Further Reading:
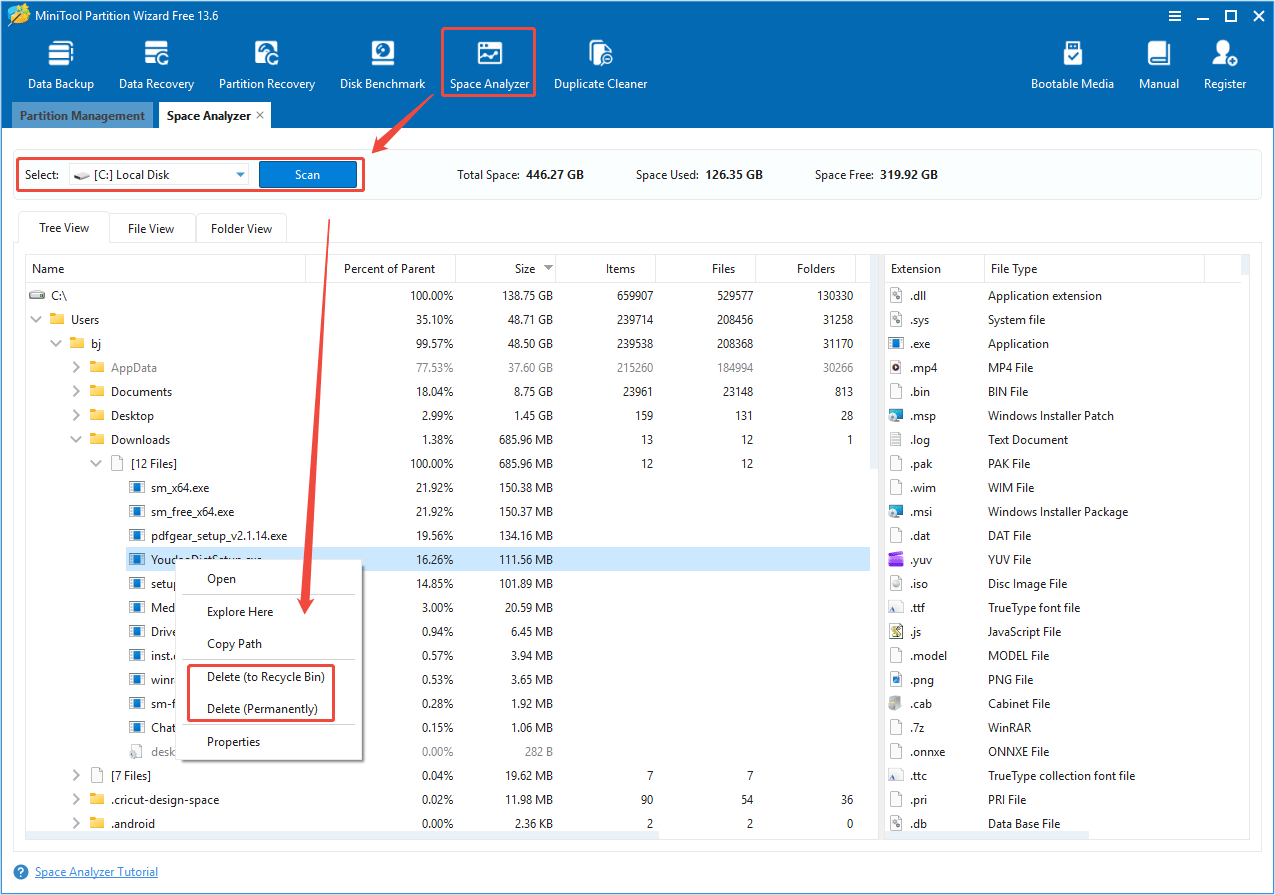
When your SSD is running out of space, you can use MiniTool Partition Wizard’s Duplicate Cleaner and Space Analyzer features to free up storage space. Here is the guide.
MiniTool Partition Wizard FreeClick to Download100%Clean & Safe
Step 1: Launch MiniTool Partition Wizard to enter its main interface. Click Duplicate Cleaner. Keep the default options and then click Scan Now.
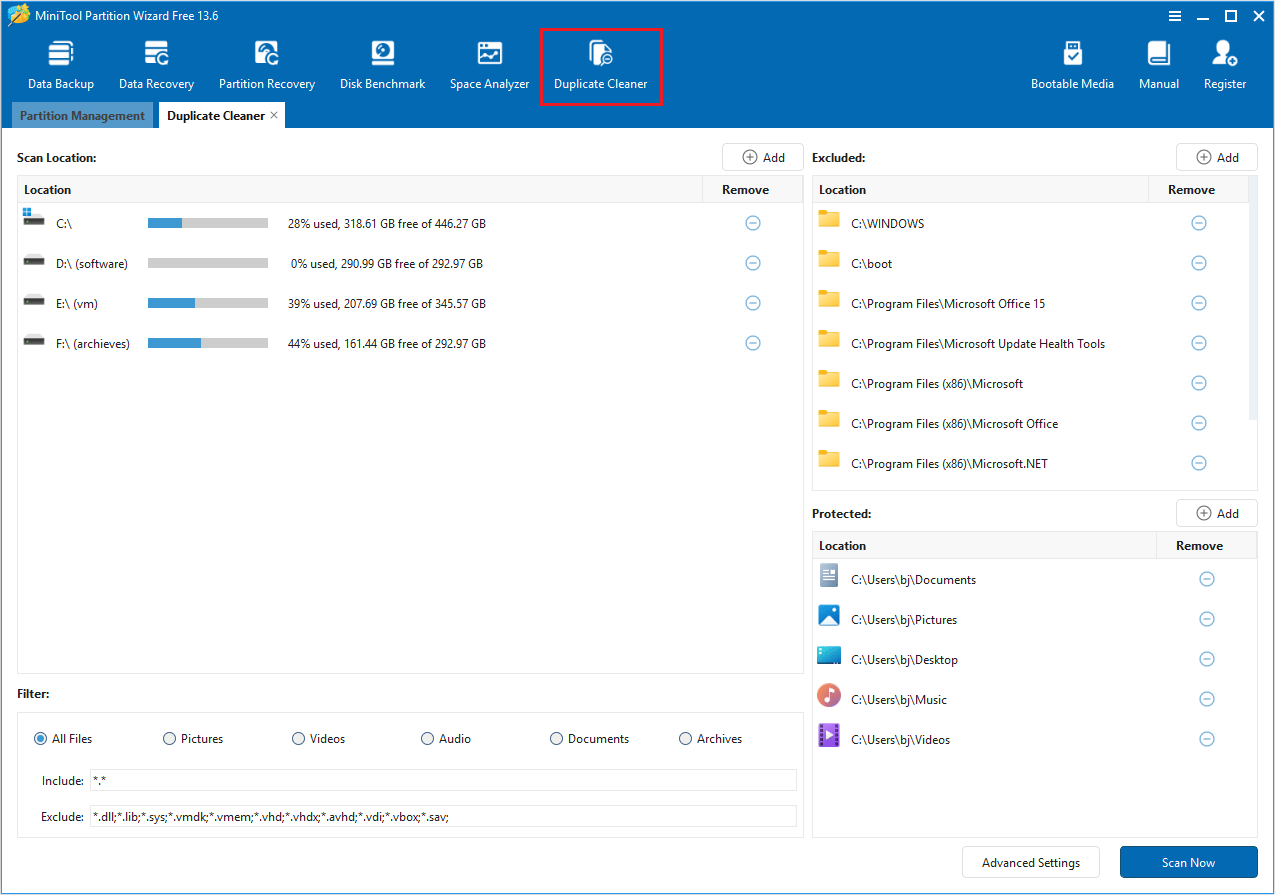
Step 2: After the scanning process is completed, select the duplicate files that you want to delete. Then, click Delete Selected Files and then OK to delete them.

Step 3: Click Space Analyzer in the tool bar. Select the drive that you want to scan from the drop-down menu and then click Scan. Once the scanning process is complete, right-click the unwanted file and select Delete.
What files can be deleted? In general, you can delete the following files:
- Personal files and programs.
- Unnecessary patch files. They are stored in the WindowsWinSxS under the WinSxS directory.
- The Windows.old folder.
#2. Using Windows Built-in Tools
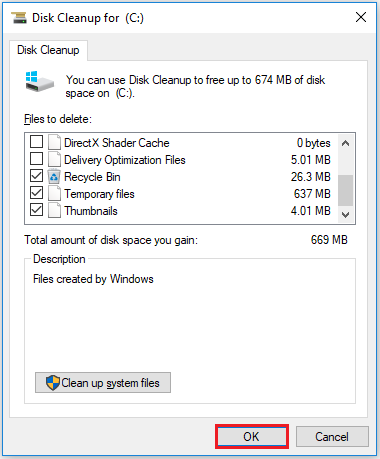
Fix 1: Run Disk Cleanup
Windows Disk Cleanup is a commonly used tool for clearing SSDs and removing unwanted files.
To run Disk Cleanup in Windows 10, follow these steps:
Step 1: Search for “Disk Cleanup” in the Windows search bar and click Open.
Step 2: Select your SSD drive and click OK.
Step 3: After a few minutes of processing, a new window will appear showing a list of files that can be cleaned. Select categories like Temporary files, Recycle Bin, and more to delete them. Then, click OK.
Fix 2: Run Storage Sense
Storage Sense is a Windows built-in feature that automatically frees up disk space by deleting unnecessary files, like temporary files or items in the Recycle Bin.
This feature is turned off by default. When your SSD space is unusually low, you can enable it and then run it to reclaim storage space and improve system efficiency.
Here is how to run it:
Step 1: Open Settings > System > Storage.
Step 2: Locate the Storage section and toggle the switch to the On position. And click Configure Storage Sense or run it now.
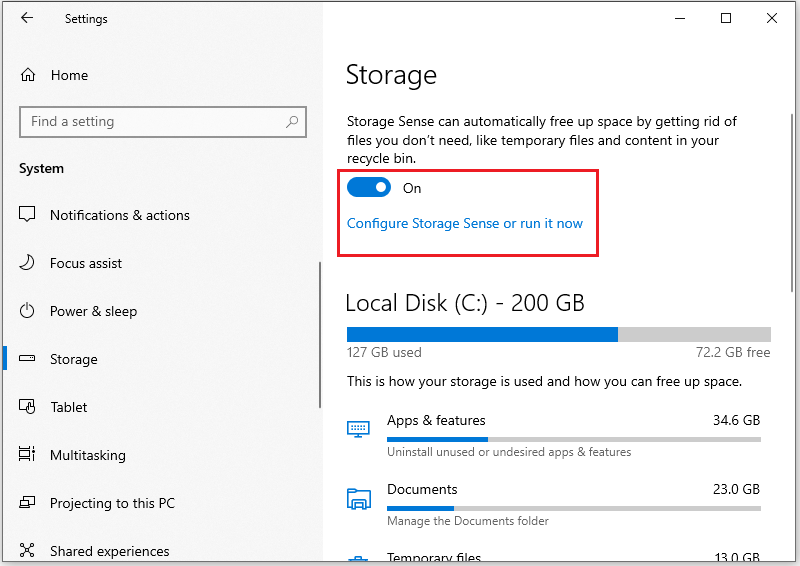
Step 3: Under the Free up space now section, click the Clean now button. Windows will start cleaning up temporary files, emptying the Recycle Bin, etc.

#3. Advanced Methods
Fix 1: Disable Hibernation
Enabling hibernation will generate a large file that may take up several GB of disk space. If you do not use this feature, you can choose to turn it off to free up space.
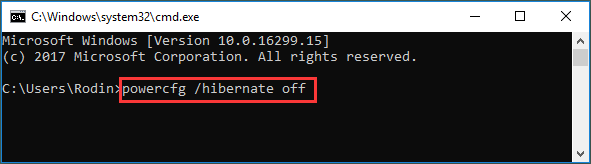
Step 1: Type Command Prompt in the Search box and select Run as administrator on the right panel.
Step 2: Type the following command to turn off Hibernation and press Enter:
powercfg /hibernate off
Fix 2: Upgrade Your SSD
If your SSD has only one partition and it’s full, you can consider adding a second hard drive or upgrading to a larger one.
Therefore, I recommend upgrading your current SSD to a larger one.
MiniTool Partition Wizard can help you easily migrate all data (including the operating system) from your original hard drive to a new one without having to reinstall your operating system.
MiniTool Partition Wizard DemoClick to Download100%Clean & Safe
Here are the steps:
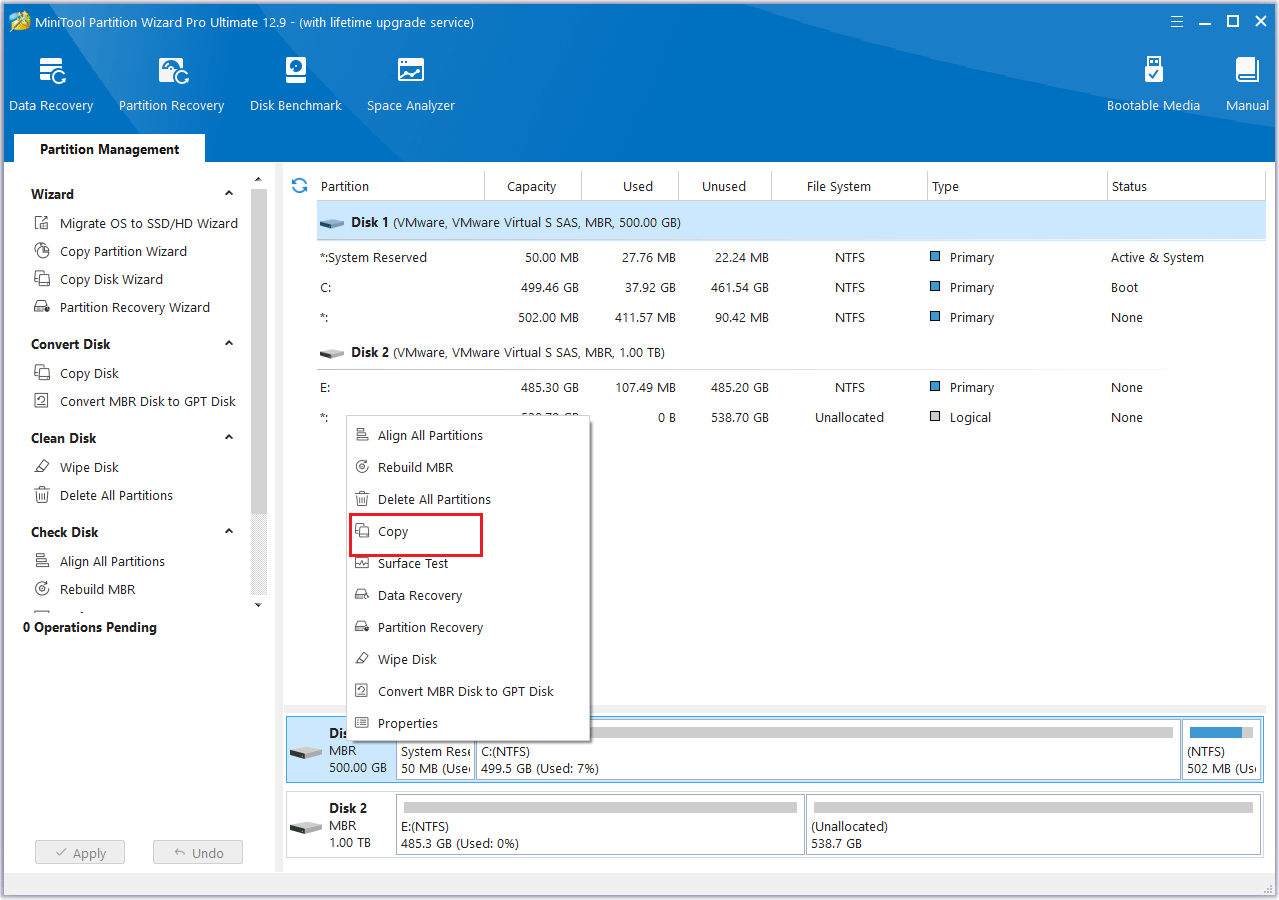
Step 1: Connect the new SSD to your PC and launch MiniTool Partition Wizard.
Step 2: Right-click the SSD that you want to clone and then select Copy.
Step 3: Choose the new SSD as the destination drive, then click Next > OK.
Step 4: Choose a Copy Option and click Next.
- The options “Fit partitions to entire disk” and “Align partitions to 1 MB” are selected by default. The former adjusts partition sizes proportionally to utilize the full capacity of the new SSD, and the latter option will apply 4K alignment to the SSD.
- If the original hard drive is an MBR disk, but you want the cloned SSD to be a GPT disk, you can choose the Use GUID partition table for the target disk option.
- Under the Change Selected Partition section, you can resize or move the partition according to your needs.
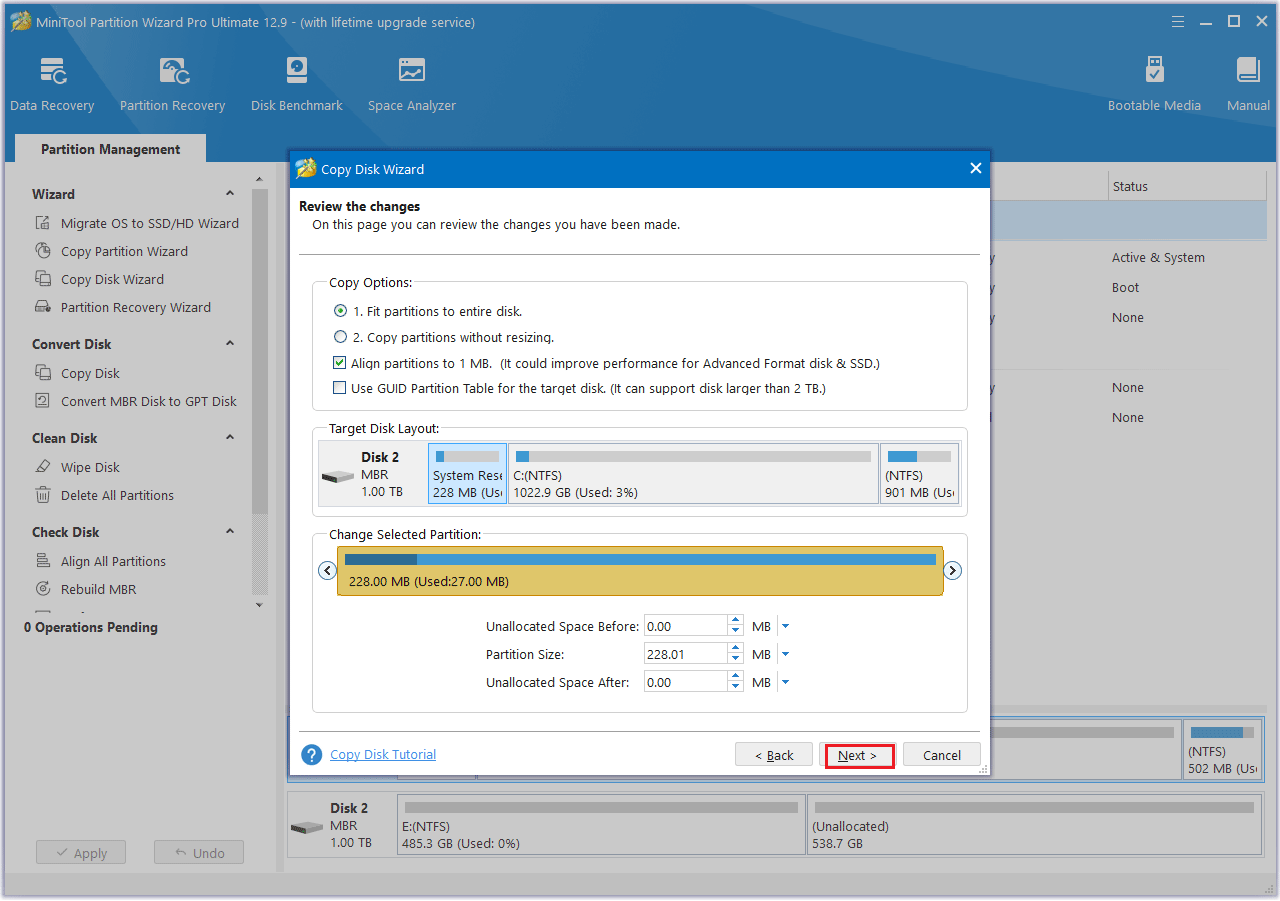
Step 5: Carefully review the note, then click Finish. After that, select Apply to start the cloning process and wait for it to complete.
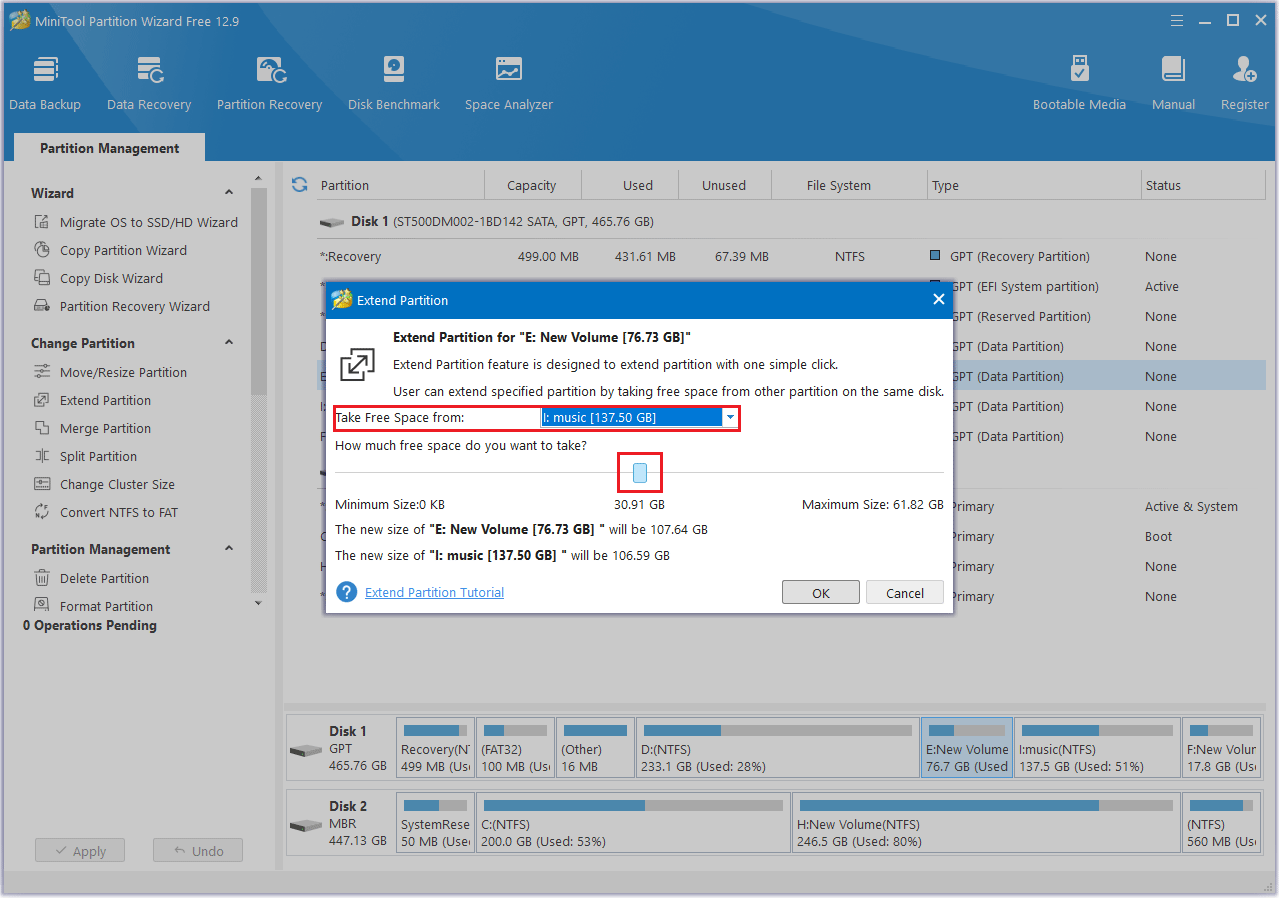
Fix 3: Extend the SSD’s Partition
If your SSD is partitioned into multiple partitions and only one partition is full, you can use space from the other partitions to extend the partition.
So, you can use the Extend Partition feature of MiniTool Partition Wizard to do this.
Here are the instructions:
Step 1: Launch MiniTool Partition Wizard to enter its main interface.
Step 2: Highlight the partition you want to extend and then select Extend Partition.
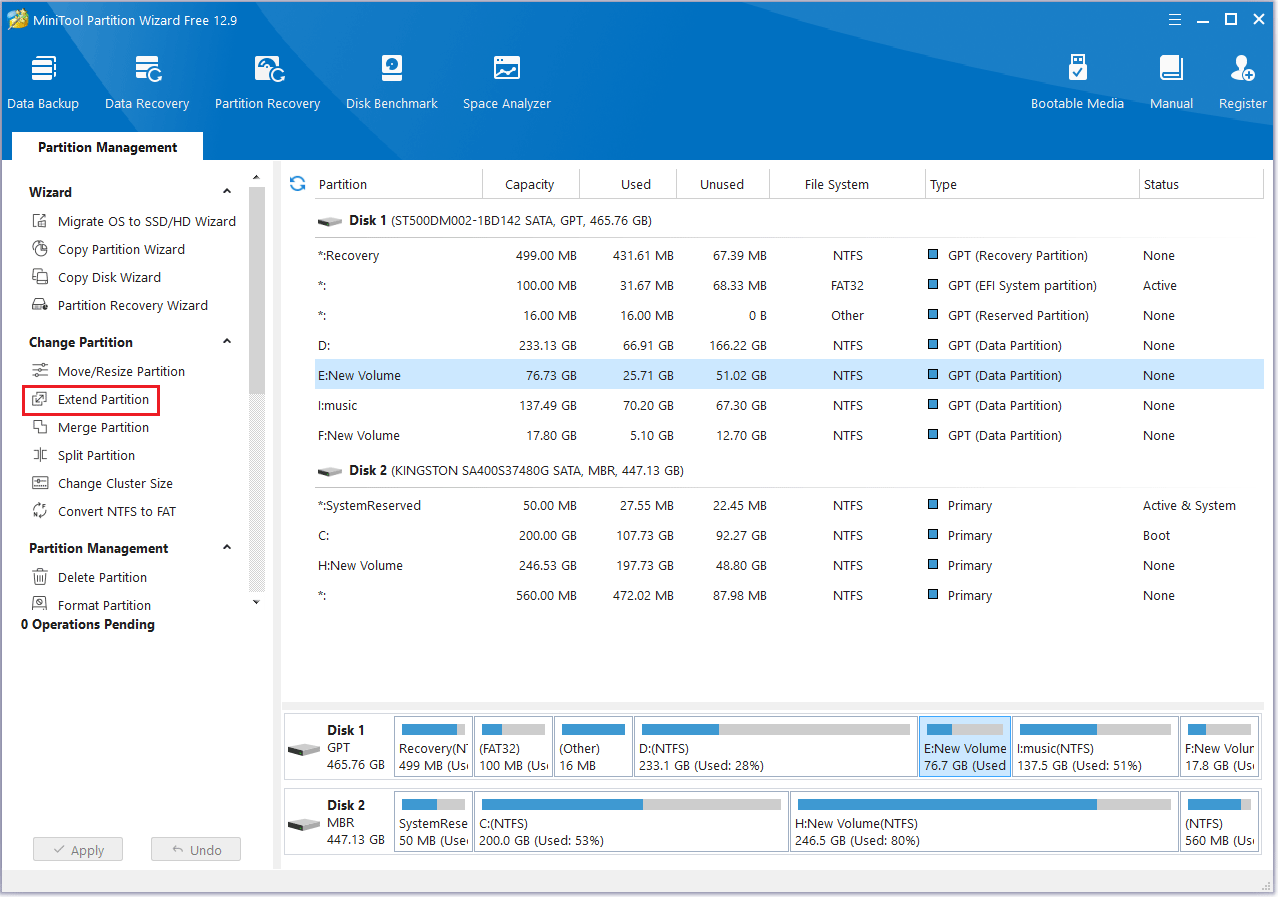
Step 3: In the pop-up window, open the drop-down list of Take Free Space from and choose a partition or unallocated space to take free space.
Then, drag the blue block to decide how much space you want to occupy. After that, click OK > Apply.
#4. Other Methods
Fix 1: Move Files to the Cloud
When your SSD is nearly full, uploading infrequently used files to a cloud storage service like OneDrive, Google Drive, or Dropbox is an effective solution.
Not only does this save local disk space, but it also keeps your files secure and allows you to access them anywhere.
Here are some popular cloud storage options:
- Google Drive: Offers 15 GB of free storage, and you can upgrade for more.
- Dropbox and OneDrive: These are cross-platform services that offer both free and paid storage options.
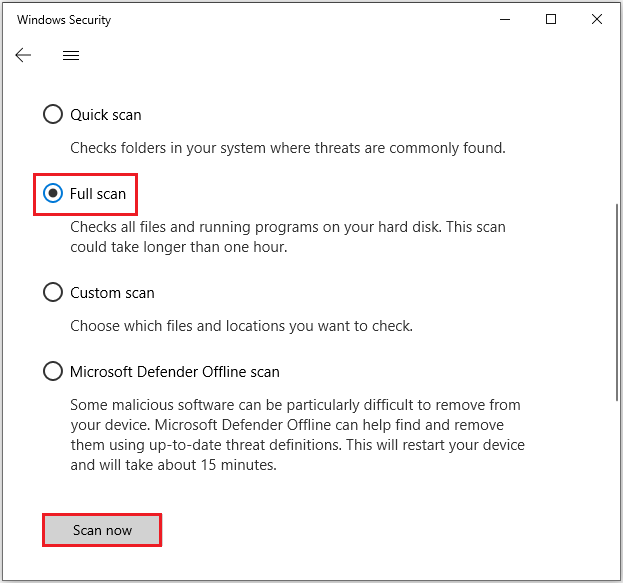
Fix 2: Run Virus Scan
Some malware can secretly create large files in the background, quickly filling up your hard drive.
For this reason, I recommend running Windows’ virus & threat protection feature to scan your system and remove any malicious programs found.
Step 1: Please press Win + I to open Windows Settings.
Step 2: Select Update & Security > Windows security > Virus & threat protection.
Step 3: Under the Virus & threat protection section, click Scan options.
Step 4: Select Full scan > Scan now. After scanning, restart your PC and reconfirm whether there’s still limited space on your hard drive.
Bottom Line
This concludes this article.
It explains the reasons why your SSD may be full and how to clean up SSD, including deleting unnecessary large files, moving files to cloud storage or an external drive to free up space, disabling hibernation mode, or upgrading to a larger SSD using MiniTool Partition Wizard.
If you have any questions or suggestions while using MiniTool Partition Wizard, you can contact us at [email protected] to get a quick reply.
SSD Is full FAQ
About The Author

Position: Columnist
Linda has been an editor at MiniTool for seven years. She continuously learns about computers and puts her knowledge into practice. Moreover, she is particularly knowledgeable in disk management, data recovery, system installation, and PDF editing. Her articles typically reference multiple examples or are based on her own experience, providing users with the most suitable solutions.
User Comments :