
Many users disable the Windows 10 login screen to skip typing a password at startup, save time when turning on the PC, or stop annoying sign-in prompts when waking from sleep on a private home computer.
This guide offers 2 methods to help you disable login screen by using User Accounts Settings and the Registry Editor.
Method 1. Disable Login screen Windows 10 from User Accounts Settings
The most straightforward method to disable the login screen is to stop Windows 10 from requiring a username and a password to sign in. To do that, follow the steps below:
Step 1. Press the Win + R keys to open the Run dialog box, and then type netplwiz in the box and hit Enter.
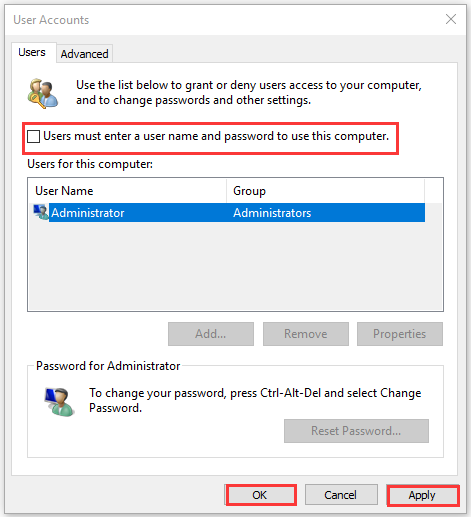
Step 2. In the User Accounts window, select the user accounts that you want to remove login screen Windows 10 and untick the checkbox next to Users must enter a user name and password to use this computer.
Step 3. Click on OK and Apply to execute this change.
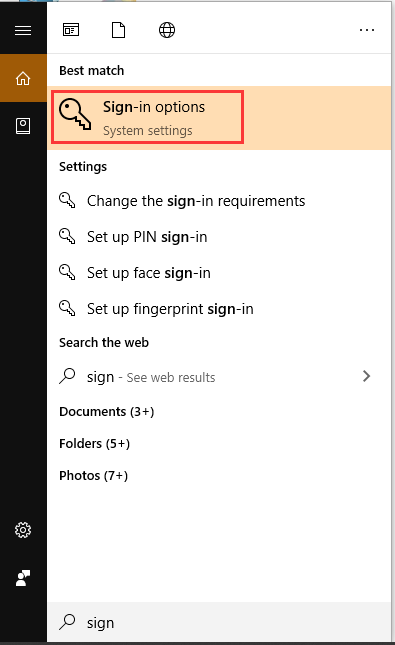
Step 4. Type sign in the search box and then select Sin-in options from the best match.
Step 5. Scroll down to reach the Require sign-in section and select Never from the drop-down menu.
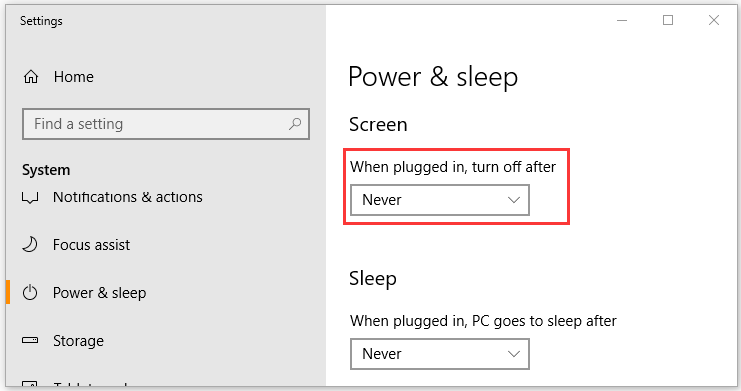
Step 6. If you want to disable login screen Windows 10 when waking from sleep mode, you can type power & sleep in the search box, and then select Never under the section When plugged in, turn off after.
Method 2. Disable Login screen Windows 10 from Registry Editor
In addition, you make some changes to Registry Editor to turn off login Windows 10. Please follow the steps below carefully. Also, you can back up the registry to avoid any unexpected situations. Here’s how to do that:
Step 1. Press the Win + R keys to open the Run dialog box, and then type regedit in the box and hit Enter.
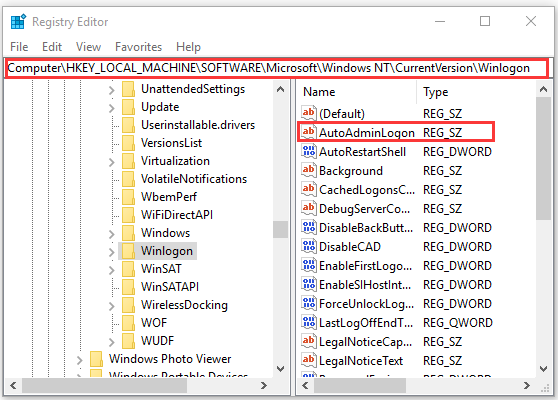
Step 2. In the Registry Editor, navigate to the following path and then double click the AutoAdminLogon key.
ComputerHKEY_LOCAL_MACHINESOFTWAREMicrosoftWindowsNTCurrentVersionWinlogon
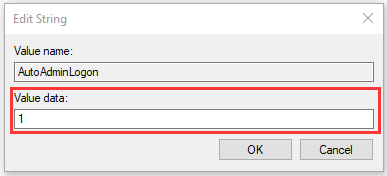
Step 3. Change the value from 0 to 1 in the Value data field and click on OK.
Step 4. Double click the DefaultDomainName key and change its value data to EQUIPO, and then click on OK.
Step 5. Back the main panel again, and then double click the DefaultUserName change its value data to AMPARO. Then click on OK.
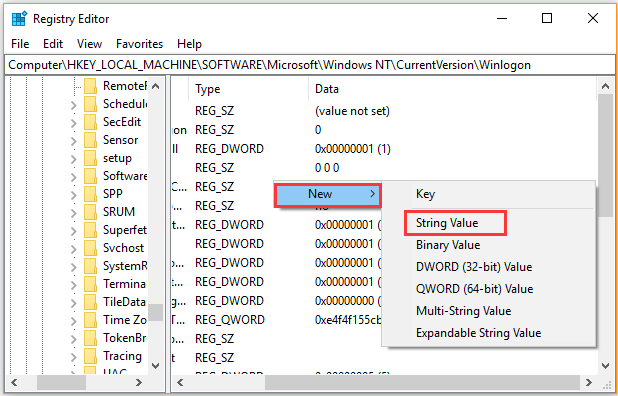
Step 6. Right-click the empty space on the main panel and select New > String Value to create a new string value. And name it DefaultPassword.
Step 7. Double click the DefaultPassword you just created and enter your account password in the Value data field. Then click on OK.
![Fix Windows Explorer Crashes on Right Click [Complete Guide]](https://images.minitool.com/partitionwizard.com/images/uploads/2020/08/windows-explorer-crashes-on-right-click-thumbnail.jpg)
Bottom Line
How to disable login screen on Windows 10? This post provides 2 easy methods for you to do that.
User Comments :